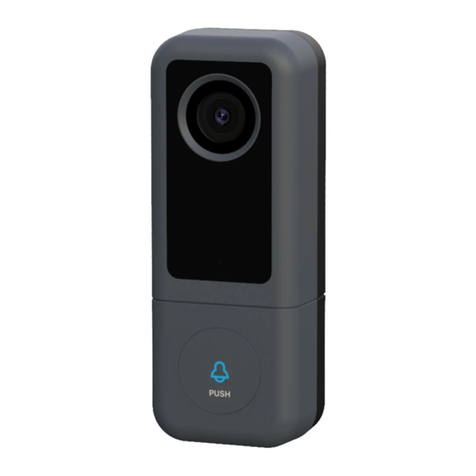
TUYA Smart V10W User manual

Wireless Battery Video Doorbell
Quick Start Guideline
Please read it carefully before using the product and safe keeping
English/Deutsch/ /Italiano/Français Español/русский
CONTENTS
English
1-6
Deutsch
7-12
Français
13-18
Italiano
19-24
Español
25-30
русский
31-36

Packing list
Appearance Introduction
Installation
After opeing the package, please make sure the doorbell is in good condition
verify parts below is complete.
As shown in the figure.
Doorbell User Guide
IR Leds
IR Leds
Button
Button
PIR
PIR
Light Sensor
Light Sensor
Indicator Light
TF Card
TF Card
Fixed hole
Fixed hole
Security screw hole
Security
Screw hole
Fixed hole
Reset Button
Reset Button
Battery
Comartment
Battery
Comartment
AC Input
AC Input
USB
USB
Indicator Light
Speaker
Speaker
MIC
MIC
Lens
Lens
Security Screw Screw bag
The ambient light is not enough, to enable the infared
light, increase the environmental brightness.
Used to collect environmental brightness value, when
the intensity of illumination is lesss than 2 Lux, enable
the IR LEDs.
Audio capture.
The doorbell button.
When human body movement in front of the doorbell,
the doorbell could be made the notification to your
mobile phone.
Video image capture.
Blinking blue: configuration status.
Long red light: failed to connect WIFI.
Blue light is on: the device is connected successfully.
Red and blue light together: The device is connected to
WIFI.
Make a sound of the doorbell, and voice intercom.
Support AC power supply input for doorbell.
Doorbell working status, long press 5 seconds to restore factory
settings.
Mounting 18650 specification battery.
Fit the support on the wall with the mounting screws for the mounting
kit. Mounting the doorbell onto the bracket.
Mounting the security screw on the fittings to prevent the doorbell
from being removed.
TF card maximum support 64GB.
Charge the battery
13
2
4
5
1. Use the screws in the mounting kit to fit the bracket on the wall.
2. The conductive screws in the accessories pack are used to connect the
AC (16-24V) wire to the AC input hole (If no AC power adaptor is available,
this step can be omitted).
3. Press the reset button for 5 seconds, waitting for the indicator light to
slow down (The doorbell should be in working condition, long press, sleep
state is invalid).
4. Mounting three 18650 specification batteries.
5. Cover the battery cover, align the doorbell and the bracket, push down
and lock the security screws to complete the installation.
English English
12

Setup Device
Please follow the below instruction to setup and using your doorbell device.
1. Downloading and installing the APP
Open the APP store(for IOS) or Google Play (for android) on your smart
phone devices. Search “Tuya Smart”/ “Smart Life” or scan the following QR
code to download and install.
2. Setting up the APP
Before you begin...
Make sure the Tuya Smart or Smart Life is installed to your device.
Make sure that your devices is connected to a 2.4GHz WIFI network, not a
5GHz network.
Add the Smart doorbell
1.) First open Tuya Smart or Smart
Life and click add device.
3.) Choose QR Code mode.
5.) Install the battery, then check if the blue light is flashing and hear the “wait
for connection” sound, click blue light has flashed.
Scan the QR code below with the camera until you hear a prompt, then tap “I
Heard a Prompt”.
6.) When the app show device added successfully, congratulations !
The device is ready for use now !
4.) The APP will automatically fill in the
WIFI name, please input the correct WIFI
password. Then click Next step.
Smart doorbell
2.) Click Add Device --> then
smart doorbell.
English English
Tuya Smart
34
Tuya Smart Smart Life

3. Note for using.
1.) The device is powered by rechargeable lithium batteries. With fully
charged, the battery life approx be six months. The mobile device APP will be
prompted while the battery is low. Please charge the device after received the
reminder.
2.) Keep the camera in range of your router.
Make sure to pick a place within range of your network. Thick or insulated
doors can greatly reduce the strength of your WIFI signal even if your router is
close by, so you should try streaming video before you mount your camera.
3.) The device is a low power consumption inntelligent products, can support
remote wake up from the APP, PIR human detection, press doorbell wake up.
The device will be works for 30 seconds after wake up then be in the resting
state automatically and until to next waking up.
Note:
In crowded environment, it is recommended to close or set the device to low
sensitivity to reduce device arousal and call times to extend battery life.
Be sure to turn on push notifications on your phone:
(1). Navigate to Settings --> Notinfications --> ON
(2). Alist of APPs that support push notifications will appear.
(3). Tap the Tuya Smart app and enable the notification.
Please choose the correct 18650 batteries
to use with the smart doorbell !!!
Technical Specification
Step 1
NOTE
Resolution 1920*1080 / 1280*720 (Matching)
View angle 166 degree
IR LED 6*850nm
WIFI IEEE 802 11 b/g/n
Audio Two-way talk without noise
Recording Device SD card recording (20 seconds)
Storage Support 8GB/16GB/32GB/64GB class 10
Battery 18650 battery (LI-Ion, 2600mAh)
Monitoring
Device button, Motion detection, Remote live view
Notifications Push notifications quickly
Device wakeup Fast wake up and push notification
Power consumption Standby 200 uA, Working 170mA
Two 18650 specification batteries (total 6800mAh), work regularly for
8-12 months.
Before the setup process, be sure your video doorbell has connected to
your pone and plug in your chime.
Flat head Shart head
(If not included, need to be purchased separately.)
English English
5 6
Set up chime with the video doorbell
Press the tune button to cycle
through 52 different tunes and
select a tune.
Press and hold the Volume button
for 5 seconds until t h e b l ue
indicator is ON.
Press the Call button again, the
chime will automatically play the
tune you selected.
Press the Call button.
Step 2
Step 4
Step 3
Step 5

Packliste
Deutsch Deutsch
Aussehen Einführung
Installieren
Stellen Sie nach dem Öffnen des Pakets sicher, dass die Türklingel in gutem
Zustand ist und überprüfen Sie, ob die Teile unten vollständig sind.
Wie in der Abbildung gezeigt.
Türklingel Benutzerhandbuch
IR Leds
IR Leds
Anrufknopf
Anrufknopf
PIR
PIR
Lichtsensor
Lichtsensor
Kontrollleuchte
Kontrollleuchte
TF-Karte
TF-Karte
Festes Loch
Festes Loch
Sicherheit
Schrauben
Festes Loch
Sicherheitsschraubenloch
Zurücksetzen
Zurücksetzen
Batterie Abteil
Batterie Abteil
AC-Eingang
AC-Eingang
USB
USB
Lautsprecher
Lautsprecher
Mikrofon
Mikrofon
Linse
Linse
Sicherheitsschraube Schraubenbeutel
Das Umgebungslicht reicht nicht aus, um das
Infrarotlicht zu aktivieren, die Umgebungshelligkeit zu
erhöhen.
Wird verwendet, um den Umgebungshelligkeitswert zu
erfassen, wenn die Beleuchtungsintensität weniger als
2 Lux beträgt, aktivieren Sie die IR-LEDs.
Audioaufnahme.
Der Klingelknopf.
Wenn sich der menschliche Körper vor der Türklingel
bewegt, könnte die Türklingel die Benachrichtigung an
Ihr Mobiltelefon senden.
Aufnahme von Videobildern.
Blau blinkend: Konfigurationsstatus.
Langes rotes Licht: WLAN konnte nicht verbunden
werden.
Blaues Licht leuchtet: Das Gerät ist erfolgreich
verbunden.
Rotes und blaues Licht zusammen: Das Gerät ist mit
WIFI verbunden.
Machen Sie ein Geräusch aus der Türklingel und der
Sprechanlage.
Unterstützt den AC-Stromversorgungseingang für die Türklingel.
Betriebsstatus der Türklingel, 5 Sekunden lang drücken, um die
Werkseinstellungen wiederherzustellen.
Montage des Akkus der Spezifikation 18650.
Montieren Sie die Halterung mit den Befestigungsschrauben des
Montagesatzes an der Wand. Montage der Türklingel an der
Halterung.
Montieren Sie die Sicherheitsschraube an den Beschlägen, um ein
Entfernen der Türklingel zu verhindern.
TF-Karte maximale Unterstützung 64 GB.
Lade die Batterie auf
13
2
4
5
1. Verwenden Sie die Schrauben aus dem Montagesatz, um die Halterung an
der Wand zu befestigen.
2. Die leitfähigen Schrauben im Zubehörpaket werden verwendet, um das
AC (16-24V)-Kabel an die AC-Eingangsöffnung anzuschließen (Wenn kein
AC-Netzteil verfügbar ist, kann dieser Schritt entfallen).
3. Drücken Sie die Reset-Taste 5 Sekunden lang und warten Sie, bis die
Kontrollleuchte langsamer wird (Die Türklingel sollte in einem
funktionsfähigen Zustand sein, lange drücken, der Schlafzustand ist
ungültig).
4. Montage von drei Batterien der Spezifikation 18650.
5. Decken Sie die Batterieabdeckung ab, richten Sie die Türklingel und die
Halterung aus, drücken Sie die Sicherheitsschrauben nach unten und
verriegeln Sie sie, um die Installation abzuschließen.
78

Gerät einrichten
Bitte befolgen Sie die nachstehenden Anweisungen, um Ihr Türklingelgerät
einzurichten und zu verwenden.
1. Herunterladen und Installieren der APP
Öffnen Sie den APP Store (für IOS) oder Google Play (für Android) auf Ihrem
Smartphone. Suchen Sie nach „Tuya Smart“/ „Smart Life“oder scannen Sie
den folgenden QR-Code, um ihn herunterzuladen und zu installieren.
2. APP einrichten
Bevor Sie beginnen...
Stellen Sie sicher, dass die Tuya Smart -APP auf Ihrem Gerät installiert ist.
Stellen Sie sicher, dass Ihre Geräte mit einem 2,4-GHz-WIFI-Netzwerk
verbunden sind, nicht mit einem 5-GHz-Netzwerk.
Fügen Sie die intelligente
Türklingel hinzu
1.) Öffnen Sie zuerst WoWCam und
klicken Sie auf Gerät hinzufügen.
3.) Wählen Sie den QR-Code-Modus.
4.) Die APP wird den WIFI-Namen automatisch ausfüllen, bitte geben Sie das
richtige WIFI-Passwort ein. Klicken Sie dann auf Nächster Schritt.
Intelligente Türklingel
2.) Klicken Sie auf Manuell
hinzufügen --> dann auf intelligente
Türklingel.
Deutsch Deutsch
910
Tuya Smart 5.) Setzen Sie die Batterie ein, überprüfen Sie dann, ob das blaue Licht blinkt
und hören Sie den Ton "Warten auf Verbindung". Klicken Sie auf das blaue
Licht hat geblinkt.
6.) Scannen Sie den unten stehenden QR-Code mit der Kamera, bis Sie eine
Aufforderung hören, und tippen Sie dann auf „Signalton gehört“.
6.) Wenn das App-Show-Gerät erfolgreich hinzugefügt wurde, herzlichen
Glückwunsch! Das Gerät ist jetzt einsatzbereit!
Tuya Smart Smart Life

Bitte wählen Sie die richtigen 18650 Batterien
mit der intelligenten Türklingel zu verwenden !!!
Technische Spezifikation
NOTIZ
Auflösung 1920*1080 / 1280*720 (Übereinstimmung)
Kamera winkel
Infrarot-LED 6*850nm
160°
WIFI IEEE 802 11 b/g/n
Audio Zwei-Wege-Gespräch ohne Rauschen
Aufzeichnung
Aufnahme auf der SD-Karte des Geräts (20 Sekunden)
Lagerung
Unterstützt 8GB/16GB/32GB/64GB Klasse 10
Batterie 18650 Batterie (LI-Ion, 2600mAh)
Überwachung
Anrufknopf, Bewegungserkennung, Remote-Live-Ansicht
Benachrichtigungen Push-Benachrichtigungen schnell
Aufwachen des Geräts
Schnelles Aufwachen und Push-Benachrichtigung
Energieverbrauch
Flach kopf Runder Kopf
Standby 200 uA, Betrieb 170mA
Zwei 18650 Spezifikationsbatterien (insgesamt 6800mAh),
funktionieren regelmäßig für 8-12 Monate.
(Wenn nicht im Lieferumfang
enthalten, muss separat
erworben werden.)
Deutsch Deutsch
11 12
3. Hinweis zur Verwendung.
1.) Das Gerät wird mit wiederaufladbaren Lithium-Batterien betrieben. Bei
voller Ladung beträgt die Akkulaufzeit ca. sechs Monate. Die APP des
Mobilgeräts wird dazu aufgefordert, während der Akku fast leer ist. Bitte
laden Sie das Gerät nach Erhalt der Erinnerung auf.
2.) Halten Sie die Kamera in Reichweite Ihres Routers.
Stellen Sie sicher, dass Sie einen Ort in Reichweite Ihres Netzwerks
auswählen. Dicke oder isolierte Türen können die Stärke Ihres WIFI-Signals
stark reduzieren, selbst wenn sich Ihr Router in der Nähe befindet. Versuchen
Sie daher, Videos zu streamen, bevor Sie Ihre Kamera montieren.
3.) Das Gerät ist ein intelligentes Produkt mit niedrigem Stromverbrauch,
kann Remote-Aufwecken über die APP, PIR-Personenerkennung und
Türklingel-Aufwecken unterstützen. Das Gerät arbeitet nach dem Aufwachen
30 Sekunden lang und befindet sich dann automatisch im Ruhezustand bis
zum nächsten Aufwachen.
Notiz:
In einer überfüllten Umgebung wird empfohlen, das Gerät zu schließen oder auf eine
niedrige Empfindlichkeit einzustellen, um die Erregung des Geräts und die
Anrufzeiten zu reduzieren, um die Batterielebensdauer zu verlängern.
Achten Sie darauf, Push-Benachrichtigungen auf Ihrem Telefon zu aktivieren:
(1). Navigieren Sie zu Einstellungen --> Benachrichtigungen --> EIN
(2). Eine Liste von APPs, die Push-Benachrichtigungen unterstützen, wird angezeigt.
(3). Tippen Sie auf die Tuya Smart-App und aktivieren Sie die Benachrichtigung.
Schritt 1
Bitte vergewissern Sie sich vor dem Einrichtungsvorgang, dass Ihre Video-
Türklingel mit Ihrem Telefon verbunden und Ihr Klingelton eingesteckt ist.
Klingel mit der Video-Türklingel einrichten
Drücken Sie die Melodie-Taste, um
durch 52 verschiedene Melodien
zu blättern und eine Melodie
auszuwählen.
Halten Sie die Lautstärketaste 5
Sekunden lang gedrückt, bis die
blaue Anzeige leuchtet.
Drücken Sie die Anruftaste erneut,
der Klingelton spielt automatisch die
von Ihnen ausgewählte Melodie.
Drücken Sie die Anruftaste.
Schritt 2
Schritt 4
Schritt 3
Schritt 5
Liste de colisage
Présentation de l'apparence
Schéma d'installation
Après avoir ouvert l'emballage, assurez-vous que la sonnette est en bon état
et vérifiez que les pièces ci-dessous sont complètes.
Comme le montre la figure.
Sonnette Manuel l'Utilisateur
DEL infrarouge
bouton
PIR
PIR
Capteur lumière
Capteur lumière
Voyant
Carte TF
Carte TF
Trou fixe
Trou fixe
Trou fixe
Trou vis sécurité
Trou vis
sécurité
Bouton
réinitialisation
Bouton de
réinitialisation
Batterie
Compartiment
Batterie
Compartiment
Entrée CA
Entrée CA
USB
USB
Conférencier
Microphone
Lentille
Vis sécurité Paquet vis
La lumière ambiante n'est pas suffisante, pour activer la
lumière infrarouge, augmenter la luminosité de
l'environnement.
Utilisé pour collecter la valeur de luminosité
environnementale, lorsque l'intensité de l'éclairage est
inférieure à 2 Lux, activez les DEL infrarouge.
Prise de son.
Le bouton de la sonnette.
Lorsque le corps humain se déplace devant la sonnette,
la sonnette peut être notifiée à votre téléphone portable.
Capture d'images vidéo.
Bleu clignotant : état de la configuration.
Longue lumière rouge: échec de la connexion WIFI.
Le voyant bleu est allumé : l'appareil est connecté avec
succès.
Lumière rouge et bleue ensemble : L'appareil est
connecté au WIFI.
Faites sonner la sonnette et l'interphone vocal.
Prise en charge de l'entrée d'alimentation CA pour la
sonnette.
État de fonctionnement de la sonnette, appuyez longuement
sur 5 secondes pour restaurer les paramètres d'usine.
Montage d'une batterie de spécification 18650.
Fixez le support au mur avec les vis de montage du kit de
montage. Montage de la sonnette sur le support.
Fixation de la vis de sécurité sur les ferrures pour empêcher
le retrait de la sonnette.
Prise en charge maximale de la carte TF 64 Go.
Charger la batterie
13
2
4
5
1. Utilisez les vis du kit de montage pour fixer le support au mur.
2. Les vis conductrices du pack d'accessoires sont utilisées pour connecter
le fil CA (16-24 V) au trou d'entrée CA (si aucun adaptateur secteur n'est
disponible, cette étape peut être omise).
3. Appuyez sur le bouton de réinitialisation pendant 5 secondes, en
attendant que le voyant ralentisse (la sonnette doit être en état de
fonctionnement, appuyez longuement, l'état de veille est invalide).
4. Montage de trois batteries de spécification 18650.
5. Couvrez le couvercle de la batterie, alignez la sonnette et le support,
abaissez et verrouillez les vis de sécurité pour terminer l'installation.
Français Français
Voyant
Microphone
DEL infrarouge
bouton
Conférencier
Lentille
13 14

Appareil de configuration
Veuillez suivre les instructions ci-dessous pour configurer et utiliser votre
sonnette.
1. Téléchargement et installation de l'APP
Ouvrez l'APP Store (pour IOS) ou Google Play (pour Android) sur vos
smartphones. Recherchez « Tuya Smart »/ « Smart Life » ou scannez le code
QR suivant pour télécharger et installer.
2. Configuration de l'application
Avant que tu commences...
Assurez-vous que l'application Tuya Smart / Smart Life est installée sur
votre appareil.
Assurez-vous que vos appareils sont connectés à un réseau WIFI 2,4 GHz,
et non à un réseau 5 GHz.
Ajouter la sonnette intelligente
1.) Ouvrez d'abord Tuya Smart ou Smart Life et cliquez sur
Ajouter un appareil.
2.) Ensuite, choisissez la sonnette intelligente.
5.) Installez la batterie, puis vérifiez si le voyant bleu clignote et entendez le
son «attendre la connexion», cliquez sur le voyant bleu a clignoté.
Scannez le code QR ci-dessous avec l'appareil photo jusqu'à ce que vous
entendiez une invite, puis appuyez sur «J'ai entendu le bip».
Français Français
15 16
Tuya Smart
3.) Choisissez le mode QR Code.
4.) L'APP remplira automatiquement le nom WIFI, veuillez saisir le mot de
passe WIFI correct. Cliquez ensuite sur Étape suivante.
6.) Lorsque l'appareil d'affichage de l'application a été ajouté avec succès,
félicitations! L'appareil est prêt à l'emploi maintenant !
Tuya Smart Smart Life

Veuillez choisir les bonnes batteries 18650
à utiliser avec la sonnette intelligente !!!
Spécifications techniques
NOTER
Résolution 1920*1080/1280*720 (correspondance)
Angle de vue 166 degrés
DEL infrarouge 6*850nm
WIFI IEEE 802 11 b/g/n
l'audio Conversation bidirectionnelle sans bruit
Enregistrer une vidéo
Enregistrement sur carte SD de l'appareil (20 secondes)
Stockage
Prise en charge de 8 Go/16 Go/32 Go/64 Go classe 10
Batterie Batterie 18650 (LI-Ion, 2600mAh)
Surveillance
Notifications Notifications push rapidement
Bouton de l'appareil, détection de
mouvement, vue en direct à distance
Réveil de l'appareil Réveil rapide et notification push
Consommation d'énergie
Tête plate Tête renflement
Veille 200 uA, travail 170mA
Two 18650 specification batteries (total 6800mAh), work regularly for
8-12 months.
(Si non inclus, doit être
acheté séparément.)
Français
17 18
3. Remarque pour l'utilisation.
1.) L'appareil est alimenté par des piles au lithium rechargeables. Avec une
charge complète, la durée de vie de la batterie est d'environ six mois.
L'application de l'appareil mobile sera invitée lorsque la batterie est faible.
Veuillez charger l'appareil après avoir reçu le rappel.
2.) Gardez la caméra à portée de votre routeur.
Assurez-vous de choisir un endroit à portée de votre réseau. Des portes
épaisses ou isolées peuvent réduire considérablement la force de votre signal
WIFI même si votre routeur est à proximité, vous devriez donc essayer de
diffuser de la vidéo avant de monter votre caméra.
3.) L'appareil est un produit intelligent à faible consommation d'énergie, peut
prendre en charge le réveil à distance à partir de l'APP, la détection humaine
PIR, appuyez sur le réveil de la sonnette. L'appareil fonctionnera pendant 30
secondes après le réveil, puis sera automatiquement en état de repos et
jusqu'au prochain réveil.
Noter:
Dans un environnement surpeuplé, il est recommandé de fermer ou de régler
l'appareil sur une faible sensibilité pour réduire l'éveil de l'appareil et les temps
d'appel pour prolonger la durée de vie de la batterie.
Assurez-vous d'activer les notifications push sur votre téléphone:
(1). Accédez à Paramètres -> Notifications -> ACTIVÉ
(2). Une liste des applications prenant en charge les notifications push apparaîtra.
(3). Appuyez sur l'application Tuya Smart et activez la notification.
Étape 1
Avant le processus de configuration, assurez-vous que votre sonnette vidéo
est connectée à votre téléphone et branchez votre carillon.
Configurer le carillon avec la sonnette vidéo
Appuyez sur le bouton de
syntonisation pour parcourir 52
mélodies différentes et sélectionner
une mélodie.
Appuyez sur le bouton Volume et
maintenez-le enfoncé pendant 5
secondes jusqu'à ce que le voyant
bleu s'allume.
Appuyez à nouveau sur le bouton
d'appel, le carillon jouera
automatiquement la mélodie que
vous avez sélectionnée.
Appuyez sur le bouton Appel.
Étape 2
Étape 4
Étape 3
Étape 5

Lista imballaggio
Aspetto Introduzione
Installazione
Dopo aver aperto la confezione, assicurati che il campanello sia in buone
condizioni, verifica che le parti sottostanti siano complete.
Come mostrato in figura.
Campanello di casa Guida utente
IR Leds
LED IR
Pulsante
Pulsante
PIR
PIR
Sensore di luce
Sensore di luce
Spia
Spia
Carta di TF
Carta di TF
Foro fisso
Foro fisso
Foro fisso
Foro per vite di sicurezza
Foro per vite
di sicurezza
Tasto reset
Tasto reset
Batteria
Scomparto
Batteria
Scomparto
Ingresso CA
Ingresso CA
USB
USB
Altoparlante
Altoparlante
Microfono
Microfono
lente
lente
Vite di sicurezza Borsa a vite
La luce ambientale non è sufficiente, per abilitare la luce
infrarossa, aumentare la luminosità ambientale.
Utilizzato per raccogliere il valore di luminosità
ambientale, quando l'intensità dell'illuminazione è
inferiore a 2 Lux, abilitare i LED IR.
Acquisizione audio.
Il pulsante del campanello.
Quando il movimento del corpo umano davanti al
campanello, il campanello potrebbe essere notificato al
tuo telefono cellulare.
Acquisizione di immagini video.
Blu lampeggiante: stato della configurazione.
Luce rossa lunga: connessione WIFI non riuscita.
La spia blu è accesa: il dispositivo è connesso
correttamente.
Luce rossa e blu insieme: il dispositivo è connesso al
WIFI.
Fai un suono del campanello e del citofono vocale.
Supporta l'ingresso di alimentazione CA per il campanello.
Stato di funzionamento del campanello, premere a lungo 5 secondi
per ripristinare le impostazioni di fabbrica.
Montaggio della batteria con specifica 18650.
Fissare il supporto alla parete con le viti di montaggio per il kit di
montaggio. Montaggio del campanello sulla staffa.
Montaggio della vite di sicurezza sui raccordi per impedire la
rimozione del campanello.
Supporto massimo della scheda TF 64 GB.
Caricare la batteria
13
2
4
5
1. Utilizzare le viti nel kit di montaggio per fissare la staffa alla parete.
2. Le viti conduttive nella confezione degli accessori vengono utilizzate per
collegare il cavo CA (16-24 V) al foro di ingresso CA (se non è disponibile un
adattatore di alimentazione CA, questo passaggio può essere omesso).
3. Premere il pulsante di ripristino per 5 secondi, aspettando che l'indicatore
luminoso rallenti (il campanello dovrebbe essere funzionante, premere a
lungo, lo stato di sospensione non è valido).
4. Montaggio di tre batterie con specifica 18650.
5. Coprire il coperchio della batteria, allineare il campanello e la staffa,
premere e bloccare le viti di sicurezza per completare l'installazione.
Italiano Italiano
19 20

Dispositivo di configurazione
Si prega di seguire le istruzioni di seguito per configurare e utilizzare il
dispositivo del campanello.
1. Download e installazione dell'APP
Apri l'APP Store (per IOS) o Google Play (per Android) sui tuoi dispositivi
smartphone. Cerca "Tuya Smart" / "Smart Life" o scansiona il seguente
codice QR per scaricarlo e installarlo.
2. Configurazione dell'APP
Prima di iniziare...
Assicurati che l'APP "Tuya Smart" / "Smart Life" sia installata sul tuo
dispositivo.
Assicurati che i tuoi dispositivi siano connessi a una rete WIFI a 2,4 GHz,
non a una rete a 5 GHz.
Aggiungi il campanello Smart
1.) Per prima cosa apri Tuya Smart o Smart Life e fai clic su aggiungi dispositivo.
2.) Quindi scegli il campanello intelligente.
Italiano Italiano
21 22
Tuya Smart
Tuya Smart Smart Life
3.) Scegli la modalità Codice QR.
4.) L'APP inserirà automaticamente il nome WIFI, inserisci la password WIFI
corretta. Quindi fare clic su Passaggio successivo.
5.) Installare la batteria, quindi controllare se la luce blu lampeggia e ascoltare
il suono di "attesa connessione", fare clic sulla luce blu lampeggia.
Scansiona il codice QR qui sotto con la fotocamera finché non senti un
messaggio, quindi tocca "Emesso Un Tono".
6.) Quando l'app mostra il dispositivo aggiunto con successo,
congratulazioni ! Il dispositivo è pronto per l'uso ora!

Si prega di scegliere le batterie 18650 corrette
da usare con il campanello smart!!!
Specifica tecnica
AVVISO
Risoluzione 1920*1080/1280*720 (corrispondente)
Vista ad angolo 166 gradi
IR LED 6*850nm
WIFI IEEE 802 11 b/g/n
Audio Conversazione bidirezionale senza rumore
Registrare
Registrazione su scheda SD del dispositivo (20 secondi)
Conservazione Supporta 8 GB/16 GB/32 GB/64 GB classe 10
Batteria Batteria 18650 (ioni di litio, 2600 mAh)
Monitoraggio
Notifiche Invia rapidamente le notifiche
Riattivazione del dispositivo
Sveglia veloce e notifica push
Pulsante del dispositivo, rilevamento del
movimento, visualizzazione live remota
Consumo di energia
Testa piatta Testa rotonda
Standby 200 uA, in funzione 170 mA
Due batterie specifiche 18650 (totale 6800 mAh), funzionano
regolarmente per 8-12 mesi.
(Se non incluso, deve essere
acquistato separatamente.)
Italiano Italiano
23 24
3. Nota per l'utilizzo.
1.) Il dispositivo è alimentato da batterie al litio ricaricabili. Con una carica
completa, la durata della batteria è di circa sei mesi. L'APP del dispositivo
mobile verrà richiesta quando la batteria è scarica. Si prega di caricare il
dispositivo dopo aver ricevuto il promemoria.
2.) Tieni la videocamera nel raggio di portata del router.
Assicurati di scegliere un luogo nel raggio della tua rete. Le porte spesse o
isolate possono ridurre notevolmente la potenza del segnale WIFI anche se il
router è vicino, quindi dovresti provare lo streaming video prima di montare la
videocamera.
3.) Il dispositivo è un prodotto intelligente a basso consumo energetico, in
grado di supportare la riattivazione remota dall'APP, il rilevamento umano
PIR, la riattivazione del campanello. Il dispositivo funzionerà per 30 secondi
dopo il risveglio, quindi sarà automaticamente nello stato di riposo e fino al
successivo risveglio.
Nota:
In ambienti affollati, si consiglia di chiudere o impostare il dispositivo su una bassa
sensibilità per ridurre l'attivazione del dispositivo e i tempi di chiamata per
prolungare la durata della batteria.
Assicurati di attivare le notifiche push sul tuo telefono:
(1). Vai su Impostazioni -> Notifiche -> ON
(2). Apparirà un elenco di APP che supportano le notifiche push.
(3). Tocca l'app Tuya Smart e abilita la notifica.
Passo 1
Prima del processo di configurazione, assicurati che il campanello con
videocamera sia collegato al telefono e di aver collegato il campanello.
Imposta il campanello con il videocitofono
Premi il pulsante dell'anello per
scorrere 52 brani diversi e
selezionarne uno.
Tieni premuto il pulsante Volume per 5
secondi finché l'indicatore blu non si
accende.
Premi nuovamente il pulsante Chiama, il
campanello suonerà automaticamente
la melodia selezionata.
Premi il pulsante Chiama.
Passo 2
Passo 4
Passo 3
Passo 5

Lista de empaque
Introduction appearance
Instalación
Después de abrir el paquete, asegúrese de que el timbre de la puerta esté en
buenas condiciones y verifique que las piezas a continuación estén
completas.
Como se muestra en la figura.
Timbre de la puerta Guía del usuario
LED infrarrojos
LED infrarrojos
Botón
Botón
PIR
PIR
Sensor luz
Sensor luz
Luz indicadora
Luz indicadora
Tarjeta TF
Tarjeta TF
Agujero fijo
Agujero fijo
Agujero fijo
Agujero tornillo seguridad
Agujero tornillo
seguridad
Botón reinicio
Botón reinicio
Batería
Compartimiento
Batería
Compartimiento
Entrada AC
Entrada AC
USB
USB
Orador
Orador
Micrófono
Micrófono
Lente
Lente
Tornillo de seguridad Paquete de tornillos
La luz ambiental no es suficiente, para habilitar la luz
infrarroja, aumenta el brillo ambiental.
Se utiliza para recopilar el valor de brillo ambiental, cuando
la intensidad de iluminación es inferior a 2 Lux, habilitará los
LED infrarrojos.
Captura de audio.
El botón del timbre.
Cuando el cuerpo humano se mueve frente al timbre, el
timbre puede ser la notificación a su teléfono móvil.
Captura de imágenes de video.
Azul intermitente: estado de configuración.
Luz roja larga: no se pudo conectar WIFI.
La luz azul está encendida: el dispositivo está conectado
correctamente.
Luz roja y azul juntas: el dispositivo está conectado a WIFI.
Haga un sonido del timbre y del intercomunicador de voz.
Admite entrada de fuente de alimentación de CA para timbre.
Estado de funcionamiento del timbre, mantenga pulsado durante 5
segundos para restaurar la configuración de fábrica.
Montaje de batería de especificación 18650.
Coloque el soporte en la pared con los tornillos de montaje del kit de
montaje. Montaje del timbre en el soporte.
Montar el tornillo de seguridad en los herrajes para evitar que se
retire el timbre.
Soporte máximo de tarjeta TF de 64 GB.
Carga la batería
13
2
4
5
1. Utilice los tornillos del kit de montaje para colocar el soporte en la pared.
2. Los tornillos conductores del paquete de accesorios se utilizan para
conectar el cable de CA (16-24 V) al orificio de entrada de CA (si no hay un
adaptador de CA disponible, este paso puede omitirse).
3. Presione el botón de reinicio durante 5 segundos, esperando que la luz
indicadora disminuya la velocidad (el timbre debe estar en condiciones de
funcionamiento, presione prolongadamente, el estado de suspensión no es
válido).
4. Montaje de tres baterías de especificación 18650.
5. Cubra la tapa de la batería, alinee el timbre y el soporte, empuje hacia
abajo y bloquee los tornillos de seguridad para completar la instalación.
Español Español
25 26

Dispositivo de configuración
Siga las instrucciones a continuación para configurar y usar su dispositivo de timbre.
1. Descarga e instalación de la APLICACIÓN
Abra la tienda de aplicaciones (para IOS) o Google Play (para Android) en sus
dispositivos de teléfono inteligente. Busque “Tuya Smart” / “Smart Life” o
escanee el siguiente código QR para descargar e instalar.
2. Configuración de la APLICACIÓN
Antes de que empieces...
Asegúrese de que Tuya Smart o Smart Life esté instalado en su dispositivo.
Asegúrese de que sus dispositivos estén conectados a una red WIFI de 2,4
GHz, no a una red de 5 GHz.
Español Español
27 28
Tuya Smart
Tuya Smart Smart Life
Agrega el timbre inteligente
1.) Primero abra Tuya Smart o Smart Life y haga clic en agregar dispositivo.
2.) Luego elija timbre inteligente.
3.) Elija el modo Código QR.
4.) La APLICACIÓN completará automáticamente el nombre WIFI, ingrese la
contraseña WIFI correcta. Luego haga clic en Siguiente paso.
5.) Instale la batería, luego verifique si la luz azul está parpadeando y escuche
el sonido de "esperar conexión", haga clic en la luz azul ha parpadeado.
Escanee el código QR a continuación con la cámara hasta que escuche un
mensaje, luego toque "Oír el tono de aviso".
6.) Cuando la aplicación muestre que el dispositivo se agregó correctamente,
¡felicitaciones! ¡El dispositivo está listo para usarse ahora!

Elija las baterías 18650 correctas
para usar con el timbre inteligente !!!
Especificación técnica
AVISO
Resolución 1920 * 1080/1280 * 720 (a juego)
Ángulo visión 166 grados
LED infrarrojos 6*850nm
WIFI IEEE 802 11 b/g/n
Audio Charla bidireccional sin ruido
Grabación
Grabación de la tarjeta SD del dispositivo (20 segundos)
Almacenamiento Soporta 8GB / 16GB / 32GB / 64GB clase 10
Batería Batería 18650 (Li-Ion, 2600mAh)
Vigilancia
Notificaciones Notificaciones push rápidamente
Botón de dispositivo, detección de
movimiento, vista remota en vivo
Activación del dispositivo
Despertar rápido y notificación push
El consumo energía Cabeza plana Cabeza saliente
En espera 200 uA, trabajo 170mA
Dos baterías de especificación 18650 (6800 mAh en total), funcionan
regularmente durante 8-12 meses.
(Si no está incluido, debe
comprarse por separado).
Español Español
29 30
3. Nota de uso.
1.) El dispositivo funciona con baterías de litio recargables. Con la carga
completa, la duración de la batería es de aproximadamente seis meses. La
APLICACIÓN del dispositivo móvil aparecerá cuando la batería esté baja.
Cargue el dispositivo después de recibir el recordatorio.
2.) Mantenga la cámara dentro del alcance de su enrutador.
Asegúrese de elegir un lugar dentro del alcance de su red. Las puertas
gruesas o aisladas pueden reducir en gran medida la intensidad de su señal
WIFI incluso si su enrutador está cerca, por lo que debe intentar transmitir
video antes de montar su cámara.
3.) El dispositivo es un producto inteligente de bajo consumo de energía,
puede admitir el despertador remoto desde la APLICACIÓN, la detección
humana PIR, presione el timbre para despertar. El dispositivo funcionará
durante 30 segundos después de despertarse, luego estará en estado de
reposo automáticamente y hasta el próximo despertar.
Nota:
En un entorno concurrido, se recomienda cerrar o configurar el dispositivo a una
sensibilidad baja para reducir la activación del dispositivo y los tiempos de
llamada para prolongar la vida útil de la batería.
Asegúrese de activar las notificaciones automáticas en su teléfono:
(1). Vaya a Configuración -> Notificaciones -> ACTIVADO
(2). Aparecerá una lista de aplicaciones que admiten notificaciones push.
(3). Toque la aplicación Tuya Smart y habilite la notificación.
Paso 1
Antes del proceso de configuración, asegúrese de que su timbre con video se
haya conectado a su teléfono y conecte su timbre.
Configurar timbre con el timbre de video
Presione el botón de tono de llamada
para recorrer 52 melodías diferentes
y seleccionar una melodía.
Mantenga presionado el botón de
volumen durante 5 segundos hasta
que el indicador azul se encienda.
Presione el botón Llamar
nuevamente, el timbre reproducirá
automáticamente la melodía que
seleccionó.
Presione el botón Llamar.
Paso 2
Paso 4
Paso 3
Paso 5

Товарная накладная
Внешний вид Введение
Установка
После открытия упаковки убедитесь, что дверной звонок в хорошем с
остоянии, проверьте комплектность деталей, указанных ниже.
Как показано на рисунке.
Дверной звонок Гид пользователя
ИК-светодиоды
ИК-светодиоды
Кнопка
Кнопка
Инфракрасный датчик
Инфракрасный
датчик
Световой датчик
Световой
датчик
Индикатор
Индикатор
TF карта
TF карта
Фиксированное
отверстие
Фиксированное
отверстие
Отверстие под
винт безопасности
Отверстие под
винт безопасности
Кнопка сброса
Кнопка сброса
Аккумулятор Отсек
Аккумулятор Отсек
Вход переменного тока
Вход переменного
USB
USB
Оратор
Оратор
Микрофон
Микрофон
Линза
Линза
Винт безопасности Сумка с винтом
Окружающего света недостаточно, чтобы включить и
нфракрасный свет, увеличить яркость окружающей ср
еды.
Используется для сбора значения яркости окружающ
ей среды, когда интенсивность освещения менее 2
люкс, включение ИК-светодиодов.
Захват звука.
Кнопка дверного звонка.
Когда человеческое тело движется перед дверным
звонком, дверной звонок может быть уведомлен на
ваш мобильный телефон.
Захват видеоизображения.
Мигающий синий: состояние конфигурации.
Длинный красный свет: не удалось подключить WIFI.
Горит синий свет: устройство успешно подключено.
Красный и синий свет вместе: устройство подключено
к Wi-Fi.
Сделайте звук дверного звонка и голосовой домофон.
Поддержка входа источника питания переменного тока для дв
ерного звонка.
Рабочий статус дверного звонка, нажмите и удерживайте 5
секунд, чтобы восстановить заводские настройки.
Монтаж аккумулятора спецификации 18650.
Закрепите опору на стене с помощью крепежных винтов для
монтажного комплекта. Крепление дверного звонка на
кронштейн.
Установка предохранительного винта на фурнитуру для
предотвращения снятия дверного звонка.
Максимальная поддержка TF-карты 64 ГБ.
Зарядить аккумулятор
13
2
4
5
1. Используйте винты из монтажного набора, чтобы закрепить
кронштейн на стене.
2. Токопроводящие винты в комплекте принадлежностей
используются для подключения провода переменного тока (16–24 В) к
входному отверстию переменного тока (при отсутствии адаптера
переменного тока этот шаг можно пропустить).
3. Нажмите кнопку сброса в течение 5 секунд, подождите, пока
индикатор не замедлится (дверной звонок должен быть в рабочем
состоянии, долгое нажатие, состояние сна недействительно).
4. Установка трех батарей по спецификации 18650.
5. Закройте крышку аккумуляторного отсека, выровняйте дверной
звонок и кронштейн, надавите и зафиксируйте стопорные винты,
чтобы завершить установку.
русский русский
31 32

Настроить устройство
Пожалуйста, следуйте приведенным ниже инструкциям по настройке
и использованию дверного звонка.
1. Скачивание и установка ПРИЛОЖЕНИЯ
Откройте магазин приложений (для iOS) или Google Play (для Android)
на своем смартфоне. Найдите «Tuya Sma» / «Sma Life» или
отсканируйте следующий QR-код, чтобы загрузить и установить.
2. Настройка приложения.
Прежде чем вы начнете...
Убедитесь, что на вашем устройстве установлены Tuya Sma или
Sma Life.
Убедитесь, что ваши устройства подключены к сети Wi-Fi 2,4 ГГц, а
не к сети 5 ГГц.
Добавьте умный дверной звонок
1.) Сначала откройте Tuya Sma или Sma Life и нажмите «Добавить
устройство».
2.) Затем выберите умный дверной звонок.
3.) Выберите режим QR-кода.
4.) Приложение автоматически введет имя WIFI, пожалуйста, введите
правильный пароль WIFI. Затем нажмите «Следующий шаг».
5.) Установите аккумулятор, затем проверьте, мигает ли синий
индикатор, и услышите звук «ждите подключения», нажмите синий
индикатор мигает.
Отсканируйте приведенный ниже QR-код с помощью камеры, пока не
услышите подсказку, затем нажмите «Я слышал подсказку».
6.) Когда приложение показывает, что устройство успешно добавлено,
поздравляем! Теперь прибор готов к работе!
Tuya Sma Sma Life Tuya Sma
русский русский
33 34

3. Примечание по использованию.
1.) Устройство питается от литиевых аккумуляторных батарей. При
полной зарядке срок службы батареи составляет около шести
месяцев. При низком заряде батареи приложение мобильного
устройства будет получать запрос. После получения напоминания
зарядите устройство.
2.) Держите камеру в пределах досягаемости вашего роутера.
Обязательно выберите место в пределах досягаемости вашей сети.
Толстые или изолированные двери могут значительно снизить
мощность вашего сигнала Wi-Fi, даже если ваш маршрутизатор
находится рядом, поэтому вам следует попробовать потоковое видео,
прежде чем устанавливать камеру.
3.) Устройство представляет собой интеллектуальные продукты с
низким энергопотреблением, может поддерживать удаленное
пробуждение из приложения, обнаружение человека PIR,
пробуждение дверного звонка. Устройство будет работать в течение
30 секунд после пробуждения, затем автоматически перейдет в
состояние покоя и до следующего пробуждения.
Внимание :
В многолюдной среде рекомендуется закрыть или установить устройство
на низкую чувствительность, чтобы уменьшить срабатывание устройства
и время вызова, чтобы продлить срок службы батареи.
Обязательно включите на телефоне push-уведомления:
(1). Перейдите в Настройки -> Уведомления -> ВКЛ.
(2). Появится список приложений, поддерживающих push-уведомления.
(3). Коснитесь приложения Tuya Sma и включите уведомление.
Пожалуйста, выберите правильные батареи 18650
использовать с умным дверным звонком !!!
Техническая спецификация
Шаг 1
Внимание
разрешение 1920*1080 / 1280*720 (Соответствие)
Угол обзора 166 градусов
ИК-светодиод 6 * 850 нм
ВАЙ ФАЙ IEEE 802 11 b/g/n
Аудио Двусторонний разговор без шума
Запись Запись на SD-карту устройства (20 секунд)
Место хранения
Поддержка 8 ГБ / 16 ГБ / 32 ГБ / 64 ГБ класса 10
Аккумулятор Аккумулятор 18650 (LI-Ion, 2600mAh)
Мониторинг Кнопка устройства, обнаружение движения,
удаленный просмотр в реальном времени
Уведомления Быстрые push-уведомления
Пробуждение
устройства Быстрое пробуждение и push-уведомление
Потребляемая
мощность
В режиме ожидания 200 мкА, в рабочем
режиме 170 мА
Две батареи спецификации 18650 (всего 6800 мАч), работают
регулярно в течение 8-12 месяцев.
Перед установкой убедитесь, что видеодомофон подключен к вашему
телефону.
Плоская голова Острая голова
(Если не входит в комплект, необходимо приобретать отдельно.)
Настроить дингдонский звонок с видеодомофоном
Нажмите кнопку настройки, что
бы просмотреть 52 различных
мелодии и выбрать мелодию.
Нажмите и удерживайте кнопку гро
мкости в течение 5 секунд, пока не
загорится синий индикатор.
Нажмите кнопку вызова еще раз, з
вонок автоматически воспроизве
дет выбранную вами мелодию.
Нажмите кнопку вызова.
Шаг 2
Шаг 4
Шаг 3
Шаг 5
русский русский
35 36

JT-2111-V10
X5 T9W T9B
T8
V10W V20WV10B V20B
M6M11
This manual suits for next models
9
Table of contents
Languages:
Other TUYA Accessories manuals

TUYA
TUYA 96236 Instruction manual

TUYA
TUYA J5 User manual

TUYA
TUYA laxihub 6972055684105 User manual

TUYA
TUYA T23 User manual

TUYA
TUYA TM001-ZA Owner's manual

TUYA
TUYA EC-SMART01 User manual

TUYA
TUYA ATLO-P1-TUYA User manual

TUYA
TUYA SimPal-TY130 User manual

TUYA
TUYA M100 Pro User manual

TUYA
TUYA PIR 323-Z-TY User manual
Popular Accessories manuals by other brands

ENKHO
ENKHO Heated underblanket user manual

IFM Electronic
IFM Electronic efector200 OG Series operating instructions

Orion
Orion 5520 quick start guide

NuAire
NuAire 1 Series Operation and maintenance manual

MOPEKA
MOPEKA Standard Sensor Installation manual operating instructions

Johnson Controls
Johnson Controls NS Series installation instructions