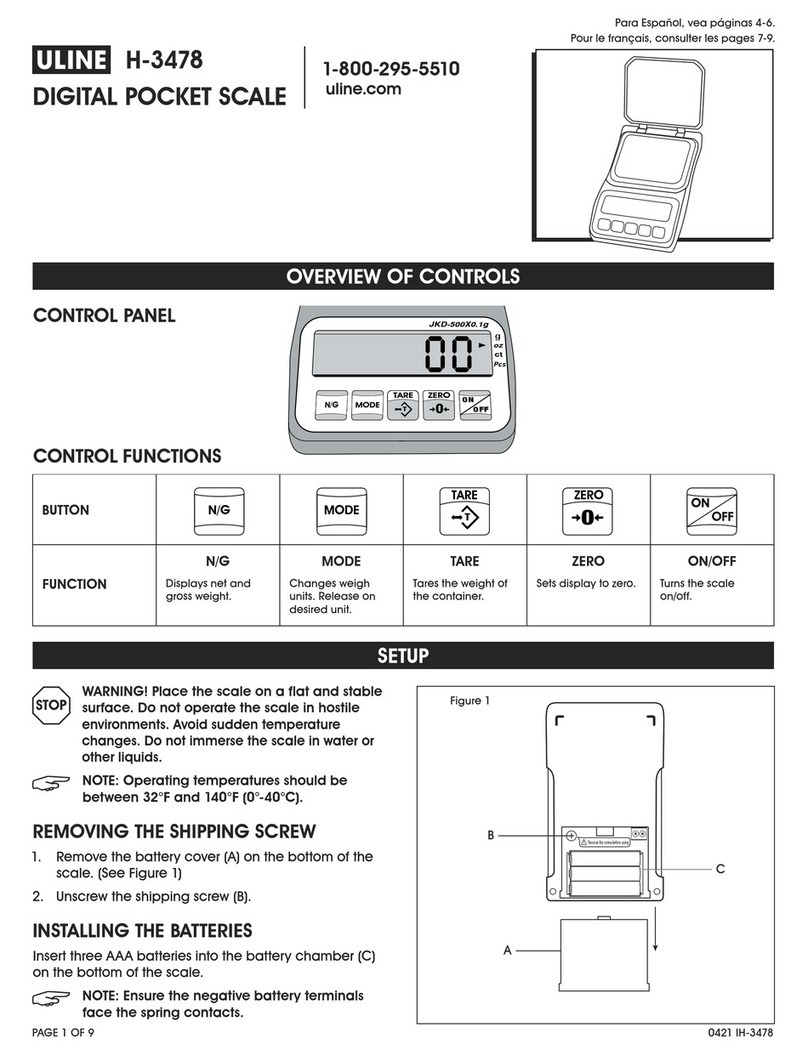
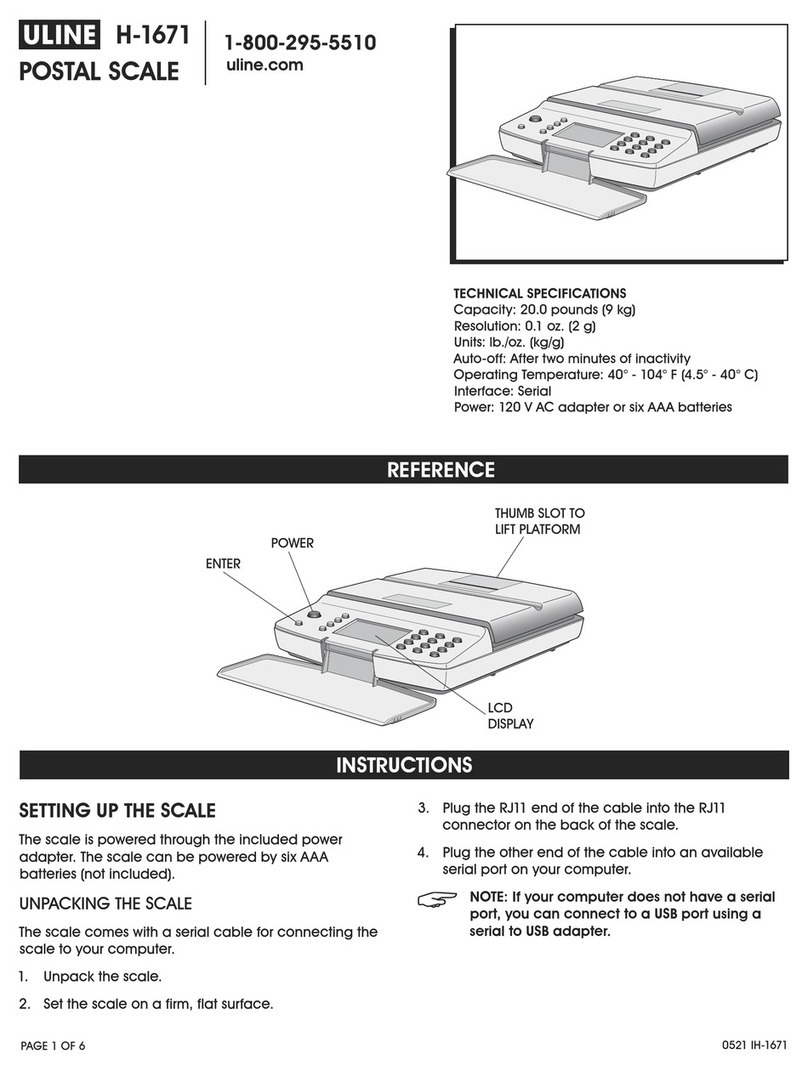
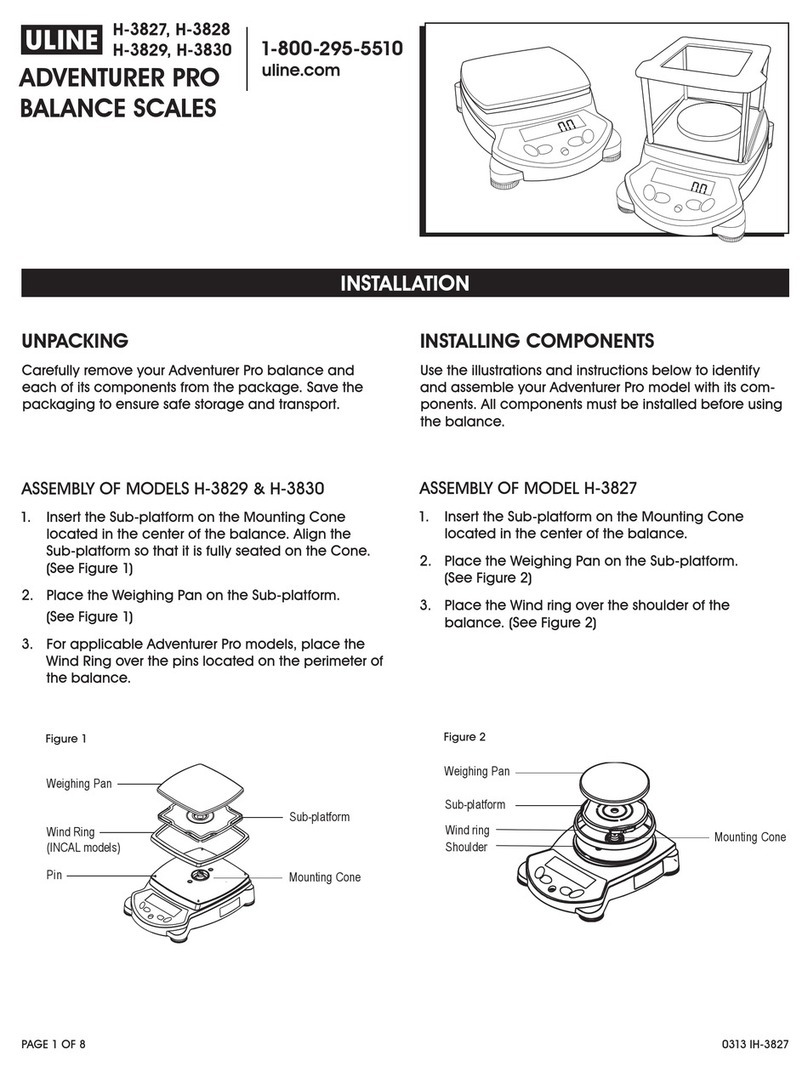
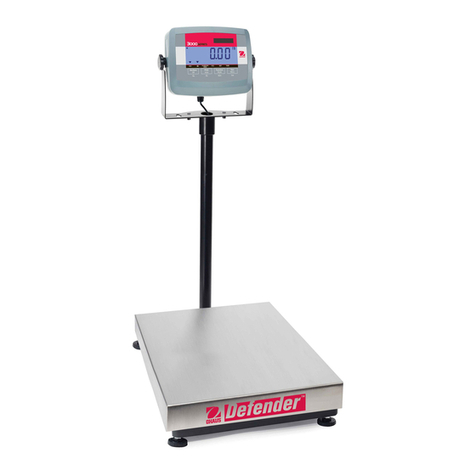
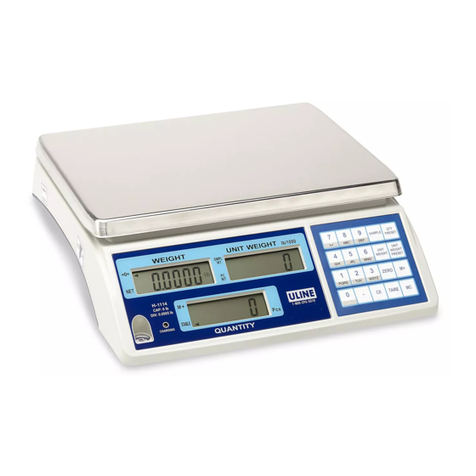
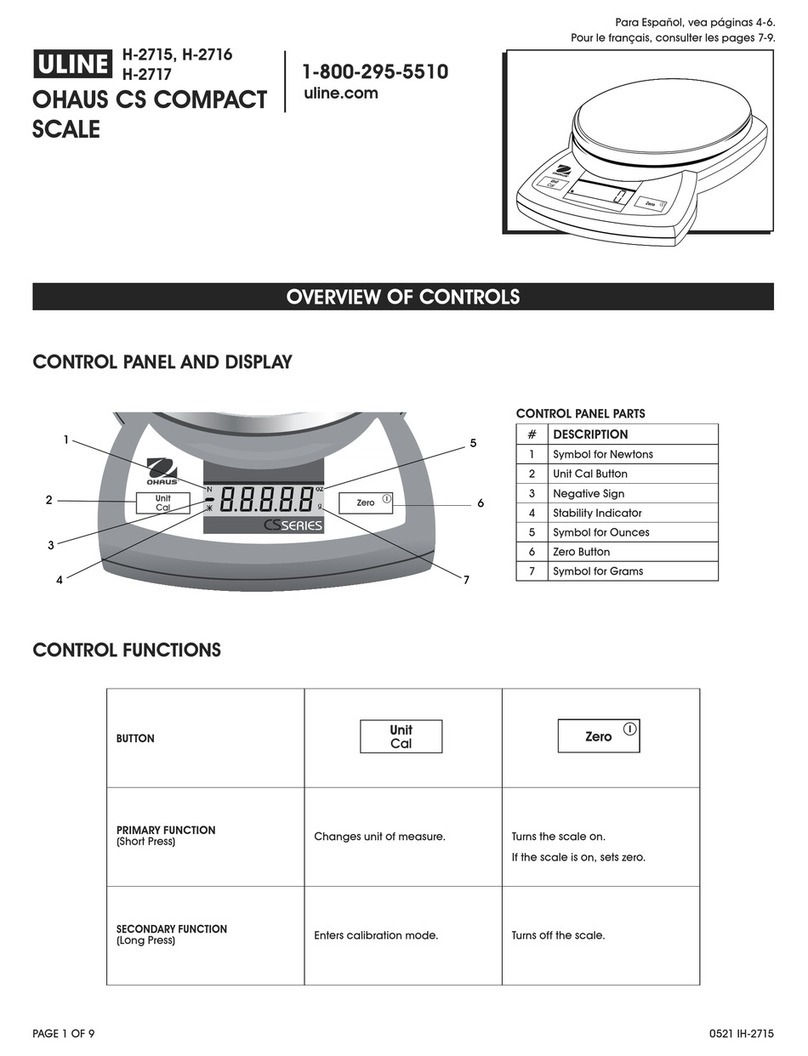
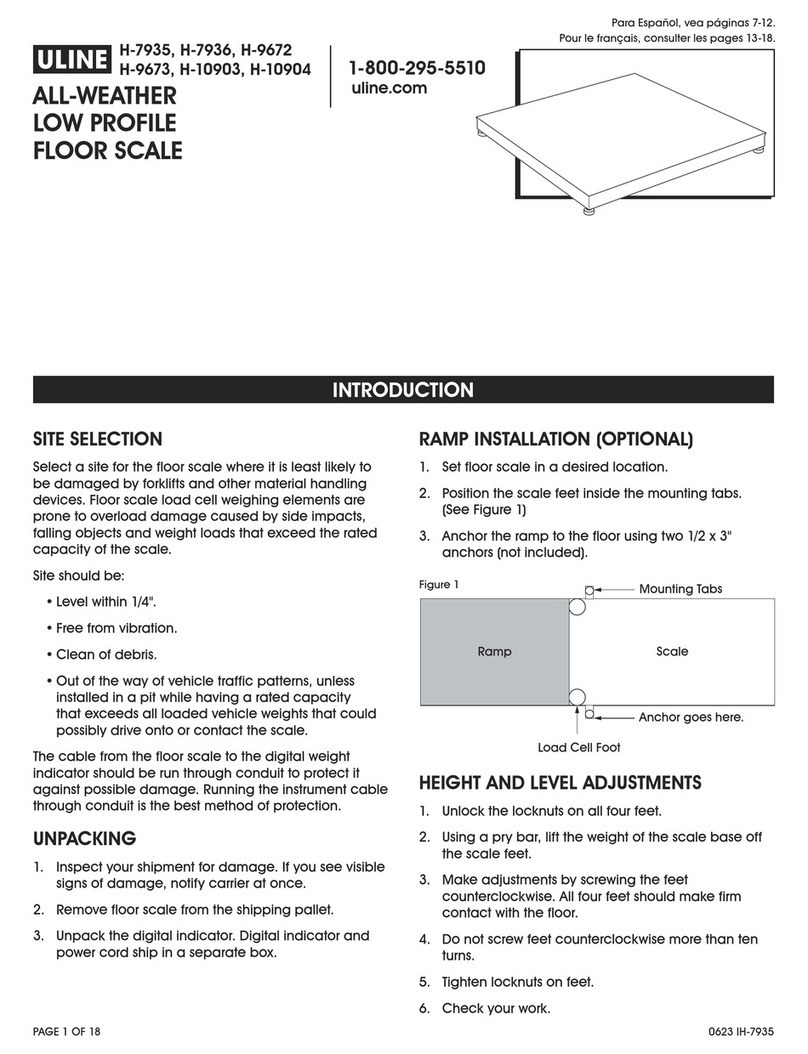
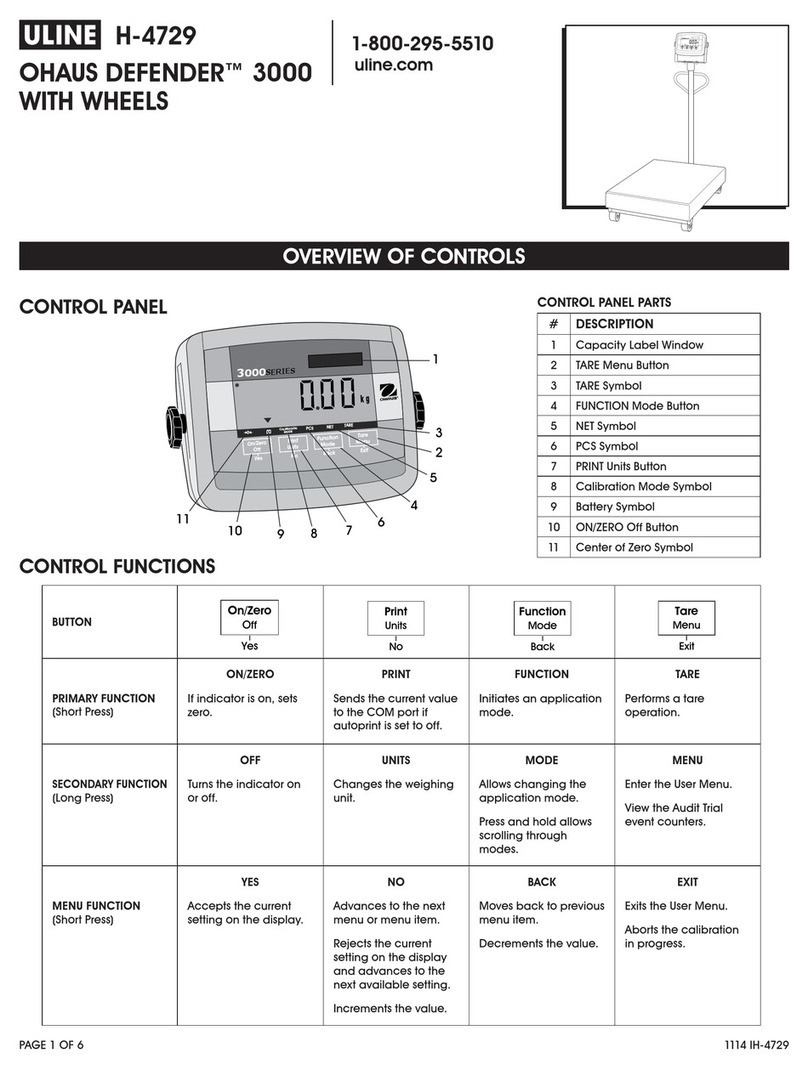
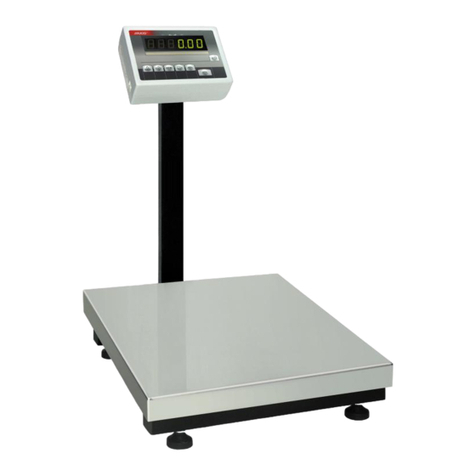
U-Line OHAUS DEFENDER 5000 User manual

PAGE 1 OF 33 1219 IH-8105
OHAUS DEFENDERTM 5000
DIGITAL SCALE
1-800-295-5510
uline.com
πH-8105, H-8106
H-8107
OVERVIEW OF CONTROLS
CONTROL PANEL
#DESCRIPTION
1Softkey Function Buttons
2 On/Clear Off Button
3 Print Units Button
4 Library Mode Button
5 User Menu Button
6 Function Mode Button
7 Tare Menu Button
8Numeric Keypad
9Input Modes Button
CONTROL PANEL PARTS
ID
>0<
O Units Mode Menu
On/CLR
DEFENDER
5000
Print Library User
1 2
ABC
#./
+/-
A
1
a
DEF
JKLGHI MNO
TUVPQRS WXYZ
3
456
789.
0
T0
g
Max
2017/08/15 11:37
10000 1
g g
d=
123
1
2
3 4 5 6
7
9
8
CONTROL FUNCTIONS
#
BUTTON ACTION
1The five softkeys correspond to several icons at the bottom of the display area. These icons display for each softkey
function specifically available for configuration and operation of the mode.
2
O
On/CLR
Short press: if the terminal is off, power on the terminal; if the terminal is on, clear the data input.
Long press: Power off the terminal.
3
Units
Print
Short press: Send the current display value to the RS-232 port or option when properly enabled.
Long Press: Change the current weighing unit. Press and hold the key to scroll through the list of enabled units.
Release the key to switch to the unit selected.
4
Mode
Library
Short press: Press the key to enter the library.
Long press: Press and hold the key to change weighing modes. Press and hold the key to scroll through all weighing
modes. Release the key to switch to the mode selected.
5
Menu
User
Short press: Press the key to enter user profile.
Long Press: Press the key to enter user menu.
60Short press: When the load on the pan is within the zero range, press the key to set the display to zero.
7T
Short press: When a container is on the pan, press this key to store the weight of the container as the tare value.
Short press: Enter the known weight of a container using the numeric keypad, then press this key to establish preset tare value.
Short press: When a tare has been entered, empty the pan and press this key to clear the tare value.
Long press: If a preset tare has been entered, press this key to view the preset tare value.

PAGE 2 OF 33 1219 IH-8105
#
BUTTON ACTION
8
1 2
ABC
#./
+/-
A
1
a
DEF
JKLGHI MNO
TUVPQRS WXYZ
3
456
789.
0
2
ABC WXYZ
9
To enter "2-9", press the numeric button in the middle of numeric input.
To enter "A", press
2
ABC
two times in the mode of uppercase input. To enter "Z", press
WXYZ
9
five times
in the mode of lowercase input.
0
To enter "0", press the button in the mode of numeric input. To enter a space, press the button in the
mode of uppercase or lowercase input.
1
#./
To enter "1", press the button in the mode of numeric input. To enter "#" or "/", press the button in the
mode of uppercase input. To enter "@", "_" or "&", press the button in the mode of lowercase input.
+/-
.
To enter ".", press the button in the mode of numeric input. To "+" or "–", press the button in the mode
of uppercase or lowercase input.
9
A
1
a
Switch between three input modes: numeric, lowercase and uppercase input.
OVERVIEW OF CONTROLS
SETUP
1. Remove shipping spacers, and place the weighing
pan securely over the rubber load pads on the top
frame of the base. (See Figure 1)
2. Connect the AC power cord (included) to the power
receptacle, then connect the AC plug to
an electrical outlet.
Figure 1
MENU STRUCTURE
CALIBRATION
Zero
Span
Linearity
GEO
READ OUT
Stability
Zero Range
Filter Level
Auto Zero Track
Auto Dim
Brightness
Screensaver
Auto Off
Adjust Contrast
Reset
UNIT
Gram (g)
Kilogram (kg)
Pound (lb)
Ounce (oz)
Pound:Ounce (lb:oz)
Tonne (t)
Ton (ton)
Custom Unit
Unit Name
Factor
Exponent
LSD
Reset
APPLICATION MODE
Weighing
Counting
Check
Percent
Dynamic
Reset
SETUP
Capacity Unit
Range
Capacity &
Graduation
>|1|< Capacity
>|1|< Graduation
>|2|< Capacity
>|2|< Graduation
Language
Power On Zero
Power On Unit
Key Beep
Transaction Counter
Next Transaction
Reset
GMP
Date Format
Date
Time Format
Time
Project ID
Scale ID
Reset

PAGE 3 OF 33 1219 IH-8105
MENU STRUCTURE CONTINUED
COMMUNICATION
RS-232/2nd RS-232/
USB Device*
Configuration
Baud Rate
Parity
Stop Bit
Handshake
Alt Print Command
Alt Tare Command
Alt Zero Command
Reset
Print Setup
Assignment
Print Options
Select Template
Edit Template
Edit String
Reset
RS-485*
Configuration
Address
Baud Rate
Parity
Stop Bit
Handshake
Alt Print Command
Alt Tare Command
Alt Zero Command
Reset
Print Setup
Assignment
Print Options
Select Template
Edit Template
Edit String
Reset
Ethernet* Configuration
Host Name
MAC Address
Port
Version
DHCP
IP Address
Subnet Mask
Gateway
Primary DNS
Secondary DNS
Alt Print Command
Alt Tare Command
Alt Zero Command
Reset
COMMUNICATION
Ethernet* Print Setup
Assignment
Print Options
Select Template
Edit Template
Edit String
Reset
WiFi & Bluetooth*
WiFi
MAC Address
Network
Port
DHCP
IP Address
Gateway
DNS
Subnet Mask
Alternate Command
Reset
Bluetooth Device Name
Print Setup
Assignment
Print Options
Select Template
Edit Template
Edit String
Reset
Analog*
Source
None, Displayed
Weight, ABS-
Displayed Weight,
Gross Weight
Output Type 4-20mA, 0-10V
Zero Value 0 (any valid value
below the high limit)
Full Scale Value Desired source value,
scale capacity
Cal Output Zero
Cal Output Full
SD CARD
Library
Memory
Mode
Review
Link To
User
User Profiles
Supervisor
Authority
Password
Rule
MAINTENANCE
Export Menu
Import Menu
Diagnosis
Format SD
Service Menu
LOCK KEY
Lock All Keys
Lock Off Key
Lock Zero Key
Lock Print Key
Lock Unit Key
Lock Soft Key
Lock Mode Key
Lock Tare Key
Lock Menu Key
Reset
*Submenu for options will only be active when the specified
board is installed.
*Submenu for options will only be active when the specified
board is installed.

PAGE 4 OF 33 1219 IH-8105
OPERATION
MENU NAVIGATION
To enter the Main Menu,
press the
Menu
User
button
from any application
home screen. (See Figure 1)
CHANGING SETTINGS
To change a menu setting, follow these steps:
1. Enter the Menu – From any application screen, press
the
Menu
User
button. The Main Menu List appears.
2. Select the Submenu – Scroll to desired submenu in
the Main Menu List using the softkey corresponding
to the ▼ icon. Press the softkey corresponding to the
icon to display the Submenu items.
3. Select the Submenu Item – Scroll to the desired
submenu Item using the softkey corresponding to
the ▼ icon. Press the softkey corresponding to the
icon to view the submenu item’s settings.
4. Select the Setting – Scroll to desired Setting using
the softkey corresponding to the ▼ icon. Press the
softkey corresponding to the icon to select the
setting. Press the softkey corresponding to the
Menu
User
icon to return to the previous screen. Press the
softkey corresponding to the
Menu
User
icon to exit menu
and return to the last active application mode.
CALIBRATION
Three calibration methods are available:
Zero Calibration, Span Calibration and Linearity Calibration.
1. Make sure that appropriate calibration masses
are available before calibration. See Uline.com for
calibration weights.
2. Make sure that the scale base is level and stable
during the entire calibration process.
3. Calibration is unavailable with LFT set to ON.
4. Allow the scale to warm up for approximately five
minutes after stabilizing to room temperature.
5. To abort calibration, press the softkey corresponding
to the "X" icon anytime during the calibration process.
6. When any selection within the GMP menu is enabled,
calibration results are automatically printed.
ZERO CALIBRATION
Zero calibration uses one calibration point. The zero
calibration point is established with no weight on scale.
Use this calibration method to adjust for a different dead
load without affecting span or linearity calibration.
1. Long press the
Menu
User
button to enter main
menu. Press the softkey
corresponding to the
icon to enter the
Calibration submenu. (See Figure 2)
2. When Zero Calibration
is highlighted, press the
softkey corresponding
to the icon to
initiate. (See Figure 3)
3. Clear the pan and
then press the softkey
corresponding to the
icon. (See Figure 4)
4. The message
"Completed" will
display on screen.
(See Figure 5)
5. Exit Zero Calibration
by pressing the softkey
corresponding to the
icon. (See Figure 6)
6. To return to Main
Menu, press the softkey
corresponding to the icon.
SPAN CALIBRATION
Span Calibration uses one point. This point is established
when a calibration mass is placed on the scale.
NOTE: Span Calibration should be performed
after Zero Calibration.
1. Long press the
Menu
User
button to enter Main
Menu. (See Figure 7)
2. Press the softkey
corresponding to the
icon to enter the
Calibration submenu.
(See Figure 8)
3. Scroll to Span Calibration using the softkey
corresponding to the ▼ icon.
Figure 1
Figure 2
Figure 3
Figure 4
Figure 5
Figure 6
Figure 7
Figure 8

PAGE 5 OF 33 1219 IH-8105
OPERATION CONTINUED
4. Press the softkey
corresponding to the
icon to initiate
Span Calibration.
(See Figure 9)
5. Place a calibration
mass of the specified
weight on pan and
press the softkey
corresponding to the
icon. To change to a
different calibration point, input desired value
and place the corresponding weight on pan for
calibration. A suggestive message shows on the
screen. (See Figure 10)
6. The message
"Completed" will
display on screen.
(See Figure 11)
7. Exit Span Calibration
by pressing the softkey
corresponding to the
icon. (See Figure 12)
8. To return to the Main Menu, press the softkey
corresponding to the
Menu
User
icon.
LINEARITY CALIBRATION
Linearity calibration uses three calibration points. The
full calibration point is established with a weight on
the scale. The mid calibration point is established with
a weight equal to half of the full calibration weight on
the scale. The zero calibration point is established with
no weight on the scale. The full calibration and mid
calibration points can be altered by the user during the
calibration procedure.
1. Long press the
Menu
User
button to enter
Main Menu.
(See Figure 13)
2. Press the softkey
corresponding to the
icon to enter the
Calibration submenu.
Scroll to Linearity
Calibration using the
softkey corresponding to
the ▼ icon. (See Figure 14)
3. Press the softkey
corresponding to
the icon to initiate
Linearity Calibration.
(See Figure 15)
4. Clear the pan and press the softkey corresponding
to the icon.
5. Put the calibration
mass of the specified
weight on the pan, and
then press the softkey
corresponding to the
icon for confirmation.
To change to a different calibration point, input the
desired value, and then place the corresponding
weight on pan for calibration. (See Figure 16)
6. Put calibration mass
on pan, and then
press the softkey
corresponding
to the icon for
confirmation. To change
to a different calibration point, input desired value,
then place the corresponding weight on pan for
calibration. (See Figure 17)
7. The message
"Completed" will
display on screen.
(See Figure 18)
8. Exit Linearity Calibration
by pressing the softkey
corresponding to the
icon. (See Figure 19)
9. To return to the Main Menu, press the softkey
corresponding to the
Menu
User
icon.
GEO ADJUSTMENT
Set the GEO factor that corresponds to your location.
GEO codes are numbered 0-31.
1. Long press the
Menu
User
button to enter Main
Menu. Select the menu
item Calibration by
pressing the softkey
corresponding to the
icon. (See Figure 20)
Figure 9
Figure 10
Fi g ure 11
Figure 12
Figure 13
Figure 14
Figure 16
Figure 17
Figure 18
Figure 19
Figure 15
Figure 20

PAGE 6 OF 33 1219 IH-8105
OPERATION CONTINUED
2. Scroll to GEO Adjustment
using the softkey
corresponding to the
▼ icon. (See Figure 21)
3. Press the softkey
corresponding to the
icon to edit GEO
value. Press the
O
On/CLR
button and enter desired
value using keypad. After editing, press the softkey
corresponding to the
Menu
User
icon to exit menu. (See Figure 22)
NOTE: See table for GEO values.
Figure 21 Figure 22
ELEVATION IN METERS
0325 650 975 1,300 1,625 1,950 2,275 2,600 2,925 3,250
325 650 975 1,300 1,625 1,950 2,275 2,600 2,925 3,250 3,575
ELEVATION IN FEET
01,060 2,130 3,200 4,260 5,330 6,400 7,460 8,530 9,600 10,660
1,060 2,130 3,200 4,260 5,330 6,400 7,460 8,530 9,600 10,660 11,730
LATTITUDE GEO VALUE
0º00' 5º46' 54433221100
5º46 9º52' 55443322110
9º52' 12º44' 65544332211
12º44' 15º06' 66554433221
15º06' 17º10' 76655443322
17º10' 19º02' 77665544332
19º02' 20º45' 87766554433
20º45' 22º22' 88776655443
22º22' 23º54' 98877665544
23º54' 25º21' 99887766554
25º21' 26º45' 10 9988776655
26º45' 28º06' 10 10 998877665
28º06' 29º25' 11 10 10 99887766
29º25' 30º41' 11 11 10 10 9988776
30º41' 31º56' 12 11 11 10 10 998877
31º56' 33º09' 12 12 11 11 10 10 99887
33º09' 34º21' 13 12 12 11 11 10 10 9988
34º21' 35º31' 13 13 12 12 11 11 10 10 998
35º31' 36º41' 14 13 13 12 12 11 11 10 10 9 9
36º41' 37º50' 14 14 13 13 12 12 11 11 10 10 9
37º50' 38º58' 15 14 14 13 13 12 12 11 11 10 10
38º58' 40º05' 15 15 14 14 13 13 12 12 11 11 10
40º05' 41º12' 16 15 15 14 14 13 13 12 12 11 11
41º12' 42º19' 16 16 15 15 14 14 13 13 12 12 11
42º19' 43º26' 17 16 16 15 15 14 14 13 13 12 12
43º26' 44º32' 17 17 16 16 15 15 14 14 13 13 12
44º32' 45º38' 18 17 17 16 16 15 15 14 14 13 13
45º38' 46º45' 18 18 17 17 16 16 15 15 14 14 13
46º45' 47º51' 19 18 18 17 17 16 16 15 15 14 14
47º51' 48º58' 19 19 18 18 17 17 16 16 15 15 14
48º58' 50º06' 20 19 19 18 18 17 17 16 16 15 15
TABLE OF GEO VALUES

PAGE 7 OF 33 1219 IH-8105
LATTITUDE GEO VALUE
50º06' 51º13' 20 20 19 19 18 18 17 17 16 16 15
51º13' 52º22' 21 20 20 19 19 18 18 17 17 16 16
52º22' 53º31' 21 21 20 20 19 19 18 18 17 17 16
53º31' 54º41' 22 21 21 20 20 19 19 18 18 17 17
54º41' 55º52' 22 22 21 21 20 20 19 19 18 18 17
55º52' 57º04' 23 22 22 21 21 20 20 19 19 18 18
57º04' 58º17' 23 23 22 22 21 21 20 20 19 19 18
58º17' 59º32' 24 23 23 22 22 21 21 20 20 19 19
59º32' 60º49' 24 24 23 23 22 22 21 21 20 20 19
60º49' 62º90' 25 24 24 23 23 22 22 21 21 20 20
62º90' 63º30' 25 25 24 24 23 23 22 22 21 21 20
63º30' 64º55' 26 25 25 24 24 23 23 22 22 21 21
64º55' 66º24' 26 26 25 25 24 24 23 23 22 22 21
66º24' 67º57' 27 26 26 25 25 24 24 23 23 22 22
67º57' 69º35' 27 27 26 26 25 25 24 24 23 23 22
69º35' 71º21' 28 27 27 26 26 25 25 24 24 23 23
71º21' 73º16' 28 28 27 27 26 26 25 25 24 24 23
73º16' 75º24' 29 28 28 27 27 26 26 25 25 24 24
75º24' 77º52' 29 29 28 28 27 27 26 26 25 25 24
77º52' 80º56' 30 29 29 28 28 27 27 26 26 25 25
80º56' 85º45' 30 30 29 29 28 28 27 27 26 26 25
85º45' 90º00' 31 30 30 29 29 28 28 27 27 26 26
OPERATION CONTINUED
TABLE OF GEO VALUES CONTINUED
SETUP MENU
When the Indicator connects to a scale base for the first
time, enter this menu to set the Capacity Unit, Range,
Capacity and Graduation.
NOTE: Default settings are in bold.
CAPACITY UNIT
Select the unit used for calibration.
Kg
t (Metric Tonne)
lb
ton (Short Ton)
g
RANGE
Set number of weighing intervals in the weighing interval.
The TD52 terminals can be configured to use single or
dual interval. Each interval can be assigned its own
graduation. If dual interval is selected, graduation will
change when the weight reaches the second interval.
When Single interval is selected, the additional
parameters available are:
>|1|< Capacity
>|1|< Graduation
SETUP OPTIONS
Capacity Unit g, kg, t (Metric Tonne), lb, ton, (Short Ton)
Range Single Interval, Dual Interval
>|1|< C a pa c it y 1-999999
>|1|< G radu at io n 0.0001~100
>|2|< C a pa ci t y 1-999999
>|2|< G ra du ati on 0.0001~100
Language English, French, German, Italian, Spanish,
Chinese, Japanese, Korean, Russian, Polish
Power On Zero Off, On
Power On Unit Auto, kg, lb, g, oz, lb:oz, t (Metric Tonne),
ton (Short Ton), c
Key Beep Off, On
Transaction Counter Off, On
Next Transaction 1-9999999
Reset

PAGE 8 OF 33 1219 IH-8105
OPERATION CONTINUED
When Dual interval is selected, the terminal functions
with two intervals, each with its own capacity and
graduation. In addition to these parameters, the
following two parameters are available:
>|2|< Capacity
>|2|< Graduation
CAPACITY
Set the scale capacity from 1 to 999999.
>|1|< Capacity
Specify the weight capacity for interval 1. If Single
interval is enabled, this will be the scale capacity. If
Dual interval is enabled, this will be the first range.
>|2|< Capacity
Specify the weight capacity for interval 2. If Dual
interval is enabled, this will be the scale capacity, and it
must be bigger than >|1|< Capacity. If Single interval is
enabled, this parameter will not be shown.
GRADUATION
Set the scale readability from 0.0001 to 100.
>|1|< Graduation
Specify the graduation for weighing interval 1. If Single
interval is enabled, this will be the graduation for the
entire weighing range of the scale. If Dual interval is
enabled, this will be the graduation used in the lower
interval.
>|2|< Graduation
Specify the graduation for interval 2. If Dual interval
is enabled, this will be the graduation for the second
weighing range of the scale. If Single interval is enabled,
this parameter will not be shown.
NOTE: Graduation settings are limited to values
from Capacity divided by 600 to Capacity
divided by 75,000. Therefore, not all settings
are available for each capacity.
LANGUAGE
Set the language displayed for menus and displayed
messages.
English Italiano
Deutsch Polski
Français Spanish
POWER ON ZERO
Zero the balance at Power On.
Off = disabled
On = enabled
POWER ON UNIT
Set the unit that will be displayed at Power On.
Automatic
g
kg
lb
oz
lb:oz
t (Metric Tonne)
ton (Short Ton)
KEY BEEP
Set how the beeper sounds when a key is pressed.
Off = no sound
On = sound
TRANSACTION COUNTER
The transaction counter is a seven-digit counter that
tracks the total transactions. When the value reaches
9,999,999, the next transaction causes a roll-over to
0000001.
Off = The transaction counter will not increase.
On = The transaction counter will increase with
the additional menu item Next Transaction
available.
NOTE: If the transaction counter is set to On,
the count number increases when the
Units
Print
key is pressed.
Next Transaction
The value of the next transaction displays in the Next
Transaction field.
Reset
Reset the Setup menu to the factory defaults (except
Range, Capacity and Graduation).
No = not reset.
Yes = reset.

PAGE 9 OF 33 1219 IH-8105
OPERATION CONTINUED
NOTE: If the Security Switch is set to ON, the
Capacity Unit, Range, Capacity, Graduation
and Power On Zero settings are not reset.
READOUT MENU
Enter this menu to customize display functionality.
NOTE: Default settings are in bold.
STABILITY
Set the amount the reading can vary before the stability
symbol turns off.
0.5d = 0.5 scale division
1d = 1 scale division
2d = 2 scale divisions
5d = 5 scale divisions
ZERO RANGE
Set the percentage of scale capacity to be zeroed.
2%
100%
NOTE: The setting is forced and locked to 2%
when security switch is set to the locked position.
FILTER LEVEL
Set the amount of signal filtering.
Low = faster stabilization time with less
stability
Medium = normal stabilization time
with normal stability
High = slower stabilization time with
more stability
AUTO ZERO TRACKING
Set the automatic zero tracking functionality.
OFF = Disabled.
0.5 division = Display will maintain zero until
a change of 0.5 divisions per
second is exceeded.
1d = Display will maintain zero until
a change of one division per
second is exceeded.
3d = Display will maintain zero until
a change of three divisions per
second is exceeded.
AUTO DIM
Set the display backlight functionality.
Settings:
1 min = Backlight turns off after one
minute of inactivity.
2 min = Backlight turns off after two
minutes of inactivity.
5 min = Backlight turns off after five
minutes of inactivity.
10 min = Backlight turns off after 10
minutes of inactivity.
Always on
Off
SCREENSAVER
Set whether the screensaver is enabled after the
selected time period.
Off = Disabled.
5 min = Screensaver is enabled after
five minutes.
10 min = Screensaver is enabled after
10 minutes.
30 min = Screensaver is enabled after
30 minutes.
AUTO OFF
Set whether the display enters sleep mode after the
selected time period.
Off = Disabled.
5 min = Display enters sleep mode after
five minutes.
10 min = Display enters sleep mode after
10 minutes.
30 min = Display enters sleep mode after
30 minutes.
READOUT OPTIONS
Stability 0.5d, 1d, 2d, 5d
Zero Range +/-2%, +/-100%
Filter Level Low, Medium, High
Auto Zero Track Off, 0.5d, 1d, 3d
Backlight Off, 1min, 2min, 5min, 10min, Always On
Screensaver Off, 5min, 10min, 30min
Auto Off Off, 5min, 10min, 30min
Adjust Contrast 1, 2, 3,4, 5
Reset

PAGE 10 OF 33 1219 IH-8105
OPERATION CONTINUED
ADJUST CONTRAST
Set the contrast degree of the display.
1
2
3
4
5
RESET
Reset all settings to factory default settings.
Yes = Reset.
No = Do not reset.
NOTE: If the security switch is set to ON,
Stability, Zero Range, Filter Level and
Auto Zero Track settings are not reset.
DISCRETE I/O
1. Long press the
Menu
User
button to enter Main
Menu. (See Figure 23)
2. Select Application Mode by pressing the
softkey corresponding to the ▼ icon.
(See Figure 23)
3. Press the softkey corresponding to the
icon to enter the submenu Application
Mode. (See Figure 24)
ENABLE
The current selected application mode cannot
be set to off.
Discrete I/O setup menus allow the configuration
of two inputs and four outputs depending on
different application modes.
RESET
If Reset is selected and confirmed, all submenu
values will return to default settings.
For more details, see the table below.
Figure 23
Figure 24
APPLICATION MODE
AND DISCRETE I/O OPTIONS
(bold is the default setting)
Weighing
Enable On, Off
Discrete Input 1 Off, Zero, Tare, Clear Tare, Print,
Unit, Accumulate
Discrete Input 2 Off, Zero, Tare, Clear Tare, Print,
Unit, Accumulate
Discrete Output 1 Off, Overload, Underload, Zero
Discrete Output 2 Off, Overload, Underload, Zero
Discrete Output 3 Off, Overload, Underload, Zero
Discrete Output 4 Off, Overload, Underload, Zero
Counting
Enable On, Off
Discrete Input 1 Off, Zero, Tare, Clear Tare, Print,
Unit, Accumulate
Discrete Input 2 Off, Zero, Tare, Clear Tare, Print,
Unit, Accumulate
Discrete Output 1 Off, Overload, Underload, Zero
Discrete Output 2 Off, Overload, Underload, Zero
Discrete Output 3 Off, Overload, Underload, Zero
Discrete Output 4 Off, Overload, Underload, Zero
Check
Enable On, Off
Discrete Input 1 Off, Zero, Tare, Clear Tare, Print,
Unit, Accumulate
Discrete Input 2 Off, Zero, Tare, Clear Tare, Print,
Unit, Accumulate
Discrete Output 1 Off, Under, Over, Accept, Under/
Over, Overload, Underload, Zero
Discrete Output 2 Off, Under, Over, Accept, Under/
Over, Overload, Underload, Zero
Discrete Output 3 Off, Under, Over, Accept, Under/
Over, Overload, Underload, Zero
Discrete Output 4 Off, Under, Over, Accept, Under/
Over, Overload, Underload, Zero
Percent Enable On, Off
Dynamic
Enable On, Off
Discrete Input 1 Off, Zero, Tare, Clear Tare, Print,
Start, Restart
Discrete Input 2 Off, Zero, Tare, Clear Tare, Print,
Start, Restart
Discrete Output 1 Off, Overload, Underload, Zero
Discrete Output 2 Off, Overload, Underload, Zero
Discrete Output 3 Off, Overload, Underload, Zero
Discrete Output 4 Off, Overload, Underload, Zero
Reset

PAGE 11 OF 33 1219 IH-8105
OPERATION CONTINUED
WEIGHING UNIT
Enter this menu to activate the desired units. Default
settings are bold.
NOTE: Due to national laws, the indicator may
not include some of the units of measure listed.
If the security switch is set to ON, the units are
locked at their current setting.
Choose desired unit, and set the status as listed below:
• GRAM (G)
• KILOGRAM (KG)
• POUND (LB)
• OUNCE (OZ)
• POUND: OUNCE (LB: OZ)
• TONNE (METRIC TONNE)
• TON (SHORT TON)
Status:
Off = Disabled
On = Enabled
CUSTOM UNIT (C)
Use the custom unit to display weight in an alternative
unit of measure. The custom unit is defined using a
conversion factor, where the conversion factor is the
number of custom units per gram expressed in scientific
notation (Factor x 10^Exponent).
Factor
Set the conversion factor using the numeric keypad.
Settings of 0.1000000 to 1.9999999 are available.
The default setting is 1.0.
Exponent
Set the factor multiplier.
-3 = divide the Factor by 1,000 (1x10⁻³)
-2 = divide the Factor by 100 (1x10⁻²)
-1 = divide the Factor by 10 (1x10⁻¹)
0 = multiply the Factor by 1 (1x100)
1 = multiply the Factor by 10 (1x101)
2 = multiply the Factor by 100 (1x10²)
Least Significant Digit
Set the graduation.
Settings of 0.5, 1, 2, 5, 10 and 100 are available.
The custom unit’s name can be customized up to three
characters.
NOTE: Custom Unit is locked at off position
when the Security Switch is set to the locked
position. Custom Unit is not available when
Range is set to Dual interval.
Set the status.
Off = Disabled
On = Enabled
GLP/GMP MENU
Enter this menu to set the Good Laboratory Practice
(GLP) or Good Manufacturing Practice (GMP) data.
Date Format
Set the date format.
MM/DD/YYYY = Month/Day/Year
DD/MM/YYYY = Day/Month/Year
YYYY/MM/DD = Year/Month/Day
DATE
Set the date.
00 to 9999 = year position
01 to 12 = month position
01 to 31 = day position
Refer to Menu Navigation (See Page 4) to enter settings.
TIME FORMAT
Set the time format.
24 hr = 24-hour format.
12 hr = 12-hour format.
TIME
Set the time.
24-hour format
00 to 23 = hour position
00 to 59 = minute position

PAGE 12 OF 33 1219 IH-8105
OPERATION CONTINUED
PROJECT ID
Set the Project identification.
Refer to Menu Navigation to enter settings.
SCALE ID
Set the Project identification.
Refer to Menu Navigation to enter settings.
RESET
If Reset is selected and confirmed, all the submenu
values will be set to default.
LOCK KEY CONFIGURATION
This menu is used to lock access to certain keys. When
you select ON for one selection, the associated key
pressed will be ignored.
NOTE: If you select Lock All Keys, you will lose
function of all keys.
NOTE: If you select Lock Off Key, you will lose
function of the off key.
ITEM AVAILABLE SETTINGS
(bold is the default setting)
Lock All Keys Off, On
Lock Off Key Off, On
Lock Zero Key Off, On
Lock Print Key Off, On
Lock Unit Key Off, On
Lock Soft Key Off, On
Lock Mode Key Off, On
Lock Tare Key Off, On
Lock Menu Key Off, On
Reset No/Yes
Weighing
%
Percent
Counting Dynamic
Check
Weighing/
Counting
APPLICATIONS
The scale can be configured to operate in up to five
Application modes (scale can be set to have one or
more applications modes active). Press the button
Mode to select an activated application. The current
application will be shown in the upper left corner of the
home screen.
The Indicator incorporates the following applications:
WEIGHING
Use this application to determine the weight of items in
the selected unit of measure.
1. Press the
Mode
Library
button until the icon
corresponding to
Weighing is displayed
(this is the default
application). Press Tare or Zero
if necessary to begin. (See Figure 25)
2. Place objects on the pan to display weight. When
the reading is stable, the * appears. The resulting
value is displayed in the active unit of measure.
APPLICATION SETUP
The Application can be customized for various user
preferences.
1. Press the button
corresponding to the
icon to enter
Configuration. The
Configuration screen
is now displayed.
(See Figure 26)
2. Select the list item and press the softkey
corresponding to the icon to change the setting
as desired.
3. To return to the Application home screen, press the
softkey corresponding to the
Menu
User
icon.
The Weighing Configurations are defined below.
NOTE: Default settings are in bold.
Figure 25
Figure 26
ITEM AVAILABLE SETTINGS COMMENTS
Auto Tare On, Off To enable Automatic Tare
Accumulate Off, Automatic, Manual To enable Accumulation/
Totalization

PAGE 13 OF 33 1219 IH-8105
APPLICATIONS CONTINUED
AUTO TARE
Set the automatic tare.
Off: Auto tare is
turned off.
(See Figure 27)
On: The first stable weight (>=5d) will be tared as
a container automatically.
NOTE: If the security switch is set to ON, Auto
Tare is locked at the current setting.
ACCUMULATION
To start Accumulate
weighing data, place
the object on the pan
and press the softkey
corresponding to the
icon. The accumulation
icon will start blinking. The load to be accumulated has
to be >= 10d. The next accumulation can only start
once pan has been cleared. (See Figure 28)
When LFT is on (no such
limitation when LFT is off
or LFT is on and the
approved mode is OIML),
(See Figure 29)
a. Gross weight
and Net weight
cannot be
accumulated
at the same
time – only Gross
Weight or Net Weight can be accumulated.
(See Figure 30)
b. After a weighing, the gross weight on the pan
has to reach zero before a new sample can be
accumulated.
NOTE: The accumulation icon is only
shown if Accumulate is set to Manual and
Automatic. See Application Setup in previous
section.
Viewing the Accumulation Results
1. To view accumulation
results, press the
softkey corresponding
to the icon. The
Accumulate Result
screen is displayed. (See Figure 31)
2. To clear accumulation
results, press the
O
On/CLR
button. (See Figure 32)
3. When the message
"Clear the statistical
data?" appears,
press the softkey
corresponding to the
icon. (See Figure 33)
4. To return to home screen, press the softkey
corresponding to the
Menu
User
icon.
5. Press the Print button to print Accumulation result.
ID INPUT
1. Press softkey
corresponding to
the icon to enter
configuration screen.
(See Figure 34)
2. User can press
alphanumeric keys to
input the ID number.
Then press the softkey
corresponding to the
icon to confirm the input. (See Figure 35)
INPUT/OUTPUT (I/O) SETUP
The I/O setup can be customized for various
user preferences. The I/O setup is defined below.
NOTE: Default settings are in bold.
Figure 27
Figure 28
Figure 29
Figure 30
Figure 31
Figure 32
Figure 33
Figure 34
Figure 35
ITEM AVAILABLE SETTINGS
Enable On, Off
Discrete Input 1 Off, Zero, Tare, Clear Tare, Print, Unit, Accumulate
Discrete Input 2 Off, Zero, Tare, Clear Tare, Print, Unit, Accumulate
Discrete Output 1 Off, Overload, Underload
Discrete Output 2 Off, Overload, Underload
Discrete Output 3 Off, Overload, Underload
Discrete Output 4 Off, Overload, Underload

PAGE 14 OF 33 1219 IH-8105
NOTE: The I/Os will only work when the I/O
Option Board has been installed.
The option I/O board provides two isolated inputs and
four dry-contact normally open relay outputs which can
be used for simple process weighing.
1. Press the
Menu
User
button
to enter the Main Menu.
(See Figure 36)
2. With the button corresponding to the ▼ icon, go
down the list and highlight Application Mode. Enter
this submenu by pressing the button corresponding
to the icon. (See Figure 36)
3. In the Application
Mode menu, enter the
Weighing submenu.
(See Figure 37)
4. The Weighing submenu
is now displayed.
Select the list item
and press the button
corresponding to the
icon to change
the setting as desired. After completion of I/O setup,
press the softkey corresponding to the
Menu
User
icon to
return to the main application screen. (See Figure 38)
COUNTING
Use this application to count samples of uniform weight.
1. Press the
Mode
Library
button until the icon
corresponding to
Counting is displayed
on the screen. The
default (or last) Average Piece
Weight (APW) is displayed. (See Figure 39)
2. Set the APW value (see below) and then place
objects on the pan to display the number of pieces.
SET THE AVERAGE PIECE WEIGHT (APW)
NOTE: It is recommended that the APW is larger
than 1d. If APW is between 0.05d and 1d, a
warning message will be displayed and the
information line will show "APW is too small!". If
APW is less than 0.05d, an error message will
appear, and the APW value cannot be stored.
There are two methods to set the APW:
ENTERING A KNOWN APW
Method 1
1. Key in the Piece Weight
using the alphanumeric
keypad. (See Figure 40)
2. Press the softkey
corresponding to
the
APW
icon.
(See Figure 41)
Method 2
1. Alternatively, first
press the softkey
corresponding to the
APW
icon to enter the
submenu for setting the
APW. (See Figure 42)
2. Press the softkey
corresponding to
the icon to edit
the APW value using
the alphanumerical
keypad. (See Figure 43)
3. After editing, press the
softkey corresponding
to the icon for
confirmation, and
then press the softkey
corresponding to the
Menu
User
icon to exit the submenu. (See Figure 44)
CALCULATING AN APW
Method 1
1. Place the sample on
the pan and then key
in the number of
pieces using the
alphanumeric keypad.
(See Figure 45)
2. Press the softkey
corresponding to
the
PCS
icon for
confirmation. The
terminal will calculate
the new APW using the
number of pieces.
(See Figure 46)
APPLICATIONS CONTINUED
Figure 36
Figure 37
Figure 38
Figure 39
Figure 40
Figure 41
Figure 42
Figure 43
Figure 44
Figure 45
Figure 46

PAGE 15 OF 33 1219 IH-8105
APPLICATIONS CONTINUED
Method 2
1. Press the softkey
corresponding to the
PCS
icon to enter
the submenu for setting
the number of pieces.
(See Figure 47)
2. Press the softkey
corresponding to the
icon to edit the
PCS value using the
alphanumeric keypad.
(See Figure 48)
3. After editing, press the
softkey corresponding
to the icon for
confirmation, and
then press the softkey
corresponding to the
Menu
User
icon to exit the submenu. (See Figure 49)
APPLICATION SETUP
The Application can be customized for various user
preferences.
1. Press the softkey
corresponding to the
icon to enter
Configuration. The
Configuration screen
is now displayed.
(See Figure 50)
2. Select the list item
and press the softkey
corresponding to the
icon to change the
setting as desired.
(See Figure 51)
3. To return to the Application home screen, press the
button corresponding to the
Menu
User
icon.
Figure 47
Figure 48
Figure 50
Figure 49
Figure 51
The Counting Configurations are defined below.
CONFIGURE ITEM OPTION DESCRIPTION
Auto Tare Off/On Off: Auto tare is turned off.
On: The first stable weight (>=5d) will be tared as a container automatically.
Accumulate Off/Automatic/Manual Off: The icon "Σ" does not display.
Manual: The softkey "Σ" displays. User can press the key to accumulate the stable weight.
Automatic: The icon "Σ" displays. The weight will be accumulated automatically.
NOTE: The load to be accumulated has to be >= 5d. The next
accumulation can only start once the pan is cleared.
When LFT is ON (no such limit when LFT is OFF or the approve mod is OIML),
a. Gross weight and net weight cannot be accumulated;
b. Gross 0 has to be reached before a new sample accumulation.
When LFT is OFF,
a. Gross weight and net weight can be accumulated;
b. A new sample can be accumulated after reaching gross 0 or net 0.
Auto Opt. Off/On Off: Auto Opt. is off.
On: The APW will be optimized automatically during count weighing.
Opt. Beep Off/On Off: Opt. Beep is off.
On: When the APW has to be optimized, the beeper will beep once.
APW Auto Save Off/On Off: APW Auto Save is off.
On: If the APW is derived from sampling, and a counting library is selected, the new APW
will be saved to library after optimized.
NOTE: It will be hidden when "Auto Opt." is off.
Internal Resolution Off/On Off: Internal Resolution is off.
On: During sampling or weighing, the internal resolution will be used.
Reference Size 10 The One Button Sampling PCS is from 0 to 999 the default is 10.
0: The One Button Sampling key will be hidden.
NOTE: Defaults settings are in bold.

PAGE 16 OF 33 1219 IH-8105
APPLICATIONS CONTINUED
ACCUMULATION
See Weighing section on page 13 for details about the
Accumulation feature.
INPUT/OUTPUT (I/O) SETUP
The I/O's setup can be customized for various user
preferences defined below.
NOTE: Default settings are in bold.
NOTE: The I/Os will only work when the I/O
Option Board has been installed. The option
I/O board provides two isolated inputs and four
dry-contact normally open relay outputs which
can be used for simple process weighing.
1. Press the
Menu
User
button to enter the Main Menu.
2. With the button
corresponding to
the ▼ icon, go down
the list and highlight
Application Mode.
Enter this submenu by
pressing the button corresponding
to the icon. (See Figure 52)
3. In the Application
Mode menu, enter the
Counting submenu.
(See Figure 53)
4. Select the list item
and press the button
corresponding to the
icon to change the
setting as desired. After
completion of I/O's
setup, press the softkey corresponding to the
Menu
User
icon to return to the main application screen.
(See Figure 54)
CHECK
Check is used to compare the weight or pieces of a
sample against target limits.
Press the
Mode
Library
button until the icon corresponding to
Check is displayed on the screen.
Two different modes can be selected in the check
mode: Weighing and Counting.
To set up check limits, see Check Weighing below.
Place object on pan to check if weight is within limits.
CHECK WEIGHING (DEFAULT)
Make sure that the check mode is set to Check
Weighing in the configuration menu.
Place objects on pan. The
Under/Accept/Over status
is shown in the progress
bar area, while the actual
weight of the item is shown
on the main display line.
(See Figure 55)
Defining Over/Under Limits
1. Press the Edit Limit button to define limit for weighing.
2. Select Over or Under
Limit and press the
button corresponding to
the icon to edit value.
(See Figure 56)
ITEM AVAILABLE SETTINGS
Enable On, Off
Discrete Input 1 Off, Zero, Tare, Clear Tare, Print, Unit Accumulate
Discrete Input 2 Off, Zero, Tare, Clear Tare, Print, Unit Accumulate
Discrete Output 1 Off, Overload, Underload
Discrete Output 2 Off, Overload, Underload
Discrete Output 3 Off, Overload, Underload
Discrete Output 4 Off, Overload, Underload
Figure 52
Figure 53
Figure 53
Figure 53
Figure 54
Figure 54

PAGE 17 OF 33 1219 IH-8105
APPLICATIONS CONTINUED
The Check Configurations are defined below.
NOTE: Default settings are in bold.
CONFIGURE ITEM OPTION DESCRIPTION
Check Mode Check Weighing/Check
Counting
Check weighing mode
Check counting mode
Auto Tare Off/On/Accept Off: Auto tare is turned off.
On: The first stable weight (>=5d) will be tared as a container automatically.
Accept: If object weight is in the range of the Over and Under Limit you set, auto tare will
be performed.
Accumulate Off/Manual/Automatic Off: The icon "Σ" does not display.
Manual: The softkey "Σ" displays. User can press the key to accumulate the stable weight.
Automatic: The icon "Σ" displays. The weight will be accumulated automatically.
NOTE: The load to be accumulated has to be >= 10d. The next
accumulation can only start once the pan is cleared.
When LFT is ON (no such limit when LFT is OFF or the approve mod is OIML),
a. Gross weight and net weight cannot be accumulated;
b. Gross 0 has to be reached before a new sample accumulation.
When LFT is OFF,
a. Gross weight and net weight can be accumulated;
b. A new sample can be accumulated after reaching gross 0 or net 0.
Audible Signal Off/Under and
Over/Accept/Under/Over
Off: No beep.
Under and Over/Accept/Under/Over: Beep when reaching the selected check point.
CHECK COUNTING
1. Press the button
and select Check
Mode to Check
Counting.
(See Figure 57)
2. Place objects on pan. The Under/Accept/Over status
is shown in the progress bar area, while the actual
number of pieces is shown on the main display line.
Set the Average Piece Weight (APW)
NOTE: It is recommended that the APW is larger
than 1d. If APW is between 0.05d and 1d, a
warning message will be displayed and the
information line will show "APW is low!". If APW is
less than 0.05d, an error message will appear
and the APW value cannot be stored.
There are three methods to set the APW. See Application
Setup at right.
Defining Over/Under Limits
Press the Edit Limit button
to define counting limit.
(See Figure 58)
wNOTE: See Check Weighing on page 17 for
information on how to set the Over/Under limits.
APPLICATION SETUP
The application can be customized for user preferences
1. Press the softkey
corresponding to the
icon to enter the
Configuration Setup.
Configuration menu is
now displayed.
(See Figure 59)
2. Select the list item
and press the softkey
corresponding to the
icon, to change
setting. (See Figure 60)
3. To return to Application home screen, press the button
corresponding to the
Menu
User
icon.
Figure 57
Figure 59
Figure 58
Figure 60

PAGE 18 OF 33 1219 IH-8105
APPLICATIONS CONTINUED
INPUT/OUTPUT (I/O) SETUP
The I/O setup can be customized for various
user preferences. The I/O setup is defined below.
NOTE: The I/O's will only work when the I/O option
board has been installed. The I/O option board
provides two isolated inputs and fur dry-contact
normally open relay outputs which can be used
for simple process weighing.
1. Press the
Menu
User
button
to enter the Main Menu.
2. With the button corresponding
to the ▼ icon, go down the list and highlight
Application Mode. Enter this submenu by pressing the
button corresponding to the icon. (See Figure 61)
3. In the Application
mode menu, enter
Check submenu. The
Check submenu is now
displayed. (See Figure 62)
4. Select the list item
and press the softkey
corresponding to the
icon to change
setting. (See Figure 63)
CONFIGURE ITEM OPTION DESCRIPTION
Check Mode Weighing/Counting Weighing:Check weighing mode
Counting: Check counting mode
Auto Tare Off/On/Accept Off: Auto tare is turned off.
On: The first stable weight (>=5d) will be tared as a container automatically.
Accept: If object weight is in the range of the Over and Under Limit you set, auto tare will
be performed.
Accumulate Off, Manual, Automatic Off: The icon "Σ" does not display.
Manual: The softkey "Σ" displays. User can press the key to accumulate the stable weight.
Automatic: The icon "Σ" displays. The weight will be accumulated automatically.
NOTE: The load to be accumulated has to be >= 10d. The
next accumulation can only start once the pan is cleared.
When LFT is ON (no such limit when LFT is OFF or the approve mod is OIML),
a. Gross weight and net weight cannot be accumulated;
b. Gross 0 has to be reached before a new sample accumulation.
When LFT is OFF,
a. Gross weight and net weight can be accumulated;
b. A new sample can be accumulated after reaching gross 0 or net 0.
Audible Signal Off/Under and
Over/Accept/Under/Over
Off: No beep.
Under and Over/Accept/Under/Over: Beep when reaching the selected check point.
Auto Opt. Off/On Off: Auto Opt. is off.
On: The APW will be optimized automatically during count weighing.
Opt. Beep Off/On Off: Opt. Beep is off. On: When the APW is optimized, the beeper will beep once.
APW Auto Save Off/On Off: APW Auto Save is off.
On: If the APW is obtained from sampling, and a counting library is selected, the new
APW will save to library after optimized.
The Check Configurations are defined below.
NOTE: Default settings are in bold.
ITEM AVAILABLE SETTINGS
Enable On, Off
Discrete Input 1 Off, Zero, Tare, Clear Tare, Print, Unit, Accumulate
Discrete Input 2 Off, Zero, Tare, Clear Tare, Print, Unit, Accumulate
Discrete Output 1 Off, Under, Over, Accept, Under/Over
Discrete Output 2 Off, Under, Over, Accept, Under/Over
Discrete Output 3 Off, Under, Over, Accept, Under/Over
Discrete Output 4 Off, Under, Over, Accept, Under/Over
Figure 61
Figure 62
Figure 63

PAGE 19 OF 33 1219 IH-8105
APPLICATIONS CONTINUED
5. After completion of I/O's setup, press the softkey
corresponding to the
Menu
User
icon to return to the main
application screen.
%
PERCENT WEIGHING
Use Percent Weighing to measure the weight of a
sample displayed as a percentage of a pre-established
reference weight.
1. Press the
Mode
Library
button until the icon
corresponding to
percent is displayed
in the upper left portion
of home screen.
(See Figure 64)
2. Establish a reference weight (see below) and then
place objects on pan to display percentage.
The default (or last) reference weight is displayed.
ESTABLISHING A REFERENCE WEIGHT
There are 3 methods to establish a reference weight:
Method 1
1. Key in the reference
weight value.
(See Figure 65)
2. Press the softkey
corresponding to the
icon for confirmation.
(See Figure 66)
Method 2
1. Press the softkey
corresponding to the
icon to enter the
submenu for setting
reference weight.
(See Figure 67)
2. Enter value
using keypad.
(See Figure 68)
3. Press the softkey
corresponding to the
icon to save the
value. Press the softkey
corresponding to the
icon to exit submenu.
(See Figure 69)
Method 3
Place the reference weight on the pan and press the
button corresponding to the icon.
APPLICATION SETUP
The application can be customized for user preferences.
1. Press the softkey
corresponding to the
icon to enter
Configuration.
(See Figure 70)
2. Select the list item
and press the softkey
corresponding to the
icon to change
settings as desired.
(See Figure 71)
3. To return to the application home screen, press the
softkey corresponding to the
Menu
User
icon.
Figure 66
Figure 67
Figure 68
Figure 69
Figure 70
Figure 71
Figure 64
Figure 65

PAGE 20 OF 33 1219 IH-8105
The Percent Configurations are defined below.
APPLICATIONS CONTINUED
CONFIGURE ITEM OPTION DESCRIPTION
Auto Tare Off/On Off: Auto tare is turned off.
On: The first stable weight (>=5d) will be tared as a container automatically.
Accumulate Off/Manual/Automatic Off: The icon "Σ" does not display.
Manual: The softkey "Σ" displays. User can press the key to accumulate the stable weight.
Automatic: The icon "Σ" displays. The weight will be accumulated automatically.
NOTE: The load to be accumulated has to be >= 10d. The next
accumulation can only start once the pan is cleared.
When LFT is ON (no such limit when LFT is OFF or the approve mod is OIML),
a. Gross weight and net weight cannot be accumulated;
b. Gross 0 has to be reached before a new sample accumulation.
When LFT is OFF,
a. Gross weight and net weight can be accumulated at the same time;
b. A new sample can be accumulated after reaching gross 0 or net 0.
NOTE: Defaults settings are in bold.
INPUT/OUTPUT (I/O) SETUP
The I/O's setup can be customized for user preferences.
NOTE: I/O's will only work when the I/O Option
board has been installed. The option I/O
board provides two isolated inputs and four
dry-contact normally open relay outputs which
can be used for simple process weighing.
1. Press the
Menu
User
button
to enter Main Menu.
With the softkey
corresponding to the
▼ icon, go down list
and highlight Application
Mode. (See Figure 72)
2. Enter this submenu by pressing the button
corresponding to the icon. (See Figure 72)
3. In the Application
Mode menu, enter
the Percent submenu.
(See Figure 73)
4. Select list item and
press the softkey
corresponding to the
icon to change
setting. (See Figure 74)
5. After completion of I/O's setup, press the softkey
corresponding to the
Menu
User
icon to return to the main
application screen.
DYNAMIC WEIGHING
Use this application to weigh an unstable load, such as
a moving animal. Three different start/reset operation
types can be selected: Manual (start and stop via key
press), Semi-Automatic (auto-start with manual reset),
and Automatic (start and stop automatically).
1. Press the
Mode
Library
button until the icon corresponding to
Dynamic is displayed in the upper left corner of the
screen. (See Figure 75)
2. Press the softkey
corresponding to
the icon to start
averaging. To abort
the averaging, press the
button corresponding to the icon. (See Figure 75)
3. When the averaging has finished, press the button
corresponding to the icon to reset.
APPLICATION SETUP
The Application can be customized for user preferences.
1. Press the button
corresponding to the
icon to enter
Configuration Menu.
(See Figure 76)
2. Select the list item
and press the softkey
corresponding to the
icon to change
setting. (See FIgure 77)
3. To return to the Application home screen, press the
softkey corresponding to the
Menu
User
icon.
ITEM AVAILABLE SETTINGS
Enable On, Off
Figure 73
Figure 74
Figure 75
Figure 76
Figure 77
Figure 72
Other manuals for OHAUS DEFENDER 5000
1
Other U-Line Scale manuals

U-Line
U-Line H-9672 User manual

U-Line
U-Line H-1121 User manual

U-Line
U-Line H-1653 User manual

U-Line
U-Line H-479 User manual

U-Line
U-Line H-1607 User manual

U-Line
U-Line H-1671 User manual

U-Line
U-Line H-8109 Manual instruction

U-Line
U-Line H-2382 User manual

U-Line
U-Line H-7935 User manual

U-Line
U-Line H-754 Manual

U-Line
U-Line H-1114 User manual

U-Line
U-Line CS Series User manual

U-Line
U-Line H-670 User manual

U-Line
U-Line H-2714 User manual

U-Line
U-Line SCOUT H-9560 User manual

U-Line
U-Line H-1096 User manual

U-Line
U-Line SCOUT PRO H-2709 User manual

U-Line
U-Line H-3677 User manual

U-Line
U-Line H-9884 User manual

U-Line
U-Line H-2289 User manual