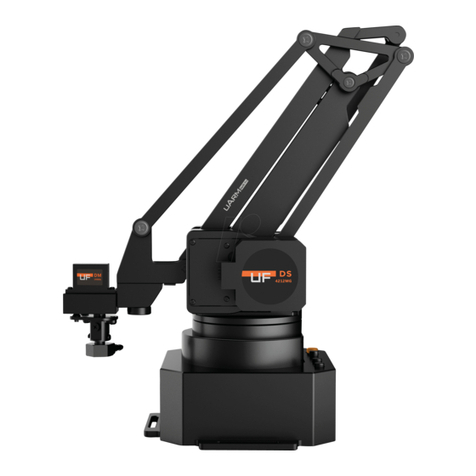
UFactory uArm Swift Pro Instruction Manual


2
Contents
SAFETY INSTRUCTIONS ......................................................................................................... 4
GENERAL INFORMATION ..................................................................................................... 4
1.Source file ............................................................................................................................... 4
2.Reference frame.................................................................................................................... 5
3.Coordinate .............................................................................................................................. 6
4.Mounting................................................................................................................................. 8
5. Buttons & indicator lights..............................................................................................10
6.Extension description........................................................................................................11
SPECIFICATIONS.....................................................................................................................13
APPLICATION INFORMATION...........................................................................................16
1.Send command over usb cable.....................................................................................16
2.Send command over bluetooth ....................................................................................19
3.The 2nd UART......................................................................................................................23
4.Arduino ..................................................................................................................................25
5.Ros & Python.......................................................................................................................27
6.Openmv demo ....................................................................................................................27
7.RECOVER FROM THE WRONG CODE..........................................................................27
PROTOCOL...............................................................................................................................28

3
1.Introduction..........................................................................................................................28
2.Example..................................................................................................................................28
3.Commands(tbd)·.................................................................................................................28
UARM COMMUNITY.............................................................................................................40
RELEASE NOTE........................................................................................................................40

4
Safety Instructions
1. Please don’t put your hands between the arms when uArm is moving.
2. Please use the official power supply for safety reasons.
3. Please clear a space for uArm, in case of knocking down anything.
General Information
General information for the robot arm, and it’s good to know before developing.
1.Source file
⚫Source code of Firmware for Swift Pro:
https://github.com/uArm-Developer/SwiftProForArduino
⚫Source code of ROS for Swift Pro:
https://github.com/uArm-Developer/SwiftproForROS
⚫Python library for Swift Pro:
https://github.com/uArm-Developer/pyuf
⚫OpenMV example for tracking:
https://github.com/uArm-Developer/OpenMV-Examples
⚫To be continued…(Arduino, C++, Raspberry Pi)

5
2.Reference Frame

6
3.Coordinate
The picture in the right also shows the dynamic payload range of uArm.
Test condition: G2202 F1000; Red point is the Tool Center Point.
Detail size of each arm and base.

7
The origin of base coordinate is in the center of the base. But the tool center point is
different for different end-effectors. And we also offer the different commands for
different usages.
Currently we offer 4 kinds of mode:
M2400 S0: Normal mode (end-effector tools: suction)
M2400 S1: Laser mode (end-effector tools: laser)
M2400 S2: 3D printing mode (end-effector tools: Hot End)
M2400 S3: Universal holder mode (end-effector tools: universal holder)
For the gripper, there is no special mode since gripper has the fingers and can rotate
horizontally.

8
4. Mounting

9

10
5. Buttons & Indicator Lights
Caution: By default, the user defined button is for switching between Bluetooth and USB
mode. Please ensure the button is UP while communicating with uArm via USB.

11
6.Extension Description

12
Details of 30P Base Extension

13
Specifications
Specifications
Weight
2.2kg
Degrees of Freedom
4
Repeatability
0.2mm
Max. Payload
500g
Working Range
50mm~320mm
Max. Speed
100mm/s
Connector
Micro USB
Wireless
Bluetooth 4.0
Input Voltage
DC 12V
Power Adapter
Input:100~240V 50/60Hz; Output: 12V5A 60W
Operation Temperature &
Humidity
0℃-35℃30%RH-80%RH
noncondensing
Storage Temperature &
Humidity
-20℃-60℃30%RH-80%RH
noncondensing
Hardware
Joint Type
Customized Gearbox + Stepper
Position Feedback
12 bit Encoder
Reducer
Customized ultra-thin Gearbox
Dimension(L*W*H)
150mm*140mm*281mm
Mother Board
Arduino MEGA 2560
Material
Aluminum
Baud Rate
115200bps
Extendable I/O Interface
I/O *27,IIC *1,5V*1,12V*1,Stepper*1
Software
PC Control
uArm Studio
App Control
uArm Play
For Developer
Python/Arduino/ROS
Feature
Open Source
Joint Speed & Torque

14
Angle
Speed
Lifetime
Torque
Base Motor
0°~180°
40°/s
>3000h
12kg⋅cm
Left Motor
0°~130°
40°/s
>3000h
12kg⋅cm
Right Motor
0°~106°
40°/s
>3000h
12kg⋅cm
End-effector Motor
0°~180°
60°/s
500h
2kg⋅cm
Accessories
Integrated Pump
Suction Diameter
5mm~10mm
Max. Pressure
33kPa
Max. Lifting Weight
1000g
Feature
With feedback
Metallic Universal Holder
Weight
36g
Dimension(L*W*H)
62mm*25mm*15mm
Material
Aluminum
Holder Diameter
14mm
Metallic Gripper
Weight
58g
Dimension(L*W*H)
92mm*50mm*18mm
Material
Aluminum
Max. Force
750~800g
Max. Size of Object
40mm
Max. Speed
20mm/s
Drive Mode
Electrically-driven
Working Voltage/Current
6V/300mA
OpenMV Camera
Focal Length
2.8mm
FOV
115°
F-number
f2.0
Programmable Method
Micro Python
Weight
16g
Dimension(L*W*H)
45mm*36mm*30mm
Integrated Bluetooth
Frequency Band(3)
100M
Operating frequency/frequencies
2400Mhz –2483.5MHz

15
Channel spacing / bandwidth
2MHz
Transmit power
0dBm
Mode of operation
GFSK
(simplex / duplex)
simplex
Duty cycle
100ms
Access Protocol (if applicable)
Bluetooth Low Energy 4.0
Transmitter Class type
CLASS 2
3D Printing Kit
(Only for Pro)
Type
E3D v6
Hot End Dimension(L*W*H)
37mm*31mm*76mm
Extruder Dimension(L*W*H)
61mm*52*66mm
Consumption
35W
Nozzle Diameter
0.4mm
Max Temp
270 ℃
Material
PLA
Max. Printing Speed
20mm/s
File Format
.Gcode
Printing Size(L*W*H)
10mm*10mm*10mm
Laser Engraving Kit
(Only for Pro)
Laser Power
500mW
Working Voltage/Current
12V/5A
Wave Length
405nm
Weight
140g
Dimension(L*W*H)
55mm*33mm*88mm
Materials to Engrave
Wood, Plastic, Leather,
Feather, Paper, etc.

16
Application Information
We would introduce several ways to play with the robot arm in different platform.
1.Send Command over USB Cable
Power on the uArm and open the Arduino IDE. And setting the board like the picture
below. Please make sure the port you are choosing is the correct port of uArm.
Open the serial monitor in the right side of Arduino IDE. After clicking, and you could
hear a beep which means the uArm is connected.

17
Set the parameter of serial monitor in the right bottom. If the setting is correct, you
would receive the detail information from uArm like the picture below.

18
Now, you are able to send the command to the uArm. Let’s send “G0 X250 Y0 Z130
F10000”.

19
If uArm finishes the movement, it replies “ok”.
Please check the chapter of Protocol (Page 20) in this guide to test more commands.
2.Send Command over Bluetooth
Plug in the Bluetooth stick, and press down the button beside the power button.

20
Power on the uArm. When the Bluetooth stick is searching, the blue indicator keeps
blink until the wireless connection is built up between stick and uArm. And the blue
indicators in both stick and uArm become solid.
Open the Arduino IDE. And setting the COM port like the picture below. Please make
sure the port you are choosing is the correct port of Bluetooth stick.
(Driver of stick: http://www.ftdichip.com/Drivers/VCP.htm )
Open the serial monitor in the right side of Arduino IDE. After clicking, and you could
hear a beep which means the uArm is connected.
Other manuals for uArm Swift Pro
3
Table of contents
Other UFactory Robotics manuals

UFactory
UFactory xARM VACUJM GRIPPER User manual

UFactory
UFactory xArm User manual

UFactory
UFactory uArm Controller User manual

UFactory
UFactory xArm User manual

UFactory
UFactory uArm Swift Pro User manual

UFactory
UFactory uArm Controller User manual

UFactory
UFactory xArm 5 User manual

UFactory
UFactory xArm6 User manual

UFactory
UFactory LITE 6 User manual

UFactory
UFactory uArm Swift Pro Instruction Manual