manuals.online logo
Brands
  1. Home
  2. •
  3. Brands
  4. •
  5. Ultravation
  6. •
  7. Air Cleaner
  8. •
  9. Ultravation Solaris SlXLED Installation instructions

Ultravation Solaris SlXLED Installation instructions

Warranty:
Ultravation® Solaris features Ultravation’s lifetime warranty, with the exception of the
UVLED-ION module, which are warranted for a period of two years aer date of con-
sumer purchase.
is warranty does not include damage to the unit from accident, misuse or improper
installation.
If this product should become defective, Ultravation will elect to repair or replace the
product free of charge. Ultravation will return repaired or replaced warranted products
pre-paid to the customer, provided that the product was delivered pre-paid.
Ultravation shall have no responsibilities for charges incurred by the customer for
installation or removal of warranted items. Liability is limited only to the replacement or
repair of this product.
is warranty gives you specic legal rights, and you may also have other rights, which
vary from state to state. All returns must be accompanied by a return authorization
number, which may be obtained by contacting Ultravation, Inc.
Ultravation, Inc.
P.O. Box 165, 212 Ideal Way, Poultney, Vermont 05764
Phone: 1-866-GO-UV-AIR (468-8247) • Fax: 802-287-9203
www.ultravation.com • info@ultravation.com
Copyright © 2008-2020 Ultravation Inc.
REV12-2020
Maintenance:
Typical maintenance of the Solaris is recommended replacement of the UVLED-ION-
module every 36,000 hours approximately 4 years, for optimum results change Module
every 2 years.
Replacement Module Part Numbers:
12”UVLED-ION module.................SLX-MOD
Installation and Owners Manual
Model #SlXLED
Whole House Air purier with advanced oxidation
combined with 8x bi-polar ION generation.
Operating voltage: 24 vac 20 watts.
(24 VAC 40 VA.Transformer included)
Solaris® air purifiers are designed
and manufactured in USA by
Fits all HVAC systems
Bring cleaner air to your life™
SOLARIS®
SOLARIS®
Tri-panel TiO2 + Silver/Zinc Ion infused-carbon pollutant oxidation
8XNP Ion-Plasma Generator / UVLED technology
Eliminates
Odors
Kills
Germs
Allergen
Reduction
Kills Mold
Spores
SolarisIAQ.com
EPA establishment number: 074725-VT-001 • Entire Contents Copyright © Ultravation, Inc.
Warning: This product is sold
only through and must be
installed by professional HVAC
contractors. Improper installation
can result in damage to the UV
system and/or HVAC equipment.
Human exposure to UV light
damages eyes and skin. This
product is not intended for sale
on the internet or in retail stores.
• Homes
• Offices
• Medical centers
• Schools
• Industry / Military
• Restaurants
• Pet centers
• Cruise ships
• Hotels /Motels
Form ISVT 12516-0120
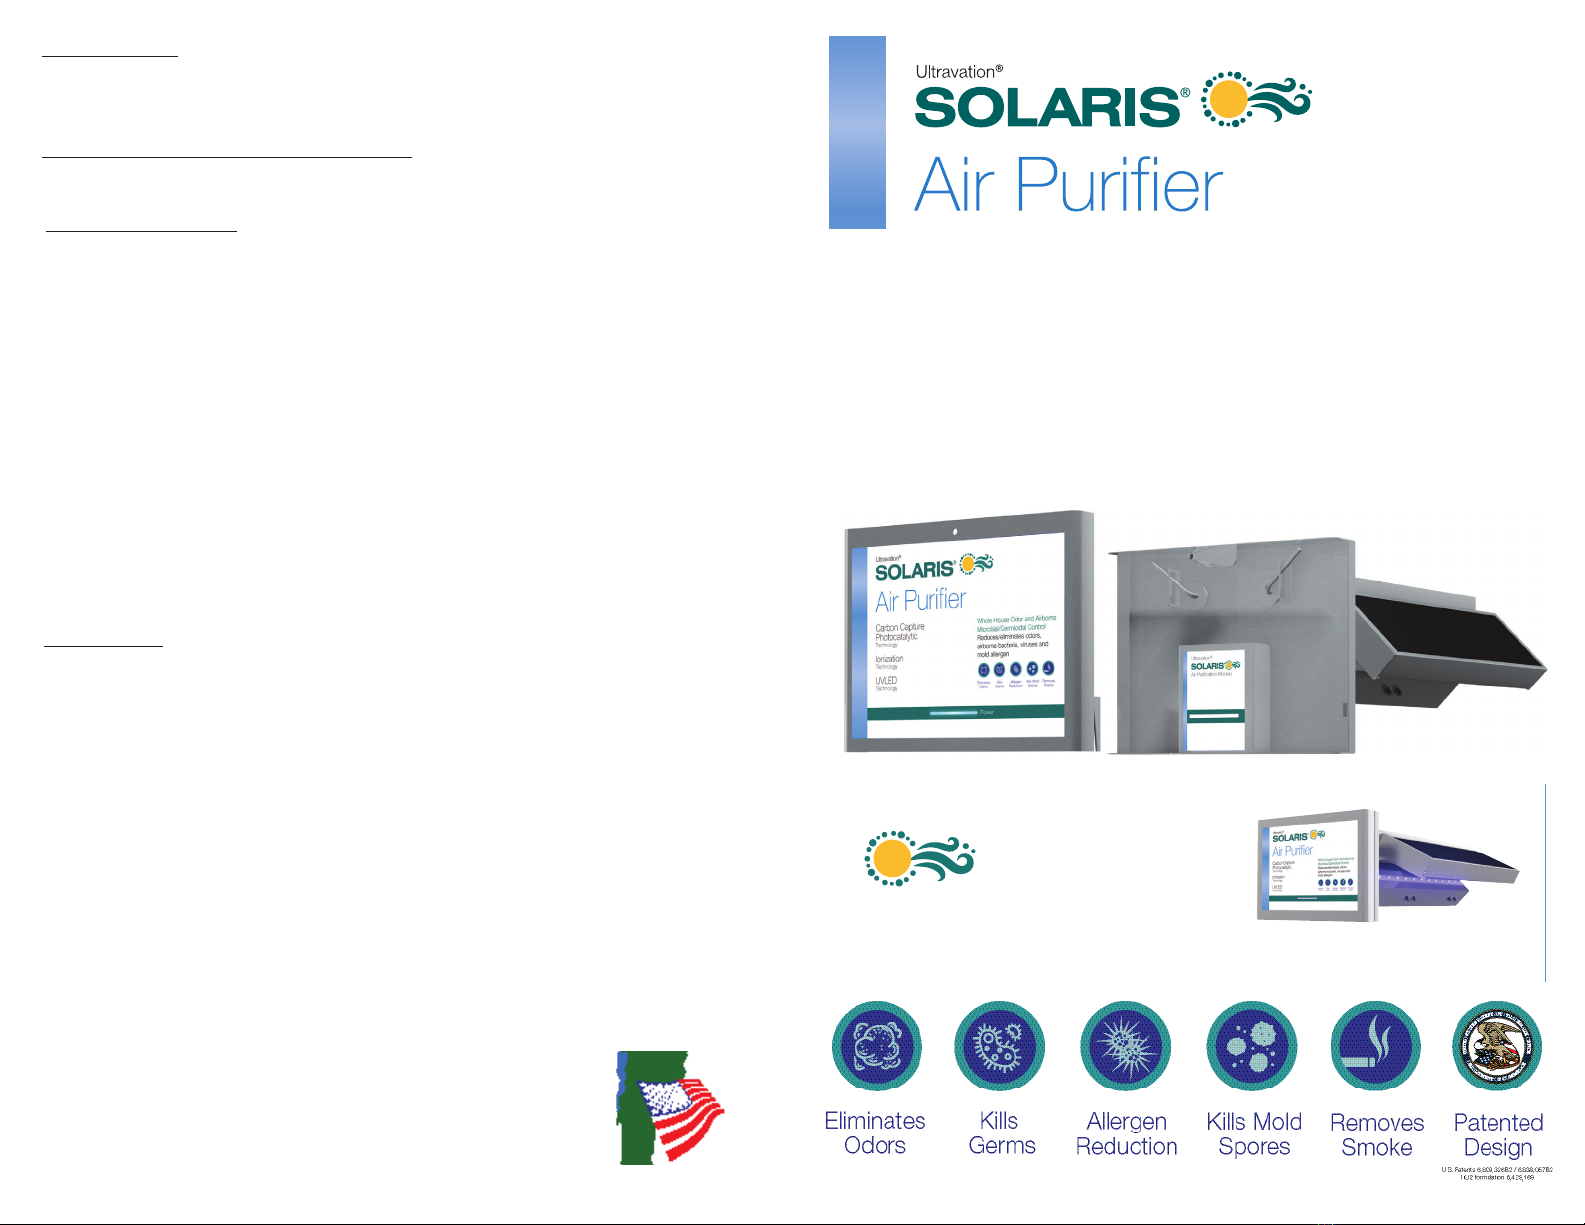
Activated Carbon / Photocatalytic (PCO) / UVLED / ION Air Purification for HVAC
made in VT
USA
SOLARIS®
Activated Carbon / Photocatalytic (PCO) / UVLED / Ionization
Whole House Air Purifier for HVAC
Replaceable UVLED and
ION/Plasma generator
lasts 4 full years
Features Benefits
HVAC integration
Patented Photocatalytic +
Silver/Zinc ion purification
Three activated carbon panels
Self-cleaning
Very low energy consumption
Cycles with HVAC system
No Ozone
Disposal
Construction
No maintenence
for 4 years!
Warranty
24 VAC power
Whole house effective! The HVAC system circulates all the air
in the home though Solaris purification for silent, even and
unobtrusive IAQ improvement
Destroys odors, VOCs, toxic gases
and microbials
More contamination capture than any other purifier in its class
PCO process continuously restores activated carbon
Uses less than 15 watts of power
Can be synchronized with HVAC system or to operate 24/7
Cleans the air without the use of ozone. Friendly ions freshen the
air in the same way a summer storm clears the air
Non-hazardous, no mercury content
Commercial grade stainless steel and aluminum build—long
lasting and highly recyclable
Purification Module is replaced every 4 years and includes latest
updates of UVLEDs, ionization and electronics.
Lifetime on enclosure and carbon capture panels
2 years Purification Module (UVLEDs / Ionizer / Electronics)
Power supply included
Ultravation®
Ultravation®
Safety Precautions:
It is recommended that this unit be installed and maintained by a trained technician.
WARNING: UVA Hazard. Always protect eyes from ultraviolet light. NEVER look at UV lamps in
operation. Unplug or disconnect power before servicing.
WARNING: Severe eye damage or temporary blindness may occur.
WARNING: DO NOT operate outside of air handler. Mount product in preferred
location rst.
WARNING: No openings should be allowed which would give direct line-of-sight to the UV light.
Note: In the event of accidental breakage or replacement of the ultraviolet lamp, please ensure that
the lamp is disposed of in accordance with local and state environmental laws regarding uores-
cent lamps containing mercury.
Notice: All wiring inside of the air handler in direct line of site of the UV lamp must be shielded
with aluminum foil tape or equivalent non-combustible material. When installing this unit, select
a mounting location that prevents ultraviolet light exposure to synthetic or other plastic com-
ponents with unknown resistance to ultraviolet light. Ultraviolet light may cause color shi or
structural degradation of plastic internal components.
• Solaris LED Module And PCO Reactor
• Four self tapping screws
• Two wire nuts
• 24VAC Power cord
• 40 VA 24 volt ac transformer
• Warranty card
• Ductboard plate / sealing tape
• Product gasket
Package Contents:
Mechanical installation
1. Determine a location for the Solaris system. Mount the unit on the exit or supply side of the
HVAC system and before the ductwork branches o.
2. Separate the power module from the mounting plate.
3. Note the orientation of the power module as it connects in only one direction.
4. Mark a 4” round opening (or use the end of the PCO chamber to mark the area) on the air duct
and cut the hole needed for the insertion of the advanced photocatalytic chamber.
5. read supplied gasket over PCO module and attach to mounting plate. (Seals against
air duct.)
6. Insert the mounting plate / PCO module into opening and attach to duct with two supplied self
-tapping screws in the lower le and upper right
(only).
7. Adjust purication level. (See next page)
8. Place the power module on the unit aligning holes in tabs with holes in mounting plate (upper
le /lower right).
9. Secure the power module to the mounting plate with the remaining two self-tapping screws.
Installation procedure for duct board plate
Position duct board plate in the center of the duct
board.
Trace and cut or simply cut in the outer slots pro-
vided.
Bend mounting tabs inwards being sure
they bend at the furthest outside slot.
Now bend inner mounting tabs at the slots
provided so they will wrap around
the duct board.
e duct board plate is to be used on 1” to 1-1/2”
duct board.
Seal edges with provided precut foil back
tape.
Module Replacement Procedure:
e UVLED-ION Module is shipped installed in the equipment
and should be replaced during biannual service.
To replace the module follow the steps below:
1. Unplug power cord and remove power module cover .
2. Remove used Module ( caution ion pins are sharp)
3. Install new Module ( press into place)
5. re-install cover by snapping it into place.
6. plug power cord in to base of new module, re-apply power.
Common
120
208
240
277
VAC
24 VAC
Electrical installation
is product operates on 24 VAC must be connected to a dedicated minimum 40va trans-
former supplied
1. Disconnect power supply before beginning installation to prevent electrical shock or
equipment damage.
2. Connect secondary voltage. Refer to voltage color or terminal coding on transformer
for proper wire combination. On terminal type transformer, be sure that no exposed wire
can come in contact with any terminal.
3. Connect primary voltage. Refer to voltage color coding on transformer for proper wire
combination. See Fig. 1 for connection and installation.
4. Tape or protect all unused exposed wire separately to avoid a possible electrical short.
5. Check installation and reconnect power supply for proper operation.
6. Connect 24 VAC wires to supplied 6  cable (polarity not important)
Typical multi-tap transformer included
Position
Actuators
Closed
Position
Actuators
Open
e PCO Panels ship in the closed position. Only open for operation aer
mechanical installation. Never move the panels by hand only use the actuators

Other Ultravation Air Cleaner manuals

Ultravation Solaris SLX1024 Installation instructions

Ultravation

Ultravation Solaris SLX1024 Installation instructions

Ultravation SOLARIS E Series Installation instructions

Ultravation

Ultravation SOLARIS E Series Installation instructions

Ultravation UVPhotomax Signature SS-PTX-1224 Installation instructions

Ultravation

Ultravation UVPhotomax Signature SS-PTX-1224 Installation instructions

Ultravation UVMatrix EZ Series User manual

Ultravation

Ultravation UVMatrix EZ Series User manual

Ultravation 92-019 650 CFM User manual

Ultravation

Ultravation 92-019 650 CFM User manual

Ultravation 90-028 User manual

Ultravation

Ultravation 90-028 User manual

Ultravation UVPhotoMAX UVP-4000 User manual

Ultravation

Ultravation UVPhotoMAX UVP-4000 User manual

Ultravation PHOTRONIC UVMatrix CW Series User manual

Ultravation

Ultravation PHOTRONIC UVMatrix CW Series User manual

Ultravation UVP-6000 User manual

Ultravation

Ultravation UVP-6000 User manual

Ultravation SOLARIS-EUVCat Installation instructions

Ultravation

Ultravation SOLARIS-EUVCat Installation instructions

Ultravation Ultramax EZ Series User manual

Ultravation

Ultravation Ultramax EZ Series User manual

Ultravation 93-002 650 CFM User manual

Ultravation

Ultravation 93-002 650 CFM User manual

Ultravation 90-026 User manual

Ultravation

Ultravation 90-026 User manual

Popular Air Cleaner manuals by other brands

INTU Evolution X7 user manual

INTU Evolution

INTU Evolution X7 user manual

EdenPURE A4647 instruction manual

EdenPURE

EdenPURE A4647 instruction manual

Ecomax ECF03 manual

Ecomax

Ecomax ECF03 manual

Coway AP-1520C product manual

Coway

Coway AP-1520C product manual

ULTTY SKJ-CR021U user manual

ULTTY

ULTTY SKJ-CR021U user manual

Envion thera pure TPP220H manual

Envion

Envion thera pure TPP220H manual

dr. Mercola Whole Home owner's manual

dr. Mercola

dr. Mercola Whole Home owner's manual

Blueair Blueair 301 user guide

Blueair

Blueair Blueair 301 user guide

Kenmore ENVIROSENSE 85500 Operator's manual

Kenmore

Kenmore ENVIROSENSE 85500 Operator's manual

Daikin Air Intelligence DV15 Series Installation & operation manual

Daikin

Daikin Air Intelligence DV15 Series Installation & operation manual

airhood AH-01AE user manual

airhood

airhood AH-01AE user manual

Winix T1 user manual

Winix

Winix T1 user manual

Jet AFS-400 Features

Jet

Jet AFS-400 Features

Honeywell C0301PC owner's manual

Honeywell

Honeywell C0301PC owner's manual

cecotec TOTALPURE 1500 CONNECTED instruction manual

cecotec

cecotec TOTALPURE 1500 CONNECTED instruction manual

Sharp Plasmacluster KC-850E Operation manual

Sharp

Sharp Plasmacluster KC-850E Operation manual

Cuisinart Purxium CAP-500C Instruction booklet

Cuisinart

Cuisinart Purxium CAP-500C Instruction booklet

Electrolux FLOW A3 Instruction book

Electrolux

Electrolux FLOW A3 Instruction book

manuals.online logo
manuals.online logoBrands
  • About & Mission
  • Contact us
  • Privacy Policy
  • Terms and Conditions

Copyright 2025 Manuals.Online. All Rights Reserved.