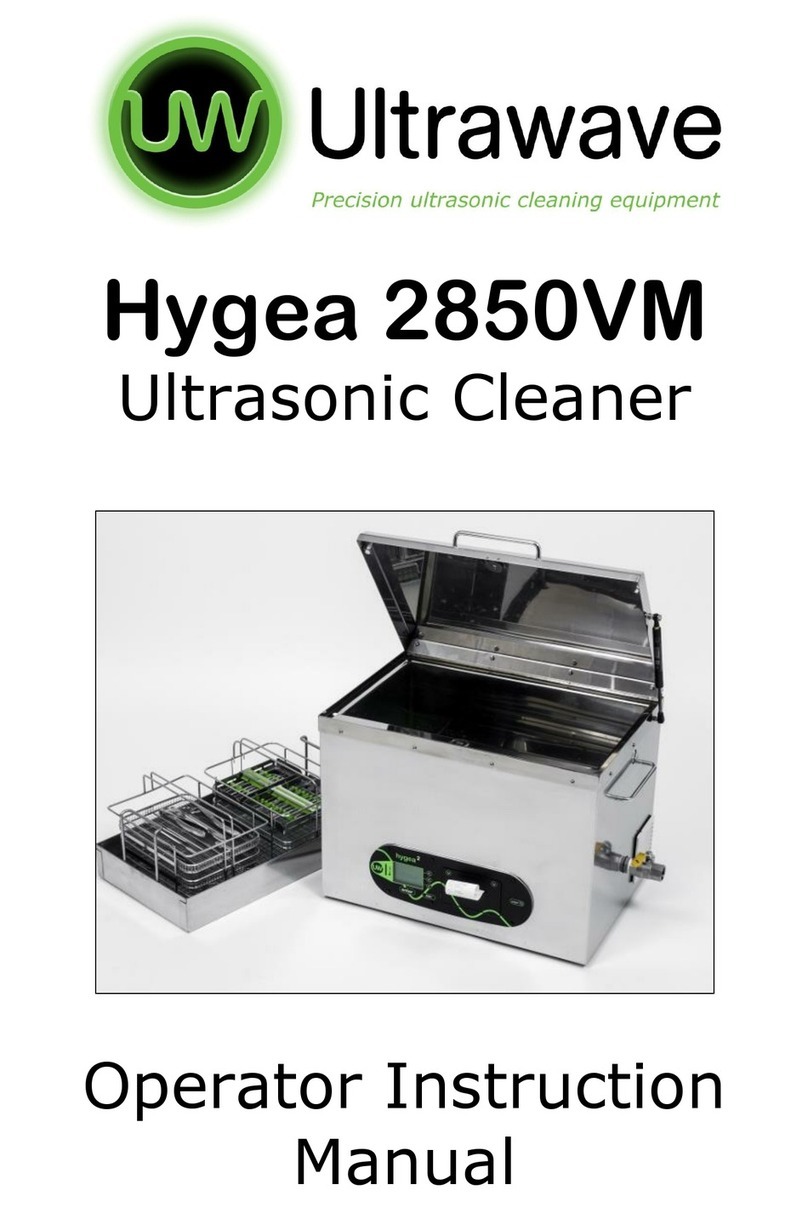
Ultrawave U50 Assembly instructions


1
Contents
Contents ..................................................................................................................1
Safety Instructions .............................................................................................1
Installation...............................................................................................................3
Quick Guide............................................................................................................4
Manual I Control Panel Instructions (U50, U95, U100, U300) ........6
Manual II Control Panel Instructions (U100H) .....................................7
Manual III Control Panel Instructions (U300H, U500H) ...................8
Technical Information .......................................................................................9
Ultrasonic cleaning detergents ....................................................................10
Maintenance ........................................................................................................11
Disposal of this ultrasonic bath ...................................................................11
Returning equipment to Ultrawave............................................................11
Troubleshooting .................................................................................................13
Fuse Ratings ........................................................................................................14
Temperatures of touchable hot surfaces .................................................15
Compliance with the Control of Noise at Work regulations .............16
Ultrawave baths are manufactured in the UK and conform to
exacting international standards.

2
Safety Instructions
Electrical
Connect to a 220 - 240 VAC fully earthed supply via a 3 pin plug. It can be
dangerous to operate an ultrasonic bath without an earth connected.
The mains plug is fitted with a 5A fuse. NEVER FIT A FUSE OF A HIGHER
RATING. Some baths are fitted with a detachable mains lead. These baths have a
mains socket on the rear of the bath fitted with two 20mm fuses. See rating
information on page 14.
Ensure that excess mains cable is stored neatly.
General Use
Ensure that the bath is at least ¾ full of liquid before you switch it on.
Always use a basket to support items to be cleaned. Not doing so may damage the
bath and invalidate the warranty.
Do not place hands or fingers in the bath.
Care should be taken when operating the bath at higher temperatures as
external surfaces may become hot.
Never use toxic, flammable, acidic, caustic or corrosive solutions in the
bath.
Where the bath is fitted with a detachable mains lead disconnect the bath from the
mains supply before emptying. When emptying baths with no waste outlet, tip the
bath AWAY from the electrical connector and lead.
The user should familiarise themselves with this Operator Instruction manual before
operating the equipment and should apply to Ultrawave or its agent for advice on
cleaning techniques and detergents. Ultrawave will not be responsible for damage
or injury caused by incorrect use of the equipment.
WEEE Compliance
Ultrawave are complying with the WEEE regulations by contracting-out our
obligations to a Producer Compliance scheme. Once it is deemed that this
model is no longer effective, please contact Ultrawave to arrange collection
by our compliance scheme provider, who will pick up the machine from
your premises.

3
Installation
The following parts and accessories are included with the Ultra Analogue Benchtop
ultrasonic baths:
-1 x Ultra Analogue Benchtop ultrasonic bath
-1 x basket
-1 x lid
-1 x 2m length of drain hose (U500Honly)
-1 x hose tail (U500Honly)
-1 x Ultraclean detergent sample
-1 x Operator Instruction manual
How to install
Locate the bath close to a drain or sink to allow easy drainage of the tank.
Connect the mains lead into a suitable mains socket.
If the bath is a U500H, screw the hose connector into the drain valve located on
the side of the unit. Connect one end of the drain hose to the hose connector and
locate the other end over a drain or sink.
Fill the bath with water and the correct dose of detergent. The bath is now
ready to use.

4
Quick Guide
Pour water into the bath until it is at least ¾ full or the fluid level reaches the lip of
the tank. To reduce the process preparation time,
fill your bath with water at the temperature
required for your process. The water you pour in
must not exceed 50°C.
Add the required dose of detergent (see page 10).
Operate the ultrasonics by turning the timer dial to
the required time and pressing the SONICS button
(where applicable).
Operate the heater, if the bath has a heating
function, by turning the heater dial to the required temperature and pressing the
HEAT button.
Turn on the ultrasonics for approximately 5-10
minutes to degas the cleaning liquid. (See page 9
for more details on degassing).
The bath is now ready to use.
At the end of the cycle, remove the basket from
the bath and rinse the items under clean running
water.
The lid can be inverted and the basket placed on
top to catch excess fluid as the items dry.
Please refer to the following pages in this manual for more detailed instructions.
Change the cleaning liquid at regular intervals. Your cleaning process will determine
how often to change the liquid –the more soiled your items, the more often you will
need to change the liquid.
Ultrawave recommend changing the cleaning liquid at least on a daily basis.
Lip of tank

5
REMEMBER
-Always ensure the liquid is at or above the lip of the tank when in
operation.
-Do not put hot water above 50°C into the bath.
-Always use the basket to support items in the bath.
-Never expose hands, fingers or other body parts to cleaning
solutions.
-Never use toxic, flammable, acidic, caustic or corrosive solutions.
-Never breathe the fumes from strong solutions.
-Rinse the items in clean water once the cycle is complete.
Subjecting the bath to improper treatment or misuse will invalidate the
warranty.

6
Manual I Control Panel Instructions
(U50, U95, U100, U300)
To switch on the ultrasonics:
Turn the Timer dial to the desired time, and the press the SONICS button.
The SONICS button and the SONICS light will glow. Ultrasonic activity will then
commence in the liquid inside the tank and the Timer dial will be heard ticking.
At the end of the timed period, the Timer will click off, the SONICS light will go out,
and the ultrasonic activity in the liquid will stop.
To stop the ultrasonic activity at any time, press the SONICS button while in
operation.

7
Manual II Control Panel Instructions
(U100H)
To switch on the ultrasonic activity:
Turn the Timer dial to the desired time, and the ultrasonics will automatically begin.
The SONICS light will glow. Ultrasonic activity will commence in the liquid inside the
tank and the Timer dial will be heard ticking.
At the end of the timed period, the Timer will click off, the SONICS light will go out,
and the ultrasonic activity in the liquid will stop.
To stop the ultrasonic activity at any time, turn the Timer dial to 0 while in
operation.
To operate the heater:
Press the HEAT button to turn on the heater.
The HEAT switch will glow, and the liquid will start warming up. No indication is
given when the preset maximum temperature of 70C is reached.
To turn off the heater at any time, press the HEAT button while in operation.
NOTE: Ultrasonic activity can elevate the liquid temperature to above the
set level. If in doubt, check actual temperature with a thermometer.

8
Manual III Control Panel Instructions
(U300H, U500H)
To switch on the ultrasonic activity:
Turn the Timer dial to the desired time, and the press the SONICS button.
The SONICS button and the SONICS light will glow. Ultrasonic activity will then
commence in the liquid inside the tank and the Timer dial will be heard ticking.
At the end of the timed period, the Timer will click off, the SONICS light will go out,
and the ultrasonic activity in the liquid will stop.
To stop the ultrasonic activity at any time, press the SONICS button while in
operation.
To operate the heater:
Turn the HEATER dial to the desired temperature, and press the HEAT button.
The HEAT button and the HEAT light will glow, and the liquid will start to heat up.
When the set temperature is reached, the HEAT light will go out.
To stop the heater at any time, press the HEAT button while in operation (ie. when
the HEAT light is already on).
NOTE: Ultrasonic activity itself will heat the liquid. This means that the
liquid temperature may rise above the level indicated on the temperature
dial.
The temperature dial only controls the heater cut-out temperature.
If in doubt, check the actual temperature with a thermometer.

9
Technical Information
The need to degas
In order to allow optimum ultrasonic activity, the gases present in ordinary
tap water need to be driven out of the cleaning solution.
The time needed to degas the liquid varies depending on the amount of
gas present in the liquid and the quantity of water in the tank. Ultrawave
recommends a degas period of at least 10 minutes.
During the de-gas cycle, you will see bubbles of gas forming on the inside
of the bath, and slowly rising to the surface. Degassing is complete when
you can no longer see these bubbles. Another indication of increased “cold-
boiling” at the liquid surface indicates that the liquid is degassed.
Once the liquid is degassed, the bath is ready for use.
The effect of heat
Heating the liquid in the bath
will aid the cleaning process.
Normally a temperature of
between 30 to 60°C is sufficient
to accelerate the process. You
will see from the graph below
that optimum cleaning will be
obtained at 60°C
If you are using your bath to clean medical equipment, it is recommended
to limit the fluid temperature to 35°C. This will avoid “baking” proteins.
Ultrasonic activity itself will heat up the liquid at a rate of approximately
10-15°C per hour if in continuous use.
Cleaning time
Cleaning time will depend on application, type and amount of contamination.
General light contamination should be removed in less than 10 minutes.
An indication of cleanliness is when stains are no longer visible, and
contamination no longer appears in a stream from the item being cleaned.
Average power
0
20
40
60
15
25
35
45
55
65
75
85
Temp (Deg C)
Power
(Watts/Inch^2)
AvPower
-3dB point

10
Ultrasonic cleaning detergents
Detergents are a vital component in the ultrasonic cleaning process, aiding
in the removal and loosening of debris from the surfaces of items placed in
the tank while also intensifying the power of the ultrasonic activity.
Ultrawave offer a range of specially formulated ultrasonic detergents for
use in applications including medical and heavier industrial cleaning
requirements.
Sonozyme: A poly-enzymatic detergent for cleaning surgical instruments.
Packaged in single shot dose sachets - 1 sachet per 5-10 litres.
Ultraclean M2: A general purpose detergent for all plastics, glass and
metals (expect aluminium and other soft metals). Also suitable for use on
medical instruments.
Ultraclean SA: A general purpose cleaning detergent for aluminium and
other soft metals.
Ultraclean CBX: A heavy oil and carbon remover for non-ferrous metals.
Ultraclean CS: A carbon and heavy contaminant remover, not for use on
aluminium and other soft metals.
Ultraclean PH: A rust removal detergent and brightening agent for non-
ferrous metals.
Dosing Matrix (ml of detergent per tank)
Detergent dose (ml)
2%
5%
U50
10
25
U95
40
100
U100
30
75
U100H
30
75
U300
50
125
U300H
50
125
U500H
90
225
Each of these detergents is available from Ultrawave. The required
detergent dose may vary depending on the component being cleaned and
the level of contamination. Ultrawave recommend a dosage of between 2
and 5% for all detergents other than Sonozyme.

11
Maintenance
It is important to keep your bath clean. Not only will contaminated liquid
reduce the performance of the bath, it may also damage it. Change the
cleaning liquid regularly. Your cleaning process will determine how often to
change the liquid –the more soiled your items, the more often you will
need to change the liquid. Change the cleaning liquid at least daily.
The base of the bath generates the ultrasonic activity by vibrating at very
high speeds. If any contaminants are in contact with the bath, they act as
an abrasive, causing wear on the metal surface. In extreme cases, the
bath will develop holes and start to leak. Portable Appliance Testing should
be conducted with water in the bath.
There are not user serviceable parts inside the unit. All service and reapair
must be conducted by suitably trained and qualified engineers approved by
Ultrawave.
Disposal of this ultrasonic bath
At the end of its useful life, please ensure that you dispose of this product in
accordance with national regulations.
Returning equipment to Ultrawave
All equipment being returned to Ultrawave for service, repair or other
reason MUST BE FULLY DECONTAMINATED prior to return and include a
copy of the certificate of decontamination.
Failure to do so may result in additional charges, or the equipment being
returned to the user/sender at Ultrawave’s discretion.
Ultrasonic baths which have been used in medical/healthcare applications
should be decontaminated/packaged in accordance with MHRA guideline
document DB2003(5) ‘Management of Medical Devices prior to Repair,
Service or Investigation’, this can be found at www.mhra.gov.uk
This policy is designed to protect the health and safety of Ultrawave
employees reducing the risk of potential injury or infection
If you require further information please contact the Service Dept. on:

12
Warranty
The warranty on this Ultrawave ultrasonic bath applies to defects appearing
within 12 months of the date of sale because of faulty material or
manufacture. Genuine defective items returned to Ultrawave or its agent’s
premises will be replaced or repaired free of charge at their discretion.
The warranty is extended to two years on transducer assemblies and to 5
years on the bonding process. If the transducers or bonding material are
exposed to liquid or cleaning chemicals, the warranty will be invalidated.
The warranty does not apply to:
-normal wear and tear.
-damage caused by misuse.
-non-observance of maintenance, service or connection instructions.
-damage caused by the use of toxic, flammable, acidic, caustic or
corrosive chemicals or fluids not recommended by Ultrawave.
The user should familiarise themselves with this instruction booklet before
operating the equipment and should apply to Ultrawave or its agent for
advice on cleaning techniques or chemicals.
Ultrawave will not be responsible for damage or injury caused by incorrect
use.
Statutory rights are not affected.

13
Troubleshooting
Ultrawave have a dedicated service team who are able to resolve any
problems that occur with your bath. However, on many occasions it is
possible that the problem can be rectified by the operator.
The unit fails to turn on
(no display is shown)
Check that the unit is plugged in and that
mains electricity is present.
The unit stops working
Check that the indicators illuminate when the
unit is switched on.
If the indicators fail to illuminate, check the
mains supply and fuse in the mains plug, as
well as the fuses in the mains socket (if fitted)
on the rear of the bath.
If the fuses and mains electricity supply are
OK, and the unit fails to operate, the bath
should be returned to your supplier for
service.
If any of these problems persist, the Ultrawave Service Department can be

14
Fuse Ratings
IEC Socket Fuse Ratings
If your bath has an IEC socket, then two 20mm fuses will be fitted. The following
table gives the correct fuse rating for each different model.
Replacement fuses should ALWAYS be anti-surge. This type of fuse is marked with
a “T”; e.g. T1.6A, T3.15A etc
Fitting fuses of the incorrect rating will invalidate the warranty. If you have any
doubt, please contact the Ultrawave Service Department
UK Mains Plug Fuse Ratings
The following models must be fitted with a 5A fuse in the mains plug:
U50, U95, U100, U100H, U300, U300H, U500H.
Fitting fuses of the incorrect rating will invalidate the warranty.
Model Number
Fuse Rating
U100,U100H,U300,U300H
1.6A
U500H
2.0A

15
Temperatures of touchable hot surfaces
BS EN 13202:2000 gives the recommended maximum surface
temperatures for different materials at various exposure times (see below).
Your Ultrawave ultrasonic bath can be set so that the cleaning fluid is up to
70°C. This means that parts of your ultrasonic bath will be above the
recommended maximum temperature.
If you operate your ultrasonic bath at temperatures above the
recommended maximum, then Ultrawave advise that you conduct a risk
assessment, and if appropriate fix a “Caution – Hot” warning label to your
machine.
The following limit values are based on the harmonized standards -
BS EN 13202:2000 Ergonomics of the thermal environment -
Temperatures of touchable hot surfaces - Guidance for establishing
surface temperature limit values in production standards with the
aid of -
EN 563: 1994 Safety of machinery - Temperatures of touchable
surfaces - Ergonomics data to establish temperature limit values for
hot surfaces
Materials/time-temp*
1 sec
4 sec
10 sec
10 min
8 hr
uncoated metal
65°C
58°C
55°C
48°C
43°C
painted metal
83°C
64°C
55°C
48°C
43°C
enamelled metals
74°C
60°C
56°C
48°C
43°C
ceramics, glass, stone
80°C
70°C
66°C
48°C
43°C
plastics
85°C
74°C
70°C
48°C
43°C
wood
110°C
93°C
89°C
48°C
43°C
Time
Contact
Part
1 sec
accidental contact
Outer case, tank flange
4 sec
parts held for short periods
knobs, switches
10 sec
parts continuously held in normal use
handles
10 min
prolonged use
handles
8 hr
continuous use
handles

16
Compliance with the Control of Noise at Work regulations
The Control of Noise at Work Regulations 2005 (the Noise Regulations[1])
came into force for all industry sectors in Great Britain on 6 April 2006. The
Control of Noise at Work Regulations 2005 replaces the Noise at Work
Regulations 1989.
The aim of the Noise Regulations is to ensure that workers' hearing is
protected from excessive noise at their place of work, which could cause
them to lose their hearing and/or to suffer from tinnitus (permanent
ringing in the ears).
The level at which employers must provide hearing protection and hearing
protection zones is now 85 decibels (daily or weekly average exposure)
and the level at which employers must assess the risk to workers' health
and provide them with information and training is now 80 decibels. There
is also an exposure limit value of 87 decibels, taking account of any
reduction in exposure provided by hearing protection, above which workers
must not be exposed.
To help you calculate your workers’ exposure, Ultrawave publish the noise
generated by your ultrasonic cleaner on the Certificate of Test. The figure
is that experienced by a worker standing in the operating position.
The full text of the Control of Noise at Work Regulations 2005[2] and the full
text of the Noise at Work Regulations 1989[3] can be viewed online.
Guidance on the 2005 Regulations can be found in the free HSE leaflet
'Noise at Work'(INDG362 (rev 1)[4] and in HSE's priced book 'Controlling
Noise at Work' (L108) (ISBN 0 7176 6164 4) available from HSE Books[5]
or from bookshops.
[1] http://www.hse.gov.uk/noise/regulations.htm
[2] http://www.opsi.gov.uk/si/si2005/20051643.htm
[3] http://www.opsi.gov.uk/si/si1989/Uksi_19891790_en_1.htm
[4] http://www.hse.gov.uk/pubns/indg362.pdf
[5] http://www.hsebooks.co.uk

This manual suits for next models
7
Table of contents
Other Ultrawave Ultrasonic Jewelry Cleaner manuals

Ultrawave
Ultrawave IND Series Assembly instructions

Ultrawave
Ultrawave hygea d3ntal Assembly instructions

Ultrawave
Ultrawave QS Series User manual

Ultrawave
Ultrawave U Series Assembly instructions

Ultrawave
Ultrawave Qi Series Assembly instructions

Ultrawave
Ultrawave Hygea 2850VM Assembly instructions

Ultrawave
Ultrawave Hygea 6427 User manual

Ultrawave
Ultrawave Qi Series Assembly instructions

Ultrawave
Ultrawave Q Series Assembly instructions

Ultrawave
Ultrawave Q Series User manual