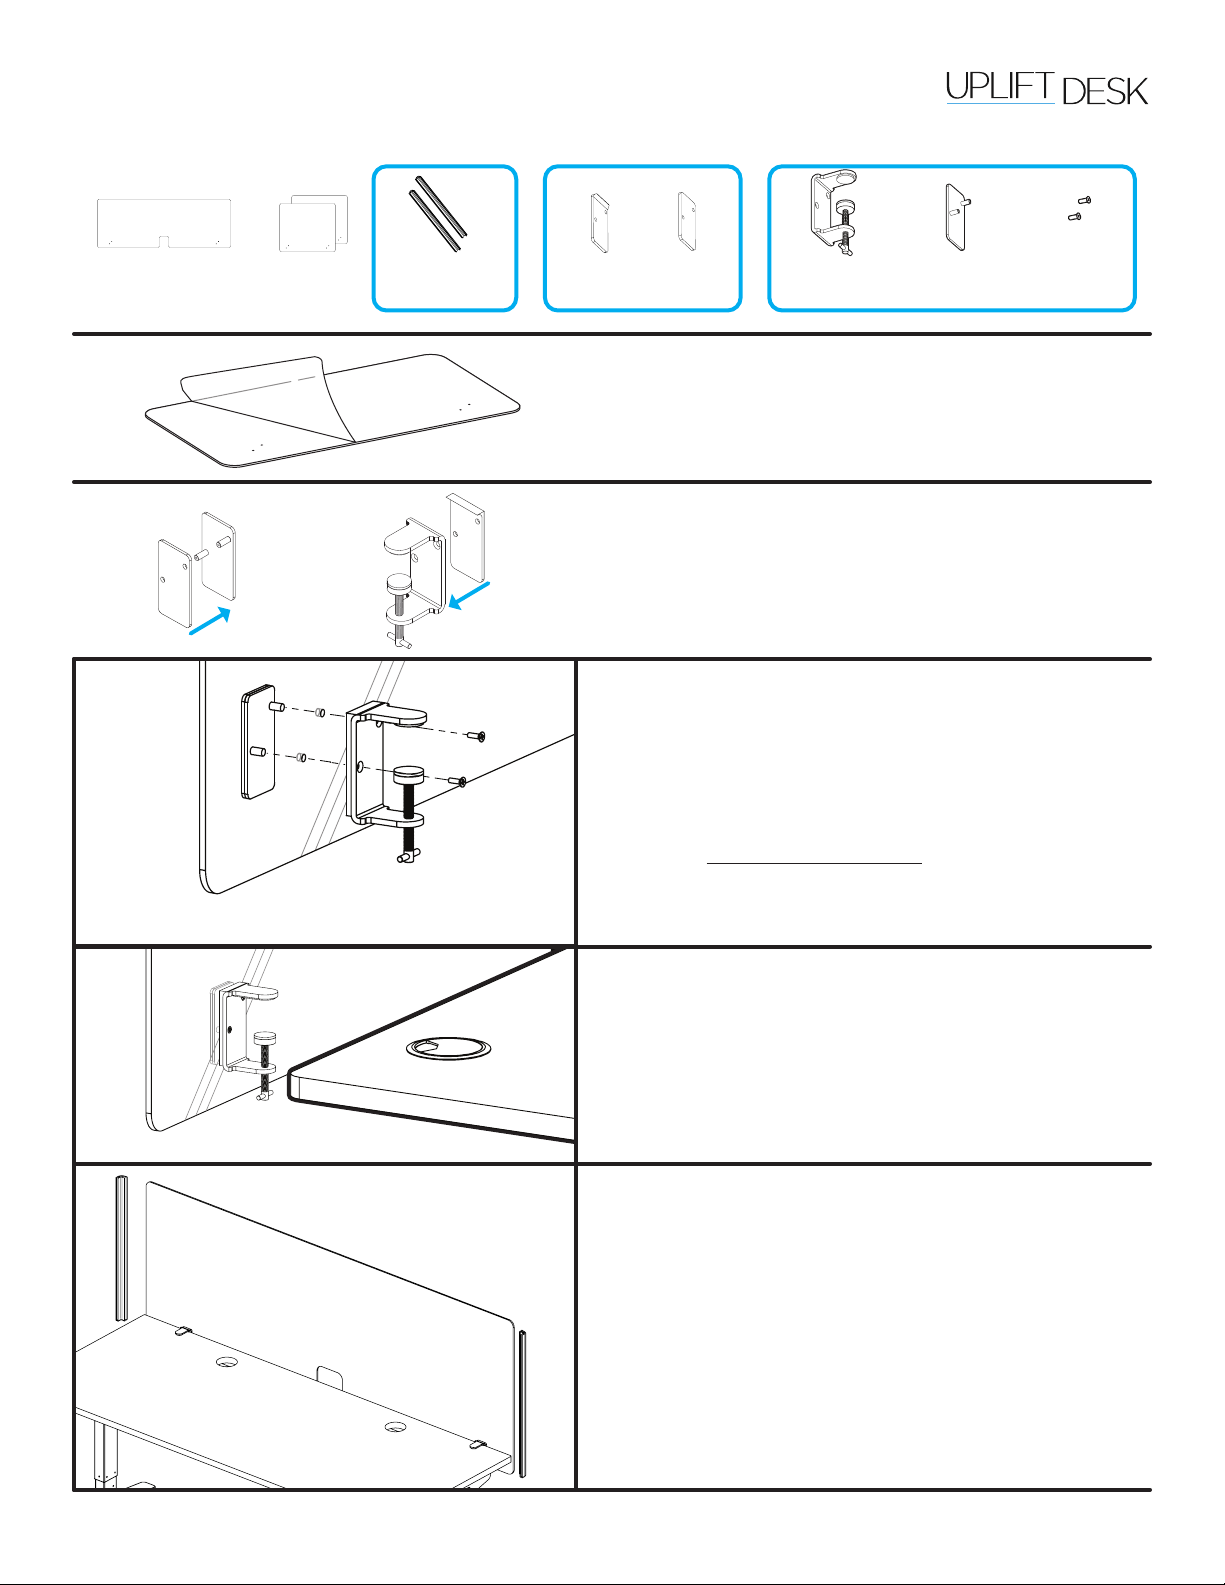
Step 3
Line up and insert the posts of each Support bracket into
the holes in the Back panel so the Support gaskets are ush
against the panel. Make sure the long end of each the Support
bracket is pointing down toward the oor, as shown.
From the other side, line the Clamp brackets up with the posts
and holes and insert the Flat head screws as shown. Tighten
until snug, but do not over tighten.
Repeat these steps to attach the hardware kits to the Side
panels.
Step 4
Loosen the clamps on the Back panel so that the openings are
wide enough to t onto your desktop (mounting hardware is
designed to t on desktops between 0.75” and 1.75” thick).
Slide the Back panel onto the back of the desktop and tighten
the clamps just enough to hold the panel in place. Do not tight-
en the clamps completely until the next step.
Step 5
IMPORTANT: Center the Back panel on the back of your desk-
top making sure that the ends of the panel are lined up with the
sides of your desktop. This is important to ensure that the Side
panels are able to connect properly to the Back panel.
Once the rear Back panel is centered on the desktop, tight-
en the mounting hardware clamps while pressing the Clamp
brackets against the edge of the desktop to keep it standing
straight up.
Next, press the Corner connectors onto each side of the Acryl-
ic panel. Make sure the connectors are completely seated and
centered on the side edge of the panel.
Flat head
screws
(qty 12)
Clamp
bracket
(qty 6)
Support
bracket
(qty 6)
3-Sided Clear Acrylic Screen
ACC071
Package Contents
Step 1
After unpacking, remove the protective lm from both sides of
each panel. The lm is only used to protect against scratches
during shipment of the panels.
Step 2
Align the posts on the Support brackets with the holes in the
Support gaskets and press the two parts together.
Then align the holes in the Clamp brackets and Clamp gaskets
in the orientation shown.
Support
gasket
(qty 6)
Ships in separate boxShips in separate bag Ships in separate box
Back panel
(qty 1)
(60’’ or 72” width)
Side
panel
(qty 2)
Corner
connector
(qty 2)
Clamp
gasket
(qty 6)


