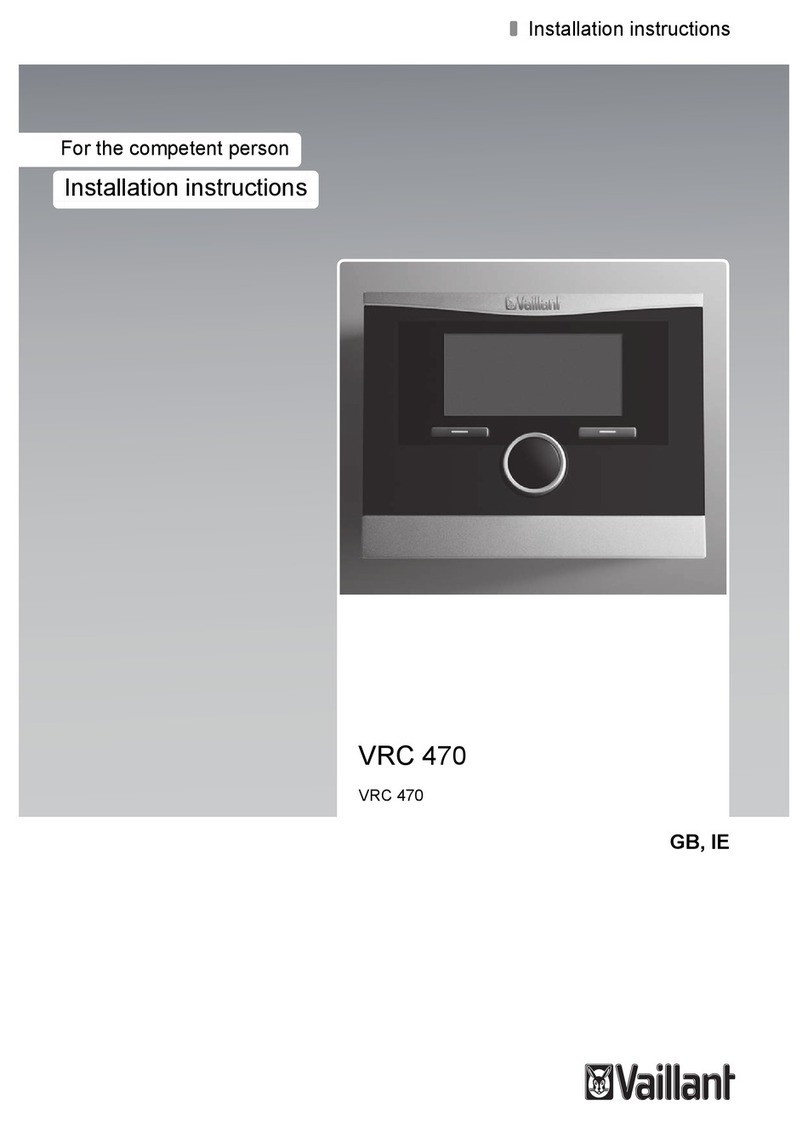
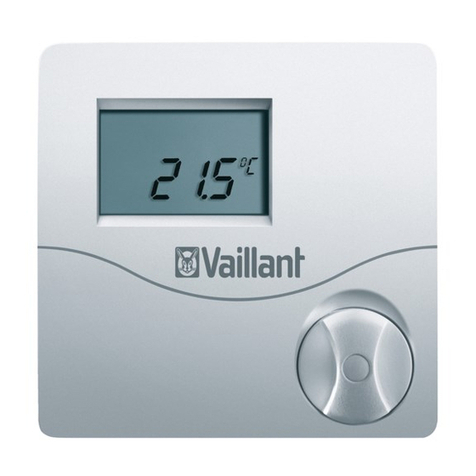
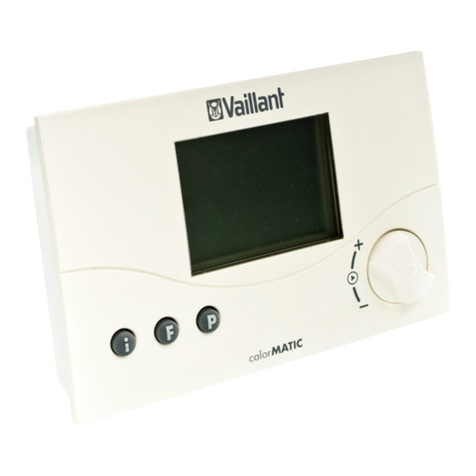
Vaillant VRC 470 User manual

Operating instructions
For the operator
GB, IE
Operating instructions
VRC 470f
Weather compensator with radio data transmis-
sion

Table of contents
2Operating instructions VRC 470 0020116689_00
Table of contents
1 Notes on the operating instructions.................. 3
1.1 Observe other applicable documents....................3
1.2 Document storage......................................................3
1.3 Symbols used...............................................................3
1.4 Identification plate .....................................................3
1.5 Applicability of the instructions.............................. 3
1.6 CE label ......................................................................... 3
1.7 Glossary......................................................................... 3
2 Safety............................................................................4
2.1 Safety and warning information .............................4
2.1.1 Classification of warnings.........................................4
2.1.2 Structure of warnings................................................4
2.2 Intended use ................................................................4
2.3 Basic safety instructions...........................................4
3 Description of the unit............................................6
3.1 Unit design ...................................................................6
3.2 Operation......................................................................6
3.3 Operating levels .......................................................... 7
3.3.1 Menu structure design ..............................................7
3.3.2 Basic display ................................................................7
3.3.3 Selection levels............................................................8
3.3.4 Setting level .................................................................8
4 Operation .....................................................................9
4.1 Operating concept......................................................9
4.1.1 Operation in the basic display.................................9
4.1.2 Operation via function keys ................................... 10
4.2 Overview of menu structure....................................11
4.3 Overview of setting and read-out options...........14
4.3.1 Overview of modes....................................................14
4.3.2 Overview of operating levels ..................................15
5 Functional description............................................19
5.1 Functions......................................................................19
5.1.1 Reading information .................................................19
5.1.2 Setting desired temperatures............................... 20
5.1.3 Setting timer programmes......................................21
5.1.4 Days away from home scheduling........................23
5.1.5 Days at home scheduling........................................23
5.1.6 Language selection..................................................23
5.1.7 Setting the time ........................................................23
5.1.8 Setting the date .......................................................23
5.1.9 Changing over to daylight-saving time ...............24
5.1.10 Setting the display contrast...................................24
5.1.11 Setting the offset room temperature ..................24
5.1.12 Setting the offset outside temperature ..............24
5.1.13 Changing heating circuit naming..........................24
5.1.14 Restoring the factory settings...............................24
5.1.15 Installer level..............................................................25
5.2 Modes ..........................................................................25
5.2.1 Modes for the heating circuit ................................25
5.2.2 Modes for hot water production and
circulation...................................................................26
5.3 Advanced functions..................................................28
5.3.1 Cylinder boost............................................................28
5.3.2 Party function............................................................28
5.3.3 1 Day away from home ............................................29
5.3.4 1 day at home.............................................................29
5.3.5 Ventilation boost.......................................................29
6 Service and troubleshooting.............................. 30
6.1 Service........................................................................ 30
6.2 Cleaning the controller........................................... 30
6.3 Detecting and rectifying malfunctions............... 30
7 Energy saving tips...................................................31
8 Warranty and customer service.........................32
8.1 Vaillant warranty.......................................................32
8.2 Vaillant Service..........................................................32
9 Decommissioning....................................................33
9.1 Replacing the controller..........................................33
9.2 Recycling and disposal ............................................33
10 Technical data..........................................................34
11 Glossary .....................................................................35
Index............................................................................37

Notes on the operating instructions
Operating instructions VRC 470 0020116689_00 3
1
1 Notes on the operating instructions
These operating instructions are intended for the opera-
tor of the heating system. No particular prior knowledge
is required.
1.1 Observe other applicable documents
When operating the VRC470 controller, always take note
of all operating instructions that accompany the other
components in the heating system.
1.2 Document storage
Store these operating instructions and all other applica-
ble documents in such a way that
– they are available whenever required,
– they are kept for the full service life of the unit,
– they are available to all subsequent operators.
1.3 Symbols used
The symbols used in the text are explained below:
iUseful instructions and information
>Required actions
1.4 Identification plate
The identification plate is located inside the controller
and is not accessible from the outside.
1.5 Applicability of the instructions
These operating instructions apply to units with the fol-
lowing article numbers only:
Type designation Article number Country
VRC 470 0020108130 GB
Tab. 1.1 Type overview
The 10-digit article number can be found in the serial
number of the unit. The article number is found in the
second line of the serial number. You can view the serial
number under "Menu ¬Information ¬Serial number"
(¬Fig. 4.10).
1.6 CE label
The CE label documents compliance of the
VRC470 controller with the fundamental
requirements of the relevant directives.
1.7 Glossary
Technical terms are explained in the glossary
(¬Section11) at the end of these instructions.

Safety
4Operating instructions VRC 470 0020116689_00
2
2 Safety
2.1 Safety and warning information
>When operating the VRC 470 controller, take account
of the general safety instructions and the warning
notes that appear before all of the actions.
2.1.1 Classification of warnings
The warning notes are classified in accordance with the
severity of the possible danger using the following dan-
ger signs and signal words:
Danger sign Signal word Explanation
a Danger! Immediate danger to life
or danger of severe
personal injury
eDanger! Risk of death from elec-
tric shock
aWarning! Risk of minor personal
injury
bCaution! Risk of material or envi-
ronmental damage
2.1.2 Structure of warnings
Warning signs are identified by an upper and lower sepa-
rating line and are laid out according to the following
basic principle:
aSignal word!
Type and source of danger!
Explanation of the type and source of danger
>Measures for averting the danger
2.2 Intended use
The VRC 470 controller is a state-of-the-art appliance
manufactured in accordance with recognised safety
regulations.
Even so, in the event of inappropriate or non-intended
use, damage to the unit and other property may occur.
The VRC 470 controller controls a Vaillant heating sys-
tem in a weather-compensated and time-dependent
manner. The controller is connected to a Vaillant boiler.
The controller can also regulate the hot water produc-
tion of a connected domestic hot water cylinder with or
without circulation.
Any other or additional use is considered to be improper.
The manufacturer/supplier is not liable for any resulting
damage. The owner alone bears any risk.
Observe the operating instructions
Intended use also includes compliance with the operat-
ing manual and all other applicable documents.
2.3 Basic safety instructions
Installation of the device can be only carried out by a
heating engineer. This heating engineer is also responsi-
ble for proper installation and start-up.
Protecting from Legionella
The controller is furnished with an anti-Legionella func-
tion to protect against infection by germs (Legionella).
When the anti-Legionella function is activated, the water
in the domestic hot water cylinder is heated to over
60°C for at least an hour. The heating engineer acti-
vates the anti-Legionella function on installation of the
controller.
>Ask the heating engineer if he has activated the anti-
Legionella function.
>Ask the heating engineer to explain how the anti-
Legionella function works.

Safety
Operating instructions VRC 470 0020116689_00 5
2
Preventing the risk of scalding
There is a danger of scalding at the hot water draw-off
points when the target temperatures are in excess of
60°C. Young children and elderly persons can even be
at danger at lower temperatures.
>Select a moderate target temperature.
>If the anti-Legionella function is activated, discuss the
following with the heating engineer:
– when does the anti-Legionella function start,
– when will the hot water cool back down to the tar-
get temperature,
– is a mixing valve incorporated in the heating sys-
tem as protection against scalding,
– what do you have to do to avoid scalding.
Preventing a malfunction
>Only operate the heating installation when it is in a
technically perfect condition.
>Ensure that any faults and damage that may nega-
tively affect safety are rectified immediately.
Preventing frost damage
If there is a power cut, or if the room temperature is set
too low in individual rooms, sections of the heating sys-
tem might be damaged by frost.
>If you are absent during a frosty spell, ensure that the
heating system remains in operation and the rooms
are warmed adequately.
>Observe the frost protection instructions
(¬Section3.2).

Description of the unit
6Operating instructions VRC 470 0020116689_00
3
3 Description of the unit
3.1 Unit design
1
2
4
3
5
Fig. 3.1 Front view of VRC 470
1 Display
2 Diagnostic socket for the heating engineer
3 Right function key
4Control knob (without pushbutton function)
5 Left function key
3.2 Operation
The VRC 470 controller controls the Vaillant heating sys-
tem and hot water production of a connected domestic
hot water cylinder.
If the controller is mounted in a living room, you can
operate the heating system and hot water production
from that room. If the controller is mounted on the
boiler, you can operate the heating system and hot water
production from the boiler.
Heating installation
You can use the controller to set the desired tempera-
tures for different times of the day and for different
days of the week.
The VRC 470 controller is a weather-compensated con-
troller with a temperature sensor mounted in the open
air.
The temperature sensor measures the outside tempera-
ture and sends the values to the controller. When the
outside temperature is low, the controller increases the
flow temperature of the Vaillant heating system. When
the outside temperature rises, the controller reduces the
flow temperature. Thus, the controller reacts to fluctua-
tions in the outside temperature and, via the flow tem-
perature, keeps the room temperature constantly at the
set desired temperature.
The frost protection function protects the heating sys-
tem and dwelling against frost damage.
The frost protection function monitors the outside tem-
perature. If the outside temperature:
– falls below 3°C, the controller switches the boiler on
after a frost protection delay time, and brings the
room temperature to 5°C.
– rises above 4°C, the controller does not switch the
boiler on but monitors the outside temperature.
iThe heating engineer will set the frost protec-
tion delay time at the time of installation.
Hot water production
With the VRC 470 controller, you can also set the tem-
perature and time for hot water production. The boiler
heats the water in the domestic hot water cylinder to
the set temperature. You can set a period during which
hot water should be available in the domestic hot water
cylinder.
If a circulation pump is installed in the heating system,
you can set a period for circulation. During the set
period, hot water circulates from the domestic hot water
cylinder to the water taps and back to the domestic hot
water cylinder. If, for example, you turn on a water tap
during this time, hot water will come out of the tap
immediately.
Hot water production is not affected by the weather
compensated control of the heating system.
Several heating circuits
The controller can control two heating circuits:
– two heating circuits independently of each other, e.g.
"HEATING 1“ in a single occupancy house and "HEAT-
ING 2" in a granny annexe in this house.
– two heating circuits interdependent on each other in
a dwelling, e.g. "HEATING 1" for radiators and "HEAT-
ING 2" for underfloor heating.

Description of the unit
Operating instructions VRC 470 0020116689_00 7
3
3.3 Operating levels
The controller has two superordinate operating levels.
Operating level for the heating engineer
The operating level for the heating engineer must only
be operated with expertise and is therefore protected by
a code. This level is used by the heating engineer to
adjust the controller to the heating system.
Operating level for the operator
The operating level for the operator shows you impor-
tant information and offers set-up options which do not
require any special prior knowledge. Via a menu struc-
ture, you can access configurable or read-only values.
3.3.1 Menu structure design
1234
34
4
4
21
A
1
Fig. 3.2 Menu structure
A Basic display
1 Selection level 1
2 Selection level 2
3 Selection level 3
4 Setting level
The menu structure of the controller is split into four
levels. From the basic display, you can access selection
level 1. Through up to three selection levels, you can
access one level lower or higher in the menu structure.
The setting level is accessed from the lowest selection
level.
3.3.2 Basic display
The basic display is the permanently visible display on
the screen. The basic display shows the current settings
and values of the heating system. If you make a setting
on the controller, the display on the screen switches
from the basic display to the display for new settings.
The basic display appears when you:
– press the left function key and thus exit selection
level 1.
– do not operate the controller for more than 5 min-
utes.
iIf your heating system has two independent
heating circuits, the heating engineer will
determine during installation whether or not
the basic display shows the values of circuit1
or circuit2.
Auto 01.01.10
°C
19,5
10:02
Desired temperature 20,0°C
Menu Mode
1
2
3
4
8
7
5
6
Fig. 3.3 Basic display
1 Date
2 Current room temperature
3 Time
4 Current function of the right function key
(Soft key function)
5 Current function of the left function key
(Soft key function)
6 Desired temperature (target room temperature)
7 Symbol for heating mode in "AUTO" mode
8 Mode set for the heating mode
Heating mode symbols
Sun = Heating mode within a set period (Comfort
mode)
Moon = Heating mode outside a set period (Night
mode)

Description of the unit
8Operating instructions VRC 470 0020116689_00
3
Soft key function
Both function keys have a soft key function.
The current functions of the function keys are displayed
in the lower display line.
Depending on the selection level selected in the menu
structure, the list entry or the value:
– the current function (5) of the left function key may
differ.
– the current function (4) of the right function key may
differ.
If, for example, you press the left function key, the cur-
rent function of the left function key switches from
"Menu" (¬Fig. 3.3)to "Back" (¬Fig. 3.4).
Menu
If you press the left function key "Menu", you switch
from the basic display to selection level 1 of the menu
structure.
Mode
If you press the right function key "Mode", you access
the settings under "Mode" directly from the basic dis-
play. In this way, you can quickly change the mode of
"HEATING 1" or "HEATING 2" (¬Section4.3.1). Whether
or not you can change a heating circuit depends on the
settings made by the heating engineer during installa-
tion.
Desired temperature
Depending on the mode, the desired temperature (6)
may be greyed out on the display. This is the case, for
example, in "Summer mode". As heating is not opera-
tional in "Summer mode", and therefore the heating cir-
cuit is off, there is no desired temperature.
3.3.3 Selection levels
Through the selection levels, you navigate to the setting
level in which you wish to read or change settings.
The selection levels have four display fields.
Menu
Information
Desired temperatures
Time programmes
Back Select
1
4
3
2
Fig. 3.4 Display fields in the selection levels
1 Scroll bar (only appears if there are more list entries than
can be shown at once on the display)
2 Current functions of the right and left function keys (soft
key functions)
3 List entries of the selection levels
4 Current function or selection level
3.3.4 Setting level
In the setting level, you can select the values you wish to
read or change.
The setting level has five display fields.
HEATING 1
Day
Night set-back
Back Change
20,0°C
7, 5 ° C
1
3
2
5
4
Fig. 3.5 Display fields in the setting level
1 Current selection level
2 Values
3 Highlighting (white font on black background) shows the
current selection.
4 Current functions of the right and left function keys (soft
key functions)
5 Setting level

Operation
Operating instructions VRC 470 0020116689_00 9
4
4 Operation
4.1 Operating concept
The controller is operated with two function keys and a
control knob (¬Section3.1).
Use the function keys to:
– navigate through the selection levels and the setting
level in the menu structure (¬Tab. 4.2),
– highlight a setting,
– confirm a value,
– activate a mode,
– cancel changing a value.
Use the control knob to:
– navigate through the list entries of a selection level
by turning the control knob to the left or right
– highlight a selection level or a setting level,
– change a selected value.
The display shows a highlighted selection level, a setting
level or a highlighted value with white font on a black
background.
iIf you do not operate the controller during a
period of more than 5 minutes, the basic dis-
play appears in the display again.
4.1.1 Operation in the basic display
From the basic display, you can change the "Desired day
temperature" directly for the current day by turning the
control knob.
Desired day temperature
Only today: 18°C
For Permanent Change
Press Ok
Ok
Fig. 4.1 Request to change the desired temperature
In the display, a request appears asking if you wish to
change the "Desired day temperature" for the current
day or on a permanent basis.
To change the "Desired day temperature" for the cur-
rent day only:
>Turn the control knob to set the desired temperature.
The display switches back to the basic display after
12seconds. The set desired temperature applies only
until the end of the active period of the current day.
To change the "Desired day temperature" perma-
nently:
>Turn the control knob to set the desired day tempera-
ture.
>Press the right function key "OK".
The display switches to the basic display. The new
desired day temperature is applied permanently.

Operation
10 Operating instructions VRC 470 0020116689_00
4
4.1.2 Operation via function keys
Example: Changing the time
You wish to change the time.
The display shows the basic display.
If the display does not show the basic display, press the
left function key "Back" until the basic display appears
again.
Day 01.01.10
°C
19,5
08:15
Desired temperature 20,0°C
Menu Mode
Fig. 4.2 Basic display
>Press the left function key "Menu".
Menu
Information
Desired temperatures
Time programmes
Back Select
Fig. 4.3 Selection level 1: "Information"
The controller is now in selection level 1.
The left function key now has the function "Back" (to
the next selection level up), the right function key has
the function "Select" (the next selection level down).
>Turn the control knob until the "Basic settings" list
entry is highlighted.
Menu
Day away from home scheduling
Day at home scheduling
Basic settings
Back Select
Fig. 4.4 Selection level 1: "Basic settings"
>Press the right function key "Select".
Basic settings
Language
Date / Time
Display
Back Select
Fig. 4.5 Selection level 2: "Language"
The controller is now in selection level 2.
>Turn the control knob until the "Date / Time" list
entry is highlighted.
Basic settings
Language
Date / Time
Display
Back Select
Fig. 4.6 Selection level 2: "Date / Time"
>Press the right function key "Select".
Date / Time
Time
Date
Day-light savings
:1508
01.01.10
Off
Back Change
Fig. 4.7 Setting level: Value for hours highlighted
The controller is now in setting level "Time". The value
for hours is highlighted.
The left function key now has the function "Back" (to
the next selection level up), the right function key has
the function "Change" (of the value).
>Press the right function key "Change".
Date / Time
Time
Date
Day-light savings
:1508
01.01.10
Off
Back Change
Fig. 4.8 Setting level: Approving the value to be changed

Operation
Operating instructions VRC 470 0020116689_00 11
4
You can change the value by turning the control knob.
The left function key now has the function "Cancel" (the
change), the right function key has the function "OK" (to
confirm the change).
>Turn the control knob to change the value.
>Press the right function key, "OK", to save the change.
The controller has saved the changed time.
Date / Time
Time
Date
Day-light savings
:1509
01.01.10
Off
Back Change
Fig. 4.9 Setting level: Change saved
>Press the left function key "Back" several times to
switch back to the next selection level up and to
access the basic display from selection level 1.
4.2 Overview of menu structure
iList entry "HEATING 2" is only shown by the
controller if there is a second heating circuit.
Two consecutive display texts mean that there
can be one display text for "HEATING 1" and
one display text for "HEATING 2".
iGreyed out display texts are only shown by
the controller if a corresponding expansion
module is connected. Ask the heating engi-
neer which expansion modules are installed.

Operation
12 Operating instructions VRC 470 0020116689_00
4
2010
2011
Back
Contact details
Installer
Phone
Back
Serial number
123456
7890123456
7890123456
Back
312 645 9
7812
10 11
0001
kWh
00000
Back Select
Back
Back
Back
Back Change
Menu
Information
Desired temperatures
Time programmes
Back Select
Auto 01.01.10
°C
19,5
1:02
Desired temperature 20,0°C
Menu Mode
Menu
Information
Desired temperatures
Time programmes
Back Select
Desired temperatures
HEATING 1
HEATING 2
Domestic hot water
Back Select
HEATING 1
Day
Night set-back
Back Change
Information
System status
Solar yield
Contact details
Back Select
Information
System status
Solar yield
Contact details
Back Select
System
Status
Water pressure
Domestic hot water
Fault
2,3bar
20,0°C
43°C
15,0°C
Charged
Back
Information
Systemstatus
Solar yield
Contact details
Back Select
Information
Solar yield
Contact details
Serialnummer
Back Select
Desired temperatures
HEATING 1
HEATING 2
Domestic hot water
Back Select
Domestic hot water
Domestic hot water
Cancel Ok
System
Collector temp
Solar yield
Reset solar yield
76°C
4500kWh
No
Back
HEATING 1
HEATING 1----------------------------------
Day temperature
Night temperature
20,0°C
7, 5 ° C
Back
HEATING 1
Room temperature 17°C
Auto day temp until
away from
22:10
01.02.10
Back
HEATING 1
away to 03.04.10
At home from
At home to
24.12.1024.12.10
26.12.10
Back
Back Select
Back Select
Menu
Information
Desired temperatures
Time programmes
Back Select
Monday
Period 1:
Period 2:
Period 3:
06 : 00 - 22 : 00
_ _ : _ _ - _ _ : _ _
_ _ : _ _ - _ _ : _ _
Back Select
Monday
Period 1:
Period 2:
Period 3:
05 : 30 - 22 : 00
_ _ : _ _ - _ _ : _ _
_ _ : _ _ - _ _ : _ _
Back Select
Time programmes
HEATING 1
HEATING 2
Domestic hot water
Back Select
Time programmes
HEATING 1
HEATING 2
Domestic hot water
Back Select
Domestic hot water
Preparation
Circulation
Back Select
Back Select
Monday
Period 1:
Period 2:
Period 3:
06 : 00 - 22 : 00
_ _ : _ _ - _ _ : _ _
_ _ : _ _ - _ _ : _ _
Back Select
Domestic hot water
Preparation
Circulation
Back Select
Fig. 4.10 Overview of menu structure part 1

Operation
Operating instructions VRC 470 0020116689_00 13
4
Basic settings
Installer level
-------------------------------------------------
Back Select
000
Back Ok
Back Select
Back Activate
Display
Display contrast
Offset room temp
Offset outside temp.
11
0,0K
0,0K
Back Change
Mode
HEATING 1
HEATING 2
Back Select
Mode
Automatic mode active
Cylinder boost
Party function
Back Select
Mode
1 Day away from home
1 day at home
Ventilation boost
Back Activate
Change heating circuit naming
Heating 1
Heating 2 HEATING2
Back Change
Factory reset
Everything
Back Select
Language
English
Back OK
Date / Time
Time
Date
Day-light savings
01: 0202
10. 03. 04
Off
Back Change
Back
Back
Menu
Days away from home scheduling
Days at home scheduling
Basic settings
Back Select
Days away from home scheduling
HEATING 1
HEATING 2
Back Select
Days away from home scheduling
Start
End
Temperature
Back Change
01. 02. 10
03. 04. 10
15,0°C
02. 10
Menu
Days away from home scheduling
Days at home scheduling
Basic settings
Back Select
Menu
Days away from home scheduling
Days at home scheduling
Basic settings
Back Select
Basic settings
Language
Date / Time
Display
Back Select
Basic settings
Language
Date / Time
Display
Back Select
Basic settings
Language
Date / Time
Display
Back Select
Basic settings
Mode
Change heating circuit naming
Factory reset
Back Select
Basic settings
Mode
Change heating circuit naming
Factory reset
Back Select
Basic settings
Mode
Change heating circuit naming
Factory reset
Back Select
Days at home schedulingDays at home scheduling
HEATING 1
HEATING 2
Back Select
Days at home schedulingDays at home scheduling
Start
End
Back Change
24. 12. 10
26. 12. 10
12. 10
Change
Change
Time Programmes
No
No
HEATING1HEATING1
Menu Enter code
Fig. 4.11 Overview of the menu structure Part 2

Operation
14 Operating instructions VRC 470 0020116689_00
4
4.3 Overview of setting and read-out options
The tables below provide overviews of the controller's
modes and the setting and read-out options.
– If the "Increment/Select" column is blank, these are
values that you can read but not adjust.
– If a value cannot be set at the factory, for example
because it is currently being measured, the "Factory
setting" column will be blank.
– If nothing is entered in a "Selection level 3" column,
you will access the setting level directly from selec-
tion level 2.
>In the last column, "Own setting", enter that value
that you or the heating engineer have set.
4.3.1 Overview of modes
The right function key can be used to navigate from the
basic display directly to the settings under "Mode".
The currently activated mode is stated in the top left of
the basic display.
If you have activated an advanced function, the display
indicates the advanced function.
Mode Setting Factory setting Own setting
Current mode
Auto
or
Summer
or
Day
or
Set-back
or
System off
Automatic mode
Summer mode
Comfort mode
Set-back mode
System off
Auto (automatic mode
active)
Special operating mode
Cylinder boost Active, Not active Not active
Party function Active, Not active Not active
1 day away from home Active, Not active Not active
1 day at home Active, Not active Not active
Ventilation boost Active, Not active Not active
Tab. 4.1 Overview of modes

Operation
Operating instructions VRC 470 0020116689_00 15
4
4.3.2 Overview of operating levels
Selection
level 1 Selection
level 2 Selection
level 3 Setting level Values Unit Increment/
Select Factory
setting Own
setting
min. max.
Information System
status System
Status Current value
(¬Section6)–
Water pressure Current value bar
Domestic hot
water Current value – Charged,
Charging
Collector temp1) Current value °C
Solar yield 1) Current value kWh
Reset solar
yield 1) Current value – Yes, No No
HEATING 1
Day tempera-
ture Current value °C 0.5 20
530
Night tempera-
ture Current value °C 0.5 15
530
Room tempera-
ture3) Current value °C
Auto day temp
until Current value h:min
away from Current value dd.mm.
yy
away to Current value dd.mm.
yy
At home from Current value dd.mm.
yy
At home to Current value dd.mm.
yy
HEATING 2 2)
Day
temperature Current value °C 0.5
530
Night tempera-
ture Current value °C 0.5
530
Auto day temp
until Current value h:min
away from Current value dd.mm.
yy
away to Current value dd.mm.
yy
At home from Current value dd.mm.
yy
At home to Current value dd.mm.
yy
Solar yield1) Bar chart Previous year to
current year com-
parison
kWh/
month
Tab. 4.2 Overview of operating levels

Operation
16 Operating instructions VRC 470 0020116689_00
4
Selection
level 1 Selection
level 2 Selection
level 3 Setting level Values Unit Increment/
Select Factory
setting Own
setting
min. max.
Information Contact
details Installer
Phone Current values
Serial
number Number of the
unit Permanent value
Desired
tempera-
tures
HEATING 1 Day/
Night 5 30 °C 0.5°C 20
15
HEATING 22) Day/
Night set-back 5 30 °C 0.5°C 20
15
Domestic
hot water Domestic hot
water 35 70 °C 1 °C 60
Time
programmes HEATING 1 Individual days
and blocks – – – Mon, Tue,
Wed, Thu, Fri,
Sat, Sun
and
Mon - Fri,
Sat - Sun,
Mon - Sun
Mon to Fri:
06:00-22:00
Sat:
07:30-23:30
Sun:
07:30 - 22:00
and
Mon - Fri
06:00-22:00
Sat-Sun
7:30-23:30
Mon-Sun
06:00-22:00
Period 1:
Start - End
Period 2:
Start - End
Period 3:
Start - End
00:00 24:00 h:min 10 min
HEATING 22) Individual days
and blocks –––Mon, Tue,
Wed, Thu, Fri,
Sat, Sun
and
Mon - Fri,
Sat - Sun,
Mon - Sun
Mon to Fri:
06:00-22:00
Sat:
07:30-23:30
Sun:
07:30 - 22:00
and
Mon - Fri
06:00-22:00
Sat-Sun
7:30-23:30
Mon-Sun
06:00-22:00
Period 1:
Start - End
Period 2:
Start - End
Period 3:
Start - End
00:00 24:00 h:min 10 min
Time
programmes Domestic
hot water Preparation Individual days
and blocks – – – Mon, Tue,
Wed, Thu, Fri,
Sat, Sun
and
Mon - Fri,
Sat - Sun,
Mon - Sun
Mon to Fri:
05:30-22:00
Sat:
07:00-23:30
Sun:
07:00-22:00
and
Mon - Fri
05:30-22:00
Sat-Sun
07:00-23:30
Mon-Sun
05:30-22:00
Period 1:
Start - End
Period 2:
Start - End
Period 3:
Start - End
00:00 24:00 h:min 10 min
Circulation Individual days
and blocks – – – Mon, Tue,
Wed, Thu, Fri,
Sat, Sun
and
Mon - Fri,
Sat - Sun,
Mon - Sun
Mon to Fri:
06:00-22:00
Sat:
07:30-23:30
Sun:
07:30-22:00
and
Mon - Fri
06:00-22:00
Sat-Sun
7:30-23:30
Mon-Sun
06:00-22:00
Period 1:
Start - End
Period 2:
Start - End
Period 3:
Start - End
00:00 24:00 h:min 10 min
Tab. 4.2 Overview of operating levels

Operation
Operating instructions VRC 470 0020116689_00 17
4
Selection
level 1 Selection
level 2 Selection
level 3 Setting level Values Unit Increment/
Select Factory
setting Own
setting
min. max.
Days away
from home
scheduling
HEATING 1 Start 01.01.00 31.12.99 dd.mm.
yy Day.Month.
Year 01.01.10
End 01.01.00 31.12.99 dd.mm.
yy Day.Month.
Year 01.01.10
Temperature Frost
protec-
tion
or 5
30 °C 0.5°C Frost protec-
tion
HEATING 22) Start 01.01.00 31.12.99 dd.mm.
yy Day.Month.
Year 01.01.10
End 01.01.00 31.12.99 dd.mm.
yy Day.Month.
Year 01.01.10
Temperature Frost
protec-
tion
or 5
30 °C 0.5°C Frost protec-
tion
Days at
home
scheduling
HEATING 1 Start 01.01.00 31.12.99 dd.mm.
yy Day.Month.
Year 01.01.10
End 01.01.00 31.12.99 dd.mm.
yy Day.Month.
Year 01.01.10
HEATING 22) Start 01.01.00 31.12.99 dd.mm.
yy Day.Month.
Year 01.01.10
End 01.01.00 31.12.99 dd.mm.
yy Day.Month.
Year 01.01.10
Basic
settings Language – – – – Languages
for selection German
Date / Time Time 00:00 24:00 h:min 10 min 00:00
Date 01.01.00 31.12.99 dd.mm.
yy Day.Month.
Year 01.01.00
Day-light
savings – Off, Auto off
Display Display contrast 01 15 – 1 8
Offset room
temp. -3.0 3.0 K 0.5 0.0
Offset
outside temp. -3.0 3.0 K 0.5 0.0
Tab. 4.2 Overview of operating levels

Operation
18 Operating instructions VRC 470 0020116689_00
4
Selection
level 1 Selection
level 2 Selection
level 3 Setting level Values Unit Increment/
Select Factory
setting Own
setting
min. max.
Basic
settings Mode2) HEATING 1 Automatic
mode or
Summer mode
or
Comfort mode
or
Set-back mode
or
System OFF
– – – Active, Not
active Automatic
mode active
Cylinder boost – – – Active, Not
active Not active
Party function – – – Active, Not
active Not active
1 Day away
from home – – – Active, Not
active Not active
1 day at home – – – Active, Not
active Not active
Ventilation
boost – – – Active, Not
active Not active
HEATING 2 Automatic
mode or
Summer mode
or
Comfort mode
or
Set-back mode
or
System OFF
– – – Active, Not
active Automatic
mode active
Cylinder boost – – – Active, Not
active Not active
Party function – – – Active, Not
active Not active
1 day away from
home – – – Active, Not
active Not active
1 day at home – – – Active, Not
active Not active
Ventilation
boost – – – Active, Not
active Not active
Change
heating cir-
cuit naming
HEATING 1 1 10 Letter/
number A to Z,
0 to 9, space HEATING 1
HEATING2) 110Letter/
number A to Z,
0 to 9, space HEATING 2
Factory
reset Time pro-
grammes – – – Yes, No No
Everything – – – Yes, No No
Installer level Enter code 000 999 – 1 000
Tab. 4.2 Overview of operating levels
1) Is only shown if solar module VR 68/2 is connected.
2) Is only shown if mixer module VR 61/2 is connected.
3) Is only shown if remote control unit VR 81/2 is connected.
4) This value depends on the expansion module connected. If no
expansion module is connected, the upper limit may be limited
by the value for the boiler.

Functional description
Operating instructions VRC 470 0020116689_00 19
5
5 Functional description
The controller offers various functions, modes and
advanced functions for controlling the heating circuit
and hot water production.
– With the functions, you can read information, and set
desired temperatures, periods and basic settings.
– With the modes, you select whether or not the heat-
ing circuit, hot water production and circulation
should be operated in automatic or manual mode.
– With the advanced functions, you can change the
active mode for the heating circuit and hot water pro-
duction in special situations quickly and with time
restrictions.
5.1 Functions
You can set the functions via the left function key
"Menu".
The path details given at the start of each function
description indicate how you reach this function in the
menu structure.
You can read and set heating circuit 1 and, if relevant,
heating circuit 2 independently of one another.
5.1.1 Reading information
Menu ¬Information
Select the "Information" list entry in selection level 1 to
reach selection level 2 with the list entries "System sta-
tus", "Solar yield", "Contact details" and "Serial
number".
Reading the system status
Menu ¬Information ¬System status
Select "System status" to read a list of the current sys-
tem values: Status, Water pressure, Domestic hot water
and the current values for "HEATING 1" and, if relevant,
"HEATING 2".
There is also information under "System status":
– regarding the active period ("Auto day temp until"),
– regarding exceptions in the time programmes, which
you may have set using the "Days away from home"
and "Days at home" functions.
Only the desired temperatures for "Day temperature"
and "Night temperature" can be also set directly under
"System status". All other values are set in other places
in the menu structure, as described in the following sec-
tions.
iThe "Room temperature" list entry is only
shown under "System status" if a remote con-
trol unit VR 81/2 is connected.
i"HEATING 2" is only shown under "System
status" if a mixer module VR 61/2 is con-
nected. "HEATING 2" has the same read
options and settings as "HEATING 1".
Reading the list of status messages
Menu ¬Information ¬System status ¬Status
If no service is required and no errors have occurred,
the value "OK" is shown next to "Status". If a service is
required or an error has occurred, the value "Fault" is
shown next to "Status". In this case the right function
key has the function "Display". If you press the right
function key "Display", the list of status messages is
shown in the display.
iThe "Collector temp", "Solar yield" and
"Reset solar yield" list entries are only shown
under "System status" if a solar module
VR68/2 is connected.
Reset solar yield (only with a connected VR68/2)
Menu ¬Information ¬System status ¬Reset solar
yield.
If you select the setting "Yes" under function "Reset
solar yield" and press the right function key "Ok", you
reset the previously totalled solar yield to 0 kWh. After
30 seconds the setting "Yes" automatically returns to
"No".
iThe "Solar yield" list entry is only shown
under "Information" if a solar module VR68/2
is connected.
Display solar statistics (only with a connected
VR68/2)
Menu ¬Information ¬Solar yield
The diagram under "Solar yield" shows a comparison of
the monthly solar yields of the previous year and of the
current year as well as the peak values of the last
month.
Display installer contact details
Menu ¬Information ¬Contact details
If the heating engineer entered his company name and
telephone number during the installation, you can read
this data under "Contact details".
Reading the serial number and article number
Menu ¬Information ¬Serial number
"Serial number" shows the serial number of the unit,
which the heating engineer may require you to tell him.
The article number is found in the second line of the
serial number (¬Fig. 4.10).

Functional description
20 Operating instructions VRC 470 0020116689_00
5
5.1.2 Setting desired temperatures
Menu ¬Desired temperatures
This function is used to set the desired temperatures for
the heating circuits "HEATING 1", "HEATING 2", if rele-
vant, and hot water production.
i"HEATING 2" is only shown under "Desired
temperatures" if a mixer module VR 61/2 is
connected. "HEATING 2" has the same read
options and settings as "HEATING 1".
For the heating circuits
Menu ¬Desired temperatures ¬HEATING 1 and, if
relevant, HEATING 2
bCaution!
Risk of damage due to frost!
If rooms are not adequately heated, this can
cause damage to the building and to the
heating system.
>If you are absent during a frosty spell,
ensure that the heating system remains in
operation and provides adequate frost
protection.
You can set two different desired temperatures for the
heating circuits.
–The desired day temperature is the temperature you
wish to have in the rooms during the day or when you
are at home (Comfort mode).
–The desired night temperature is the temperature
that you wish to have in the rooms during the night
or when you are away from home (Night mode).
For hot water production
Menu ¬Desired temperatures ¬Domestic hot water
You can only use the controller's functions and setting
options for hot water production if a domestic hot water
cylinder is connected to the heating system.
aDanger!
Risk of being scalded by hot water!
There is a danger of scalding at the hot water
draw-off points if the temperatures are
greater than 60°C. Young children and eld-
erly persons can even be at danger at lower
temperatures.
>Select the temperature so that nobody is
at risk.
You can set the desired "Hot water" temperature for the
domestic hot water.
Other manuals for VRC 470
4
This manual suits for next models
1
Table of contents
Other Vaillant Temperature Controllers manuals

Vaillant
Vaillant VRT 230 Operating and User manual

Vaillant
Vaillant VRC 470 User manual

Vaillant
Vaillant VRC 430f Specification sheet

Vaillant
Vaillant VR 92/3 User manual

Vaillant
Vaillant VRT 350f User manual

Vaillant
Vaillant VRT 230 Operating and User manual

Vaillant
Vaillant VRT 50 User manual

Vaillant
Vaillant VRT 340f User manual

Vaillant
Vaillant VRC 400 Operating and Specification sheet

Vaillant
Vaillant VRC 470 Quick start guide