manuals.online logo
Brands
  1. Home
  2. •
  3. Brands
  4. •
  5. Vaisala
  6. •
  7. Measuring Instrument
  8. •
  9. Vaisala WA252 User manual

Vaisala WA252 User manual

© Vaisala 2021.All rights reserved. Any logos and/or product names are trademarks of
Vaisala or its individual partners. Any reproduction, transfer, distribution or storage of
information contained in this document is strictly prohibited. All specifications —
technical included are subject to change without notice.
QUICK GUIDE
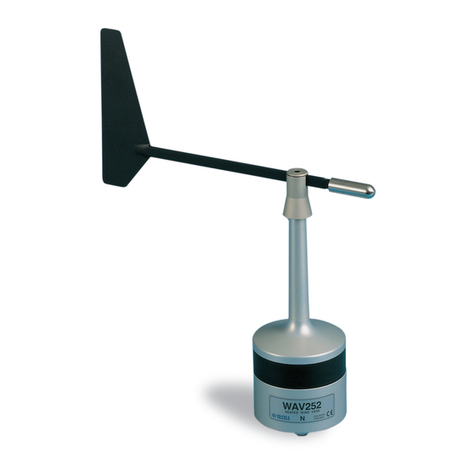
WA252 Heated Anemometer
INSTALLATION
Initial check
Before installation, check that WAA252 is not damaged during
transportation. Make sure that the shaft rotates smoothly without
any detectable noise. Vaisala recommends mounting the sensor
body when the cup assembly is removed. Be careful not to cause
damage to the shaft of the sensor body or to the connector pins.
Mounting instructions
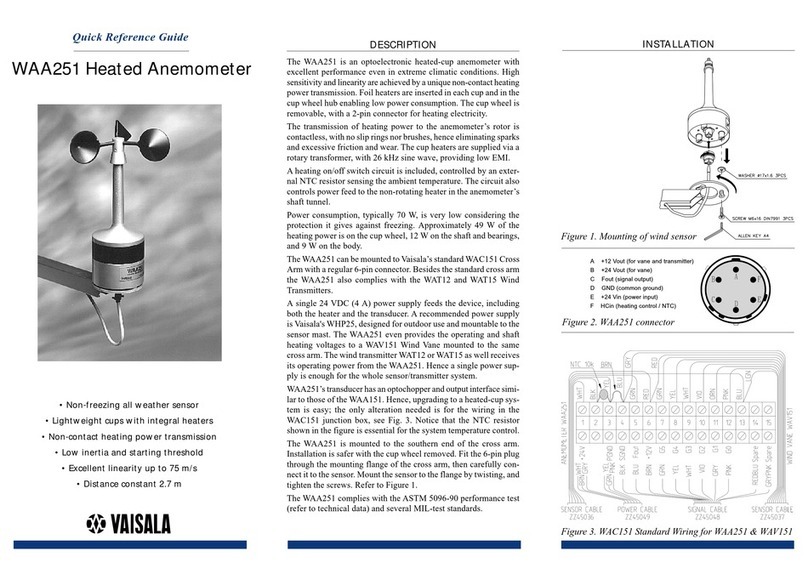
Vaisala recommends installing the heated anemometer WAA252
onto WAC151 sensor cross arm. On bottom of WAA252 there is
a special button-shaped temperature sensor (diameter 22 mm),
elastically attached to the bottom plate. This is for sensing the
ambient temperature. Set it in good thermal contact with the
mounting support.
NOTE The three mounting screws must be properly
tightened to force the temperature sensor button
firmly enough against the support.
Figure 1. Mounting of the wind sensor and the hub
If you use the WAC151 cross arm, mount WAA252 at the
southern end, and WAV252 Heated Wind Vane at the northern
end.
1.
Pre-assemble the 3 mounting screws with plastic washers
to the anemometer's mounting legs.
2.
Fit the 6-pin cable plug through the mounting flange and
connect it to the sensor.
3.
Mount the anemometer to the flange by twisting, and
tighten the screws.
4.
Mount the cup assembly. Align the planes in the shaft and
inside the hub. The bottom edges of the hub and the
shoulder must reach approximately the same level (see
Figure 1). Tighten the set screw.
WAC151 wiring
The wiring diagram for the WA252 system to the WAC151 sensor
cross arm is shown in Figure 2. The power input wire connections
are highlighted, since they differ from those for regular wind
sensors.
Figure 2. WAC151 standard wiring for WAA252 and WAV252
When using standard power and signal cables ZZ45049 and
ZZ45048, the connections are following:
1.
For power supply, connect the YEL, GRN, and PNK
wires to the screw terminal #2 and the WHT, BRN, and
GRY wires to the terminal #3.
2.
For signal output and grounding, connect BLU to the
terminal #1 and BLK to the terminal #5.
3.
For the optional transducer power input connect RED to
the terminal #4.
4.
For the optional power output for external transmitter
move the REDBLU spare wire to the terminal #13.
Use Vaisala WHP25 Mains Power Supply as a power source. It
has a mast-mountable, all-weather enclosure. For a typical
installation, see cover figure. WHP25 is sold as a spare part.

www.vaisala.com
M210758EN-B
MAINTENANCE AND REPAIR
Check the ball bearings once a year visually and by rotating the
sensor shaft. To do this, remove first the cup assembly as
instructed below (A1.). Make sure that the shaft spins smoothly
and does not create any detectable noise.
Only a trained technician may replace the bearings.
The numbers in parenthesis refer to Figure 3.
To disassemble the sensor:
A1.
Loosen the set screw with Allen key and carefully remove
the cup assembly.
CAUTION Be careful with the connector pins, do
not bend them.
A2.
Loosen the hex nut of the green MIL-connector at the
bottom of the sensor body (use 22-mm tool).
A3.
Loosen the three cap nuts (1) at the bottom of the sensor
body with a 7-mm tool.
A4.
Remove the body cover and the O-rings (2).
A5.
Release the connector (3) of two white wires from the
power supply board (4).
A6.
Loosen the three nuts (5) at the bottom of the power
supply board (4) and remove it with a 7-mm tool.
A7.
Loosen the shaft heating foil (6) with pliers.
A8.
Loosen the set screw of the rotating transformer assembly
(7) with an Allen key.
A9.
Loosen the spacer screws (8) with a 6-mm tool.
A10.
Remove the sensor board (9) together with the rotating
transformer assembly (7).
CAUTION Handle the rotating transformer
carefully, do not drop or hit.
A11.
Remove the retaining ring (10) with narrow-pointed pliers
and the bushing (11) from the shaft tunnel.
A12.
Remove the upper bearing (12) after pulling out the
shaft.
CAUTION Handle the shaft carefully, do not drop
or hit.
A13.
Remove the retaining ring (13) at the shaft.
A14.
Remove the lower bearing (14).
For reassembling the sensor:
B1.
Install the bearings in reverse order.
NOTE Be careful when assembling the
bearings.
B2.
The rotating transformer assembly (7) is reinstalled
together with the sensor board (9). Its (7) set screw is not
fastened until in step B7, when the power supply board
has been reinstalled and the gap adjusted.
B3.
In assembling, push the transformer (7) as far up as
possible towards the shaft tunnel.
B4.
Reassemble the spacer screws (8), the power supply board
(4) and tighten the nuts (5).
NOTE Make sure the 4-pin connector (15)
installs properly.
B5.
For adjusting the gap, place a 1.2 mm feeler gauge
between ferrite coils (parts 4 and 7) (preferably use 30
mm wide feeler gauge).
B6.
Place a screwdriver tip into the slot between the top end
of rotating transformer assembly (7) and the shaft tunnel,
and pry until the air gap between ferrite coils is 1.2 mm
(0.047") (use feeler gauge for measuring).
CAUTION The ferrite coils are breakable, do not
try to adjust the gap by prising them.
B7.
When the gap is right, fasten the set screw of the rotating
transformer assembly (7).
CAUTION Make sure the rotating transformer
assembly rotates freely without
touching the lower part at any rotary
position of the shaft.
B8.
Reconnect the shaft heating foil (6) and the connector of
two white wires (3).
B9.
Reassemble the body cover (2) with new O-rings.
B10.
Tighten the three cap nuts (1) and the connector nut.
B11.
Install the cup assembly as instructed in mechanical section.
Spare parts:
Order number:
Cup assembly for WAA252
WA35066
Set of bearings and gasket
Power supply WHP25
16644WA
WHP25
Figure 3 WAA252 assembly

Other Vaisala Measuring Instrument manuals

Vaisala FC-11 User manual

Vaisala

Vaisala FC-11 User manual

Vaisala HUMICAP HMI41 User manual

Vaisala

Vaisala HUMICAP HMI41 User manual

Vaisala M212551EN-B User manual

Vaisala

Vaisala M212551EN-B User manual

Vaisala HUMICAP HM70 User manual

Vaisala

Vaisala HUMICAP HM70 User manual

Vaisala CARBOCAP GMP231 User manual

Vaisala

Vaisala CARBOCAP GMP231 User manual

Vaisala BAROCAP PTB330 User manual

Vaisala

Vaisala BAROCAP PTB330 User manual

Vaisala HUMICAP HM70 User manual

Vaisala

Vaisala HUMICAP HM70 User manual

Vaisala MGP261 Installation and operating manual

Vaisala

Vaisala MGP261 Installation and operating manual

Vaisala Radiosonde RS41-SGM User manual

Vaisala

Vaisala Radiosonde RS41-SGM User manual

Vaisala SPH10 Product manual

Vaisala

Vaisala SPH10 Product manual

Vaisala HMP3 User manual

Vaisala

Vaisala HMP3 User manual

Vaisala 26150GM User manual

Vaisala

Vaisala 26150GM User manual

Vaisala Veriteq viewLinc 4.3 User manual

Vaisala

Vaisala Veriteq viewLinc 4.3 User manual

Vaisala CARBOCAP GMP343 User manual

Vaisala

Vaisala CARBOCAP GMP343 User manual

Vaisala MGP260 Series User manual

Vaisala

Vaisala MGP260 Series User manual

Vaisala HUMICAP HM70 User manual

Vaisala

Vaisala HUMICAP HM70 User manual

Vaisala CL31 User manual

Vaisala

Vaisala CL31 User manual

Vaisala K-PATENTS PR-23 Series User manual

Vaisala

Vaisala K-PATENTS PR-23 Series User manual

Vaisala K-PATENTS PR-43 User manual

Vaisala

Vaisala K-PATENTS PR-43 User manual

Vaisala WAA251 User manual

Vaisala

Vaisala WAA251 User manual

Vaisala DMP80 Series User manual

Vaisala

Vaisala DMP80 Series User manual

Vaisala Humicap HM40 User manual

Vaisala

Vaisala Humicap HM40 User manual

Vaisala Optimus OPT100 User manual

Vaisala

Vaisala Optimus OPT100 User manual

Vaisala K-PATENTS PR-23-SD Generation 1 Instructions for use

Vaisala

Vaisala K-PATENTS PR-23-SD Generation 1 Instructions for use

Popular Measuring Instrument manuals by other brands

DeWalt DW078 Original instructions

DeWalt

DeWalt DW078 Original instructions

Loreme IPL 144V Configuration handbook

Loreme

Loreme IPL 144V Configuration handbook

FrSky FLD-02 user manual

FrSky

FrSky FLD-02 user manual

PCE Instruments PCE-CT 21BT user manual

PCE Instruments

PCE Instruments PCE-CT 21BT user manual

GOK SmartBox 4 GSM Assembly and operating manual

GOK

GOK SmartBox 4 GSM Assembly and operating manual

ICT International PSY1 manual

ICT International

ICT International PSY1 manual

Medivance Simply Advanced Arctic Sun 5000 Operator's manual

Medivance

Medivance Simply Advanced Arctic Sun 5000 Operator's manual

Alere Cholestech LDX Quick reference guide

Alere

Alere Cholestech LDX Quick reference guide

Fortinet FortiAnalyzer 1000B quick start guide

Fortinet

Fortinet FortiAnalyzer 1000B quick start guide

DLG PHOTOMETER 2 instruction manual

DLG

DLG PHOTOMETER 2 instruction manual

Black & Decker Autotape ATM100 Type 3 instruction manual

Black & Decker

Black & Decker Autotape ATM100 Type 3 instruction manual

Amphenol Wilcoxon TN14 Troubleshooting installations

Amphenol

Amphenol Wilcoxon TN14 Troubleshooting installations

Dräger Polytron 7500 Instructions for use

Dräger

Dräger Polytron 7500 Instructions for use

Dräger DrugTest 5000 Technical manual

Dräger

Dräger DrugTest 5000 Technical manual

PeakTech 5305 A Operation manual

PeakTech

PeakTech 5305 A Operation manual

Stewart Warner Diesel/Alternator Tachometer 3-3/8” & 5” installation instructions

Stewart Warner

Stewart Warner Diesel/Alternator Tachometer 3-3/8” & 5” installation instructions

Klipspringer LAQUAtwin user manual

Klipspringer

Klipspringer LAQUAtwin user manual

Rotronic Hygromer MP 400 A operating instructions

Rotronic

Rotronic Hygromer MP 400 A operating instructions

manuals.online logo
manuals.online logoBrands
  • About & Mission
  • Contact us
  • Privacy Policy
  • Terms and Conditions

Copyright 2025 Manuals.Online. All Rights Reserved.