VALBERG 14S40 B XAD929C User manual

975370 - 14S40 B XAD929C
975403 - 14S40 B DXAD929C
INSTRUCTIONS FOR USE .....................02
CONSIGNES D'UTILISATION .....................58
GEBRUIKSAANWIJZINGEN ...................114
INSTRUCCIONES DE USO ...................174
11/2022 - V3
Dishwasher
Lave-vaisselle
Vaatwasmachine
Lavavajillas
EN
WARRANTY CONDITION
This product has a 2-year warranty as of the date of purchase*, covering any fault resulting from
a manufacturing or material defect. This warranty does not cover defects or damage resulting
from incorrect installation, improper use or abnormal wear of the appliance.
*upon presentation of the sales receipt.
FR
CONDITION DE GARANTIE
Ce produit est garanti pour une période de 2 ans à partir de la date d’achat*, contre toute
défaillance résultant d’un vice de fabrication ou de matériau. Cette garantie ne couvre pas les
vices ou les dommages résultant d’une mauvaise installation, d’une utilisation incorrecte ou
de l’usure anormale du produit.
*sur présentation du ticket de caisse.
NL
GARANTIEVOORWAARDEN
Dit product wordt gegarandeerd voor een periode van 2 jaar vanaf de aankoopdatum*, voor
elke storing die het gevolg is van een fabricagefout of het materiaal. Gebreken of schade door
slechte installatie, onjuist gebruik of abnormale slijtage van het product worden niet gedekt
door deze garantie.
*op vertoon van kassabon.
ES
CONDICIONES DE GARANTÍA
El certificado de garantía de este producto tiene una duración de 2 años a partir de la fecha de
compra* que se limita a los defectos de fabricación y averías del material. Se excluyen de la
garantía deficiencias o daños originados por una mala instalación, errores en la manipulación
o por un uso inadecuado.
*previa presentación del comprobante de compra.
Made in PRC
ELECTRO DEPOT
1 route de Vendeville
59155 FACHES-THUMESNIL
FRANCE

1
2
3
4
5
6
7 8
A B
9

2 3
FR FR
Aperçu de l’appareil
A A
3
Table of contents
AOverview of the
appliance
CUseful information
BUsing the appliance Using your dishwasher
Installation instruction
Loading the baskets
Quick user guide
Using your dishwasher
Wash cycle table
Usage counter
Maintenance and cleaning
Troubleshooting tips
Availability of spare parts
Error codes
Product overview
2
Thanks!
Thank you for choosing this VALBERG product.
Chosen, tested and recommended by ELECTRO DEPOT,
VALBERG branded products are easy to use, reliable,
and of an impeccable standard.
With every use of this appliance, you can be sure of
complete satisfaction.
Welcome to ELECTRO DEPOT.
Visit our website: www.electrodepot.fr
EN EN

5EN
Using the appliance
B
4EN
Preview of the appliance
A
Product overview
IMPORTANT
To get the best performance from your dishwasher, read
all operating instructions before using it for the first time.
1Inner pipe
2Salt container
3Dispenser
4Top spray arm
5Lower spray arm
6Filter assembly
7Cutlery rack
8Upper basket
AUpper spray arm
BCup rack
9Lower basket
NOTE
Pictures are only for reference, different models may be
different.
Using your dishwasher
• Before using your dishwasher :
OutsideInside
SALT
1. Set the water softener
2. Loading the salt Into the softener
3. Loading the basket
4. Fill the detergent dispenser
NOTE
Please check the section «Water Softener», if you need to
set the water softener.
Loading the salt into the softener
• If your model does not have any water softener, you may skip this section.
• Always use salt intended for dishwasher use.
• The salt container is located beneath the lower basket and should be filled as explained in
the following:
WARNING
Only use salt specifically designed for dishwashers use!
Every other type of salt not specifically designed for
dishwasher use, especially table salt, will damage the water
softener. In case of damages caused by the use of unsuitable
salt the manufacturer does not give any warranty nor is
liable for any damages caused.

6 7
EN EN
Using the appliance Using the appliance
B B
WARNING
Only fill with salt before running a cycle.
This will prevent any grains of salt or salty water, which may
have been spilled, remaining on the bottom of the machine
for any period of time, which may cause corrosion
• Please follow the steps below for adding dishwasher salt:
SALT
1. Remove the lower basket and unscrew the reservoir cap.
2. Place the end of the funnel (if supplied) into the hole and pour in about 1.5 kg of
dishwasher salt.
3. Fill the salt container to its maximum limit with water, It is normal for a small amount of
water to come out of the salt container.
4. After filling the container, screw back the cap tightly.
5. The salt warning light will turn off after the salt container has been filled with salt.
6. Immediately after filling the salt into the salt container, a washing program should be
started (We suggest to use a short program). Otherwise the filter system, pump or other
important parts of the machine may be damaged by salty water. This is out of warranty.
NOTE
• The salt container must only be refilled when the salt
warning light in the control panel comes on. Depending
on how well the salt dissolves, the salt warning light may
still be on even though the salt container is filled. If there is
no salt warning light in the control panel (for some models),
you can estimate when to fill the salt into the softener by
the cycles that the dishwasher has run.
• If salt has spilled, run a soak or quick program to remove
it.

8 9
EN EN
Using the appliance Using the appliance
B B
Basket Loading Tips
Adjusting the upper basket
• Type 1:
The height of the upper basket can be easily adjusted to accommodate taller dishes in either
the upper or lower basket.
To adjust the height of the upper rack, follow these steps:
1. Pull out the upper basket.
lower position
2. Remove the upper basket.
3. Re-attach the upper basket to upper or lower rollers.
4. Push in the upper basket.
upper position
• Type 2:
1. To raise the upper basket, just lift the upper basket at the center of each side until the
basket locks into place in the upper position. It is not necessary to lift the adjuster handle.
2. To lower the upper basket, lift the adjust handles on each side to release the basket and
lower it to the lower position.

10 11
EN EN
Using the appliance Using the appliance
B B
Folding back the cup shelves
To make room for taller items in the upper basket, raise the cup rack upwards. You can then
lean the tall glasses against it.
Folding back the rack shelves
The spikes of the lower basket are used for holding plates and a platter. They can be lowered
to make more room for large items.
raise upwards fold backwards
Installation instruction
WARNING
Electrical shock hazard
Disconnect electrical power before installing dishwasher.
Failure to do so could result in death or electrical shock.
WARNING
The installation of the pipes and electrical equipments
should be done by professionals.
About power connection
WARNING
For personal safety:
• Do not use an extension cord or an adapter plug with this
appliance.
• Do not, under any circumstances, cut or remove the
earthing connection from the power cord.
Electrical requirements
Please look at the rating label to know the rating voltage and connect the dishwasher to
the appropriate power supply. Use the required fuse 10A/13A/16A, time delay fuse or circuit
breaker recommended and provide separate circuit serving only this appliance.
Electrical connection
Ensure the voltage and frequency of the power being corresponds to those on the rating
plate. Only insert the plug into an electrical socket which is earthed properly. If the electrical
socket to which the appliance must be connected is not appropriate for the plug, replace the
socket, rather than using a adaptors or the like as they could cause overheating and burns.
WARNING
Ensure that proper earthing exists before use

12 13
EN EN
Using the appliance Using the appliance
B B
Water supply and drain
Cold water connection
• Connect the cold water supply hose to a threaded 3/4(inch) connector and make sure that
it is fastened tightly in place.
• If the water pipes are new or have not been used for an extended period of time, let the
water run to make sure that the water is clear.
• This precaution is needed to avoid the risk of the water inlet to be blocked and damage the
appliance.
ordinary supply hose
safety supply hose
About the safety supply hose
• The safety supply hose consists of the double walls. The system guarantees its intervention
by blocking the flow of water in case of the supply hose breaking and when the air space
between the supply hose itself and the outer corrugated hose is full of water.
WARNING
A hose that attaches to a tap can burst if it is installed on
the same water line as the dishwasher. If your sink has
one, it is recommended that the hose be disconnected and
the hole plugged.
How to connect the safety supply hose
1. Pull the safety supply hoses out from storage compartment located at rear of dishwasher.
2. Tighten the screws of the safety supply hose to the faucet with thread 3/4inch.
3. Turn the water fully on before starting the dishwasher.
How to disconnect the safety supply hose
1. Turn off the water.
2. Unscrew the safety supply hose from the faucet.
Connection of drain hoses
Insert the drain hose into a drain pipe with a minimum diameter of 4 cm, or let it run into
the sink, making sure to avoid bending or crimping it. The height of drain pipe must be less
than 1000 mm. The free end of the hose must not be immersed in water to avoid the back
flow of it.
WARNING
Please securely fix the drain hose in either position
A
or
position B
A
B
Water Inlet
Mains Cable
Back of dishwasher
Drain Pipe
Drain hose
40 mm
MAX 1000 mm
Drain Pipe Counter

14 15
EN EN
Using the appliance Using the appliance
B B
How to drain excess water from hoses
If the connection to the drain pipe is positioned higher than 1000 mm, excess water may
remain in the drain hose. It will be necessary to drain excess water from the hose into a bowl
or suitable container that is held outside and lower than the sink.
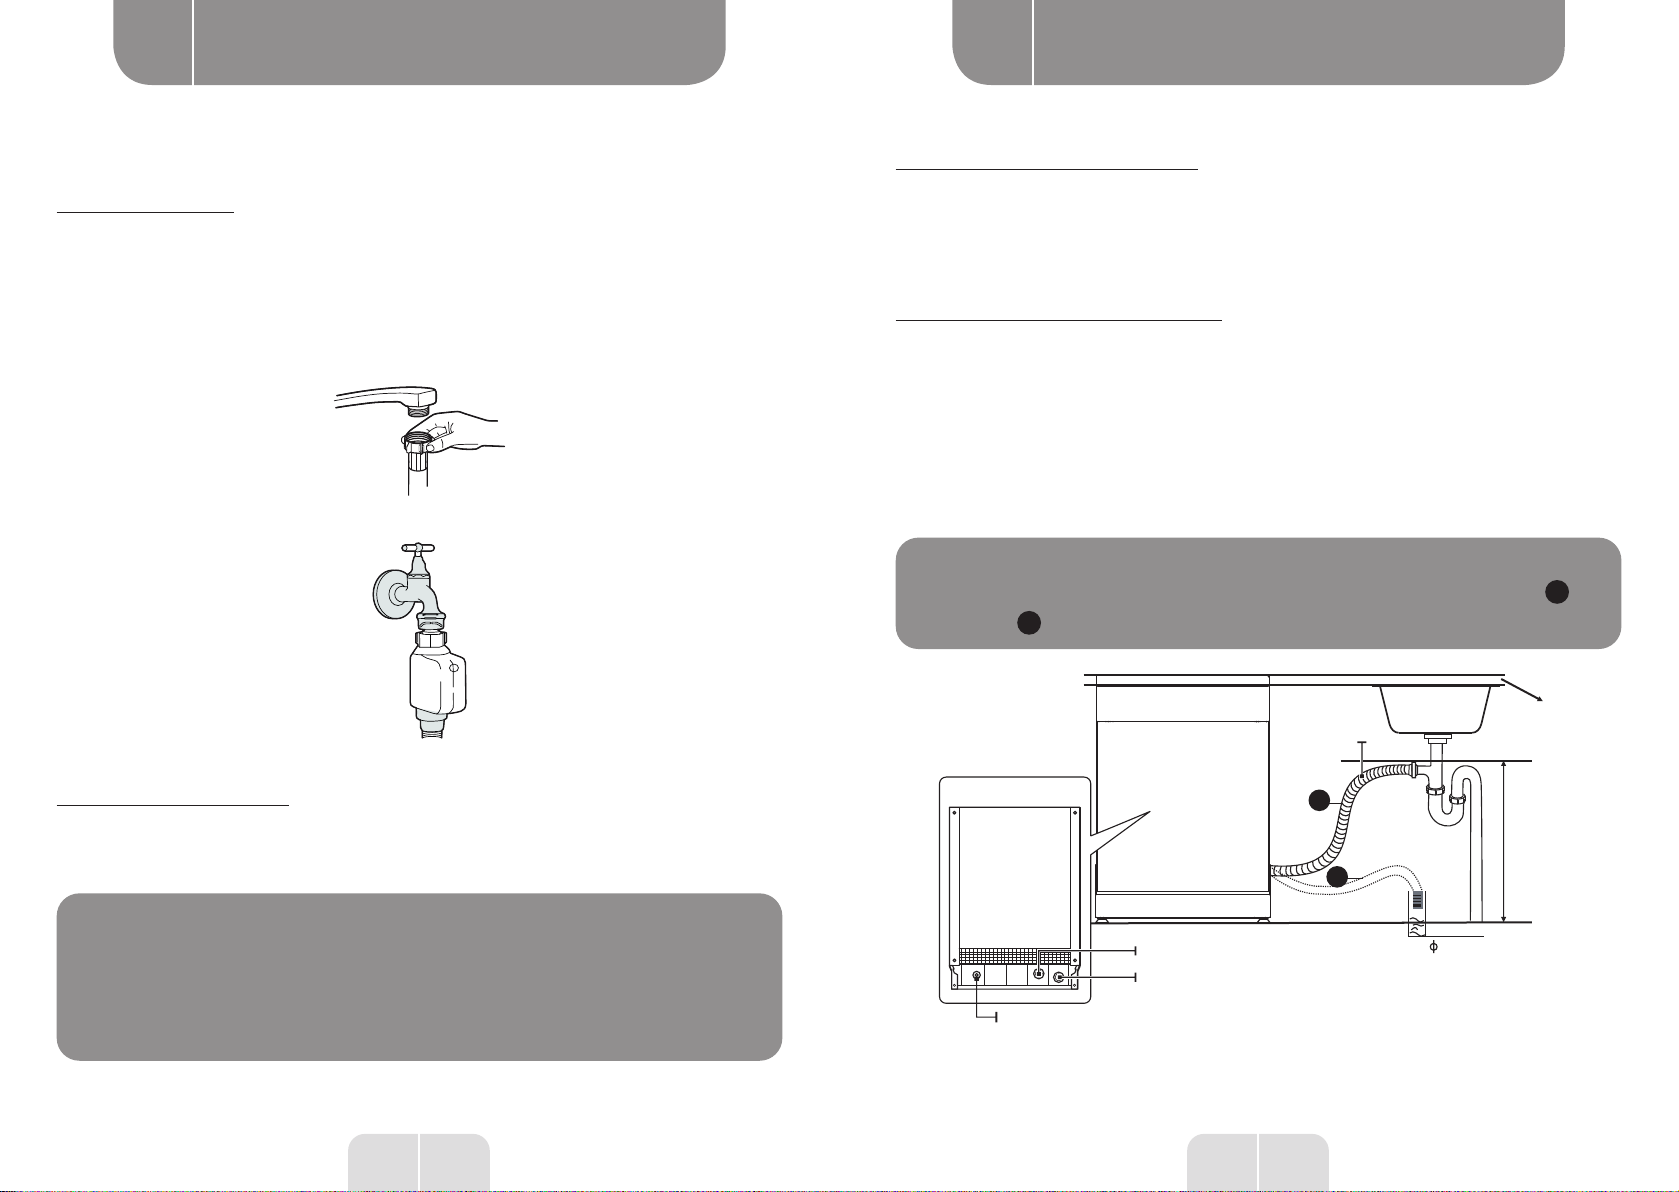
Water outlet
• Connect the water drain hose. The drain hose must be correctly fitted to avoid water leaks.
• Ensure that the water drain hose is not kinked or squashed.
Extension hose
• If you need a drain hose extension, make sure to use a similar drain hose.
• It must be no longer than 4 meters, otherwise the cleaning effect of the dishwasher could
be reduced.
Syphon connection
The waste connection must be at a height less than 1000 mm (maximum) from the bottom
of the dishwasher.
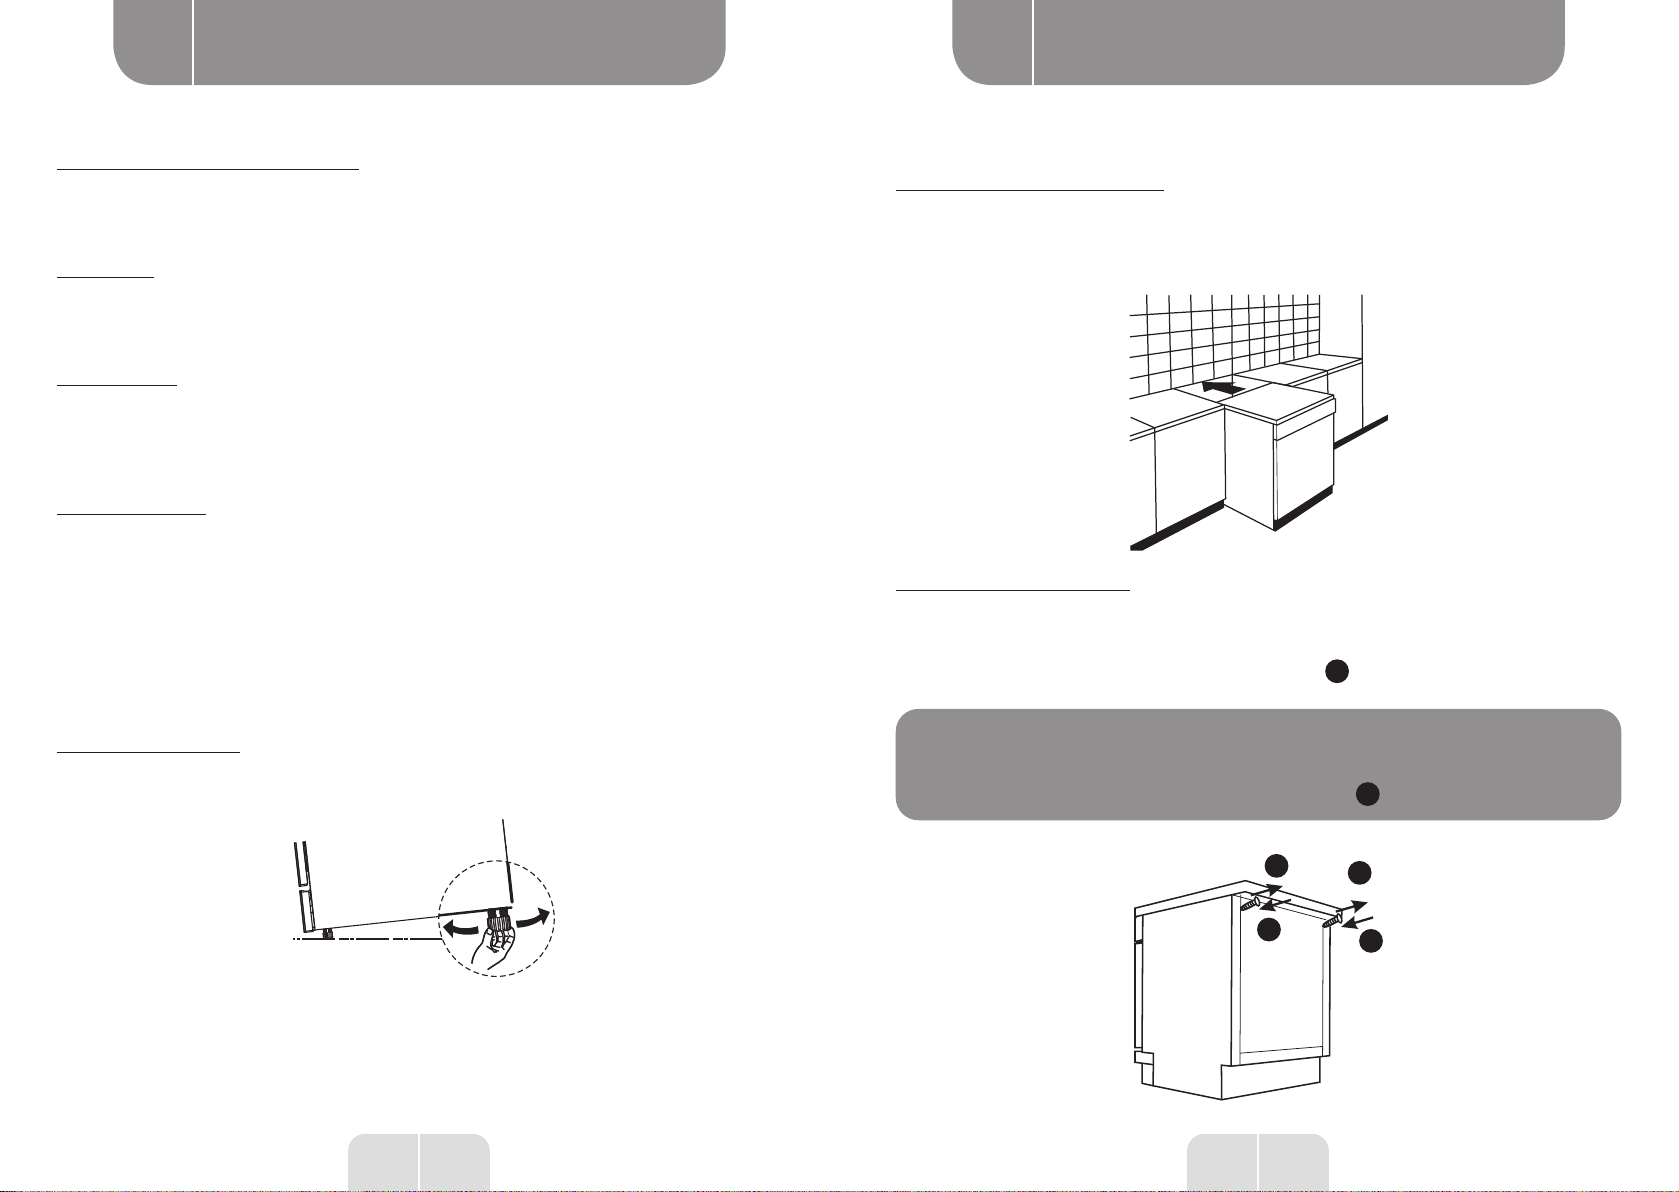
Positioning the appliance
• Position the appliance in the desired location. The back should rest against the wall behind
it, and the sides, along the adjacent cabinets or walls.
• The dishwasher is equipped with water supply and drain hoses that can be positioned
either to the right or the left sides to facilitate proper installation.
Levelling the appliance
Once the appliance is positioned for levelling, the height of the dishwasher may be altered via
adjustment of the screwing level of the feet. In any case, the appliance should not be inclined
more than 2°.
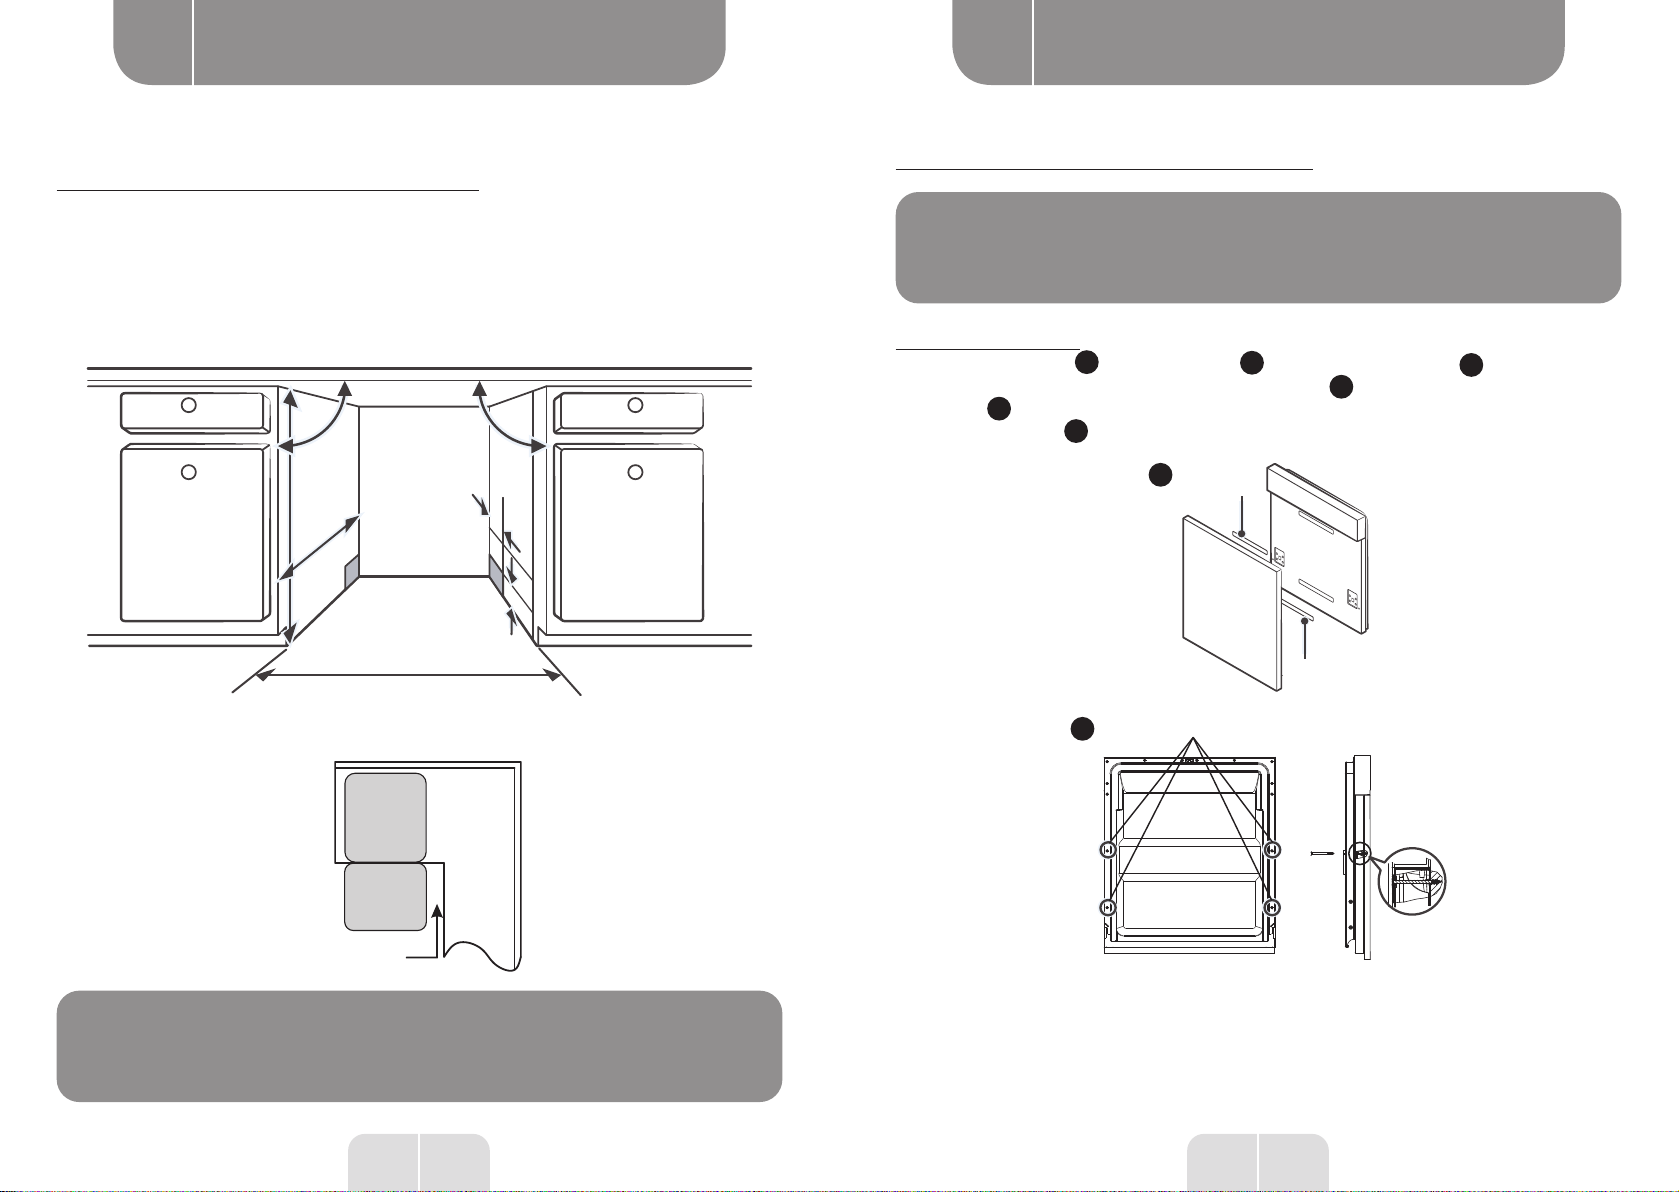
Free Standing Installation
Fitting between existing carbinets
The height of the dishwasher, 845 mm, has been designed in order to allow the machine to be
fitted between existing cabinets of the same height in modern fitted kitchens.
The laminated top of the machine does not require any particular care since it is heatproof,
scratchproof and stainproof.
Underneath existing work top
(When fitting beneath a work top)
In most modern fitted kitchens there is only one single work top under which cabinets
and electrical appliances are fitted. In this case remove the work top of the dishwasher by
unscrewing the screws under the rear edge of the top a.
WARNING
After removing the work top, the screws must be screwed
again under the rear edge of the top b
aa
bb

16 17
EN EN
Using the appliance Using the appliance
B B
Built-In Installation (for the integrated model)
Step 1. Selecting the best location for the dishwasher
The installation position of dishwasher should be near the existing inlet and drain hose and
power socket.
Illustrations of cabinet dimensions and installation position of the dishwasher.
1. Less than 5 mm between the top of dishwasher and cabinet and the outer door aligned to
cabinet.
90 ° 90 °
820mm
580mm
Electrical, drain and
water supply line
connection
80
100
Space between cabinet
bottom and floor
600 mm(for 60cm model)
450 mm(for 45cm model)
2. If dishwasher is installed at the corner of the cabinet, there should be some space when
the door is opened.
Dishwasher
Door of
dishwasher
Cabinet
Minimum space
of 50mm
NOTE
Depending on where your electrical outlet is, you may need
to cut a hole in the opposite cabinet side.
Step 2. Aesthetic panel’s dimensions and installation
NOTE
Follow the specific installation instruction for attaching the
aesthetical door panel.
Semi-integrated model
Seperate velcro stripe Aand velcro stripe Band attach velcro stripe Aon the inner side
of the aesthetic panel. Attach the felted velcro stripe Bon the outer door of dishwasher
(see figure A). After positioning of the panel, fix the panel onto the outer door by screws
and bolts (See figure B).
AVelcro stripe
Velcro stripe
1.Take away the four short screws
2.Pin up the four long screws
B

18 19
EN EN
Using the appliance Using the appliance
B B
Fully-integrated model
Install the hook on the aesthetic panel and put the hook into the slot of the outer door of
dishwasher (see figure A). After positioning of the panel, fix the panel onto the outer door
by screws and bolts (See figure B).
A
1.Take away the four short screws
2.Pin up the four long screws
B
Step 3. Tension adjustment of the door spring
1. The door springs are set at the factory to the proper tension for the outer door. If aesthetic
panel are installed, you will have to adjust the door spring tension. Rotate the adjusting
screw to drive the adjustor to strain or relax the steel cable.
2. Door spring tension is correct when the door remains horizontal in the fully opened
position, yet rises to a close with the slight lift of a finger.
Step 4. Dishwasher installation steps
NOTE
Please refer to the specific installation steps in the
installation drawings.
1. Affix the condensation strip under the work surface of cabinet. Please ensure the
condensation strip is flush with edge of work surface. (Step 2)
2. Connect the inlet hose to the cold water supply.
3. Connect the drain hose.
4. Connect the power cord.
5. Place the dishwasher into the cabinet.
6. Level the dishwasher. The rear foot can be adjusted from the front of the dishwasher by
turning the Philips screw in the middle of the base of dishwasher use a Philips screw driver.
To adjust the front feet, use a flat screw driver and turn the front feet until the dishwasher is
level. (Step 5 to Step 6)

20 21
EN EN
Using the appliance Using the appliance
B B
7. Install the furniture door to the outer door of the dishwasher. (Step 7 to Step 10)
8. Adjust the tension of the door springs by using a Philips screw driver turning in a clockwise
motion to tighten the left and right door springs. Failure to do this could cause damage to
your dishwasher. (Step 11)
9. The dishwasher must be secured in place. There are two ways to do this:
ANormal work surface: Put the installation hook into the slot of the side plane and secure
it to the work surface with the screws.
BMarble or granite work top: Fix the side with screws.
A
B
Step 5. Levelling the dishwasher
Dishwasher must be level for proper dish rack operation and wash performance.
1. Place a spirit level on door and rack track inside the tub as shown to check that the
dishwasher is level.
2. Level the dishwasher by adjusting the three levelling feet individually.
3. When level the dishwasher, please pay attention not to let the dishwasher tip over.
UP
DOWN
Check level
front to back
Check level
side to side
NOTE
The maximum adjustment height of the feet is 50 mm.

22 23
EN EN
Using the appliance Using the appliance
B B
Cutlery rack:
5
7
2
1
2
3
3
2
1
2
4
8
6
6
7
5
2
1
2
3
6
6
8
3
2
1
2
4
Loading the baskets
According to EN60436:
Loading the dishwasher to its full capacity
will contribute to energy and water savings.
Upper basket:
3
4
5
2
34
1
3
1
2
33
4
54
3
Lower basket:
9
12
12 8
11
10
13
3
77
14
6
14
11
6
13
7
10
12
9
8
7
3
12
Number Item
1Cups
2Saucers
3Glasses
4Mugs
5Small pot
Number Item
6Oven pot
7Dessert plates
8Dinner plates
9Soup plates
10 Oval platter
11 Melamine dessert plates
12 Melamine bowls
13 Glass bowl
14 Dessert bowls
1 32 6444 5 7 8
1 2 3 4 5 6 7 8
Information for comparability tests in accordance
with EN60436
Capacity: 14 place settings
Position of the upper basket: lower position
Program: ECO
Rinse aid setting: MAX
Softener setting: H3
Number Item
1Soup spoons
2Forks
3Knives
4Tea spoons
5Dessert spoons
6Serving spoons
7Serving fork
8Gravy ladle

24 25
EN EN
Using the appliance Using the appliance
B B
To create more space for the glass basket, the cutlery rack can be removed. Steps :
• Lift the right hand side of the rack, while keeping both parts of the rack flat
• Slide the right hand side of the rack towards the left. Both sections overlap.
• Pull on the right hand side of the rack to remove it completely.
• Do this in reverse order to put the right hand rack back in position.
Quick user guide
Please read the corresponding content on the instruction manual for detailed operating
method.
1. Install the dishwasher
(Please check the section “INSTALLATION INSTRUCTION ”.)
2. Remove larger residue from dishes. Avoid pre-rinsing.
3. Load the baskets
OutsideInside

26 27
EN EN
Using the appliance Using the appliance
B B
Control panel
1
2 3 4 5
98
1210 11
6 7
13 14
1615 17 18 19
Operation (Button)
1Power Press this button to turn on the dishwasher, the screen lights
up.
2Auto For lightly, normally or heavily soiled crockery with or without
dried-on food.
3Hygiene
72˚C
With the Hygiene option selected, the water temperature is
increased to 72˚C for high temperature sanitization.
4ECO
This is standard program, it is suitable to clean normally
soiled tableware and it is the most efficient program in terms
of its combined energy and water consumption for that type of
tableware.
5Glass For lightly soiled crockery and glass.
690 min For normally soiled loads that need quick wash.
758 min For normally soiled loads that need faster wash.
8Rapid A shorter wash for lightly soiled loads that do not need drying.
9Soak To rinse dishes that you plan to wash later that day.
Using your dishwasher
4. Fill the dispenser with detergent and rinse aid.
5. Select a suitable program and start the dishwasher.

28 29
EN EN
Using the appliance Using the appliance
B B
10 Screen
To show the remaining program time and delay time, error
code etc.
Rinse Aid
If the “ ” icon is lit, it means the dishwasher is low on
dishwasher rinse aid and requires a refill.
Salt
If the “ ” icon is lit, it means the dishwasher is low on
dishwasher salt and needs to be refilled.
Water Faucet
If the “ ” icon is lit, it means the water faucet closed.
Upper
When you select Upper, only the dishes in the upper rack will
be washed. The spray system of the lower basket will not
operate.
Lower
When you select Lower, only the dishes in the lower rack will
be washed. The spray system of the upper basket will not
operate.
11 Self-
cleaning
This program provides an effective cleaning of the dishwasher
itself.
12 Turbo
speed+
Reduce the program time. (It can only be used with Hygiene
72˚C, ECO, Glass, 90min, 58min.)
13 Extra
Drying
For better drying result. (It can only be used with Hygiene
72˚C, ECO, Glass, 90min, 58min.)
14 Auto
open
After washing, the door will open automatically to achieve
better drying effect.(It can only be used with Auto Hygiene
72˚C, ECO, Glass, 90min, 58min, Self-cleaning.)
The button will light on when above programs are selected.
You can cancel the auto-open function by pressing this button
before pressing the START button, then the light will be off.
15 Alt Press the button to select either upper basket or lower basket
loaded, and the corresponding indicator will light up.
16 Delay - Press the “-” button to decrease the delay time, maximum 24
hours delay can be defined.
17 Delay + Press the “+” button to add the delay time.
18 Child
lock
This option allows you to lock the buttons on the control panel,
so children cannot accidently start the dishwasher by pressing
the buttons on the panel. Only the Power button remains
active. To lock or unlock the buttons on the control panel,
press this button for 3 seconds .
19 Start
Pause
To start the selected washing program or pause it when the
dishwasher is working.
Water softener
• The water softener must be set manually, using the water hardness dial.
• The water softener is designed to remove minerals and salts from the water, which would
have a detrimental or adverse effect on the operation of the appliance.
• The more minerals there are, the harder your water is.
• The softener should be adjusted according to the hardness of the water in your area.
• Your local Water Authority can advise you on the hardness of the water in your area.
Adjusting salt consumption
• The dishwasher is designed to allow for adjustment in the amount of salt consumed based
on the hardness of the water used. This is intended to optimise and customise the level of
salt consumption.
• Please follow the steps below for adjustment in salt consumption.
1. Close the door, switch on the appliance;
2. Within 60 seconds after the appliance was switched on press the Self-cleaning for more
than 5 seconds to enter the water softener setting mode.
3. Press the Self-cleaning again to select the proper set according to your local environment,
the setting will change in the following sequence: H3->H4->H5->H6->H1->H2;
4. Without operation in 5 seconds or press the Power button to complete the setup and exit
the setup mode.

30 31
EN EN
Using the appliance Using the appliance
B B
WATER HARDNESS
Water
softner level
Regeneration
occurs every
X program
sequence 1)
Salt
consumption
(gram/cycle)
German
°dH
French
°fH
British
°Clarke Mmol/l
0 - 5 0 - 9 0 - 6 0 - 0,94 H1 No
regeneration 0
6 - 11 10 - 20 7 - 14 1,0 - 2,0 H2 10 9
12 - 17 21 - 30 15 - 21 2,1 - 3,0 H3 5 12
18 - 22 31 - 40 22 - 28 3,1 - 4,0 H4 3 20
23 - 34 41 - 60 29 - 42 4,1 - 6,0 H5 2 30
35 - 55 61 - 98 43 - 69 6,1 - 9,8 H6 1 60
1°dH=1.25 °Clarke=1.78 °fH=0.178mmol/l
The factory setting: H3
1) Every cycle with a regeneration operation consumes additional 2.0 litres of water, the
energy consumption increases by 0.02 kWh and the program extents by 4 minutes.
NOTE
Please check the “Loading The Salt Into The Softener”, if
your dishwasher lacks salt.
NOTE
If your model does not have any water softener, you may
skip this section.
Water Softener
• The hardness of the water varies from place to place. If
hard water is used in the dishwasher, deposits will form
on the dishes and utensils.
• The appliance is equipped with a special softener that
uses a salt container specifically designed to eliminate
lime and minerals from the water.
Preparing and loading dishes
• Consider buying utensils which are identified as dishwasher-proof.
• For particular items, select a program with the lowest possible temperature.
• To prevent damage, do not take glass and cutlery out of the dishwasher immediately after
the program has ended.
For washing the following cutlery/dishes
Are not suitable:
- Cutlery with wooden, horn china or mother-of-pearl handles
- Plastic items that are not heat resistant
- Older cutlery with glued parts that are not temperature resistant
- Bonded cutlery items or dishes
- Pewter or cooper items
- Crystal glass
- Steel items subject to rusting
- Wooden platters
- Items made from synthetic fibres
Are of limited suitability:
- Some types of glasses can become dull after a large number of washes
- Silver and aluminum parts have a tendency to discolour during washing
- Glazed patterns may fade if machine washed frequently
Recommendations for loading the dishwasher
• Scrape off any large amounts of leftover food. Soften remnants of burnt food in pans.
It is not necessary to rinse the dishes under running water. For best performance of the
dishwasher, follow these loading guidelines.
(Features and appearance of baskets and cutlery baskets may vary from your model.)
Place objects in the dishwasher in the following way:
• Items such as cups, glasses, pots/pans, etc. must face downwards.
• Curved items, or ones with recesses, should be loaded aslant so that water can run off.
• All utensils are stacked securely and can not tip over.
• All utensils are placed in the way that the spray arms can rotate freely during washing.
• Load hollow items such as cups, glasses, pans etc. With the opening facing downwards so
that water cannot collect in the container or a deep base.

32 33
EN EN
Using the appliance Using the appliance
B B
• Dishes and items of cutlery must not lie inside one another, or cover each other.
• To avoid damage, glasses should not touch one another.
• The upper basket is designed to hold more delicate and lighter dishware such as glasses,
coffee and tea cups.
• Long bladed knives stored in an upright position are a potential hazard!
• Long and / or sharp items of cutlery such as carving knives must be positioned horizontally
in the upper basket.
• Please do not overload your dishwasher. This is important for good results and for
reasonable consumption of energy.
NOTE
Very small items should not be washed in the dishwasher
as they could easily fall out of the basket.
Removing the dishes
To prevent water dripping from the upper basket into the lower basket, we recommend that
you empty the lower basket first, followed by the upper basket.
WARNING
Items will be hot! To prevent damage, do not take glass
and cutlery out of the dishwasher for around 15 minutes
after the program has ended.
Loading the upper basket
The upper basket is designed to hold more delicate and lighter dishware such as glasses,
coffee and tea cups and saucers, as well as plates, small bowls and shallow pans (as long
as they are not too dirty). Position the dishes and cookware so that they will not get moved
by the spray of water.
Loading the lower basket
• We suggest that you place large and difficult to clean items into the lower basket: such as
pots, pans, lids, serving dishes and bowls, as shown in the figure below. It is preferable to
place serving dishes and lids on the side of the racks in order to avoid blocking the rotation
of the top spray arm.
• The maximum diameter advised for plates in front of the detergent dispenser is of 19 cm,
this not to hamper the opening of it.
Loading the cutlery basket
Cutlery should be placed in the cutlery basket separate from each other in the appropriate
positions. Avoid nesting of the cutlery to prevent insufficient cleaning performance.
WARNING
Do not let any item extend through the bottom.
Always load sharp utensils with the sharp point down!
NOTE
For the best washing effect, please load the baskets refer
to standard loading options.
Function of the rinse aid and detergent
The rinse aid is released during the final rinse to prevent water from forming droplets on
your dishes, which can leave spots and streaks. It also improves drying by allowing water to
run off the dishes. Your dishwasher is designed to use liquid rinse aids.
WARNING
Only use branded rinse aid for dishwasher. Never fill
the rinse aid dispenser with any other substances (e.g.
Dishwasher cleaning agent, liquid detergent). This would
damage the appliance.

34 35
EN EN
Using the appliance Using the appliance
B B
When to refill the rinse aid
The regularity of the dispenser needing to be refilled depends on how often dishes are
washed and the rinse aid setting used.
• The Low Rinse Aid indicator ( ) will be lit when more rinse aid is needed.
• Do not overfill the rinse aid dispenser.
Function of detergent
• The chemical ingredients that compose the detergent are necessary to remove, crush and
dispense all dirt out of the dishwasher.
• Most of the commercial quality detergents are suitable for this purpose.
WARNING
Proper Use of Detergent
• Use only detergent specifically made for dishwashers
use. Keep your detergent fresh and dry.
• Do not fill detergent into the dispenser until you are ready
to start the dishwasher
Dishwasher detergent is corrosive! Keep dishwasher
detergent out of the reach of children.
Filling the rinse aid reservoir
1. Remove the rinse reservoir cap by lifting up the handle.
2. Pour the rinse aid into the dispenser, being careful not to overfill.
3. Close the cap after all.
Adjusting the rinse aid reservoir
To achieve a better drying performance with limited rinse aid, the dishwasher is designed to
adjust the consumption by user. Follow the below steps.
1. Open the door, switch on the appliance.
2. Within 60 seconds after step 1, press the Self-cleaning button more than 5 seconds, and
then press the Delay + Button to enter the set model, the rinse aid indication blinks as 1Hz
frequency.
3. Press the Self-cleaning button to select the proper set according to your using habits,
the sets will change in the following sequence: d3->d4->d5->d1->d2->d3. The higher the
number, the more rinse aid the dishwasher uses.
4. Without operation in 5 seconds or Press the Power button to end the setup model.

36 37
EN EN
Using the appliance Using the appliance
B B
Filling the detergent dispenser
1. Please choose an open way according to the actual situation.
1Open the cap by sliding the release catch.
2Open the cap by pressing down the release catch.
3Open the cap by pressing in the release latch.
1
2
3
Sliding it to the right
Press down
Press in
Three ways to open the cover:
2. Add detergent into the larger cavity Afor main wash. For better cleaning result,
especially if you have very dirt items, pour a small amount of detergent onto the door.
The additional detergent will activate during the pre-wash phase.
A
B
3. Close the flap by sliding it to the front and then pressing it down.
NOTE
• Please observe the manufacturer’s recommendations on
the detergent packaging.
This manual suits for next models
3
Table of contents
Languages:
Other VALBERG Dishwasher manuals

VALBERG
VALBERG 972793 User manual

VALBERG
VALBERG 3S58 F WAD929C User manual

VALBERG
VALBERG FBI 16S43 A XAD929C User manual

VALBERG
VALBERG 14S42 C XAD929C User manual

VALBERG
VALBERG 10S44 D SAD929C User manual

VALBERG
VALBERG 14S42 D WAD929C User manual

VALBERG
VALBERG FBI 14S40 B KAD929C User manual

VALBERG
VALBERG 12S45 D DXAD701T User manual

VALBERG
VALBERG 972652 User manual

VALBERG
VALBERG FBI 14S42 C SAD929C User manual