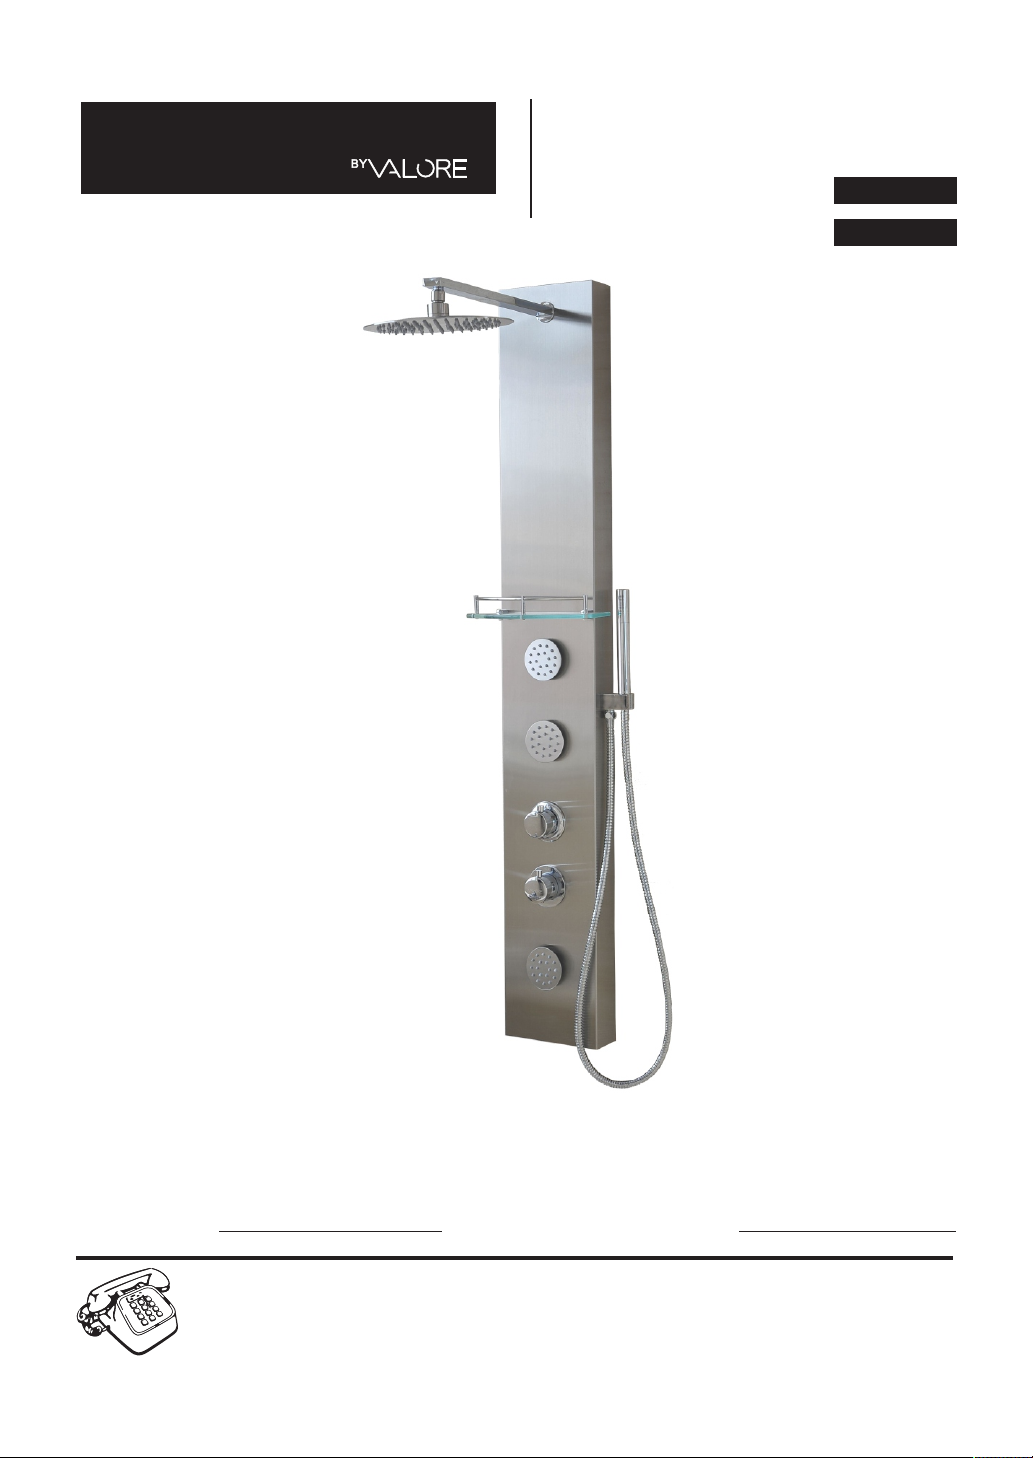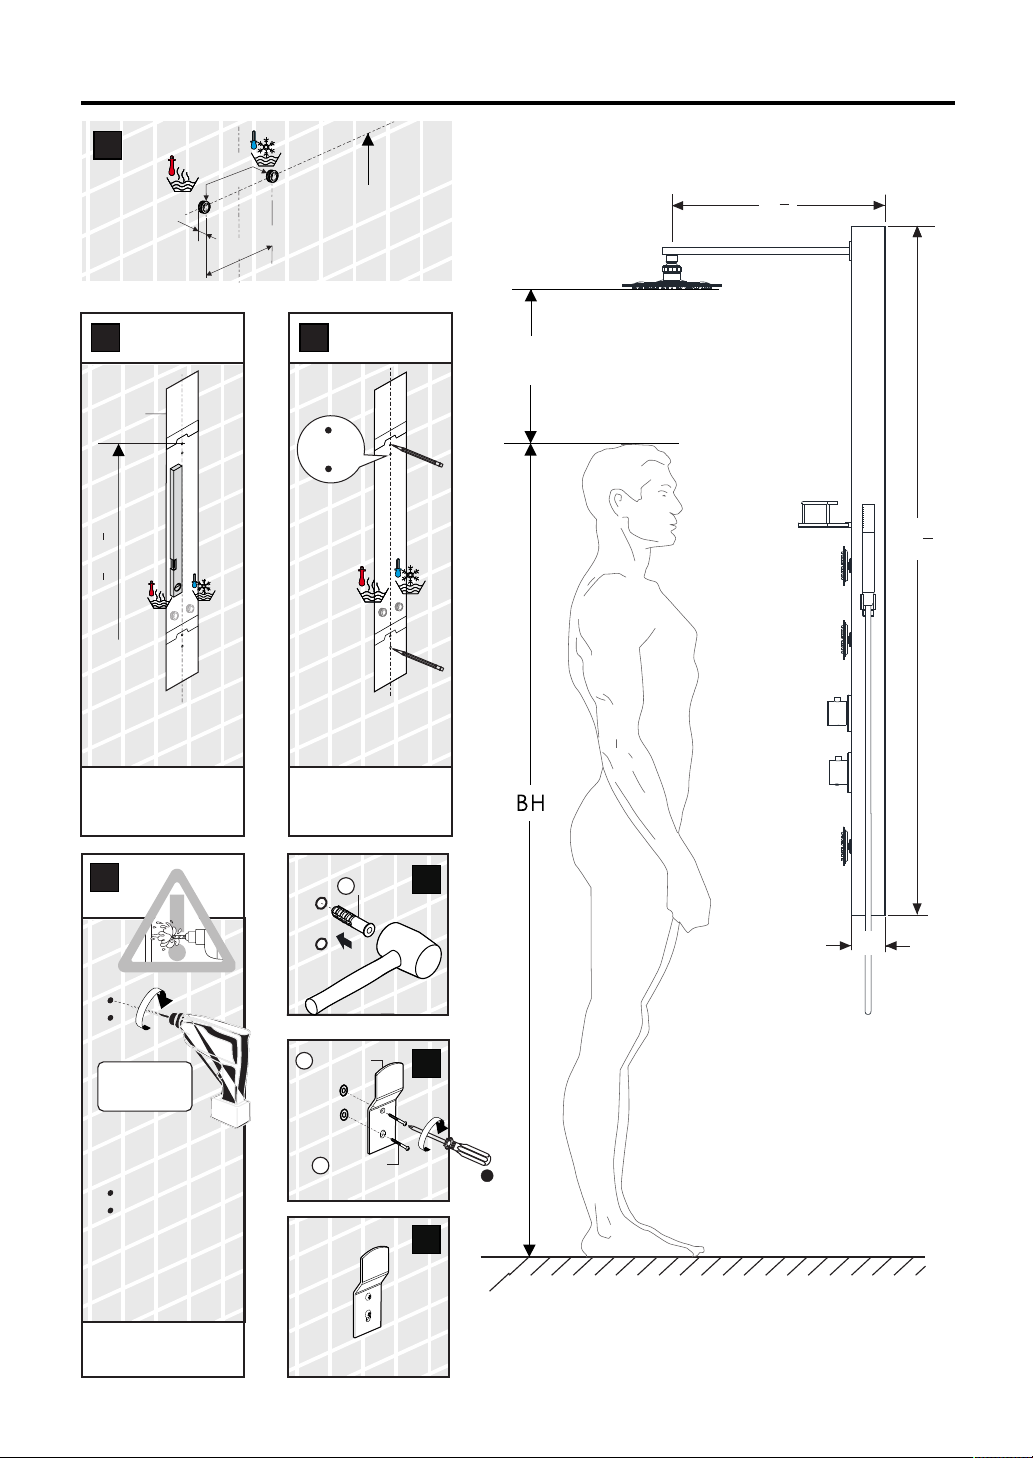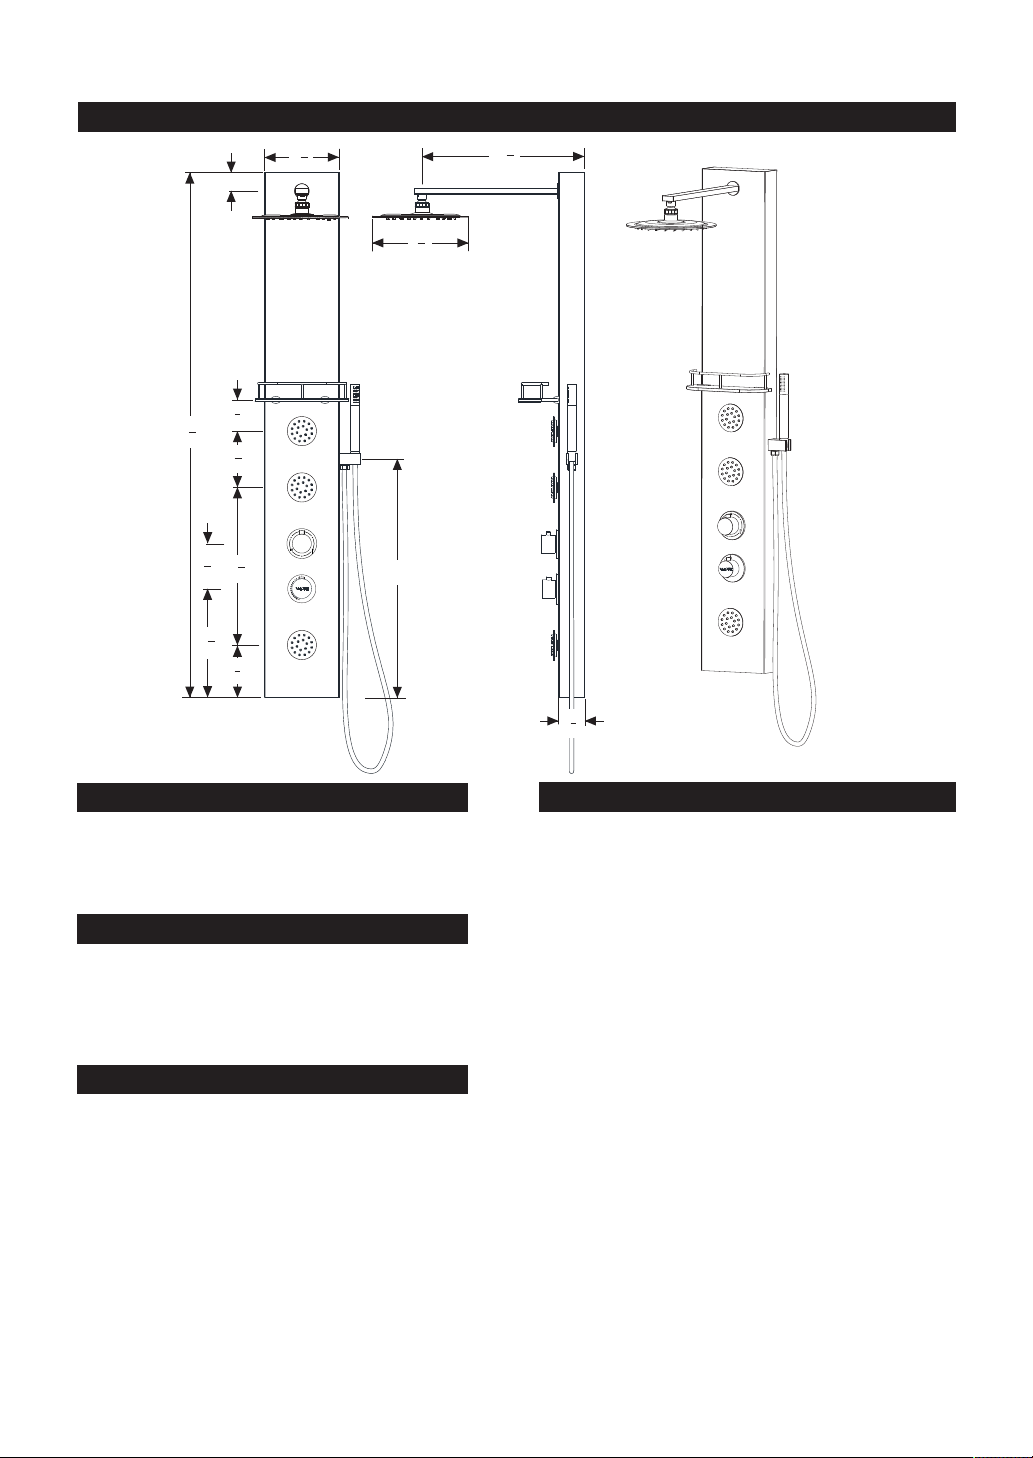
DIMENSIONS
• (H) 55.12" x (W) 7.88" x (D) 3"
• Hand shower hose: 59.05"
• Weight: Net: 22 lbs /Gross: 27.3 lbs
161
2"
551
8"
57
8"
113
8"
43
4"
31
4"
1
52"
2"
77
8"
97
8"
25"
3
24"
1
178"
FEATURES
• Attractive modern design
• High quality materials and construction
• "Rainfall" experience with oversized shower
head
• Full stainless steel matt finished casing with
nano technology fingerprint-resistant coating
• High performance brass hydro jets in chrome
finish with rubber nozzles
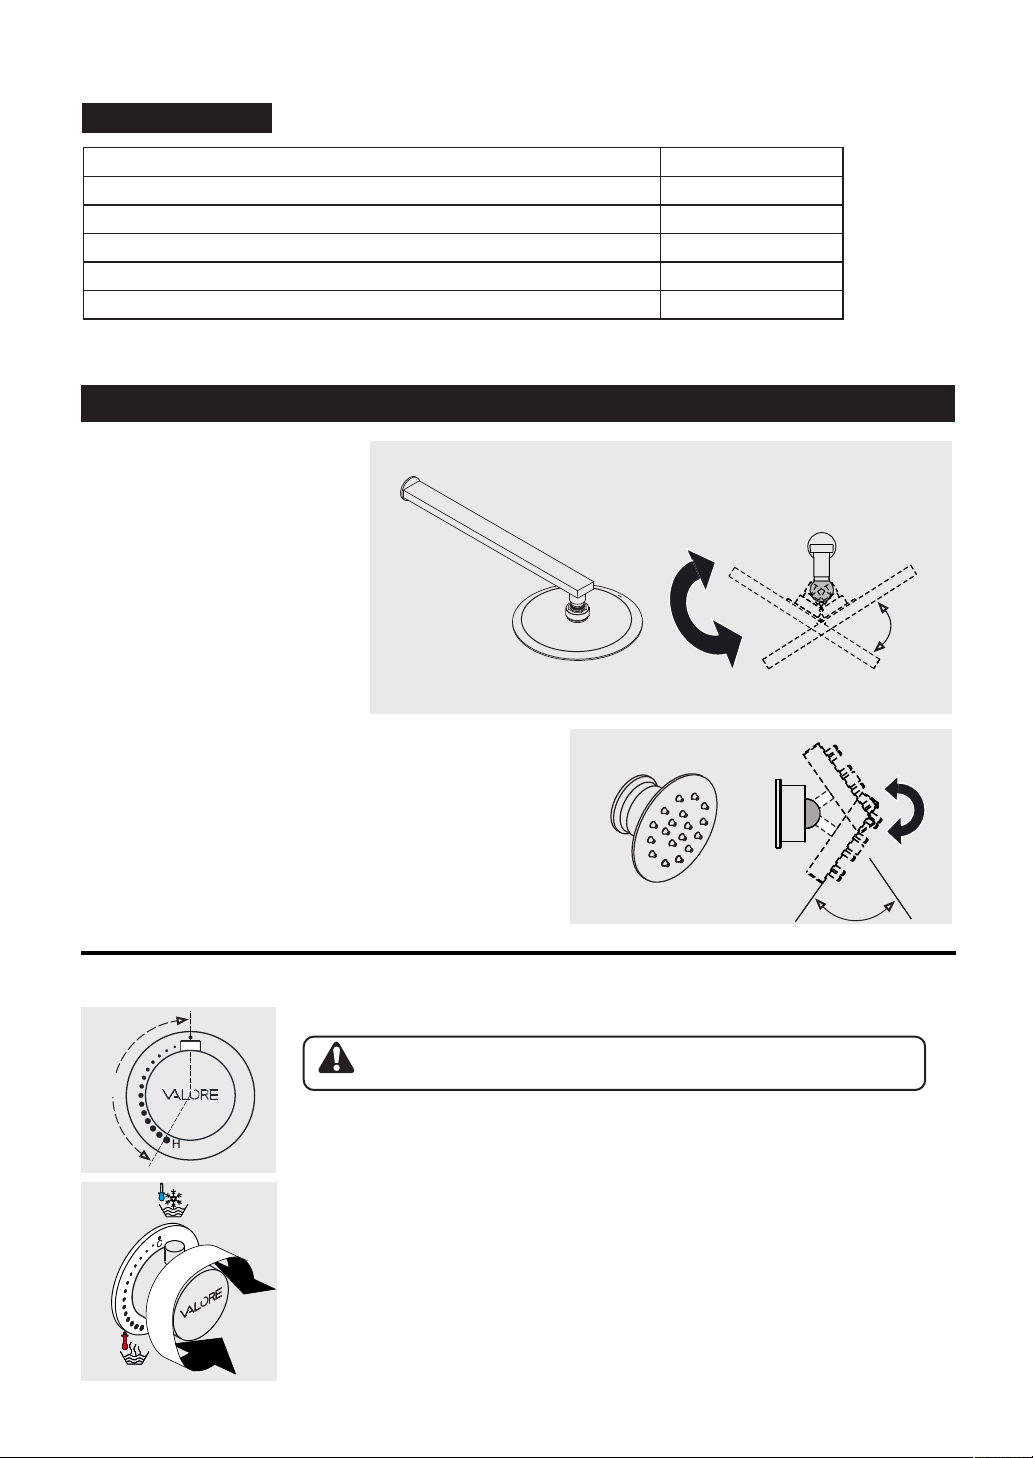
• Rotary knob controls
• Tempered glass shelf with mount
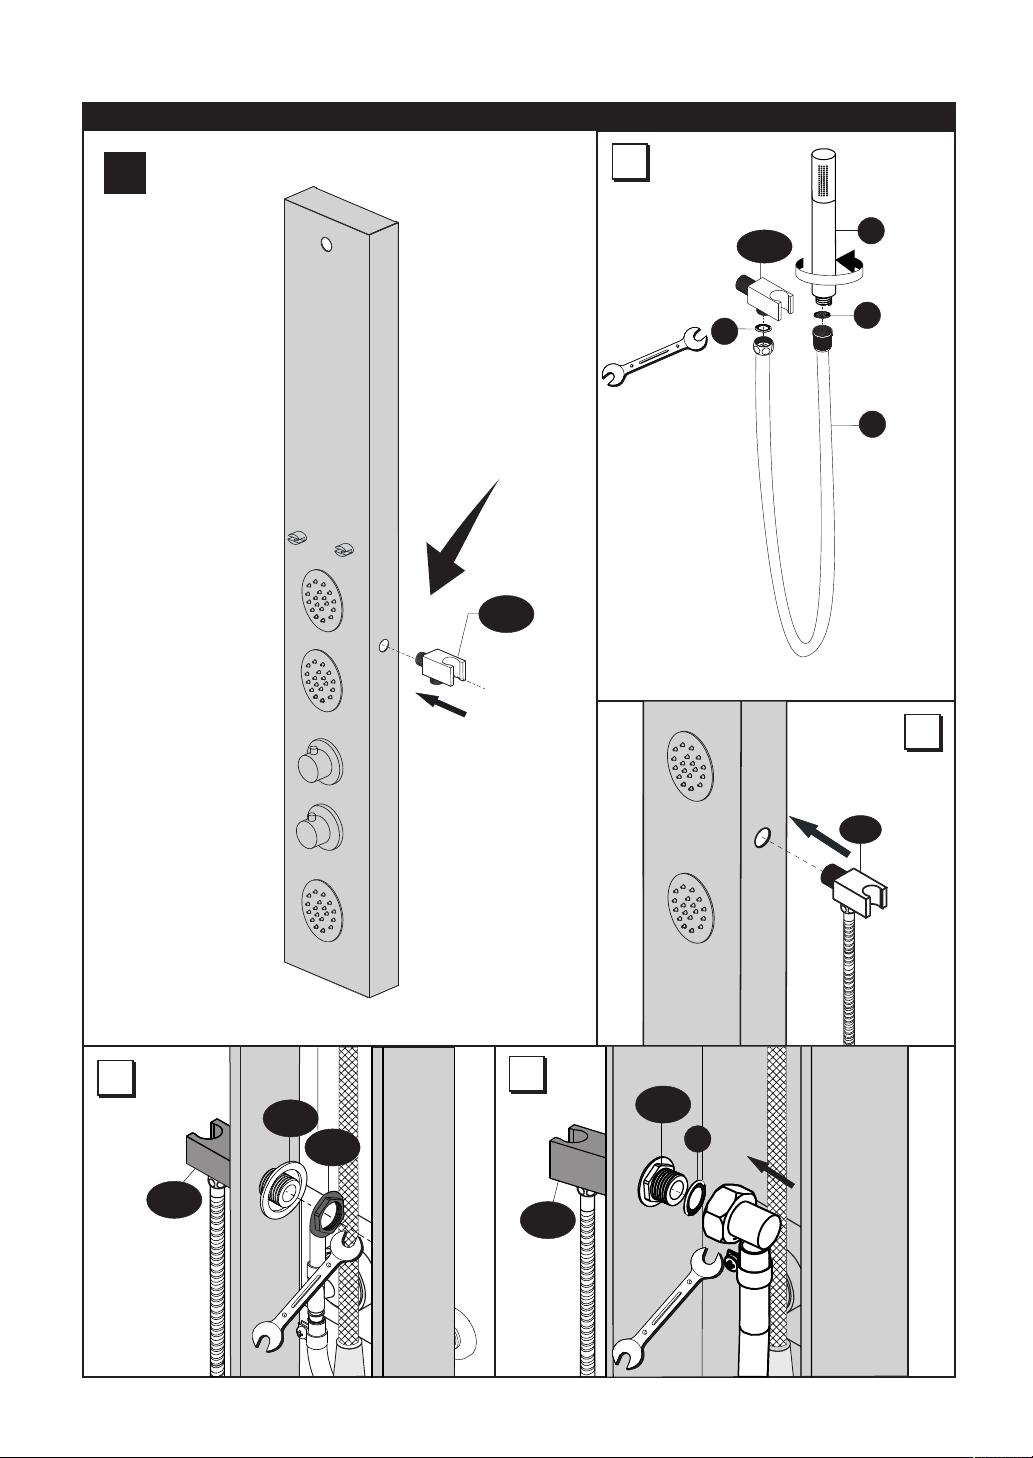
• Durable and easy to install screw and bracket
system
DIMENSIONS
This product is tested and certified to
meet U.S. and international standards
cUPC-certified
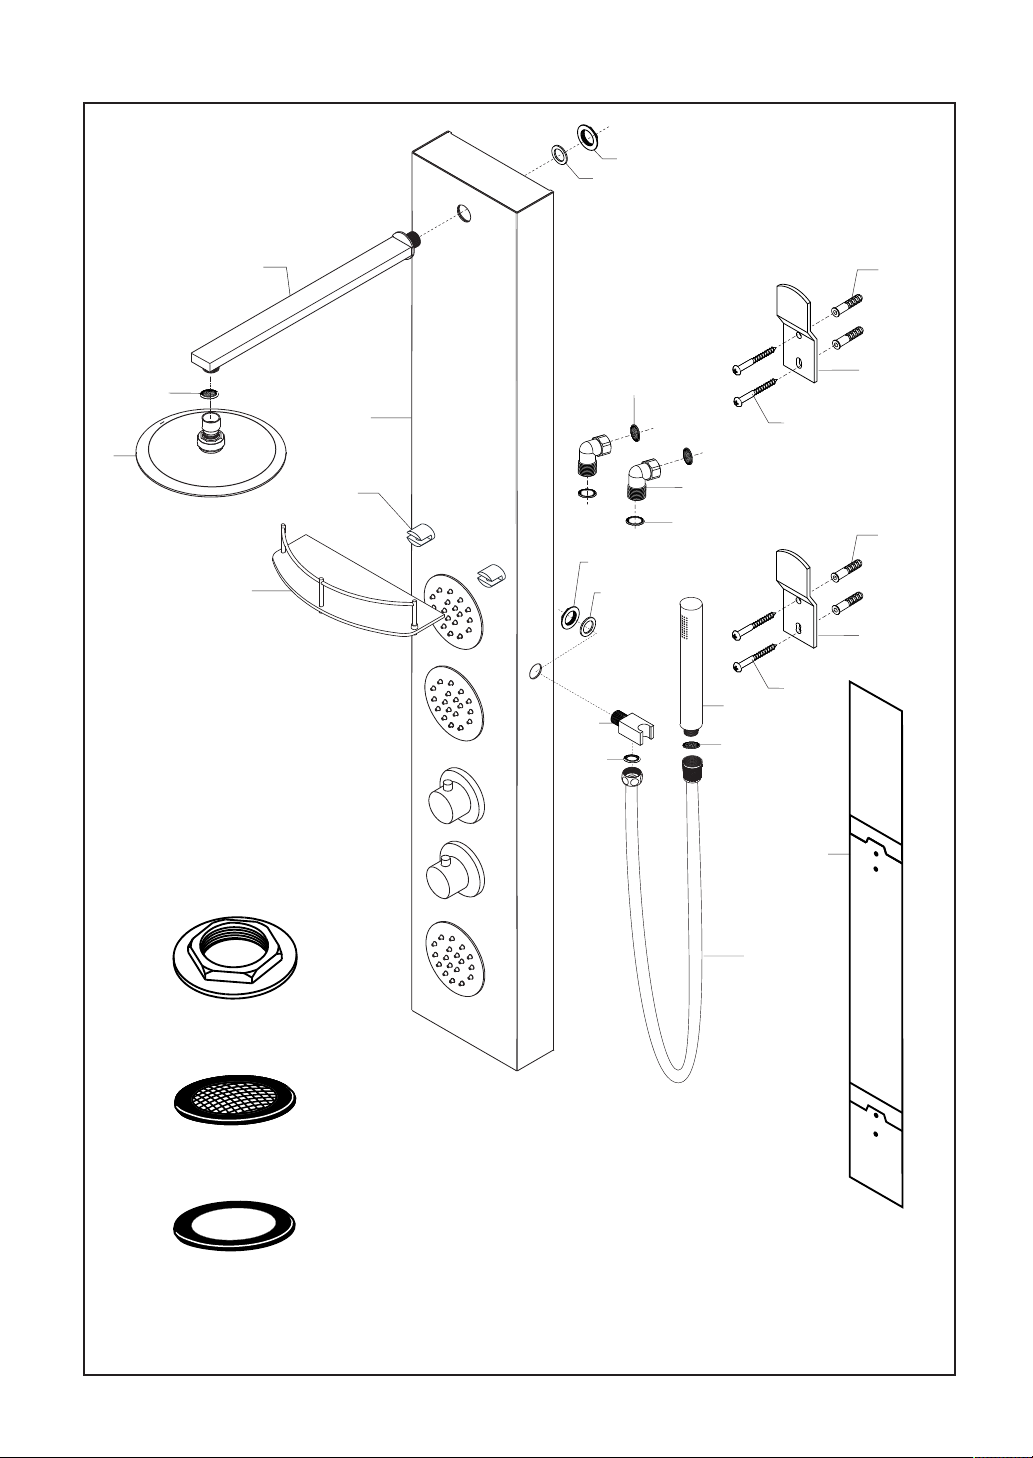
CODE COMPLIANCE
• Ceramic Mixing Cartridges with Integral Pressure
Balancing.
This shower panel is equipped with a Pressure Balance
valve which conforms to UPC standards. all-in-one
cartridge provides manual selection of temperature,
automatic compensation for differential pressure
variations, assuring unchanged temperature output.
• High Quality Stainless Steel Hydro Jets.
To enhance shower performance, the VS-2001 Plus
shower panel comes with three (3) high quality stainless
steel hydro jets. Each hydro jet is easily adjustable and
has 18 silicone nozzles each. Finished in chrome to
match the panels' design, these hydro jets have
stainless steel construction at its base; making sure
they will deliver best performance for many years.
• Solid Brass Deluxe Hand Shower Wand.
The VS-2001 Plus also features a handshower wand
made of solid brass core. This is a high quality and
heavy duty type of handshower and will provide many
years or handshower performance for a more enjoyable
shower experience. Please always care for your
handshower wand and place it on its cradle after
use/when not in use. Do not leave the handshower
wand dangling by its hose from the shower panel.
SPECIAL FEATURES
- 2 -