manuals.online logo
Brands
  1. Home
  2. •
  3. Brands
  4. •
  5. Vanraam
  6. •
  7. Bicycle
  8. •
  9. Vanraam Fun-2-Go User manual

Vanraam Fun-2-Go User manual

Van Raam BV
Aaltenseweg 56
7051 CM Varsseveld
Netherlands 06.13
User manual
Fun-2-Go
User manual
Fun-2-Go 06.13
2
Contents
Contents........................................................................................................................
Contact details manufacturer.........................................................................................
Conformity.....................................................................................................................
Introduction....................................................................................................................
Delivery .........................................................................................................................
Intended usage..............................................................................................................
Safety measures ...........................................................................................................
Delivery inspection ........................................................................................................
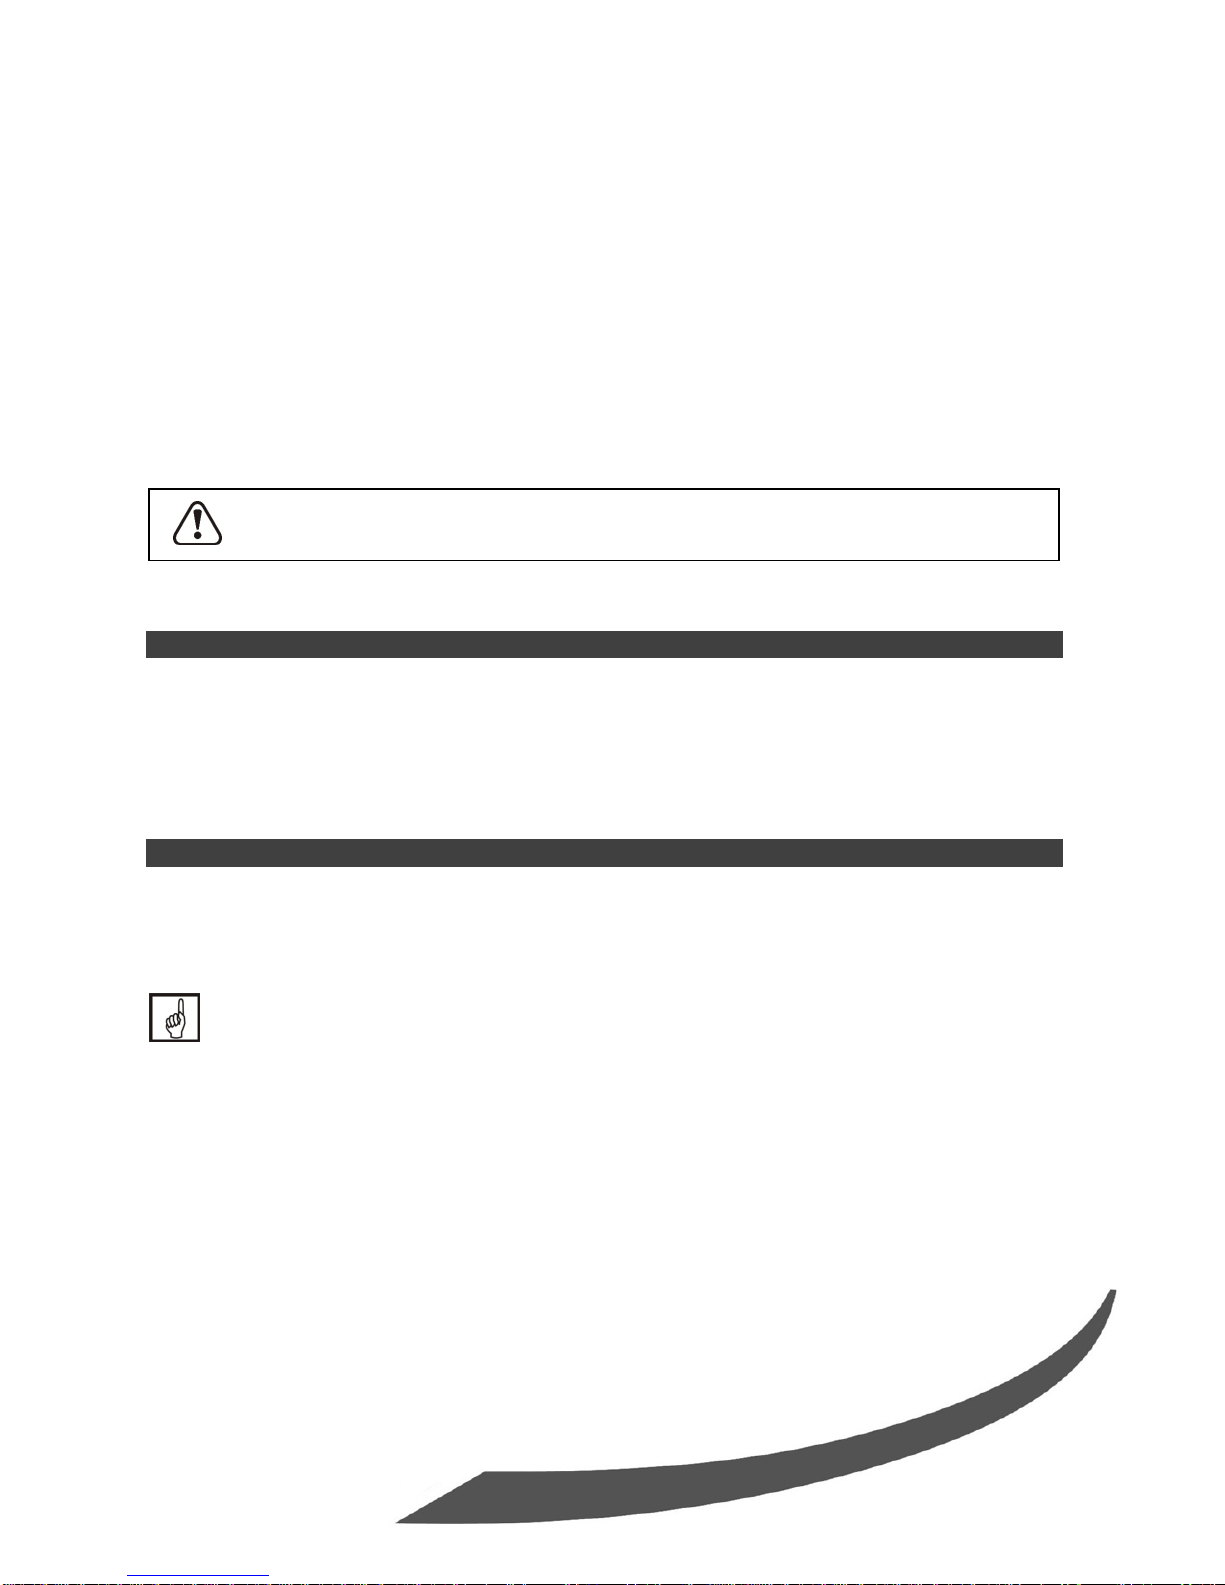
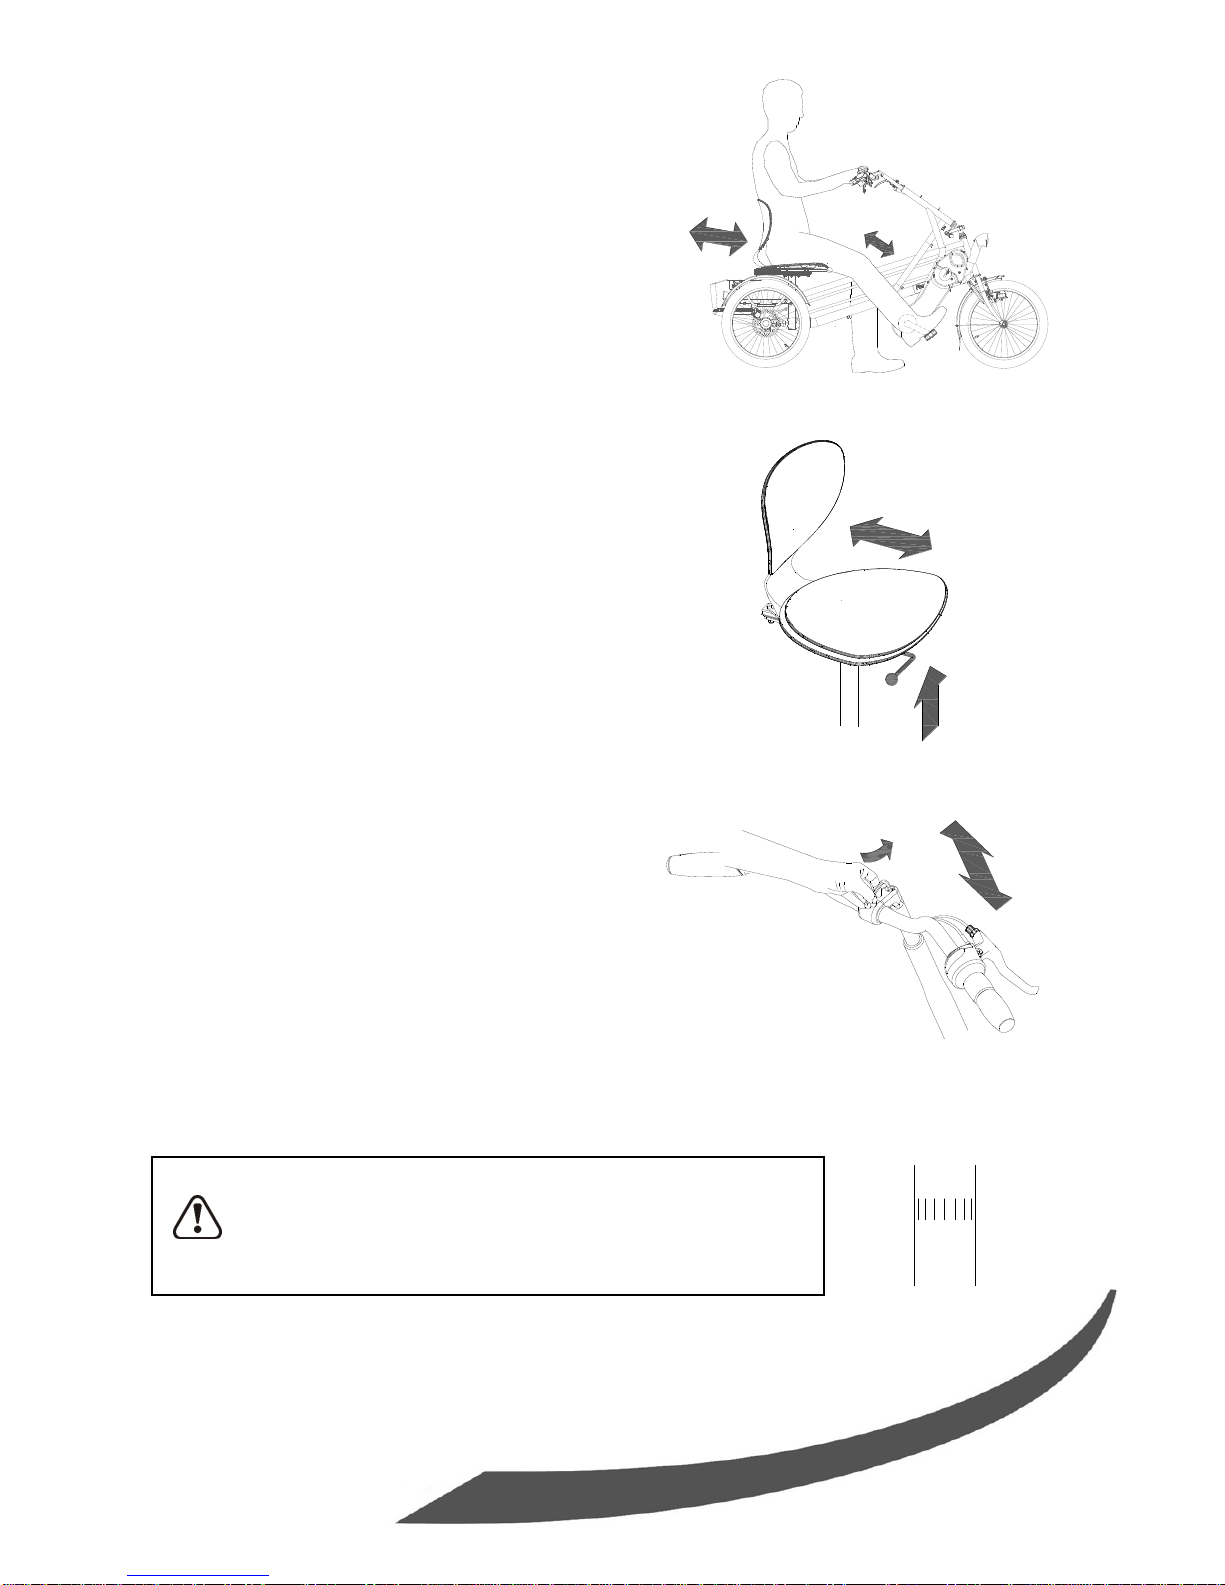
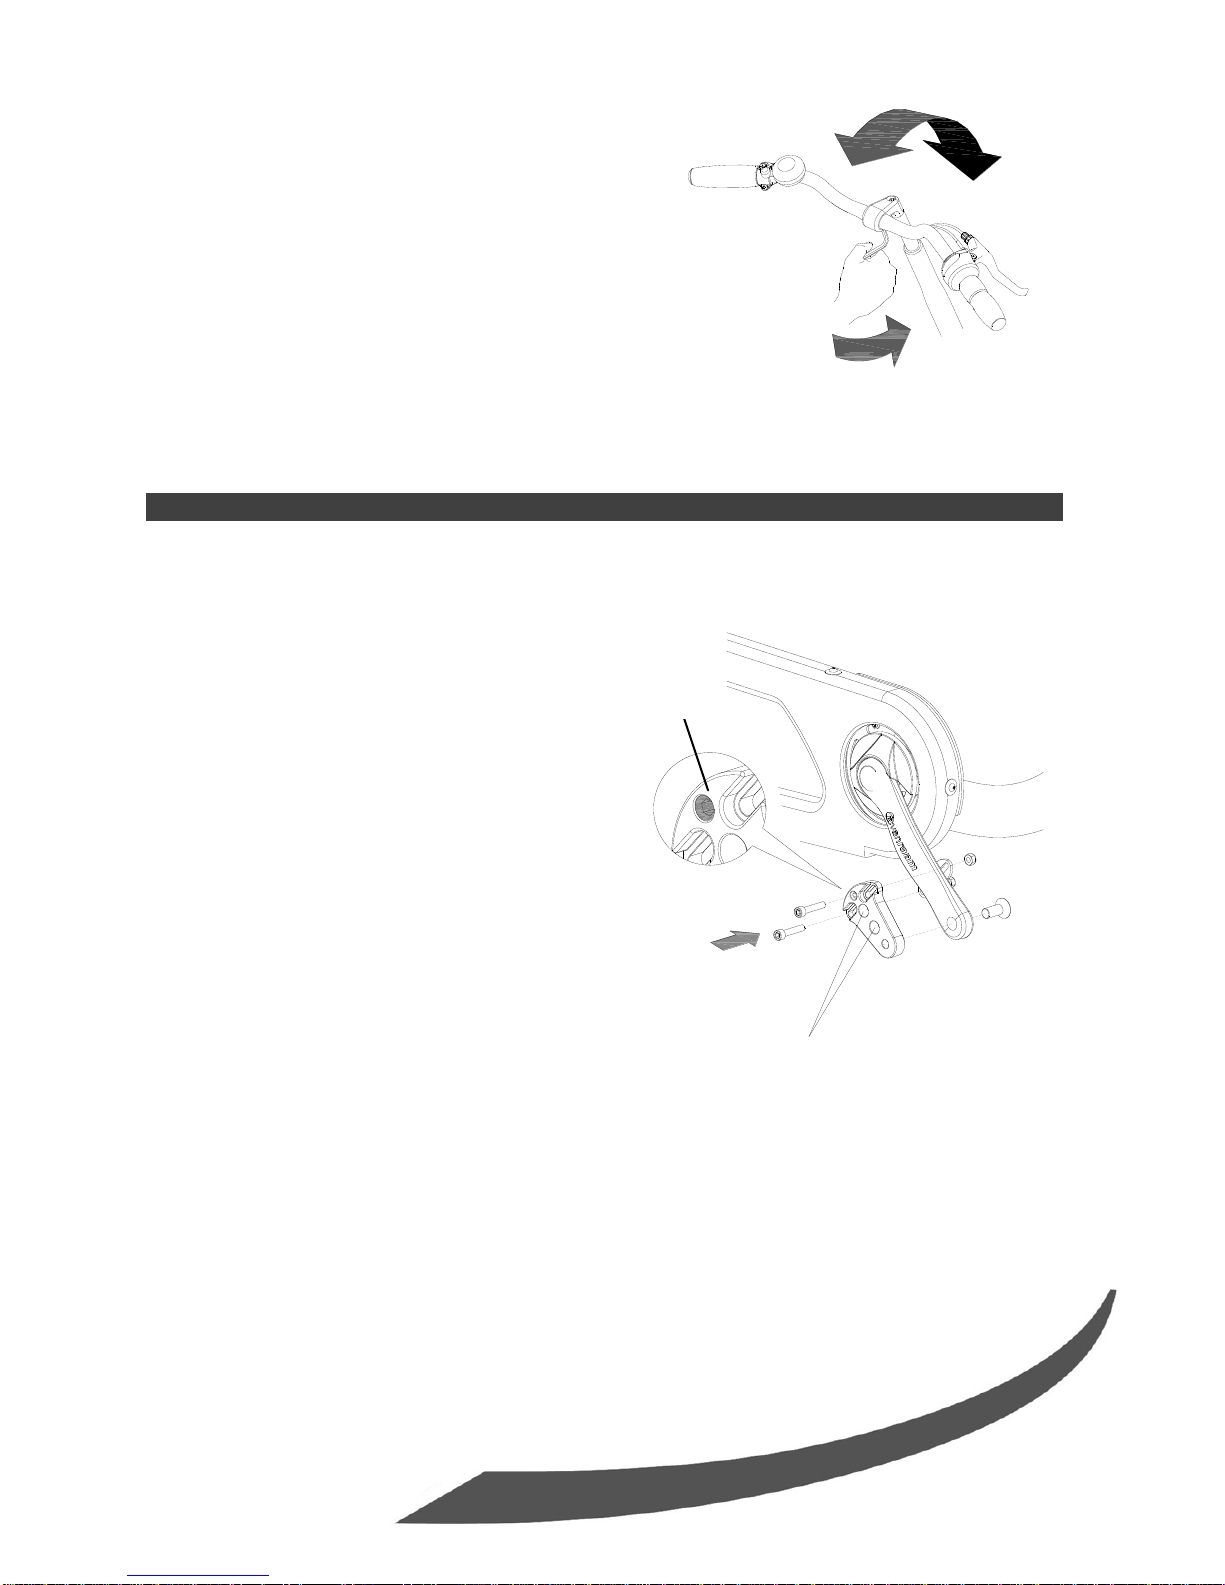
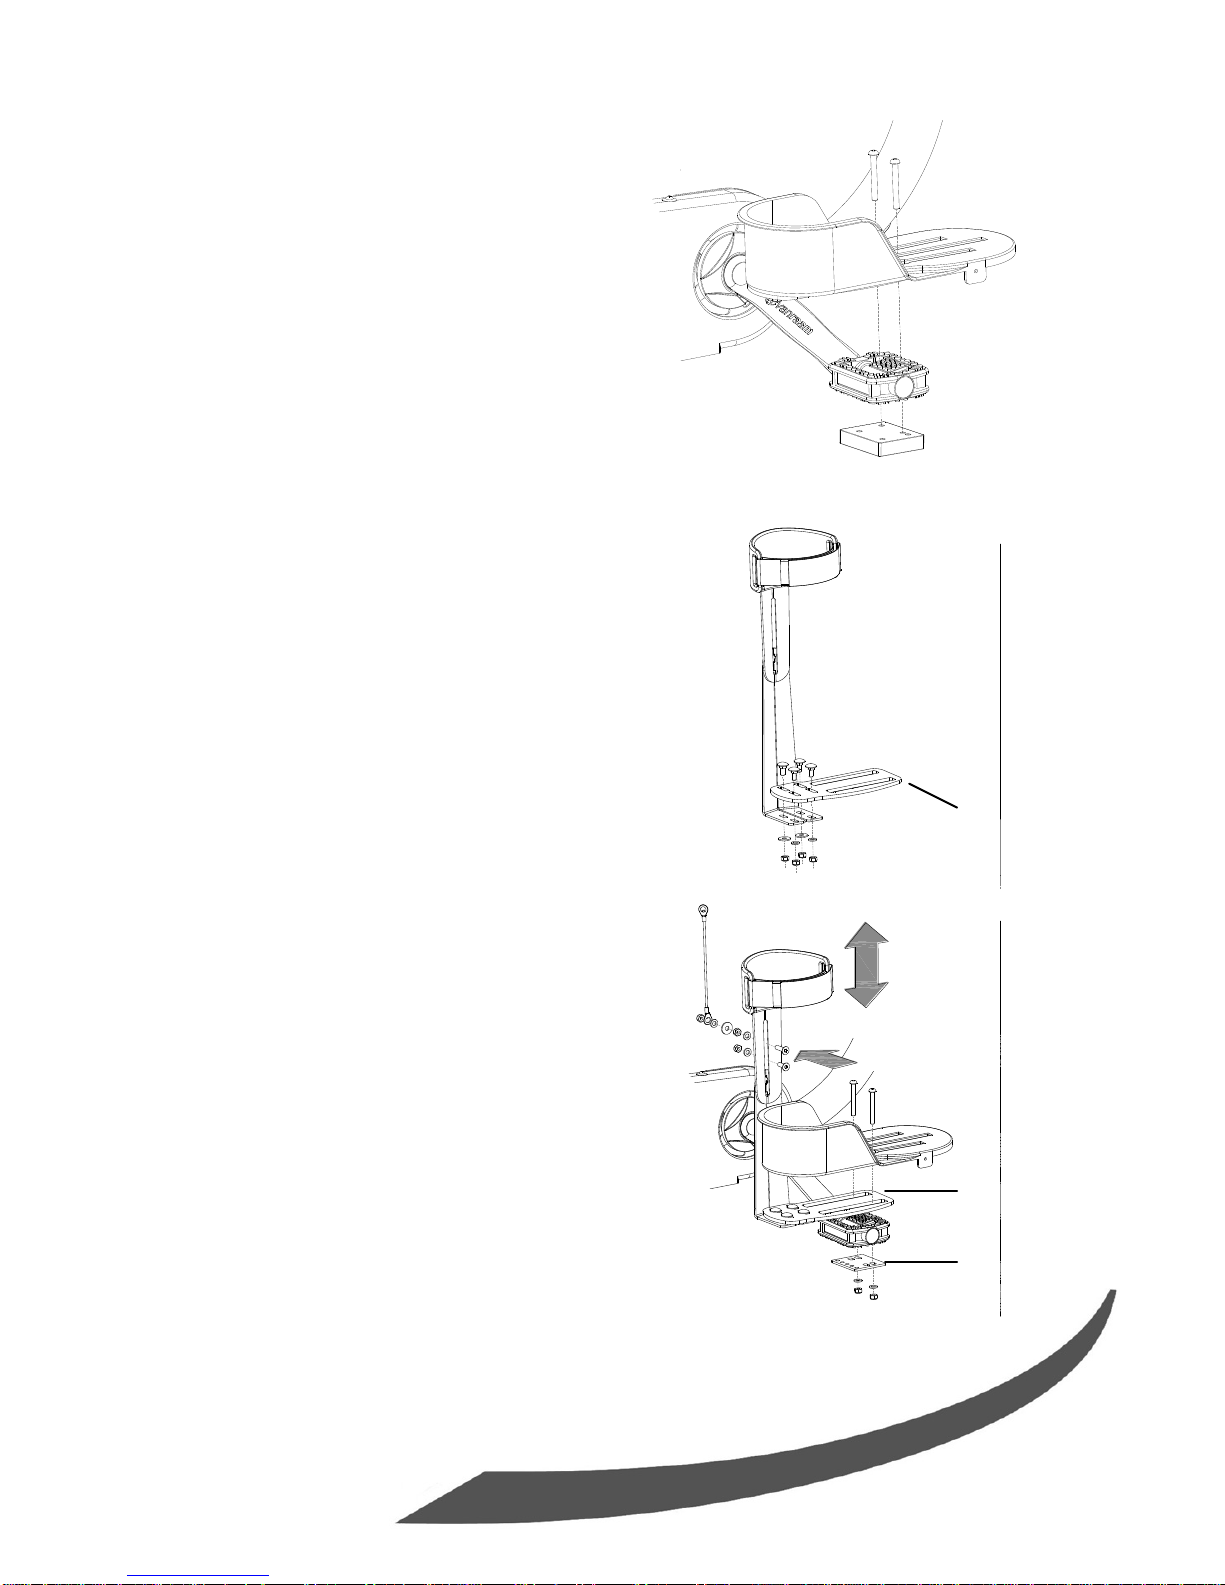
Adjustment of the bicycle...............................................................................................
Accessories...................................................................................................................
Before the first use........................................................................................................
Technical details............................................................................................................
Maintenance and adjustments to be done by owner .....................................................
Repairs and maintenance to be done by dealer............................................................
Disposal.........................................................................................................................
Handover/sale to a new owner......................................................................................
Guarantee .....................................................................................................................
Frame number...............................................................................................................
Contact details manufacturer
Van Raam BV
Aaltenseweg 56
7051 CM Varsseveld
Netherlands
Tel. : +31 (0)315 257370
E-mail : [email protected]
Internet : www.vanraam.com
Conformity
Van Raam declares as manufacturer that the Fun-2-Go bicycle has been produced in
accordance with the 93/42/EEG guidelines.
User manual
Fun-2-Go 06.13
3
Introduction
This user manual gives important and necessary
information about the use of your bicycle. We ask you to go
through the manual thoroughly before using the bicycle.
Delivery
- bicycle with possible packaging
- user manuals (s)
- possible charger (s), depending on options
Intended usage
The bicycle is designed for normal use on level and solid ground. The usual bicycle
caution should always be taken into consideration. At the same time all safety
instructions as described in this manual should be complied with explicitly. Also the
local traffic rules should always be complied with.
All other use, including damage or physical injuries due to this, are not the
manufacturer's responsibility.
READ
THOROUGHLY!
User manual
Fun-2-Go 06.13
4
Safety measures
Ensure the bicycle is in good condition each time before using it.
Check before each ride that the brakes are in order.
Check the lights and reflectors.
Regularly check whether all screw joints are tight.
Regularly check whether the wheels, the handlebars and the saddle are
secure.
Make sure there is sufficient air in the tyres.
Only use the bicycle on a solid and level surface.
Make sure that wide trousers or lose hanging clothing don’t get caught in the
chain, spokes or pedals.
Do not use a pressure washer or a steam cleaner for the cleaning of the
bicycle.
Use the parking brake if the drivers get on or off the bike.
If children or people with limited mental perception join the bike ride, there
should always be a responsible supervising person as the main driver of the
bike. This main driver is always responsible for the safe use of the bike.
User manual
Fun-2-Go 06.13
5
Load
The maximum load should not be exceeded. See information in the index of technical
details on page 20. By permitted load we mean the total load, including the load in the
basket.
Make sure that the permitted basket weight is not exceeded. People are not to be
transported in the basket!
Damaged or worn out parts
The replacement and repair of parts (frame, forks, illumination, brakes, drive
mechanism and the handle bars) should always be performed by a dealer. If not, the
guarantee ceases to be valid and you will be personally responsible in the event of
possible damage.
Specific safety parts should always be replaced by new parts!
Delivery inspection
Check the delivery immediately after receiving it.
In the event of damage or incomplete delivery we ask you to contact your dealer
immediately.
Adjustment of the bicycle
Before using the bicycle, adjust it to the measurements of the 2 cyclists. This is of
great importance, especially the seats and the handlebars.
If an optimal adjustment of the bicycle, as defined in the instructions, is not
possible for the cyclist, you can contact your dealer for a fitting solution.
The brakes are correctly adjusted as standard and can only be adjusted by the dealer
during periodic maintenance.
User manual
Fun-2-Go 06.13
6
MIN INSERT
Seat position
The seat position is correctly adjusted when
the cyclist is sitting on the bicycle and puts a
foot on the pedal in the furthest position.
Adjust the seat in such a way that the leg is
stretched but still relaxed.
To adjust the seat:
1. Pull the handle up.
2. Move the seat to the correct position and
release the handle.
Handle bar height
The height of the handle bars affects the
comfort of the ride. It determines the pressure
on the hands and the position of the back.
Determine your own most comfortable height
by using the bike.
To adjust the handle bars:
1. Slightly loosen the screw by using an Allen
key.
2. Slide the handle bars to the correct height
and tighten the screw very firmly again.
Do not pull out the handle bars further than the
mark. Otherwise the tube will not be deep enough in
the shaft and will risk coming off, which can lead to
serious injuries.
1.
2.
1.
2.
User manual
Fun-2-Go 06.13
7
Position handle bars
You can tilt the handle bars. This influences
the distance from the handle bars to the upper
body. Determine your own most comfortable
position by using the bike.
To tilt the handle bars:
1. Slightly loosen the screw with an Allen key.
2. Put the handle bars in the desired position
and then tighten the screw very firmly again.
Accessories
Depending on your order, you can use the accessories as described below.
Crank shortener
The crank shortener is fitted to the crank,
as illustrated. The pedal can then be fitted
into the crank shortener at two positions.
With the socketed screw (A) the crank
shortener should be aligned with the
crank.
1.
2.
2 assembly points pedal
[A]
User manual
Fun-2-Go 06.13
8
Foot support
The foot support is fitted to the pedal with a
balance block.
Lower leg support
To fit the lower leg support:
1. First fit the lower leg support to the metal
plate (A).
2.The lower leg support is then fitted to the
foot support. Make sure that plate (B) is
under the pedal and plate (A) is between
the pedal and the foot support.
3.Adjust the height of the lower leg support in
such a way that it matches the lower leg of
the cyclist.
4. Fit the elastic to a point on the frame, so
that the lower leg support stays upright in
stationary position. Determine by yourself
which point is best.
Use the velcro to secure the lower leg.
4.
1.
3.
2.
[A]
[A]
[B]
User manual
Fun-2-Go 06.13
9
Speed hub co-driver
The main driver can adjust the co-biking of the
co-driver with the speed hub. There are three
positions:
1. The pedals of the co-driver move
independently of the pedals of the main
driver. The pedals move free and the co-
driver can not cycle.
2. The pedals of the co-driver move
independently from the pedals of the main
driver. The co-driver can cycle also.
3. The pedals of the co-driver are moving
together with the pedals of the main driver.
The co-driver has to cycle also.
Rotating seat
To rotate the seat:
1. Pull the handle to the front and rotate the
seat. The seat locks itself.
2. Pull the handle again to rotate the seat
back. The seat locks itself again.
Lap belt of the co-driver
Wrap the belt around the body and buckle it.
Push the red button to unfasten the belt
again.
1.
1.
2.
User manual
Fun-2-Go 06.13
10
Armrests
The armrests can be switched upwards.
Footrest
The footrest is mounted on the adapter.
The adapter can be removed from the bike
frame. To do this:
1. Slightly loosen the handle behind the
footrest.
2. Slightly loosen the handle at the crank.
3. Slide the clamp out of the bike frame.
To assemble the adapter again, follow these
steps in reverse order.
3.
2.
1.
User manual
Fun-2-Go 06.13
11
Comfort seat and children-comfort seat
Depending on your order, the comfort seat is
mounted on the bike frame or on the child-
seat adapter.
To adjust the position of the seat correctly, the
driver puts a foot on the pedals at the furthest
position. Adjust the position in such a way that
the leg is stretched but still relaxed.
To adjust the seat on the bike frame:
1. Pull the handle up.
2. Move the seat to the required position and
release the handle.
To adjust the seat on the adapter:
1. Slightly loosen the grip handle.
2. Bring the seat in the required position.
3. Tighten the grip handle again.
(children-) comfort seat on
the child-seat adapter.
2.
1.
2.
1.
Comfort seat on the
bike frame.
User manual
Fun-2-Go 06.13
12
Position backrest comfort seat
The backrest can be adjusted to the desired
position. To do this:
1. Loosen the wing nut slightly.
2. Put the backrest in the desired position.
3. Tighten the wing nut again.
Position backrest comfort seat
(only seat on child-seat adapter)
The back rest can be adjusted to the desired
position. To do this:
1. Slightly loosen the screw with an Allen key.
2. Put the backrest in the desired position and
then tighten the screw again.
Firmness backrest comfort seat
To adjust the backrest to a looser or tighter
position:
1. Open the straps by loosening the velcro.
2. Tighten the straps or loosen them.
3. Fasten the velcro again.
1.
2.
1.
2.
User manual
Fun-2-Go 06.13
13
Transporting a walker
To firmly attach a walker to the back of
the bike:
1. If possible, fold in the walker.
2. Loosen the star knob.
3.Pull the clamp up.
4. Place the walker with the upper bar in
the bracket [A].
5. Pull the clamp [3] down so that the
upper bar is closed in. Tighten the
star knob again.
To disassemble the rack, all screws
can be loosened with an Allan key.
Once they are loosened, all the pipes
can be taken out of the frame.
4.
2.
3.
1.
[A]
User manual
Fun-2-Go 06.13
14
Wheelchair carrier
To attach the wheelchair on the back of
the bike:
1. Place the wheelchair on the supports.
2. Wrap the belts around the tires and
then through the buckle. Next, tighten
the belts thoroughly.
Loosen the screws with an Allen key
to adjust the supports.
Loosen the screws with an Allen key
to remove the rack. When loosened,
the rods can be pulled out of the bike
frame.
1.
2.
User manual
Fun-2-Go 06.13
15
Electric motors
The tricycle can be equipped with an electric Silent motor system or Heinzmann.
Silent Electric motor
The Electric motor has the following Functions:
- Pedal assistance while cycling
- Launch control
- Backwards pedaling with assistance
Press the on/off button to turn on the motor .
After the system is turned on, the electric
motor is active in level 1.
Level 1 provides light support. Level 3
provides optimum support. You can change
the level while cycling.
The engine has launch control. This allows the driver to accelerate without pedaling
up to a speed of 5 km / h . To accelerate, press the launch button and keep it
pressed down . The motor is activated after 2 seconds.
The reverse gear is activated by pedalling back from a standing position. Within a
few seconds the motor is activated and the tricycle cycles at a speed of about 3KM/h
backwards when you start to pedal backwards.
Do not be frightened by an unexpected noise of the electric motor. If you
e.g. wait for the traffic light and you play with the pedals by moving them
backwards the reverse gear is activated and the tricycle cycles
backwards.
With the on/off button, you can turn off the system. When the system is not used, it
will automatically turn off after a certain time.
You can see the battery level at the indication lights at the coloured display. If only
the red light is on, the battery is almost empty and needs to be recharged or
replaced by a new, fully charged battery.
When the last red light flashes, the battery is empty and the engine will not support
you any longer while cycling.
On/of Button
Stand 1, 2 or 3
Indication lights battery
deAkkus
Launch
Con
User manual
Fun-2-Go 06.13
16
When you push the bicycle, turn off the motor.
When the motor is not used for several days, the battery switches into the sleeping
mode. This to protect the batteries. To activate it, you must connect the battery to
the charger for a few seconds or cycle the bike forwards and push the on/off button
to activate the system.
Charging the Battery:
For the best performance and to prolong the
life of the battery, we recommend that you
charge the battery at home at room
temperature.
To charge the battery:
1
Open the little lock by turning the key a
quarter (to the right)
2
Push down the lock while pulling the battery
with your other hand.
3
Take the battery pack into the house. Plug the
charger into the plug contact of the battery.
User manual
Fun-2-Go 06.13
17
4
Connect the charger plug into the socket. The
red light on the charger will light up.
5
Depending on the battery level, the charging
time is about 4 hours. If the green light is on,
the battery is charged.
6
Once the battery is charged, pull the plug
from the socket first..
7
Then pull the connector from the battery.
8
Put the battery back in the holder of the cycle
and close the lock.
It is also possible to charge the battery while it is still in the holder.
When charging the battery, first connect the charging point and then insert
the plug into the socket!
After being charged, first disconnect the socket and only then remove the
charger from the tricycle!
After charging, always remove the charger cable from the battery.
Ensure that the battery is always is pushed straight into the holder.
4.
User manual
Fun-2-Go 06.13
18
Heinzmann Electric motor
The bicycle can be supplied with an electricHeinzmann motor. There are 2 types
available.
Accelerator:
The electric motor is operated by using the accelerator. By using the cockpit you
start the motor and determine the power of the motor. This motor accelerates and
drives with a speed up to 6 km/h maximum. For more speed the cyclist has to pedal
as well.
Pas-Vario:
The electric motor is operated by the cockpit. With this cockpit you switch the engine
on/off and you can also determine the power of the motor. This motor only supports
the cycling and does not accelerate.
Use of the cockpit (same in both types):
Press one of the buttons, 1, 2 or 3 to start the
electric motor. With these buttons you can
determine the power of the motor, also during
cycling.
With the red button you shut down the system.
If the system is not used, it will automatically shut
itself down after a period of time.
When walking backwards with the bicycle, always turn off the motor.
User manual
Fun-2-Go 06.13
19
Charging the battery:
The charging point is situated under the seat at the
backside of the bicycle. To charge the battery:
1. First connect the charger plug to the
charging point under the seat.
2. Put the charger plug in the wall socket.
3. Depending on the state of the battery, it
needs 4 to 12 hours to charge. The battery
is completely charged when the green lamp
lights up.
4. As soon as the battery is charged, first take
the plug from the wall socket and then
disconnect the charger from the bicycle.
When charging, first connect the plug to the charging point on the
bicycle and then put the plug in the wall socket!
When charged, first take the plug from the wall socket and then
disconnect the charger from the bicycle!
Depending on your
order, this charger is
supplied.
1.
2.
User manual
Fun-2-Go 06.13
20
The batteries can also be taken from the containers
and charged somewhere else, indoors for instance.
To do this:
1. Loosen the charge connector of the batteries
from the charging point under the seat.
2. Undo the lock of the fastening device and open
it.
3. Take the batteries from the containers.
4. Put the batteries down and connect the charge
connector of the batteries to the connector of
the charger.
5. Put the charger plug in the wall socket. The red
light will light up.
6. Depending on the state of the battery it will take
4 to 12 hours to fully charge.
7. As soon as the battery is charged, first take the
plug from the wall socket.
8. Then take the charge connector of the batteries
from the connector of the charger.
9. Place the batteries back in the containers on the
bicycle and lock the fastening devices.
10.Then, connect the charge connector of the
batteries to the connector of the charging point
again.
Beware:
Charge the battery until the green lamp lights up.
Never interrupt the charging process.
For the lifespan of the battery it is better to charge
the battery when it is almost discharged.
It is damaging for the battery if it is not used for
more than 2 months. In that case charge the battery
every now and then.
The case of the charger may not be opened by the
buyer. In the event of problems go to your dealer!
Only use the charger in non-humid indoor spaces.
Below 5 degrees Celsius the charger will not
function properly. In that case it is advisable to
charge the batteries indoors.
Extra accessories are available at your dealer.
2.
3.
4.
5.
1.

Other manuals for Fun-2-Go

1

Other Vanraam Bicycle manuals

Vanraam Easy Rider 3 User manual

Vanraam

Vanraam Easy Rider 3 User manual

Vanraam Chat User manual

Vanraam

Vanraam Chat User manual

Vanraam O-Pair User manual

Vanraam

Vanraam O-Pair User manual

Vanraam Tavara Balance User manual

Vanraam

Vanraam Tavara Balance User manual

Vanraam Easy Sport User manual

Vanraam

Vanraam Easy Sport User manual

Vanraam Tavara Balance User manual

Vanraam

Vanraam Tavara Balance User manual

Vanraam Twinny User manual

Vanraam

Vanraam Twinny User manual

Vanraam Fun-2-Go User manual

Vanraam

Vanraam Fun-2-Go User manual

Vanraam Balance User manual

Vanraam

Vanraam Balance User manual

Vanraam Funtrain User manual

Vanraam

Vanraam Funtrain User manual

Vanraam Twinny User manual

Vanraam

Vanraam Twinny User manual

Vanraam Husky User manual

Vanraam

Vanraam Husky User manual

Vanraam VeloPlus3 User manual

Vanraam

Vanraam VeloPlus3 User manual

Vanraam Tavara Balance User manual

Vanraam

Vanraam Tavara Balance User manual

Vanraam Chat Assembly instructions

Vanraam

Vanraam Chat Assembly instructions

Vanraam VeloPlus3 User manual

Vanraam

Vanraam VeloPlus3 User manual

Vanraam Easy Go User manual

Vanraam

Vanraam Easy Go User manual

Vanraam Easy Rider 3 User manual

Vanraam

Vanraam Easy Rider 3 User manual

Vanraam Balance User manual

Vanraam

Vanraam Balance User manual

Vanraam Velo-Plus2 User manual

Vanraam

Vanraam Velo-Plus2 User manual

Vanraam City Walking aid Technical manual

Vanraam

Vanraam City Walking aid Technical manual

Vanraam O-Pair User manual

Vanraam

Vanraam O-Pair User manual

Vanraam Chat User manual

Vanraam

Vanraam Chat User manual

Vanraam Husky User manual

Vanraam

Vanraam Husky User manual

Popular Bicycle manuals by other brands

e-nova FB-NOVABIKE FBNB2201 user manual

e-nova

e-nova FB-NOVABIKE FBNB2201 user manual

ARGON18 nitrogen Assembly guide

ARGON18

ARGON18 nitrogen Assembly guide

Btwin ROCKRIDER E-ST500 user manual

Btwin

Btwin ROCKRIDER E-ST500 user manual

Btwin E-LD500 Instructions for use

Btwin

Btwin E-LD500 Instructions for use

Bulls Sonic Evo AM-SL 1 Carbon Translation of original operating instructions

Bulls

Bulls Sonic Evo AM-SL 1 Carbon Translation of original operating instructions

InMotion V3 user manual

InMotion

InMotion V3 user manual

Btwin FOLD 560 user manual

Btwin

Btwin FOLD 560 user manual

ARGON18 Road Racing operating instructions

ARGON18

ARGON18 Road Racing operating instructions

KIKKA BOO ALONCY Instructions for use

KIKKA BOO

KIKKA BOO ALONCY Instructions for use

KINGSONG KS-16X user manual

KINGSONG

KINGSONG KS-16X user manual

ARGON18 E-118 TRI+ Disc 315A Assembly guide

ARGON18

ARGON18 E-118 TRI+ Disc 315A Assembly guide

Bion X Smart Repair instructions

Bion X

Bion X Smart Repair instructions

Btwin R500E user manual

Btwin

Btwin R500E user manual

Liteville 301 Mk14 manual

Liteville

Liteville 301 Mk14 manual

Xtreme XB-502 owner's manual

Xtreme

Xtreme XB-502 owner's manual

Air Creation TANARG 582 Instruction and maintenance handbook

Air Creation

Air Creation TANARG 582 Instruction and maintenance handbook

Orbea BLUE PAPER TERRA OMR 2022 Technical manual

Orbea

Orbea BLUE PAPER TERRA OMR 2022 Technical manual

Lectric eBikes XP 3.0 owner's manual

Lectric eBikes

Lectric eBikes XP 3.0 owner's manual

manuals.online logo
manuals.online logoBrands
  • About & Mission
  • Contact us
  • Privacy Policy
  • Terms and Conditions

Copyright 2025 Manuals.Online. All Rights Reserved.