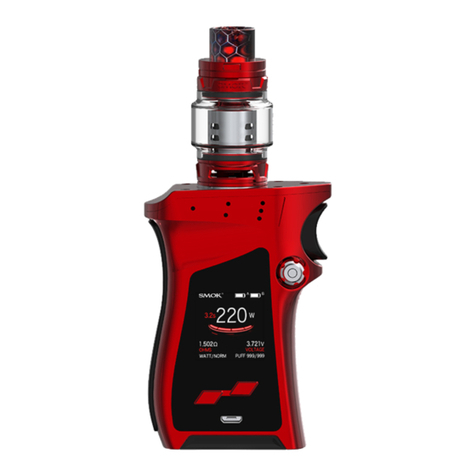
Vaporfi V-GRIP 220 User manual

QUICK START GUIDE
ENGLISH


WHAT’S INCLUDED
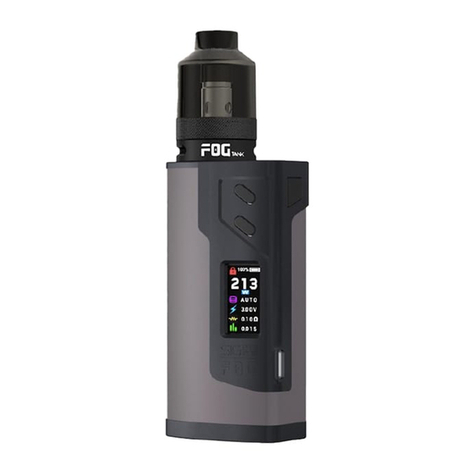
» [ 1 ] 220 Watt TC Mod (18650 Batteries Not Included)
» [ 1 ] USB Charger
» [ 1 ] Quick Start Guide

USING THE V-GRIP 220 MOD
To turn on the VaporFi V-GRIP 220 TC MOD, click the fire bar five
times. You will do the same to turn the device off. When inserting
your batteries, ensure that they are facing the correct directions
indicated on the battery door. Battery 1 will require the positive
terminal facing upwards and battery 2 will require the negative
terminal facing upwards. Before using the device, make sure you are
in the correct mode depending on the atomizer you are using. To
adjust modes, press the fire bar three times to enter the designated
menu. Once there, use the – button to navigate the menu and the
+ button to make any necessary changes. Once you’ve checked
your settings, you are now ready to vape. Hold the fire bar while
inhaling from the drip tip, releasing the fire bar once the desired
vapor production is achieved. Use the + and – buttons to determine

TEMPERATURE CONTROL MODE
If you are planning to use an atomizer in one of three temperature
modes, press the fire bar 3 times to enter the designated menu. Once
in the menu, press the – button, you will notice that the modes will
begin to flash. Now, press the + button to scroll through the different
modes. Once you have found the correct mode for your atomizer,
you are ready to vape in temperature control mode. Using the + and
NOTE: When the fire bar is held for longer than 10 seconds, the
device will no longer fire and the screen will display, “Over 10s
Protection.”
the best wattage or temperature, depending on your atomizer, that
works for your vaping style. When using a variable wattage atomizer,
start at a lower wattage and gradually raise your wattage to avoid
burning your atomizer.

SWITCHING FROM CELSIUS TO FAHRENHEIT
Switching from Celsius to Fahrenheit or vice versa is fairly easy.
Hold the + button to increase the temperature, until you’ve reached
NOTE: When using temperature control atomizers, you must
lock your resistance. To lock resistance, press the fire bar three
times, press the – button, and the OHMs will begin to blink. Press
the + to lock your resistance. To unlock resistance, follow the
aforementioned steps and unlock. Additionally, when using new
atomizers in temperature control mode it is important to start at
lower temperatures to avoid burning your atomizers. To properly
initiate temperature control settings, be sure that your atomizer is
at room temperature before using.
– buttons you can adjust your temperature. You may select between
Power, Bypass, Temp NI, Temp TI, Temp SS316, M1, M2 and M3 Modes.
(Temperature ranges from 100° - 315°C or 200° - 600°F).

CHANGING WATTAGE IN TEMPERATURE CONTROL MODE
TCR (M1, M2, M3)
Wattage can be adjusted in temperature control mode to best suit
your temperature control atomizer. Press the fire bar three times to
enter the menu. By pressing the – button, you will notice the wattage
will begin to blink. Next, press the + button to increase your wattage
to its desired power.
The V-GRIP 220 TC MOD contains a TCR mode that will assist in
providing a quality temperature control vaping experience. In
order to utilize and set the TCR mode, first click the fire bar five
times to switch the mod off. Next press the fire bar and + button
the maximum temperature (315 degrees Celsius or 600 degrees
Fahrenheit). Once you reach the maximum temperature, press the +
button once more to complete the switch.

EXTRA FEATURES
1. NEW COIL / SAME COIL PROMPT
simultaneously to enter the TCR setting mode. Next, press the + or
– button to select your desired setting M1, M2 or M3 and press the
fire bar to select the mode. Press the + or – button to increase or
decrease the setting in order to select your ideal TCR setting based
on your coil. The following numerical values are best suited to the
following temperature control atomizers: Nickel (Ni200) 600 – 700,
Titanium (TI) 300 – 400, SS316 & 316L (Stainless Steel) 80 – 200.
Once you have dialed in your TCR settings, activate your MOD. Once
your MOD is turned on, click the fire bar three times to enter the
navigation menu. Once in the navigation menu enter the TCR setting
and select your M1, M2 or M3 setting. Press the fire button and enjoy
your favorite vape juice.

When replacing your atomizer, particularly from a Nickel atomizer
to a temperature control atomizer (Ni, Ti or SS 316/L), you will
be required to reset the resistance of your atomizer. This helps
the device recognize that the new atomizer is to be used at room
temperature, which in turn avoids causing a burned hit. When
prompted, press the + button to indicate that the replacement
atomizer is new. If prompted with your older or already in use
atomizer, press the – button to indicate that the atomizer is the same.
This will ensure that the new atomizer, installed at room temperature,
is read at the correct base resistance.
2. LOCK/UNLOCK IN TEMPERATURE CONTROL MODE
When using an atomizer in temperature control, to ensure that
your atomizer is read at the correct base resistance, you have the
ability to lock your resistance. Press the fire bar three times to enter

3. KEY LOCK
While the device is on, hold the + and – buttons to enter key lock
mode. While in this mode, you will be unable to change the wattage/
temperature, but will still be able to fire.
NOTE: It is important to unlock your atomizer’s resistance before
replacing the atomizer. This will ensure that the new atomizer is
installed at room temperature.
4. STEALTH MODE
While the device is on, hold the power and – buttons to enter stealth
mode. While in stealth mode, you will be able to fire your device
without the screen lighting up. This helps to save battery life. You
the menu. Then press the – button to enter the second row of your
display, you will notice the resistance display is now blinking. Now,
press the + button to lock the resistance.

5. REAL TIME CLOCK DISPLAY
The V-GRIP 220 TC MOD contains a real-time clock display. To set
this real-time clock display, press the fire bar three times. Next,
press the + button. To adjust your time, press the fire bar then the
– button until the individual hands on the clock or numerical values
are flashing. Once they are flashing, press the + button to reach the
desired time or date.
CHANGING BETWEEN ANALOG AND DIGITAL CLOCKS
To switch between Analog and Digital clocks, click the fire bar three
times and wait for the display to flash. Once the display is flashing
press the + button to shift between clock types.
can still see the screen when changing your wattage/temperature.

2. NO ATOMIZER FOUND
You will receive the “Unable to read if there is an atomizer attached”
message if the device is unable to read there is an atomizer attached
or if the atomizer has shorted. Please ensure the atomizer is attached
properly. Also make sure the atomizer is not damaged in any way
before use.
You will receive the “Weak Battery” message when your battery
meter begins to blink. If you continue to press the fire bar, the
message will then change to “Battery Low Lock.” The device will not
work until the battery is replaced or charged.
1. WEAK BATTERY
PROTECTIONS AND ALERTS

3. TEMPERATURE PROTECTION
BATTERY LIFE
There is a battery meter at the bottom of your screen that will
display the device’s current battery strength. As you use the device,
this meter will continue to decrease until the device can no longer
fire and the “Weak Battery” message is displayed on the screen.
Once this message is displayed, it is now time to replace both of your
drained 18650 batteries with a set of new ones. If you do not have
a fully charged set, feel free to use the USB cord included with the
device, to charge your batteries.
In temperature control mode, if the temperature of the atomizer is
higher than the set temperature of the device, the “Temperature
Protection” message will be displayed.

DISCLAIMER
Vaporfi products are not smoking cessation products and have
not been tested as such. The U.S. FDA has not approved these
products for any use and they are not intended to diagnose, cure,
mitigate, treat or prevent any disorder, disease, or physical or
mental condition. Some Vaporfi products contain a chemical known
to the State of California to cause cancer or birth defects or other
reproductive harm. Nicotine is addictive and habit forming, and it is
very toxic by inhalation, in contact with the skin, or if swallowed.
WARNING
Do not attempt to modify equipment; doing so can result in
permanent damage, overheating and/or explosion which may lead to
severe injuries or death.
For more information visit: vaporfi.com/how-it-works


GUIA DE INICIO
ESPAÑOL

¿QUÉ VIENE INCLUIDO?
» [ 1 ] 220Watt TC Mod (18650 Baterias No Incluida)
» [ 1 ] Micro Usb
» [ 1 ] Guia de inicio rapido

USO DEL DISPOSITIVO
Para encender el VaporFi VGRIP 220, haga clic cinco veces en la
barra de fuego. Haga lo mismo para apagarlo. Antes de usar el
dispositivo, asegúrese de que el mismo se encuentre en el modo
correcto dependiendo del atomizador que esté utilizando. Para
ajustar los modos, presione la barra de fuego tres veces para entrar
en el menú designado. Una vez allí, utilice el botón con el símbolo
- para navegar por el menú y el botón + para realizar los cambios
necesarios. Una vez que haya comprobado su configuración, ya
está listo para el vape. Mantenga la barra de fuego mientras inhala
de la boquilla, liberando la barra de fuego una vez que se logre
la producción de vapor deseada. Utilice los botones + y - para
determinar el mejor voltaje o temperatura, dependiendo de su
atomizador, el cual funciona para su estilo de vaping. Cuando utilice
un atomizador de potencia variable, comience con una potencia
más baja y aumente gradualmente su potencia para evitar que su

atomizador se queme.
NOTA: Cuando la barra de fuego se mantiene activa durante más de
10 segundos, el dispositivo ya no se disparará y la pantalla mostrará
“Protección de más de 10 segundos”.
MODO DE CONTROL DE TEMPERATURA
Si está planeando usar un atomizador en uno de los tres modos
templados, presione la barra de fuego 3 veces para entrar en el menú
designado. Una vez en el menú, presione el botón -, notará que los
modos comenzarán a parpadear. Ahora, presione el botón + para
desplazarse por los diferentes modos. Una vez que haya encontrado
el modo correcto para su atomizador, está listo para vaporizar en el
modo de control de temperatura. Con los botones + y - puede ajustar
la temperatura. Puede seleccionar entre los modos Power, Bypass,
Temp NI, Temp TI, Temp SS316, M1, M2 y M3. (La temperatura oscila

NOTA: Cuando utilice atomizadores de control de temperatura,
debe bloquear su resistencia. Para bloquear la resistencia,
presione la barra de fuego tres veces, presione el botón - y los
OHM comenzarán a parpadear. Pulse la tecla + para bloquear
su resistencia. Para desbloquear la resistencia, siga los pasos
mencionados y desbloquee. Además, al usar nuevos atomizadores
en el modo de control de temperatura es importante comenzar
a temperaturas más bajas para evitar quemar sus atomizadores.
Para iniciar correctamente los ajustes de control de temperatura,
asegúrese de que el atomizador esté a temperatura ambiente antes
de usarlo.
CAMBIO DE CELSIUS A FAHRENHEIT
Cambiar de Celsius a Fahrenheit o viceversa es bastante fácil.
entre los 100 °C- 315 ° o 200 ° - 600 °F).
Table of contents
Other Vaporfi Vaporizer manuals

Vaporfi
Vaporfi VOX 80 TC User manual

Vaporfi
Vaporfi VAIO 75 TC User manual

Vaporfi
Vaporfi AIR 2 User manual

Vaporfi
Vaporfi PULSE User manual

Vaporfi
Vaporfi VOX 60 TC User manual

Vaporfi
Vaporfi VEX 150 TC User manual

Vaporfi
Vaporfi VEX 75 TC User manual

Vaporfi
Vaporfi PRO II User manual

Vaporfi
Vaporfi Rebel User manual

Vaporfi
Vaporfi VAIO 80 TV User manual