manuals.online logo
Brands
  1. Home
  2. •
  3. Brands
  4. •
  5. Vaxcel
  6. •
  7. Outdoor Light
  8. •
  9. Vaxcel T0571 Instruction manual

Vaxcel T0571 Instruction manual

191204
W
ASSEMBLY AND INSTALLATION
INSTRUCTIONS
T0571
WARNING: Turn off the main power at circuit breaker before installing fixture.
AVERTISSEMENT: Coupez la source d’alimentation principale au panneau
central de disjoncteurs avant d’installer le luminaire.
NOTE: 1. Before installing, consult local electrical codes for wiring and grounding requirements.
2. READ AND SAVE THESE INSTRUCTIONS.
Hardware Package (included):
Installation steps
Turn off the power at fuse or circuit box.
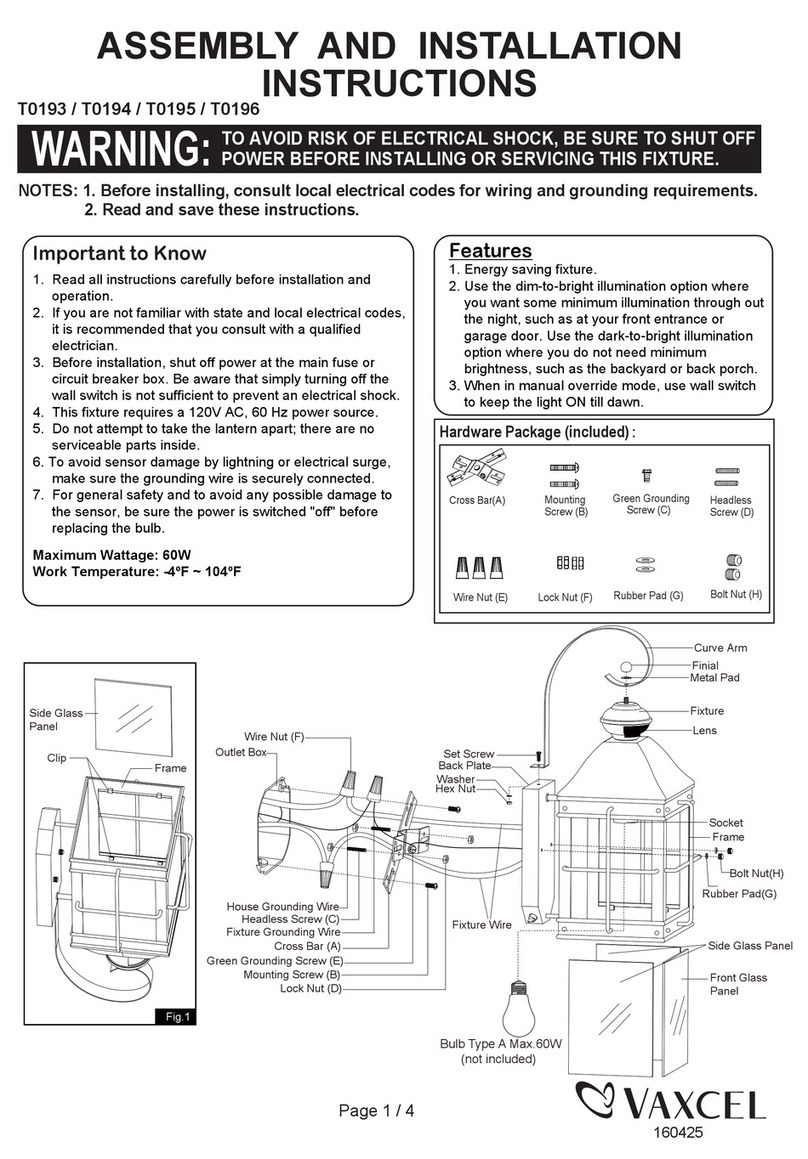
1. Thread two headless screws (E) through the
cross bar (A), and then secure them with four
lock nuts (F) (two on each side of the cross
bar (A).) Adjust the length of the headless
screws (E) if necessary.
Note: Make sure the headless screws are lined up
horizontally to make the fixture level.
2. Attach the
cross bar
(A) to the outlet box by using two
mounting screws (B).
Green Grounding Screw (D)
Headless screw (E)
Mounting Screw (B) Wire Connector (C)
Lock Nut (F)
Bolt Nut (G) Rubber Pad (H)
Cross Bar (A)
Max.60W Type A Bulb
(not included)
Glass Shade
Fixture
Set Screw
Metal Cover
Backplate
Photocell
Bolt Nut (G)
Rubber Pad (H)
Wire Connector (C)
House Grounding Wire
Outlet Box
Mounting Screw (B)
Green Grounding Screw (D)
Headless Screw (E)
Cross Bar (A)
Lock Nut (F)
Fixture Grounding Wire
Fixture Wire
191204
3. Pull out the source wires from the outlet box. Make wire connections using wire connectors (C) as follows:
• Connect the hot wire (usually black insulation) from the fixture to the black wire from the power source.
• Connect the neutral wire (usually white insulation) from the fixture to the white wire from the power source.
• Attach the fixture grounding wire (usually green insulation or bare wire) to the cross bar (A) with the green
grounding screw (D). Then, depending on local code connect it to the house grounding wire with the wire
connector (C).
Carefully put all of the wires back into the outlet box.
4. Attach the backplate of the fixture to the cross bar (A) by aligning and inserting the two headless screws (E) from
the cross bar (A) into the open holes on the backplate, then place the two rubber pads (H) over the exposed
headless screws (E) before screwing the two bolt nuts (G).
Note: With silicone caulking compound, caulk completely around where the backplate meets with the wall
surface to prevent water from seeping into the outlet box.
5. Install bulb (not included).
Check relamping label at socket area or packaging for maximum wattage allowed .
6. Place the glass shade on the fixture carefully and rotate the glass shade to hold it in place, then attach the metal cover
to the fixture by using the two set screws.
Turn on the power at fuse or circuit box.
1. Turn off the power at the fuse or circuit box before starting installation.
2. Loosen the wire connectors connected with the wires from photocell. (See Fig.1)
Note: Do not move the photocell to prevent water from seeping into the outlet box.
3. Take a white pigtail and black pigtail and make wire connections using wire connectors (C): (See Fig.2)
a. The black wire from the fixture to one end of the black pigtail.
b. The white wire from the fixture to one end of the white pigtail.
c. The other end of the black pigtail to the black wire from the power source.
d. The other end of the white pigtail to the white wire from the power source.
Put all wires back into the backplate of the fixture.
Operation the Unit Without Photocell
Fig.1 Fig.2
Photocell
White Wires From Photocell
Wire Connector
Wires From Fixture
Wires From Fixture
Wires From
Main Power
Wire Connector (C)
White Pigtail
Pigtail
Red Wires From Photocell
Black Wires From Photocell
191204
Green Grounding Screw (D)
Headless screw (E)
Mounting Screw (B) Wire Connector (C)
Lock Nut (F)
Bolt Nut (G) Rubber Pad (H)
Cross Bar (A)
The following parts are available for re-order if damaged or missing.
Spare Parts List:
Mounting Hardware
6200MM (1SET)
Glass Shade
X1
10148CS
Set Screw
6201MM
B
A
C
A: 16-3/4”
B: 15”
C: 23”

Other Vaxcel Outdoor Light manuals

Vaxcel T0350 Instruction manual

Vaxcel

Vaxcel T0350 Instruction manual

Vaxcel T0696 Instruction manual

Vaxcel

Vaxcel T0696 Instruction manual

Vaxcel T0142 Instruction manual

Vaxcel

Vaxcel T0142 Instruction manual

Vaxcel T0112 User manual

Vaxcel

Vaxcel T0112 User manual

Vaxcel T0717 Instruction manual

Vaxcel

Vaxcel T0717 Instruction manual

Vaxcel T0246 Instruction manual

Vaxcel

Vaxcel T0246 Instruction manual

Vaxcel T0258 Instruction manual

Vaxcel

Vaxcel T0258 Instruction manual

Vaxcel T0468 Instruction manual

Vaxcel

Vaxcel T0468 Instruction manual

Vaxcel T0503 Instruction manual

Vaxcel

Vaxcel T0503 Instruction manual

Vaxcel T0568 Instruction manual

Vaxcel

Vaxcel T0568 Instruction manual

Vaxcel T0449 Instruction manual

Vaxcel

Vaxcel T0449 Instruction manual

Vaxcel T0238 Instruction manual

Vaxcel

Vaxcel T0238 Instruction manual

Vaxcel T0616 Instruction manual

Vaxcel

Vaxcel T0616 Instruction manual

Vaxcel T0414 Instruction manual

Vaxcel

Vaxcel T0414 Instruction manual

Vaxcel T0575 Instruction manual

Vaxcel

Vaxcel T0575 Instruction manual

Vaxcel T0594 Instruction manual

Vaxcel

Vaxcel T0594 Instruction manual

Vaxcel T0366 Instruction manual

Vaxcel

Vaxcel T0366 Instruction manual

Vaxcel T0274 Instruction manual

Vaxcel

Vaxcel T0274 Instruction manual

Vaxcel T0076 Instruction manual

Vaxcel

Vaxcel T0076 Instruction manual

Vaxcel T0172 Instruction manual

Vaxcel

Vaxcel T0172 Instruction manual

Vaxcel T0542 Instruction manual

Vaxcel

Vaxcel T0542 Instruction manual

Vaxcel T0364 Instruction manual

Vaxcel

Vaxcel T0364 Instruction manual

Vaxcel T0099 Instruction manual

Vaxcel

Vaxcel T0099 Instruction manual
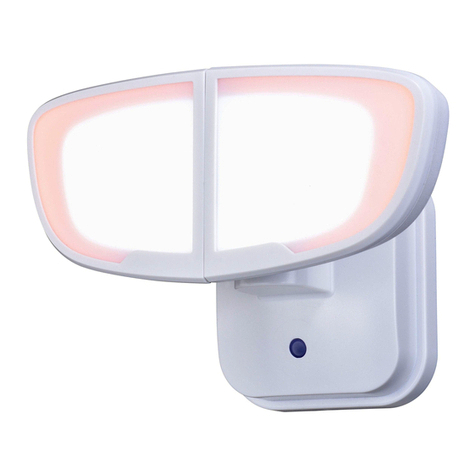
Vaxcel T0244 Instruction manual

Vaxcel

Vaxcel T0244 Instruction manual

Popular Outdoor Light manuals by other brands

Nordic D'Luxx FLOWERPOT user manual

Nordic D'Luxx

Nordic D'Luxx FLOWERPOT user manual

Wetelux XLMD-101 instruction manual

Wetelux

Wetelux XLMD-101 instruction manual

TotalPond UW16200 quick start guide

TotalPond

TotalPond UW16200 quick start guide

Telefunken MAL 31200xTF Mounting instructions

Telefunken

Telefunken MAL 31200xTF Mounting instructions

Lighting Technologies FREGAT LED 100 (W) RU 5000K manual

Lighting Technologies

Lighting Technologies FREGAT LED 100 (W) RU 5000K manual

LIGMAN BENTON 12 installation manual

LIGMAN

LIGMAN BENTON 12 installation manual

Prismatibro Prisma Light Eliott 4 Series manual

Prismatibro

Prismatibro Prisma Light Eliott 4 Series manual

Nave NORA manual

Nave

Nave NORA manual

HEPER MINIMO 3x90 Installation & maintenance instructions

HEPER

HEPER MINIMO 3x90 Installation & maintenance instructions

Moooi Trix Cleaning instructions

Moooi

Moooi Trix Cleaning instructions

WAC Lighting 5222 installation instructions

WAC Lighting

WAC Lighting 5222 installation instructions

LightPro Juno 2 user manual

LightPro

LightPro Juno 2 user manual

Hubbell WGH81L installation instructions

Hubbell

Hubbell WGH81L installation instructions

Paradise Datacom U000-0880 instructions

Paradise Datacom

Paradise Datacom U000-0880 instructions

LIGMAN LIGHTALK 8 installation manual

LIGMAN

LIGMAN LIGHTALK 8 installation manual

DT Light e DePadova Assembly instructions

DT Light

DT Light e DePadova Assembly instructions

Quoizel Granby GRB9008EK installation guide

Quoizel

Quoizel Granby GRB9008EK installation guide

Bona VIKING D15 quick start guide

Bona

Bona VIKING D15 quick start guide

manuals.online logo
manuals.online logoBrands
  • About & Mission
  • Contact us
  • Privacy Policy
  • Terms and Conditions

Copyright 2025 Manuals.Online. All Rights Reserved.