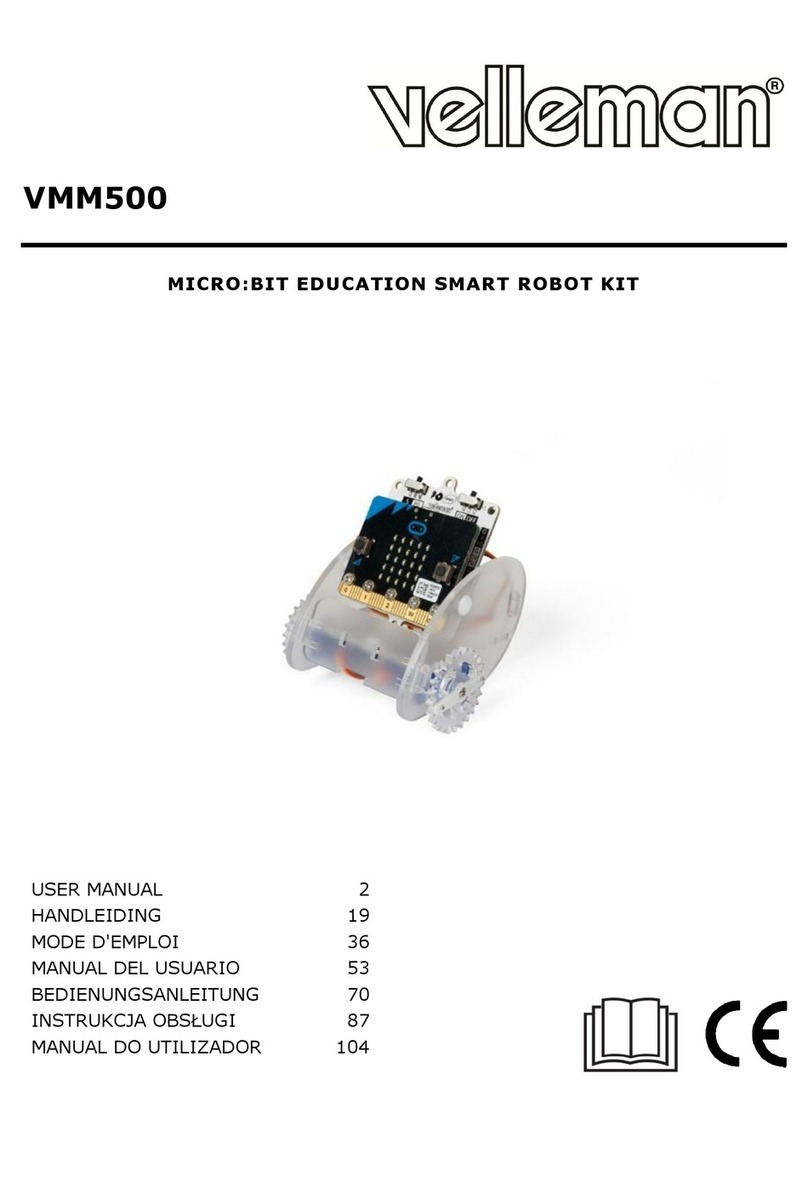
Velleman VMM500 User manual

VMM500
V. 01 –17/01/2019 2 ©Velleman nv
USER MANUAL
1. Introduction
To all residents of the European Union
Important environmental information about this product
This symbol on the device or the package indicates that disposal of the device after its lifecycle could
harm the environment. Do not dispose of the unit (or batteries) as unsorted municipal waste; it
should be taken to a specialized company for recycling. This device should be returned to your
distributor or to a local recycling service. Respect the local environmental rules.
If in doubt, contact your local waste disposal authorities.
Thank you for choosing Velleman®! Please read the manual thoroughly before bringing this device into service.
If the device was damaged in transit, do not install or use it and contact your dealer.
2. Safety Instructions
This device can be used by children aged from 8 years and above, and persons with
reduced physical, sensory or mental capabilities or lack of experience and knowledge if
they have been given supervision or instruction concerning the use of the device in a
safe way and understand the hazards involved. Children shall not play with the device.
Cleaning and user maintenance shall not be made by children without supervision.
Indoor use only.
Keep away from rain, moisture, splashing and dripping liquids.
3. General Guidelines
Refer to the Velleman®Service and Quality Warranty on the last pages of this manual.
Familiarise yourself with the functions of the device before actually using it.
All modifications of the device are forbidden for safety reasons. Damage caused by user
modifications to the device is not covered by the warranty.
Only use the device for its intended purpose. Using the device in an unauthorised way
will void the warranty.
Damage caused by disregard of certain guidelines in this manual is not covered by the
warranty and the dealer will not accept responsibility for any ensuing defects or
problems.
Nor Velleman nv nor its dealers can be held responsible for any damage (extraordinary,
incidental or indirect) –of any nature (financial, physical…) arising from the possession,
use or failure of this product.
Due to constant product improvements, the actual product appearance might differ from
the shown images.
Product images are for illustrative purposes only.
Do not switch the device on immediately after it has been exposed to changes in
temperature. Protect the device against damage by leaving it switched off until it has
reached room temperature.
Keep this manual for future reference.
4. What is micro:bit?
The BBC micro:bit is a pocket-sized (52 x 42 mm –2” x 1.75”) computer, 70 times smaller and 18 times faster
than the original BBC micro computers used in schools. The design is appealing to a young public. It features
25 red LEDs used to flash messages and create games.
micro:bit is compatible with different coding languages starting from Block Editor and mobile apps for the
starters, to Python for more advanced users.
micro:bit has an accelerometer so it can detect motion and knows when you are on the move. The built-in
compass knows which direction you are heading in and it uses a low-energy wireless connection to interact with
other devices and the Internet.
Each element is completely programmable via easy-to-use software on a dedicated website (microbit.org)
accessible from a PC, tablet or mobile.

VMM500
V. 01 –17/01/2019 3 ©Velleman nv
5. Component List
1
front shield
5
base board
2
back shield
6
2x servo
3
2x wheel
7
1x universal wheel
4
left + right side board

VMM500
V. 01 –17/01/2019 4 ©Velleman nv
8
4x rivet
12
screwdriver
9
6x M2.2x5 tapping screw
13
Ring:bit
10
5x M3x5 screw
micro:bit
11
rubber band

VMM500
V. 01 –17/01/2019 5 ©Velleman nv
6. Assembly
6.1 Installing the universal wheel
Before installation, please get rid of the film paste on the acrylic components.
Components used
base board
1x universal wheel
Assembly
Fix the universal wheels on the board with the rivets.

VMM500
V. 01 –17/01/2019 6 ©Velleman nv
6.2 Installing the servos to each side of the board
Components used
2x servo
4x M2.2x5 tapping screw
left + right side board
Assembly
Fix the servos to each side board with the tapping screws.
Hold the acrylic-frosted side on the outside.

VMM500
V. 01 –17/01/2019 7 ©Velleman nv
6.3 Assembling the Ring:bit Car body
Components used
front shield
base board
back shield
Assembly
Fix the front and back shield to the side and base boards.
Hold the acrylic-frosted side on the outside.

VMM500
V. 01 –17/01/2019 8 ©Velleman nv
6.4 Installing the Ring:bit Car wheels
Components used
2x wheel
2x M2.2x5 tapping screw
Assembly
Fix the wheels to the servo rod with the tapping screws.

VMM500
V. 01 –17/01/2019 9 ©Velleman nv
6.5 Fixing the micro:bit to the Ring:bit
Components used
Ring:bit
micro:bit
5x M3x5 screw
Assembly
Fix the micro:bit to the Ring:bit with the screws.

VMM500
V. 01 –17/01/2019 10 ©Velleman nv
6.6 Wire connection
Place 3x LR03 batteries into the holder of the Ring:bit.
Slide and fit the micro:bit assembly into the car.
Batteries are not included.
G = brown = ground (servo)
V = red = power 3 V (servo)
P1/P2 = orange =signal (video)

VMM500
V. 01 –17/01/2019 11 ©Velleman nv
Fix with the rivets.
Your car is now completed!

VMM500
V. 01 –17/01/2019 13 ©Velleman nv
Once loaded, the Ring:bit Car appears in the code drawer.
7.2 The S-Walk
We make a code to let the Ring:bit Car run in an S-shape.
1. On start, set the pins for the servos.
2. Move forward for 1000 ms.
3. Turn left for 1000 ms.
4. Move forward for 2000 ms.
5. Turn right for 1000 ms.
6. Pause for 1000 ms.
7. Move forward for 1000 ms.
8. Download the programme into micro:bit.

VMM500
V. 01 –17/01/2019 14 ©Velleman nv
Drag and drop the block set left wheel at pin P1 right wheel at pin P2 into the block on start in the editor
window. You will find this block in the Ring:bit Car menu of the code drawer. When correct, they snap together.
Now, make a second block as shown in the image.
Drag and drop the block move forward into the block forever. Then, drag and drop the pause block under
the move forward block. You will find the pause block in the basic menu of the code drawer. Set the pause at
1000 ms (= 1 second).
Now, do the same for the other blocks for steps 3 through 7.
When complete, we compile the program to generate a .hex file. Click on the download button and save the
.hex file to the Downloads folder (C:\downloads). This .hex file is ready to be uploaded to the micro:bit.
Plug the micro:bit into the USB port via the micro-USB cable. Then, drag and drop the .hex-file (from the
Downloads folder) onto the micro:bit Removable device to upload the programme.
Now, place the Ring:bit Car onto the ground and switch on the micro:bit via the on-off switch. The Ring:bit Car
runs in a S-shape line.
7.3 Drawing a circle
We make the Ring:bit Car draw a circle. Install a pen or pencil as shown below and install the Ring:bit Car on a
sheet of A4/A3 paper or cardboard.

VMM500
V. 01 –17/01/2019 15 ©Velleman nv
1. Set a different speed for the two wheels.
2. Download the programme into micro:bit.
The block left wheel speed (0) right wheel speed (0) can be found when you click on More in the menu of
the code drawer.
When complete, we compile the programme to
generate a .hex file. Click on the download button
and save the .hex file to the Downloads folder
(C:\downloads). This .hex file is ready to be
uploaded to the micro:bit.
Plug the micro:bit into the USB port via the micro-
USB cable. Then, drag and drop the .hex-file (from
the Downloads folder) onto the micro:bit
Removable device to upload the programme.
Now, place the Ring:bit Car on a sheet of A4/A3
paper or cardboard. Switch on the Ring:bit Car and
see what happens!
7.4 Wireless control
Let’s make a remote control for controlling the Ring:bit Car via RF (radio frequency).
For doing that, you will need a second micro:bit in option.
Click button A to turn right.
Click button B to turn left.
Click buttons A + B to move forward.

VMM500
V. 01 –17/01/2019 16 ©Velleman nv
Remote control code
1. Set the radio group. Keep the sender and
receiver the same.
2. Press buttons A + B to send number 1.
3. Press button A to send number 2.
4. Press button B to send number 3.
5. If there is no operation, send number 0.
6. Download the programme into micro:bit.
The block radio set group can be found in the menu of the code drawer Radio. Drag and drop this block in the
on start block. Set the number on 7.
Then, we make a forever loop. In this loop, we add a logic function: if then else if.
Then click on the gear icon again, and drag and drop the new created logic function under the forever loop.
Now, place the block button A+B is pressed next to the first if logic. Place block button A is pressed next to
the first else if logic, and block button B is pressed next to the second else if logic. The blocks can be found
in the code drawer menu.
Now, place the radio send number 1 block next to the first then logic and set the number to 1. Drag and
drop a second radio send number 2 block next to the second then logic and set the number to 2. Drag and
drop a third radio send number 3 block next to the third then logic and set the number to 3. Drag and drop a
fourth radio send number 0 block next to the else logic and set the number to 0. The blocks can be found in
the code drawer menu.
Click on the gear icon for more
options. Then, drag and drop the
else if logic in the following
order.

VMM500
V. 01 –17/01/2019 17 ©Velleman nv
At least, place a pause block under the else logic and set it to 100 (100 milliseconds).
When complete, we compile the program to generate a .hex file. Click on the download button and save the
.hex file to the Downloads folder (C:\downloads). This .hex file is ready to be uploaded to the micro:bit.
Plug the micro:bit into the USB port via the micro-USB cable. Then, drag and drop the .hex-file (from the
Downloads folder) onto the micro:bit Removable device to upload the programme.
Ring:bit Car code
Drag and drop the blocks in the code drawer as shown below, and download this code into the second
micro:bit.
1. Set the radio group. Keep the sender
and receiver the same.
2. Set the pins for the servos.
3. Save the received numbers into a
variable item.
4. Judge the number received. 1 means
to move forward.
5. 2 means to turn left.
6. 3 means to turn right.
7. Other means to stop.
8. Download the programme into
micro:bit.
When complete, we compile the program to generate a .hex file. Click on the download button and save the
.hex file to the Downloads folder (C:\downloads). This .hex file is ready to be uploaded to the micro:bit.
Plug the second micro:bit into the USB port via the micro-USB cable. Then, drag and drop the .hex-file (from
the Downloads folder) onto the micro:bit Removable device to upload the programme for the remote
control.

VMM500
V. 01 –17/01/2019 18 ©Velleman nv
7.5 About Ring:bit
a. Function switch
S: P0 can connect two GVS modules through G-V-SR and G-V-SL.
P0: use the connector for P0 only.
b. Power switch
Use this device with original accessories only. Velleman nv cannot be held responsible in the event of damage or
injury resulting from (incorrect) use of this device. For more info concerning this product and the latest version
of this manual, please visit our website www.velleman.eu. The information in this manual is subject to change
without prior notice.
© COPYRIGHT NOTICE
The copyright to this manual is owned by Velleman nv. All worldwide rights reserved. No part of this manual may
be copied, reproduced, translated or reduced to any electronic medium or otherwise without the prior written consent of the
copyright holder.

VMM500
V. 01 –17/01/2019 36 ©Velleman nv
MODE D'EMPLOI
1. Introduction
Aux résidents de l'Union européenne
Informations environnementales importantes concernant ce produit
Ce symbole sur l'appareil ou l'emballage indique que l’élimination d’un appareil en fin de vie peut
polluer l'environnement. Ne pas jeter un appareil électrique ou électronique (et des piles
éventuelles) parmi les déchets municipaux non sujets au tri sélectif ; une déchetterie traitera
l’appareil en question. Renvoyer l'appareil à votre fournisseur ou à un service de recyclage local.
Respecter la réglementation locale relative à la protection de l’environnement.
En cas de questions, contacter les autorités locales pour élimination.
Nous vous remercions de votre achat! Lire attentivement le présent mode d'emploi avant la mise en service de
l’appareil. Si l'appareil a été endommagé pendant le transport, ne pas l’installer et consulter votre revendeur.
2. Consignes de sécurité
Cet appareil peut être utilisé par des enfants âgés de 8 ans et plus et des personnes
manquant d’expérience et de connaissances ou dont les capacités physiques,
sensorielles ou mentales sont réduites, si elles ont été formées et encadrées quant à
l'utilisation de l'appareil d'une manière sûre et connaissent les risques encourus. Ne pas
laisser les enfants jouer avec l'appareil. Le nettoyage et l'entretien ne doivent pas être
effectués par des enfants sans surveillance.
Utiliser cet appareil uniquement à l'intérieur.
Protéger l’appareil contre la pluie, l’humidité et les éclaboussures.
3. Directives générales
Se référer à la garantie de service et de qualité Velleman® en fin de ce mode d'emploi.
Se familiariser avec le fonctionnement de l'appareil avant de l'utiliser.
Toute modification est interdite pour des raisons de sécurité. Les dommages
occasionnés par des modifications par le client ne tombent pas sous la garantie.
N’utiliser l'appareil qu’à sa fonction prévue. Un usage impropre annule d'office la
garantie.
La garantie ne se s’applique pas aux dommages survenus en négligeant certaines
directives de ce mode d'emploi et votre revendeur déclinera toute responsabilité pour
les problèmes et les défauts qui en résultent.
Ni Velleman SA ni ses distributeurs ne peuvent être tenus responsables des dommages
exceptionnels, imprévus ou indirects, quelles que soient la nature (financière,
corporelle, etc.), causés par la possession, l’utilisation ou le dysfonctionnement de ce
produit.
Dans le souci d'une amélioration constante de nos produits, l'apparence du produit peut
différer légèrement des images affichées.
Les images des produits sont à titre indicatif seulement.
Ne pas brancher immédiatement l’appareil après exposition à des variations de
température. Afin d’éviter des dommages, attendre jusqu’à ce que l’appareil ait atteint
la température ambiante.
Garder ce mode d'emploi pour toute référence ultérieure.
4. Qu’est-ce que le micro:bit ?
BBC micro:bit est un ordinateur de poche (52 x 42 mm - 70 x 1.75"), 70 fois plus petit et 18 fois plus rapide
que les micro-ordinateurs BBC utilisés dans les écoles. Le design attire un jeune public. Il comporte des LED
rouges permettant d’afficher des messages déroulants et créer des jeux.
micro:bit est compatible avec différents langages de programmation, de Block Editor et des applications
mobiles pour les débutants jusqu'à Python pour les utilisateurs plus avancés.
micro:bit est doté d'un accéléromètre permettant de détecter les mouvements et d’indiquer aux autres
appareils que vous êtes en déplacement. La boussole intégrée peut vous indiquer dans quelle direction vous

VMM500
V. 01 –17/01/2019 37 ©Velleman nv
vous dirigez et utilise une connexion sans fil basse consommation pour interagir avec d'autres appareils et
l’Internet.
Chaque élément est entièrement programmable via un logiciel facile à utiliser sur un site Web dédié
(microbit.org) accessible depuis un PC, une tablette ou un téléphone portable.
5. Liste des composants
1
shield avant
5
carte de base
2
shield arrière
6
2x servo
3
2x roue
7
1x roue universelle
4
plaque latérale gauche + droite
Other manuals for VMM500
2
Table of contents
Languages:
Other Velleman Robotics manuals

Velleman
Velleman KSR20 User manual

Velleman
Velleman VMM500 User manual

Velleman
Velleman KSR10 User manual

Velleman
Velleman VMA500 User manual

Velleman
Velleman KSR3 User manual

Velleman
Velleman KSR13 Installation guide

Velleman
Velleman KSR14 User manual

Velleman
Velleman KSR1 User manual

Velleman
Velleman KSR2 User manual

Velleman
Velleman KSR1 User manual