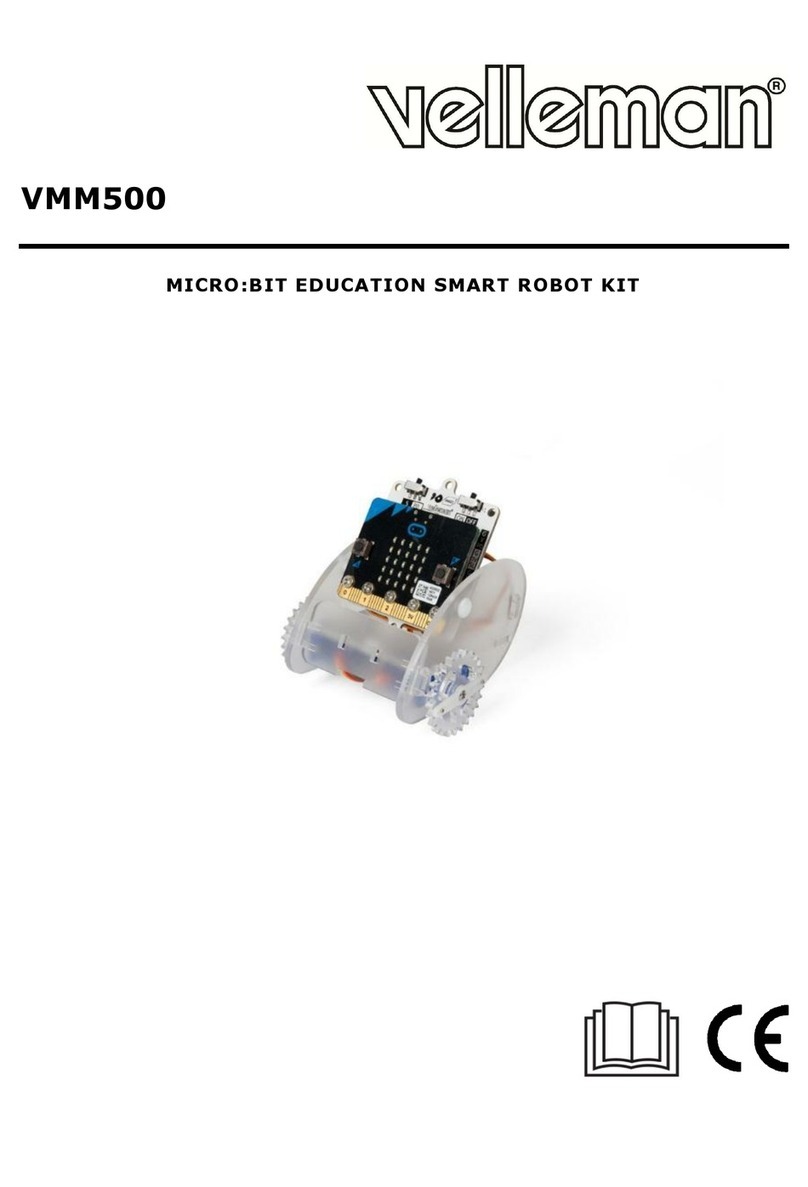
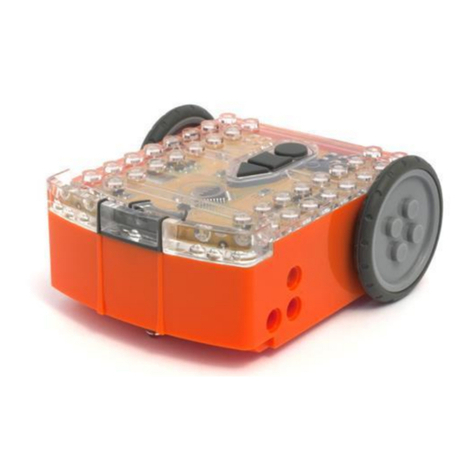
Velleman VMM500 User manual

VMM500
MICRO:BIT EDUCATION SMART ROBOT KIT
USER MANUAL 2
HANDLEIDING 19
MODE D'EMPLOI 36
MANUAL DEL USUARIO 53
BEDIENUNGSANLEITUNG 70
INSTRUKCJA OBSŁUGI 87
MANUAL DO UTILIZADOR 104

VMM500
V. 01 –17/01/2019 2 ©Velleman nv
USER MANUAL
1. Introduction
To all residents of the European Union
Important environmental information about this product
This symbol on the device or the package indicates that disposal of the device after its lifecycle could
harm the environment. Do not dispose of the unit (or batteries) as unsorted municipal waste; it
should be taken to a specialized company for recycling. This device should be returned to your
distributor or to a local recycling service. Respect the local environmental rules.
If in doubt, contact your local waste disposal authorities.
Thank you for choosing Velleman®! Please read the manual thoroughly before bringing this device into service.
If the device was damaged in transit, do not install or use it and contact your dealer.
2. Safety Instructions
This device can be used by children aged from 8 years and above, and persons with
reduced physical, sensory or mental capabilities or lack of experience and knowledge if
they have been given supervision or instruction concerning the use of the device in a
safe way and understand the hazards involved. Children shall not play with the device.
Cleaning and user maintenance shall not be made by children without supervision.
Indoor use only.
Keep away from rain, moisture, splashing and dripping liquids.
3. General Guidelines
Refer to the Velleman®Service and Quality Warranty on the last pages of this manual.
Familiarise yourself with the functions of the device before actually using it.
All modifications of the device are forbidden for safety reasons. Damage caused by user
modifications to the device is not covered by the warranty.
Only use the device for its intended purpose. Using the device in an unauthorised way
will void the warranty.
Damage caused by disregard of certain guidelines in this manual is not covered by the
warranty and the dealer will not accept responsibility for any ensuing defects or
problems.
Nor Velleman nv nor its dealers can be held responsible for any damage (extraordinary,
incidental or indirect) –of any nature (financial, physical…) arising from the possession,
use or failure of this product.
Due to constant product improvements, the actual product appearance might differ from
the shown images.
Product images are for illustrative purposes only.
Do not switch the device on immediately after it has been exposed to changes in
temperature. Protect the device against damage by leaving it switched off until it has
reached room temperature.
Keep this manual for future reference.
4. What is micro:bit?
The BBC micro:bit is a pocket-sized (52 x 42 mm –2” x 1.75”) computer, 70 times smaller and 18 times faster
than the original BBC micro computers used in schools. The design is appealing to a young public. It features
25 red LEDs used to flash messages and create games.
micro:bit is compatible with different coding languages starting from Block Editor and mobile apps for the
starters, to Python for more advanced users.
micro:bit has an accelerometer so it can detect motion and knows when you are on the move. The built-in
compass knows which direction you are heading in and it uses a low-energy wireless connection to interact with
other devices and the Internet.
Each element is completely programmable via easy-to-use software on a dedicated website (microbit.org)
accessible from a PC, tablet or mobile.
VMM500
V. 01 –17/01/2019 3 ©Velleman nv
5. Component List
1
front shield
5
base board
2
back shield
6
2x servo
3
2x wheel
7
1x universal wheel
4
left + right side board

VMM500
V. 01 –17/01/2019 4 ©Velleman nv
8
4x rivet
12
screwdriver
9
6x M2.2x5 tapping screw
13
Ring:bit
10
5x M3x5 screw
micro:bit
11
rubber band

VMM500
V. 01 –17/01/2019 5 ©Velleman nv
6. Assembly
6.1 Installing the universal wheel
Before installation, please get rid of the film paste on the acrylic components.
Components used
base board
1x universal wheel
Assembly
Fix the universal wheels on the board with the rivets.

VMM500
V. 01 –17/01/2019 6 ©Velleman nv
6.2 Installing the servos to each side of the board
Components used
2x servo
4x M2.2x5 tapping screw
left + right side board
Assembly
Fix the servos to each side board with the tapping screws.
Hold the acrylic-frosted side on the outside.

VMM500
V. 01 –17/01/2019 7 ©Velleman nv
6.3 Assembling the Ring:bit Car body
Components used
front shield
base board
back shield
Assembly
Fix the front and back shield to the side and base boards.
Hold the acrylic-frosted side on the outside.

VMM500
V. 01 –17/01/2019 8 ©Velleman nv
6.4 Installing the Ring:bit Car wheels
Components used
2x wheel
2x M2.2x5 tapping screw
Assembly
Fix the wheels to the servo rod with the tapping screws.

VMM500
V. 01 –17/01/2019 9 ©Velleman nv
6.5 Fixing the micro:bit to the Ring:bit
Components used
Ring:bit
micro:bit
5x M3x5 screw
Assembly
Fix the micro:bit to the Ring:bit with the screws.

VMM500
V. 01 –17/01/2019 10 ©Velleman nv
6.6 Wire connection
Place 3x LR03 batteries into the holder of the Ring:bit.
Slide and fit the micro:bit assembly into the car.
Batteries are not included.
G = brown = ground (servo)
V = red = power 3 V (servo)
P1/P2 = orange =signal (video)

VMM500
V. 01 –17/01/2019 11 ©Velleman nv
Fix with the rivets.
Your car is now completed!

VMM500
V. 01 –17/01/2019 12 ©Velleman nv
7. Code
7.1 Adding the package
Go to www.makecode.org and click on the micro:bit button to enter the code editor.
Click and select Advanced in the bottom of the code drawer.
Click Add Package.
Search for Ring:bit. Select the Ring:bit Car package.

VMM500
V. 01 –17/01/2019 13 ©Velleman nv
Once loaded, the Ring:bit Car appears in the code drawer.
7.2 The S-Walk
We make a code to let the Ring:bit Car run in an S-shape.
1. On start, set the pins for the servos.
2. Move forward for 1000 ms.
3. Turn left for 1000 ms.
4. Move forward for 2000 ms.
5. Turn right for 1000 ms.
6. Pause for 1000 ms.
7. Move forward for 1000 ms.
8. Download the programme into micro:bit.

VMM500
V. 01 –17/01/2019 14 ©Velleman nv
Drag and drop the block set left wheel at pin P1 right wheel at pin P2 into the block on start in the editor
window. You will find this block in the Ring:bit Car menu of the code drawer. When correct, they snap together.
Now, make a second block as shown in the image.
Drag and drop the block move forward into the block forever. Then, drag and drop the pause block under
the move forward block. You will find the pause block in the basic menu of the code drawer. Set the pause at
1000 ms (= 1 second).
Now, do the same for the other blocks for steps 3 through 7.
When complete, we compile the program to generate a .hex file. Click on the download button and save the
.hex file to the Downloads folder (C:\downloads). This .hex file is ready to be uploaded to the micro:bit.
Plug the micro:bit into the USB port via the micro-USB cable. Then, drag and drop the .hex-file (from the
Downloads folder) onto the micro:bit Removable device to upload the programme.
Now, place the Ring:bit Car onto the ground and switch on the micro:bit via the on-off switch. The Ring:bit Car
runs in a S-shape line.
7.3 Drawing a circle
We make the Ring:bit Car draw a circle. Install a pen or pencil as shown below and install the Ring:bit Car on a
sheet of A4/A3 paper or cardboard.

VMM500
V. 01 –17/01/2019 15 ©Velleman nv
1. Set a different speed for the two wheels.
2. Download the programme into micro:bit.
The block left wheel speed (0) right wheel speed (0) can be found when you click on More in the menu of
the code drawer.
When complete, we compile the programme to
generate a .hex file. Click on the download button
and save the .hex file to the Downloads folder
(C:\downloads). This .hex file is ready to be
uploaded to the micro:bit.
Plug the micro:bit into the USB port via the micro-
USB cable. Then, drag and drop the .hex-file (from
the Downloads folder) onto the micro:bit
Removable device to upload the programme.
Now, place the Ring:bit Car on a sheet of A4/A3
paper or cardboard. Switch on the Ring:bit Car and
see what happens!
7.4 Wireless control
Let’s make a remote control for controlling the Ring:bit Car via RF (radio frequency).
For doing that, you will need a second micro:bit in option.
Click button A to turn right.
Click button B to turn left.
Click buttons A + B to move forward.

VMM500
V. 01 –17/01/2019 16 ©Velleman nv
Remote control code
1. Set the radio group. Keep the sender and
receiver the same.
2. Press buttons A + B to send number 1.
3. Press button A to send number 2.
4. Press button B to send number 3.
5. If there is no operation, send number 0.
6. Download the programme into micro:bit.
The block radio set group can be found in the menu of the code drawer Radio. Drag and drop this block in the
on start block. Set the number on 7.
Then, we make a forever loop. In this loop, we add a logic function: if then else if.
Then click on the gear icon again, and drag and drop the new created logic function under the forever loop.
Now, place the block button A+B is pressed next to the first if logic. Place block button A is pressed next to
the first else if logic, and block button B is pressed next to the second else if logic. The blocks can be found
in the code drawer menu.
Now, place the radio send number 1 block next to the first then logic and set the number to 1. Drag and
drop a second radio send number 2 block next to the second then logic and set the number to 2. Drag and
drop a third radio send number 3 block next to the third then logic and set the number to 3. Drag and drop a
fourth radio send number 0 block next to the else logic and set the number to 0. The blocks can be found in
the code drawer menu.
Click on the gear icon for more
options. Then, drag and drop the
else if logic in the following
order.

VMM500
V. 01 –17/01/2019 17 ©Velleman nv
At least, place a pause block under the else logic and set it to 100 (100 milliseconds).
When complete, we compile the program to generate a .hex file. Click on the download button and save the
.hex file to the Downloads folder (C:\downloads). This .hex file is ready to be uploaded to the micro:bit.
Plug the micro:bit into the USB port via the micro-USB cable. Then, drag and drop the .hex-file (from the
Downloads folder) onto the micro:bit Removable device to upload the programme.
Ring:bit Car code
Drag and drop the blocks in the code drawer as shown below, and download this code into the second
micro:bit.
1. Set the radio group. Keep the sender
and receiver the same.
2. Set the pins for the servos.
3. Save the received numbers into a
variable item.
4. Judge the number received. 1 means
to move forward.
5. 2 means to turn left.
6. 3 means to turn right.
7. Other means to stop.
8. Download the programme into
micro:bit.
When complete, we compile the program to generate a .hex file. Click on the download button and save the
.hex file to the Downloads folder (C:\downloads). This .hex file is ready to be uploaded to the micro:bit.
Plug the second micro:bit into the USB port via the micro-USB cable. Then, drag and drop the .hex-file (from
the Downloads folder) onto the micro:bit Removable device to upload the programme for the remote
control.

VMM500
V. 01 –17/01/2019 18 ©Velleman nv
7.5 About Ring:bit
a. Function switch
S: P0 can connect two GVS modules through G-V-SR and G-V-SL.
P0: use the connector for P0 only.
b. Power switch
Use this device with original accessories only. Velleman nv cannot be held responsible in the event of damage or
injury resulting from (incorrect) use of this device. For more info concerning this product and the latest version
of this manual, please visit our website www.velleman.eu. The information in this manual is subject to change
without prior notice.
© COPYRIGHT NOTICE
The copyright to this manual is owned by Velleman nv. All worldwide rights reserved. No part of this manual may
be copied, reproduced, translated or reduced to any electronic medium or otherwise without the prior written consent of the
copyright holder.

VMM500
V. 01 –17/01/2019 19 ©Velleman nv
HANDLEIDING
1. Inleiding
Aan alle ingezetenen van de Europese Unie
Belangrijke milieu-informatie betreffende dit product
Dit symbool op het toestel of de verpakking geeft aan dat, als het na zijn levenscyclus wordt
weggeworpen, dit toestel schade kan toebrengen aan het milieu. Gooi dit toestel (en eventuele
batterijen) niet bij het gewone huishoudelijke afval; het moet bij een gespecialiseerd bedrijf
terechtkomen voor recyclage. U moet dit toestel naar uw verdeler of naar een lokaal recyclagepunt
brengen. Respecteer de plaatselijke milieuwetgeving.
Hebt u vragen, contacteer dan de plaatselijke autoriteiten betreffende de verwijdering.
Dank u voor uw aankoop! Lees deze handleiding grondig door voor u het toestel in gebruik neemt. Werd het
toestel beschadigd tijdens het transport, installeer het dan niet en raadpleeg uw dealer.
2. Veiligheidsvoorschriften
Dit toestel is geschikt voor gebruik door kinderen vanaf 8 jaar, door personen met
fysieke, zintuiglijke of verstandelijke beperkingen, of door personen met gebrek aan
ervaring en kennis, op voorwaarde dat dit onder toezicht gebeurt van een persoon die
verantwoordelijk is voor hun veiligheid of hun aanwijzingen heeft gegeven, hoe zij het
toestel moeten gebruiken en zich bewust zijn van de risico's die het gebruik van het
toestel met zich meebrengt. Kinderen mogen niet met het toestel spelen. De reiniging
en het onderhoud van het toestel mogen niet worden uitgevoerd door kinderen, tenzij
ze onder toezicht staan.
Uitsluitend voor gebruik binnenshuis.
Bescherm tegen regen, vochtigheid en opspattende vloeistoffen.
3. Algemene richtlijnen
Raadpleeg de Velleman® service- en kwaliteitsgarantie achteraan deze handleiding.
Leer eerst de functies van het toestel kennen voor u het gaat gebruiken.
Om veiligheidsredenen mag u geen wijzigingen aanbrengen. Schade door wijzigingen
die de gebruiker heeft aangebracht aan het toestel valt niet onder de garantie.
Gebruik het toestel enkel waarvoor het gemaakt is. De garantie vervalt automatisch bij
ongeoorloofd gebruik.
De garantie geldt niet voor schade door het negeren van bepaalde richtlijnen in deze
handleiding en uw dealer zal de verantwoordelijkheid afwijzen voor defecten of
problemen die hier rechtstreeks verband mee houden.
Noch Velleman nv noch zijn verdelers kunnen aansprakelijk gesteld worden voor schade
(buitengewoon, incidenteel of onrechtstreeks) –van welke aard dan ook (financieel,
fysisch…) voortvloeiend uit het bezit, gebruik of falen van dit product.
We streven voortdurend naar verbetering van onze producten. Daarom kan dit product
uiterlijk verschillen van de afbeeldingen.
De afbeeldingen van het product zijn enkel ter illustratie.
Schakel het toestel niet onmiddellijk in nadat het werd blootgesteld aan
temperatuurschommelingen. Om beschadiging te vermijden, moet u wachten tot het
toestel de kamertemperatuur heeft bereikt.
Bewaar deze handleiding voor verdere raadpleging.
4. Wat is micro:bit?
De BBC micro:bit is een computer in zakformaat (52 x 42 mm - 2" x 1.75"), die 70 keer kleiner en 18 keer
sneller is dan de originele BBC-microcomputers die op scholen worden gebruikt. Het ontwerp spreekt een jong
publiek aan. Het beschikt over 25 rode leds die gebruikt worden om berichten weer te geven en games te
creëren.
micro:bit is compatibel met verschillende programmeertalen, van Block Editor en mobiele apps voor beginners,
tot Python voor geavanceerdere gebruikers.

VMM500
V. 01 –17/01/2019 20 ©Velleman nv
micro:bit heeft een versnellingsmeter zodat het beweging kan detecteren en weet wanneer u onderweg bent.
Het ingebouwde kompas weet welke richting u uit gaat en gebruikt een energiezuinige draadloze verbinding om
met andere apparaten en het internet te communiceren.
Elk element is volledig programmeerbaar via gebruiksvriendelijke software op een speciale website
(microbit.org) die toegankelijk is vanaf een pc, tablet of mobiele telefoon.
5. Componentenlijst
1
frontplaat
5
basisplaat
2
achterplaat
6
2x servo
3
2x wiel
7
1x universeel wiel
4
zijplaat links + rechts
Other manuals for VMM500
2
Table of contents
Languages:
Other Velleman Robotics manuals

Velleman
Velleman KSR2 User manual

Velleman
Velleman KSR5 User manual

Velleman
Velleman KSR14 User manual

Velleman
Velleman VMM500 User manual

Velleman
Velleman KSR20 User manual

Velleman
Velleman KSR10 User manual

Velleman
Velleman KSR20 User manual

Velleman
Velleman KSR1 User manual

Velleman
Velleman KSR1 User manual

Velleman
Velleman KSR3 User manual