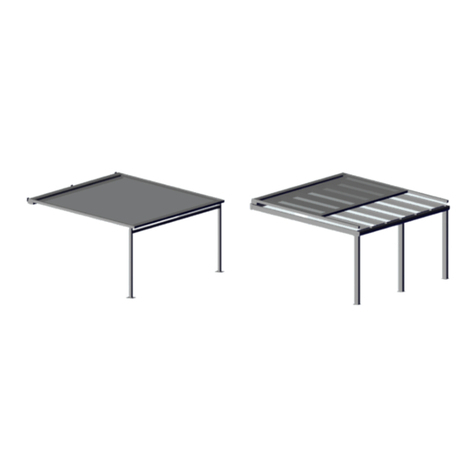
Verano V805 CORTONA User manual

INSTALLATION MANUAL
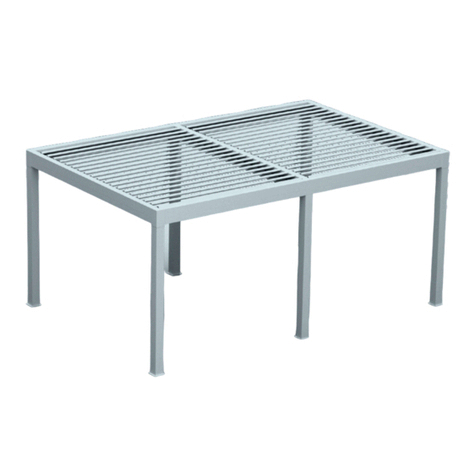
FREESTANDING - PATIO AWNING
V805 - CORTONA

1779-160404(2)Drukfouten, fouten en technische wijzigingen voorbehouden.
INSTALLATION MANUAL PATIO AWNING V805 - CORTONA
1441-191212EN
1
Subject to misprints, errors and technical modifications
Index
page
Wall installation
1. Installation of the frame 2
2. Installation of the patio awning 4
3. Setting the patio awning 6
4. Installation of the water cap (optional) 7
Freestanding installation
1. Installation of the frame 8
2. Installation of the patio awning 10
3. Setting the patio awning 12
4. Installation of the water cap (optional) 13
Important before installation
Be careful for damages
Don’t use a knife or any other sharp object when opening the packing. This may cause damage to the content of the
package. Put the content of the package on a so surface.
Be careful when drilling, falling drill cuttings can cause damages.
Gerenal warning
Installing the Verano® product yourself is at your own risk. Only use this instruction as a tool and for the installation of
this specic Verano® product. If you cannot install the product yourself, you can always opt for professional installation.
The installation team of Verano® is pleased to help you.

1779-160404(2)Drukfouten, fouten en technische wijzigingen voorbehouden.
INSTALLATION MANUAL PATIO AWNING V805 - CORTONA
1441-191212EN
2
Subject to misprints, errors and technical modifications
1
Wall installation
1. Installation of the frame
Determine, before installation of the V805-Cortona, if the existing building is suitable for the installation of the Cortona
system (if necessary, ask a building expert to judge the situation). Make sure that there are enough xing tools for the
combination of the wall and the V805-Cortona.
1. Measure the positions for the wall support installation. Drill the holes for the xing tools. If necessary,
ask your xing tool supplier for advise (in the wall supports is space for 3 x M12 bolts (opening 14 mm).
2. Install the wall supports to the wall and level the supports. By sliding the supports in the slots, the position can be
limited corrected. (le in height, right in width).
3. Measure the positions of the uprights on the oor. Depending on the situation, the oor installation can be
accomplished in dierent ways. For example: with concrete bases, foundation or an existing oor.
In this manual we explain the installation with concrete bases.
4. Dig two pits and place the two concrete bases (dig 140 – 150 mm). Put these on the exact height, potentially, take a
certain height below the surface level and setting possibilities on the concrete base into account.
1. Install the two beams for the wall installation to the uprights, creating an angle.
2. Make sure that one of the angles is provided with an operation cable for the valance system.
Guide this cable through the beam.
3. Connect the upright to the beam, working from the inside, with M8x35 bolts.
4. Connect the plug to the cable on the side of the uprights.
1
2
3
4
2
1
2
3
4
1779-160404(2)Drukfouten, fouten en technische wijzigingen voorbehouden.
INSTALLATION MANUAL PATIO AWNING V805 - CORTONA
1441-191212EN
3
Subject to misprints, errors and technical modifications
1. Slide the installed angle construction on the wall support. Make sure that the operation cable in the wall support is
guided to the outside through the recess.
2. Fixate the beam prole on top with the two outer bolts. The other two bolts are placed aer the cassette is laid on the
system.
3. Do not xate yet on the set-foot side.
3
1. Install the front of the beam between the two placed angles.
2. Guide the motor cable through the hole in the upright.
3. Fixate the front of the beam with the M8x35 bolts. Keep the proles at to each other on the front side.
4. Install the plug to the motor cable. Connect the plug and lower it in the upright.
5. Measure the system diagonal, optionally slide the concrete base so that the perfect position is reached.
6. Also set the exact height of the set-foot.
4
1
2
3
1
2
3
4 5
6

1779-160404(2)Drukfouten, fouten en technische wijzigingen voorbehouden.
INSTALLATION MANUAL PATIO AWNING V805 - CORTONA
1441-191212EN
4
Subject to misprints, errors and technical modifications
1. Fasten the set-foot to the concrete base.
2. Install the cover caps on the uprights.
5
2. Installation of the patio awning
1. Place the cassette on the beams and xate them with two bolts per side.
6
1 2
1

1779-160404(2)Drukfouten, fouten en technische wijzigingen voorbehouden.
INSTALLATION MANUAL PATIO AWNING V805 - CORTONA
1441-191212EN
5
Subject to misprints, errors and technical modifications
1. Slide the guides to the cassette and let them rest on the oor.
2. Fixate the guide on the outside to the cassette.
3. Guide the motor cable together with the motor cable of the bag system through the wall inside and connect.
You can use a weld box on the outside. Make sure that you have enough cable space to move the cassette.
1. Lower the valance system and li the guides on the front bar.
2. Fixate the front bar to end pieces of the guides.
3. Remove the top cap of the pull bar en remove the cord from the cord clamps. Push the cord in over the pulley wheel
on the front side of the guide, make sure that the cord can not cross.
7
8
1
2
3
1
2
3

1779-160404(2)Drukfouten, fouten en technische wijzigingen voorbehouden.
INSTALLATION MANUAL PATIO AWNING V805 - CORTONA
1441-191212EN
6
Subject to misprints, errors and technical modifications
1. Pull the cord correctly through the pulleys in the pull list and xate the cord with the cord clamps.
2. Unroll half of the awning and tension the cord in the cord tensioners. Close the pull list.
Make sure that the fabric is tightened. Around 25 kilogram of manual power should be suicient.
Attention! The spring may be pulled out 60% in limit position, this is 40% with tension.
3. Setting the patio awning
2
1
9
Assemblage instructie Cubola®
cod.82-70-1102_gnirewnozednaatsjirV_LN_alobuC blz. 11
Sub-samenstelling Cassette (vervolg)
p. Schuif de treklijst aan de voorzijde van het
doek (let op: bovenste doeksleuf
gebruiken).
q. Schuif de middenkatrol in het profiel
r. Monteer de geleiderblokken links en rechts
aan de treklijst.
s. Plaats schroefoog, veren kartollen en
koordspanners in de treklijst
t. Plaats vervolgens de afdekkap of monteer
eerst het koord (tijdelijk).
u. Koord plaatsen: Voer het koord door het geleiderblok, vervolgens door het middenkatrol, en het
katrolletje aan de veer. Zet het koord vast in de koordspanner.
v. Zorg er bij het plaatsen van het koord voor dat er een grootte lus (2 x uitval) over blijft tussen
cassette en treklijst. Deze zal in de montage om de katrol aan de voorzijde van de geleider
worden gehaald.
w. Sluit de cassette voor transport.
w
v
t
p
q
r
s
1

1779-160404(2)Drukfouten, fouten en technische wijzigingen voorbehouden.
INSTALLATION MANUAL PATIO AWNING V805 - CORTONA
1441-191212EN
7
Subject to misprints, errors and technical modifications
1. Optional: place the water cap with brush.
Fixate the water cap on the guides with self drilling screws.
Attention! Screw max. 10 mm from the outside of the cap so that the pierced screw can not conict with the cord.
2. Optional: place the water gutter.
Install the water gutter on the outside of the guides with self drilling screws.
3. Set both fabrics following the specications in the description for the motors.
The system is now ready.
10
11
4. Installation of the water cap (optional)
1
2
3
3

1779-160404(2)Drukfouten, fouten en technische wijzigingen voorbehouden.
INSTALLATION MANUAL PATIO AWNING V805 - CORTONA
1441-191212EN
8
Subject to misprints, errors and technical modifications
1. Measure the positions of the uprights on the oor. Depending on the situation, the oor installation can be carried out
in dierent ways. For example: with concrete bases, foundation or an existing oor.
In the instruction, we explain the installation with concrete bases.
2. Dig four pits and place the four concrete bases (dig 140 – 150 mm). Put these on the exact height, potentially, take
a certain height below the surface level and setting possibilities on the concrete base into account.
1. Install the two uprights to the beam. This makes the side of the Cortona, in which the wiring is included.
2. Make sure that an operation cable for the valance system is guided through the beam.
3. Connect the uprights from the inside to the beam, keep the proles tightly to each other so that the seam closes nicely.
4. Connect, on the front side of the system, a plug to the cable.
5. On the side of the cassette, the cable goes to a little junction box, which falls in the upright later.
6. From the upright foot, a cable is guided, which is connected to the net up to the top of the junction box.
2
1
Freestanding installation
1. Installation of the frame
1
2
1
2
4
5
6
3

1779-160404(2)Drukfouten, fouten en technische wijzigingen voorbehouden.
INSTALLATION MANUAL PATIO AWNING V805 - CORTONA
1441-191212EN
9
Subject to misprints, errors and technical modifications
1. Install the composite arch on the two concrete bases. Make sure that the cable on has enough space on the underside
(set the set foot on small height above the base). Fixate the arch, level, on the concrete bases.
2. Compose an angle with a beam and upright, without wiring. Place the angle on the next concrete base and connect it
to the already placed arch. This is the back beam of the system.
3. Create the next angle and place this on the next concrete base en connect to the already placed angle.
This creates the side, not the operation side. Don’t xate the concrete base.
1. Place the front side of the beam between the remaining opening.
2. Guide the cable of the motor through the hole in the upright.
3. Fixate the front side of the beam with the M8x35 bolts.
4. Install the plug to the motor cable. Connect the plug and lower the plug in the upright.
5. Measure the system diagonal, slide the concrete base for reaching the perfect position.
6. Also set the height of the set foot correctly.
3
12
3
4
1
2
3
45
6

1779-160404(2)Drukfouten, fouten en technische wijzigingen voorbehouden.
INSTALLATION MANUAL PATIO AWNING V805 - CORTONA
1441-191212EN
10
Subject to misprints, errors and technical modifications
1. Fixate the set foot on the concrete base.
2. Place the covers on the uprights, leaving the upright with the junction box and the (ground)cable open,
so that the cassette can be connected there.
1. Uninstall the two inside bolts from the top side of the beams where the cassette will be placed on.
Place the cassette to the beams and xate with the two uninstalled bolts.
55
2. Installation of the patio awning
1
2
56
1

1779-160404(2)Drukfouten, fouten en technische wijzigingen voorbehouden.
INSTALLATION MANUAL PATIO AWNING V805 - CORTONA
1441-191212EN
11
Subject to misprints, errors and technical modifications
1. Lower the valance system and li the guides on the front bar.
2. Fixate the front bar to the end pieces of the guides.
3. Pull the cord over the pulley on the front side of the guides, make sure that cord does not intersect.
1. Slide the guides to the cassette and let it rest on the oor.
2. Fixate the guide on the outside to the cassette.
3. Guide the cable of the motor through a drilled hole (and tulle) in the cover of the upright.
4. Connect the cable, together with the other cables, to the junction box. Lower the junction box in the upright and
xate the cover to the upright. Make sure that there is enough cable space for moving the cassette.
8
1
2
3
7
1
2
3
4

1779-160404(2)Drukfouten, fouten en technische wijzigingen voorbehouden.
INSTALLATION MANUAL PATIO AWNING V805 - CORTONA
1441-191212EN
12
Subject to misprints, errors and technical modifications
1
2
3
1. Remove the top cover of the pull list and loosen the cord from the cord clamps.
2. Pull the cord correctly through the pulleys in the pull list and xate with the cord clamps.
3. Pull the awning half way out and tension the cord in the cord tension. Close the pull list. Make sure that, when
tensioning, the fabric is tightened. Around 25 kilogram of manual power should be suicient.
Attention! The spring may be pulled out 60% in limit position, this is 40% with tension.
9
3. Setting the patio awning
Assemblage instructie Cubola®
cod.82-70-1102_gnirewnozednaatsjirV_LN_alobuC blz. 11
Sub-samenstelling Cassette (vervolg)
p. Schuif de treklijst aan de voorzijde van het
doek (let op: bovenste doeksleuf
gebruiken).
q. Schuif de middenkatrol in het profiel
r. Monteer de geleiderblokken links en rechts
aan de treklijst.
s. Plaats schroefoog, veren kartollen en
koordspanners in de treklijst
t. Plaats vervolgens de afdekkap of monteer
eerst het koord (tijdelijk).
u. Koord plaatsen: Voer het koord door het geleiderblok, vervolgens door het middenkatrol, en het
katrolletje aan de veer. Zet het koord vast in de koordspanner.
v. Zorg er bij het plaatsen van het koord voor dat er een grootte lus (2 x uitval) over blijft tussen
cassette en treklijst. Deze zal in de montage om de katrol aan de voorzijde van de geleider
worden gehaald.
w. Sluit de cassette voor transport.
w
v
t
p
q
r
s
2

1779-160404(2)Drukfouten, fouten en technische wijzigingen voorbehouden.
INSTALLATION MANUAL PATIO AWNING V805 - CORTONA
1441-191212EN
13
Subject to misprints, errors and technical modifications
1. Optional: place the water cap with brush.
Fixate the water cap on the guides with self drilling screws.
Attention! Screw max. 10 mm from the outside of the cap so that the pierced screw can not conict with the cord
2. Optional: place the water gutter.
Install the water gutter on the outside of the guides with self drilling screws.
Set both fabrics following the specications in the description for the motors.
10
11
4. Installation of the water cap (optional)
The system is now ready.
1
1
2
2
Table of contents
Other Verano Accessories manuals

Verano
Verano Mallorca Special V150 User manual

Verano
Verano DROP-ARM AWNING V120 NAPOLI User manual

Verano
Verano V160 Florence User manual

Verano
Verano V460 SANTANDER User manual

Verano
Verano V124 - CALPE User manual

Verano
Verano V480 Cannes User manual

Verano
Verano VERANDA V905 - ISEO User manual

Verano
Verano V255 Salou User manual

Verano
Verano V124 - CALPE User manual

Verano
Verano V225 Porto User manual