VIA Technologies AMOS-825 User manual

QUICK START GUIDE
AMOS-825
Android EVK v5.0.3
1.00-051702018-120700

Copyright
Copyright © 2018 VIA Technologies Incorporated. All rights reserved.
No part of this document may be reproduced, transmied, transcribed, stored in a retrieval system, or translated into any language, in any
form or by any means, electronic, mechanical, magnec, opcal, chemical, manual or otherwise without the prior wrien permission of
VIA Technologies, Incorporated.
Trademarks
All brands, product names, company names, trademarks and service marks are the property of their respecve holders.
Disclaimer
VIA Technologies makes no warranes, implied or otherwise, in regard to this document and to the products described in this document.
The informaon provided in this document is believed to be accurate and reliable as of the publicaon date of this document. However,
VIA Technologies assumes no responsibility for the use or misuse of the informaon (including use or connecon of extra device/
equipment/add-on card) in this document and for any patent infringements that may arise from the use of this document. The informaon
and product specicaons within this document are subject to change at any me, without noce and without obligaon to nofy any
person of such change.
VIA Technologies, Inc. reserves the right the make changes to the products described in this manual at any me without prior noce.

AMOS-825 Android EVK v5.0.3 Quick Start Guide
Version Date Remarks
1.00 05/17/2018 Inial release
Revision History
iii

AMOS-825 Android EVK v5.0.3 Quick Start Guide
Table of Contents
1. Introducon����������������������������������������������������������������������������������������������������������������������� 1
1�1 EVK Package Content���������������������������������������������������������������������������������������������������������������������������� 1
1�1�1 Firmware Folder Contents ������������������������������������������������������������������������������������������������������������� 1
1�1�2 Document Folder Contents������������������������������������������������������������������������������������������������������������ 1
1�1�3 Tools Folder Contents �������������������������������������������������������������������������������������������������������������������� 1
1.2 VersionInformaonandSupportedFeatures �������������������������������������������������������������������������������������� 2
2. ImageInstallaon ������������������������������������������������������������������������������������������������������������� 3
2.1 BoongfromaMicroSDCard ������������������������������������������������������������������������������������������������������������� 3
3. HardwareFuncon ����������������������������������������������������������������������������������������������������������� 5
3.1 SengUpU-BootParameters ������������������������������������������������������������������������������������������������������������� 5
3.2 RestoringDefaultU-BootParameters �������������������������������������������������������������������������������������������������� 7
3.3 UsingtheAndroidConsole������������������������������������������������������������������������������������������������������������������� 7
3.4 EnablingGPS����������������������������������������������������������������������������������������������������������������������������������������� 8
3.5 EnablingWi-Fi��������������������������������������������������������������������������������������������������������������������������������������� 8
3.6 EnablingBluetooth������������������������������������������������������������������������������������������������������������������������������� 9
3.6.1 SengUpBluetoothA2DPProle������������������������������������������������������������������������������������������������� 9
3.6.2 SengUpBluetoothSPPProle ��������������������������������������������������������������������������������������������������� 9
3.7 SmartETK ������������������������������������������������������������������������������������������������������������������������������������������� 11
3.7.1 TesngWatchdogTimerFuncon ����������������������������������������������������������������������������������������������� 12
3.7.2 TesngFlexCANFuncon������������������������������������������������������������������������������������������������������������� 13
4. Accessories ���������������������������������������������������������������������������������������������������������������������� 16
4.1 ConguringtheEMIO-2550miniPCIeMobileBroadbandModule ���������������������������������������������������� 16
4.1.1 ConnecngtotheInternet ���������������������������������������������������������������������������������������������������������� 16
iv


1
AMOS-825 Android EVK v5.0.3 Quick Start Guide
1� Introducon
ThisQuickStartGuideprovidesanoverviewonhowtoboottheAndroidEVKsystemimagefortheAMOS-825
systemandcongurethesupportedhardwarefunconsinthebuild.
TheAMOS-825AndroidEVKv5.0.3isdevelopedbasedontheNXPandroid_m6.0.1_1.0.0-ga(Android6.0
Marshmallow)andenablesthehardwarefeaturesoftheAMOS-825system.
1�1 EVK Package Content
Therearethreefoldersinthepackagelistedasbelow.
AMOS-825 Android EVK contents
1�1�1 Firmware Folder Contents
Images_autoinstall_sd.zip: containsinstallaonscriptlesandtheprecompiledU-bootandAndroidimagefor
evaluangtheAMOS-825system.
1�1�2 Document Folder Contents
AMOS-825_Android_EVK_v5.0.3_Quick_Start_Guide _v1.00_20180517.pdf:ThisQuickStartGuideprovides
anoverviewonhowtoboottheAndroidEVKsystemimagefortheAMOS-825systemandcongurethe
supportedhardwarefunconsinthebuild.
1�1�3 Tools Folder Contents
AMOS-825_Smart_ETK_Demo_v1.0.apk:isthedemoprogramoftheSmartETK.
BluetoothSPPTest.apk:isthetesngprogramoftheBluetoothSPPprole.
Firmware folder Descripon
Images_autoinstall_sd.zip AndroidEVKsystemimageandinstallaon
scriptles
Document folder Descripon
AMOS-825_Android_EVK_v5.0.3_Quick_
Start_Guide_v1.00_20180517.pdf
QuickStartGuide
Tool folder Descripon
AMOS-825_Smart_ETK_Demo_v1.0.apk SmartETKdemoprogram
BluetoothSPPTest.apk BluetoothSPPtesngprogram

2
AMOS-825 Android EVK v5.0.3 Quick Start Guide
1�2 VersionInformaonandSupportedFeatures
• U-Bootversion:2015.04
• Kernelversion:3.14.52
• Evaluaonimage:AndroidMarshmallow6.0
• DevelopmentbasedonNXPandroid_M6.0.1_1.0.0-ga(Android6.0Marshmallow)
• SupportsSPIwitheMMCboot
• Supports7”Projecvecapacivetouchmonitor(800x480)throughI2Cinterface
• SupportsCOMasdebugport
• SupportstwoFlexCANTX/RX
• SupportsGigabitEthernet
• SupportsMic-in
• SupportsIEEE802.11b/g/nWi-Fi
• SupportsBluetooth4.0
κ A2DPandSPPprole
• SupportsU-bloxMAX-7GPS/GNSSmodule
• SupportsEMIO-2550miniPCIeMobileBroadbandmodule
• SupportsSmartETKv1.00:WatchdogTimer,UART,andFlexCAN
• SupportsOTA(Over-The-Airtechnology)
• SupportsshutdownoponinQuickSengs
• SupportsEthernetconguraoninSengs

3
AMOS-825 Android EVK v5.0.3 Quick Start Guide
2� ImageInstallaon
TheAMOS-825AndroidsystemonlyprovidesboongfromtheSPIROMwitheMMC.Thisseconexplainsthe
setuprequirementsforboongfromtheSPIROMandeMMC.
Theinstallaonscriptles,theprecompiledU-bootandimageareprovidedinthe“Firmware”folder.
2�1 BoongfromaMicroSDCard
TheImages_autoinstall_sd.zipincludestheAndroidEVKsystemimageandtheinstallaonscriptsles.
TherststepistoextractImages_autoinstall_sd.zipletomakethebootableMicroSDcard.InsertaMicroSD
cardintoyourLinuxhostmachineandmakesureitisnotmounted.Opentheterminalonyourhostmachine.
Runthemk_android6_install_sd.shasshownbelow,replacing<devicename>withthecorrectvalueforthe
card,forexample“sdb”.
Important:Makesureyouarewringtothecorrectdeviceorthehostsystemenvironmentcouldbedamaged.
Next,ontheAMOS-825,settheMicroSD/SPIbootswitchtotheMicroSDposionasshownbelow.
Micro SD/SPI boot switch diagram
InsertthepreparedMicroSDcardintotheAMOS-825,connectanHDMIdisplay,andpoweronthedeviceto
iniatetheupdateprocessautomacally.
$ sudo ./mk_android6_install_sd.sh /dev/<device name>

4
AMOS-825 Android EVK v5.0.3 Quick Start Guide
Update process screen
Whentheinstallprocessiscompleted,unplugthepowercableandremovetheMicroSDcard.
InordertobootfromtheSPIROMmakesuretheMicroSD/SPIbootswitchissettoSPIROMboot.
Micro SD/SPI boot switch diagram
Next,poweronthedevicetoiniatethebootprocess.Whenthebootprocessiscompleted,youwillseethe
Androiddesktop.

5
AMOS-825 Android EVK v5.0.3 Quick Start Guide
3� HardwareFuncon
ThisseconexplainshowtoenableandtestthehardwarefunconsprecompiledintheAMOS-825Android
EVKincludingsengU-Bootparameters,restoringdefaultU-Bootparameters,usingtheAndroidConsole,
enablingGPS,enablingWi-Fi,enablingBluetooth,aswellasinstallingandapplyingthedierentfuncons
includedintheVIASmartETKsampleprogramwhicharetesngWatchdogmerfunconandtesngthe
FlexCANfuncon.
3�1 SengUpU-BootParameters
TherststepistoconnectthehostmachineandtheAMOS-825throughtheCOMport.Useaserialport
communicaonprogramsuchasPuTTY,GtkTerm,orMinicom,toconguretheserialportsengandconnect
tothedebugconsole.ThereyouwillbeabletoseetheU-BootbootlogandadjustsengsintheU-Boot
console�
Serial port seng of host machine
COM port diagram

6
AMOS-825 Android EVK v5.0.3 Quick Start Guide
Next,powerontheAMOS-825toiniatethebootprocess.Whenprompted,pressanykeytostoptheboot
process,andentertheU-Bootconsoleasillustratedbythescreenshotbelow.
Debug console view of boot process
TolistthecurrentU-Bootparameters,usethefollowingcommand:
Makesuretheprintoutmessageisasfollows:
U-Boot 2015.04 (Mar 7 2017 - 18:49:13)AMOS-825 ver:5.0.3
CPU: Freescale i.MX6Q rev1.2 at 996 MHz
CPU: Temperature 30 C, calibration data: 0x5894f169
Reset cause: POR
Board: iMX6Q-VAB820
I2C: ready
DRAM: 1 GiB
MMC: FSL_SDHC: 0, FSL_SDHC: 1
SF: Detected W25Q32BV with page size 256 Bytes, erase size
4 KiB, total 4 MiB
*** Warning - bad CRC, using default environment
No panel detected: default to Hannstar-XGA
Display: Hannstar-XGA (1024x768)
In: serial
Out: serial
Err: serial
Net: FEC [PRIME]
Warning: failed to set MAC address
Normal Boot
Hit any key to stop autoboot: 0
=>
=> printenv
=> printenv
baudrate=115200
boot_emmc_root=mmc dev ${root_media_uboot};ext2load mmc ${root_media_uboot}:${root_partition}
${loadaddr} uImage;ext2load mmc ${root_media_uboot}:${root_partition} ${dtbaddr} imx6q-
vab820.dtb;bootm ${loadaddr} - ${dtbaddr};
boot_media=booti mmc1

7
AMOS-825 Android EVK v5.0.3 Quick Start Guide
3�2 RestoringDefaultU-BootParameters
IftheU-Bootparametershavebeenmodied,the“destroyenv”commandintheU-Bootconsolecanrestore
thefactorydefaultsengs.
Torestartthedevice,usethe“reset”command.
3�3 UsingtheAndroidConsole
TherststepistoconnectthehostmachineandtheAMOS-825throughtheCOMport.Useaserialport
communicaonprogramsuchasPuTTY,GtkTerm,orMinicom,toconnecttothedebugconsole.Thereyouwill
beabletoseetheU-BootbootlogandadjustsengsintheU-Bootconsole.Next,powerontheAMOS-825to
iniatethebootprocess.Whenthebootprocessiscompletedyouwillbepromptedtologin.
COM port diagram
Whenthebootprocessiscompleted,youwillautomacallylogintoanAndroidconsole.
=> destroyenv
=> saveenv
=> Reset
root@vab820_6dq:/ #

8
AMOS-825 Android EVK v5.0.3 Quick Start Guide
3�4 EnablingGPS
ClickSengs->Locaontoenabletheopon.
3�5 EnablingWi-Fi
Next,fromtheSengsscreen,clickWi-Fi->OntoenableWi-Fifuncon.
Whentheconneconiscreated,connecttotheinternetthroughyourwebbrowser.

9
AMOS-825 Android EVK v5.0.3 Quick Start Guide
3�6 EnablingBluetooth
ThefollowingseconsshowhowtoenabletheBluetoothAdvancedAudioDistribuonProle(A2DP)toallow
audioplaybackthroughaconnectedBluetoothdeviceaswellashowtoconguretheBluetoothSerialPort
Prole(SPP).
3�6�1 SengUpBluetoothA2DPProle
First,puttheaccessoryyouwanttouseintodiscoverymode.Theexactwaytodothisdependsonthe
accessory.Ifyouhaveaheadset,youmayneedtoholdabuondownontheheadsetforseveralsecondsunl
alightstartsashing.Itwillonlystaydiscoverableforafewminutes.
Ifyouarenotsurehowtoputyouraccessoryintodiscoverymode,pleaserefertoitsmanual,checkthe
manufacturer’swebsite,orperformawebsearchforinstrucons.ToenabletheBluetoothA2DPfuncon,go
toSengs->BluetoothandsettheswitchtoOn.
Alistoflocaldeviceswillappearonthescreen,selecttheappropriatedevicetocompletetheBluetooth
pairing.
3�6�2 SengUpBluetoothSPPProle
TherststepistocopytheBluetoothSPPTest.apkontoamassstoragedevicesuchasUSBthumbdrive.Next,
fromtheSengsscreen,clickSecurity->Unknownsourcestoallowinstallaonofnon-Marketapps.
TheAMOS-825implementstheBluetoothSerialPortProleallowingserialportcommunicaonbetweentwo
Androiddevices.
IncludedintheAMOS-825ToolsfolderistheBluetoothSPPTest.apkwhichisasimplecommunicaon
applicaonwhichulizestheBluetoothSPPProletotransmitandreceivedatabetweentwopairedAndroid
devices�
ThefollowingexamplewilldemonstratehowtousetheBluetoothSPPTest.apktocommunicateoverthe
BluetoothSPPProlebetweentwoAMOS-825systems.
First,the BluetoothSPPTest.apkmustbeinstalledontoeachAMOS-825system.FromtheSengsscreen,click
Security->Unknownsourcesandallowtheinstallaonofnon-Marketapps.Next,copytheBluetoothSPPTest.
apkontoamassstoragedevice,suchasaUSBthumbdrive,andinstalltheBluetoothSPPTest.apkontoboth
AMOS-825systems.

10
AMOS-825 Android EVK v5.0.3 Quick Start Guide
Aertheinstallaonprocesshascompleted,gotoSengs->Bluetooth->OntoenabletheBluetoothfuncon
onbothAMOS-825systems.Alistoflocaldeviceswillthenappearoneachscreen.Fromeitherscreen,select
theAMOS-825systemfromthelisttocompletethepairingprocessasseeninthegurebelow.
BluetoothSPPTest diagram
Aerthedeviceshavepaired,opentheBluetoothSPPTest.apkonbothAMOS-825systemsandcongurethe
sengsasfollowsinbothapps.
“Auto”–enabled
“ShowMessage”–enabled
SelectCONNECTfromeitherAMOS-825tocreatetheconneconbetweenthetwo.BothAMOS-825can
communicateovertheBluetoothSPPProtocol.

11
AMOS-825 Android EVK v5.0.3 Quick Start Guide
3�7 SmartETK
TheAMOS-825SmartETKsupportsWatchdog,UARTandCANbusfuncons.Pleasefollowtheprocedures
belowtoexperimentwiththeSmartETKfunconsontheAMOS-825system.
TherststepistocopytheAMOS-825_Smart_ETK_Demo_v1.0.apkontoamassstoragedevicesuchasa
USBthumbdrive.Next,fromtheSengsscreen,clickSecurity,andthenswitchonthe“Unknownsources”as
showninthediagrambelow.
Finally,inserttheUSBthumbdriveintotheAMOS-825anddoubleclickontheAMOS-825_Smart_ETK_Demo_
v1.0.apkletoinstall.
Whentheinstallaonprocesshascompleted,runtheAMOS-825_Smart_ETK_Demo_v1.0.apkandstarttotest
thedierentfunconswithit.
Smart ETK SDK sample screen

12
AMOS-825 Android EVK v5.0.3 Quick Start Guide
3�7�1 TesngWatchdogTimerFuncon
TheWatchdogTimerisanelectronicmerthatisusedtodetectandrecoverfromsystemmalfuncons.
TheWatchdogTimerincludesEnable/Disable,SetTimeout,KeepAliveandCountdownTimerfuncons.
Smart ETK Watchdog mer diagram
AlistofoponswillappearontheSmartETKDemoProgrampage,selecttheappropriateopontostart
tesng.
TotesttheWatchdogfuncon,therststepistoenterthemevalue(1~128seconds)intheTimeoutseng.
ClickontheEnable/Disablebuontostartthewatchdogmerfuncon.
ClickontheREFRESHbuontorefreshthecountdownmevaluebacktothebeginning.
ClickontheSTOPbuontostopthewatchdogmerfuncon.

13
AMOS-825 Android EVK v5.0.3 Quick Start Guide
3�7�2 TesngFlexCANFuncon
TheCOM/CANportoftheAMOS-825supportsdebug(COM)andtwoCANbus.TheCANbussupportsCAN
protocolspecicaonVersion2.0BwhiletheCOM2supportsTX/RXfordebuggingpurposesonly.
InordertoconnecttheCANdevicefortesng,youneedtoaddaddionaltransceivercircuit.PleasevisitTexas
Instrumentswebsite(hps://www..com/)tosearchinformaonon“TISN65HVD1050CANBusTransceiver”.
TherststepistomakesurethereisconneconwithCAN1andCAN2.
COM/CAN port diagram
COM/CAN port pin denion table
Pin Signal
1CANH1
2RX
3TX
4CANL2
5GND
6CANL1
7GND
8CANH2
9 VCC5
10 CANRX1

14
AMOS-825 Android EVK v5.0.3 Quick Start Guide
Smart ETK FlexCAN diagram
TheCANIDframestructureare32bits,oneframeincludes1-bitEFFag,1-bitRTRag,1-bitERRag,an18-
bitextension(“idenerextension”)and11-bitidener(“baseidener”).
Inordertousetheidenerextension,youneedtoclick“EFF”.
Ifyouselect“RTR,theRTR-bitistransmiedasadominantbitintheDataFrameandtheDataFieldwillbe
emptyintheRemoteField.
First,pleaseopentheSmartETKsampleprogram,thenfromthelesideoftheSmartETKsamplepage;select
CANtostarttesng.
Forbasetesng,settheBitRatevalueandclickontheConnectbuon.
PleasenotethatyouneedtodisabletheCANbusrstthensettheCANbusbitrate.TheCANbusbitrateshould
be5000<[BRT_value]<1000000.
Next,typetheIDanddataintheCAN1(whiteblockinthediagram)andclicktheSendbuon.
TheCAN1transfersdatatoCAN2,thedatashowsintheCAN2(redblockinthediagram).
ClickontheResetbuontoresetthisCANbusfuncon.
ClickontheDisconnectbuontodisablethisfuncon.
Foradvancedtesng,you’lluseFilter_IDandFilterMaskfuncons.
Theltermaskisusedtodeterminewhichbitsintheidenerofthereceivedframearecomparedwiththe
lter.Filter_IDandFilterMaskmustbetypedinhexadecimalvalues.
Note:
Thelterisusedtogetspecicinformaon.Eachreceivermustsettheltertogettheinformaonthatisneeded.

15
AMOS-825 Android EVK v5.0.3 Quick Start Guide
Ifamaskbitissettozero,thecorrespondingIDbitwillautomacallybeaccepted,regardlessofthevalueof
thelterbit.
Ifamaskbitissettoone,thecorrespondingIDbitwillbecomparewiththevalueofthelterbit.
Iftheymatch,itisacceptedotherwisetheframeisrejected.
Therearefourexamplesandthesevaluearehexadecimalvaluesbelow.
Note:
Thefourexampleshavefourdierentstatuses.
Example 1.
YouwishtoacceptonlyframeswithIDof00001567(hexadecimalvalues)
Setthelterto00001567andmaskto1FFFFFFF.
Whenaframearrives,itsIDiscomparedwiththelterandallbitsmustmatch;anyframethatdoesnotmatch
ID00001567isrejected
Example 2.
YouwishtoacceptonlyframeswithIDsof00001560thruto0000156F(hexadecimalvalues)
Setthelterto00001560andmaskto1FFFFFF0.
Whenaframearrives,itsIDiscomparedwiththelterandallbitsexceptbits0to3mustmatch;anyother
frameisrejected
Example 3.
YouwishtoacceptonlyframeswithIDsof00001560thruto00001567(hexadecimalvalues)
Setthelterto00001560andmaskto1FFFFFF8.
WhenaframearrivesitsIDiscomparedwiththelterandallbitsexceptbits0to2mustmatch;anyother
frameisrejected
Example 4.
Youwishtoacceptanyframe
Setthelterto0andsetmaskto0.
Allframesareaccepted

16
AMOS-825 Android EVK v5.0.3 Quick Start Guide
4� Accessories
ThisseconexplainshowtoinstallandconguretheEMIO-2550miniPCIeMobileBroadbandModuleavailable
fortheAMOS-825system.
4�1 ConguringtheEMIO-2550miniPCIeMobileBroadband
Module
TheEMIO-2550miniPCIeMobileBroadbandmodulesupports3Gfuncons.
4�1�1 ConnecngtotheInternet
TherststepistoinsertanacveSIMcardintotheEMIO-2550module,andtheninserttheEMIO-2550
moduleintotheminiPCIeslot.Aerinstallingthemodule,connecttheprovidedantennatothemodule.Next,
makesuretounpluganyLANcablesorUSBWi-Fidonglesyouhaveinstalled.Finally,powerontheAMOS-825.
Inserng the EMIO-2550 module
TocheckthatthesystemhascorrectlydetectedtheEMIO-2550module,usethefollowingcommand:
Makesuretheprintoutmessageincludes“ppp0Linkencap:Point-to-PointProtocol”.
root@vab820_6dq:/ # busybox ifcong
Other manuals for AMOS-825
4
Table of contents
Other VIA Technologies Industrial PC manuals

VIA Technologies
VIA Technologies AMOS-5210 User manual

VIA Technologies
VIA Technologies AMOS-3007 User manual

VIA Technologies
VIA Technologies AMOS-825 User manual

VIA Technologies
VIA Technologies AMOS-820-QP SKU User manual

VIA Technologies
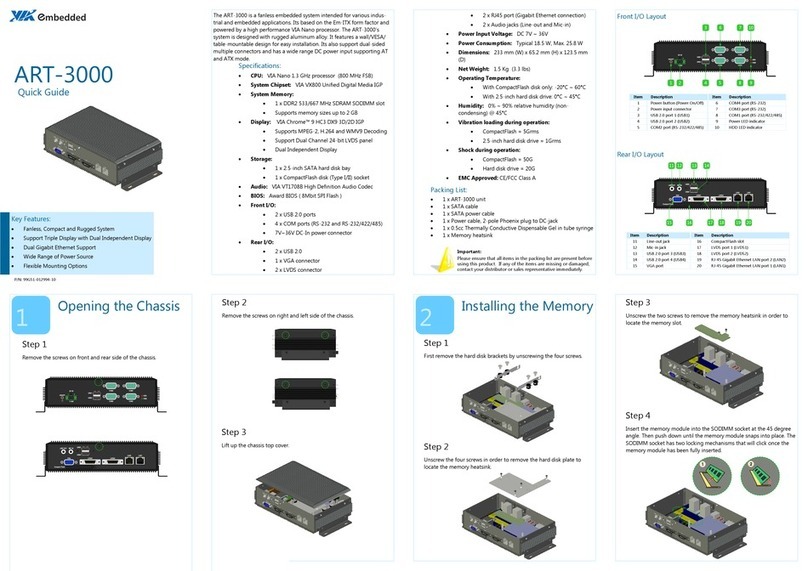
VIA Technologies ART-3000 User manual

VIA Technologies
VIA Technologies EPIA-P910 User manual

VIA Technologies
VIA Technologies AMOS-5002 User manual

VIA Technologies
VIA Technologies AMOS-820 SKU User manual

VIA Technologies
VIA Technologies AMOS-3000 User manual

VIA Technologies
VIA Technologies AMOS-3003 User manual