manuals.online logo
Brands
  1. Home
  2. •
  3. Brands
  4. •
  5. Viavi
  6. •
  7. Test Equipment
  8. •
  9. Viavi ONX 580 User manual

Viavi ONX 580 User manual

Preparation for use
When you unpack the OneExpert, do the following:
yInspect the unit for damage. If damaged, put back in box and contact VIAVI customer
service (see the Technical Assistance section on the next page).
yIf undamaged, save the box and packing materials in case you need to ship the unit in
the future.
yRemove the protective film from the LCD. This film is in place for protection during
shipment. There is tab in the lower right corner for easy removal.
Before using the OneExpert for the first time, do the following:
yTurn the unit ON (use the green button on the front of the unit), and then verify that
it is operating properly by navigating through a few menus.
yIf the Batt. LED is red, charge the battery.
Status indicators
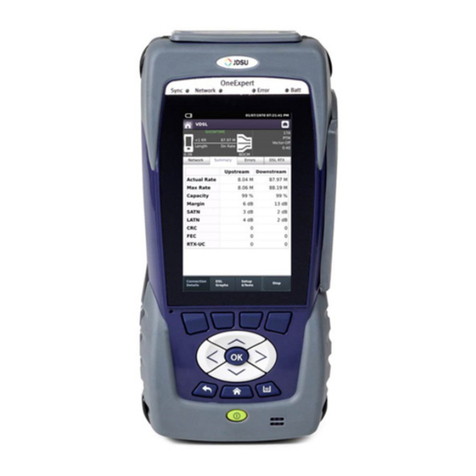
Sync – Reports the status of G.fast/xDSL modem synchronization.
yBlinking green indicates that the modems are training.
ySolid green indicates that the modems are synchronized (reached Showtime).
Network – Indicates the status of network connectivity.
yBlinking green indicates that the unit is acquiring an IP address.
ySolid green indicates an IP address has been acquired.
yBlinking amber indicates a timeout—the unit was unable to acquire an IP address.
yIf the LED is not illuminated, the network is not active (either the unit is not connected
or it is logged off).
Error – Solid red indicates error and alarm conditions. The type of error varies depending on
the application.
Batt – A multi-color LED that indicates the battery status.
ySolid green indicates that either the battery charge is higher than 30%, or that an
external source is powering the unit.
ySolid red indicates that the battery charge is critically low, less than 10%.
ySolid amber indicates that the battery is getting low; the charge is between 10% and
30%.
Touchscreen display
The touchscreen display operates similar to a smart phone or tablet, where you swipe to go
to the next page or zoom in/out by pinching or opening your fingers. Touch the screen to
select options or navigate menus.
System buttons
The Back, Home, and Tray buttons are found under the arrow buttons.
Back/Cancel – Go back to the previous menu
Tray – Launch the Tray menu. From the Tray menu you can save test reports,
turn on/off Bluetooth, or enable/disable Remote Operation (see “Using the
Tray Menu” section on the next page)
There are also two home wiring ports, one RJ11, one RJ45, one RJ11 POTS connector, and one
RJ45 DSL connector (under the flap on the bottom module).
Back panel
The upper area of the back panel on the ONX-580 provides connectors for Copper or G.fast/
xDSL testing.
Note: These connectors are not provided on the ONX-580A.
Bottom panel
The DC power input, located on the bottom of the OneExpert, is used to connect the AC
adapter.
Charge indicator
The Charge indicator, located next to the charge connector, is a multi-color indicator
that shows the charge status.
ySolid green – Charging is complete
ySolid amber – Battery is charging
ySlow flashing red – Battery charge is critically low (less than 10%)
yFast flashing red – Charging was suspended due to a fault and user intervention is
necessary (for example, the wrong charger may be attached)
ySolid red – Charging was suspended due to overheating. The unit can continue to run,
no user intervention is necessary
ONX-580 Quick Start Guide
Features
yMultitouch, friendly user interface is similar to smart devices
yMobile-connectivity iOS app provides remote control, job management, data
enhancements, and technical support content, including tutorials
yBluetooth and WiFi connectivity
yStrataSync™ cloud-enabled architecture for easy asset and test data management
yModel numbers ONX-580 / ONX-580A
– G.fast, ADSL2+/VDSL2 testing, including bonded and vectored pairs (requires
supporting test module)
– HPNA, WiFi, IP Video, and VoIP testing; fiber inspection
– RFC 6349 TCP TrueSpeed testing
– Coax testing, including SmartID™ Plus smart-probe testing
yModel Number ONX-580:
– Copper Multimeter, TDR (including OneCheck™ TDR), Opens, Balance, Load Coil,
and POTS call testing
– OneCheck™ Copper, which automates field tests and simplifies copper results
– RFL, K-Test, Spectral, Noise, Impulse Noise testing
Right side panel
The right side panel provides the following input / output ports.
Note: The POTS and wiring ports are only available on the ONX-580 and ONX-580P; they are
not provided on the ONX-580A.
Home – Return to the main/home screen
Charge indicator
Status indicators
Touchscreen
Shortcut buttons
Arrows /OK buttons
Back, Home, and Tray buttons
Power button
Two USB ports
DSL/G.fast
connector
Two Ethernet/
Network ports
DC power input
Save Report – Saves the results to a
report in XML, PDF, or HTML format
View Reports – Displays a saved report.
Select View Reports and then select
the report to view. If there are no saved
reports, the function will be grayed out.
Job Manager – Allows you to see all your
current jobs
Screen Shot – Takes a screen shot of the screen you were viewing when you launched
the tray menu.
Navigating the user interface
The user interface of the OneExpert is designed to be intuitive and easy to use. You can view
test results, set up the OneExpert, and configure test parameters easily.
When you power up the ONX-580, the Home screen appears. The Home screen indicates the
options enabled on your instrument.
Battery status and time
The area at the top of the screen provides the battery status (using a graphic of the
battery charge remaining), indicates whether the adapter is plugged in (using a lightning
bolt next to the battery), and displays the current time.
Expanding a menu
Each item on the main menu is a collapsible menu. You can expand each of the
collapsible menu items by pressing the triangle on the right.
The triangle points down to show the menu is expanded.
Selecting a menu option
After you expand a collapsible menu, you can select a specific option by pressing the
menu option.
Using the tray menu
The Tray menu allows access to common used functions. It can be accessed either by pressing
the Tray system key or by swiping downward from the top of the screen.
Technical assistance
If you require technical assistance, call 1-844-GO-VIAVI / 1.844.468.4284.
For the latest TAC information, visit
http://www.viavisolutions.com/en/services-and-support/support/technical-assistance
Collapsible menu
Rearrange icons
Quick Access Bar with
shortcuts
©  VIAVI Solutions Inc.
Product specifications and descriptions in this
document are subject to change without notice.
22064010
Jan 2021
English
VIAVI Solutions
North America: 1.844.GO VIAVI / 1.844.468.4284
Latin America +52 55 5543 6644
EMEA +49 7121 862273
APAC +1 512 201 6534
All Other Regions: viavisolutions.com/contacts
email CATVsupport@viavisolutions.com
Network – Enables or disables the currently selected network (Ethernet or WiFi)
Bluetooth – Enables or disables Bluetooth
Volume – Controls the volume of the OneExpert
Help – Provides TAC phone numbers
The Tray menu also includes buttons for settings and functions specific to a test. For example:
DSL, Video, TDR, and other test settings; “POTS dialer”, “Compensate”, “Opens Method”,
“Spectral Settings” and other functions for Copper measurements. Test notifications also
appear in the tray menu.
Personalizing the user interface
If you have a test or function that you use frequently (for example, system settings), you can
rearrange the supporting icons or create up to four shortcuts.
Shortcuts
To create a shortcut, touch and hold the icon and then drag it to the bottom of the
screen. To remove the shortcut, drag it off of the shortcut bar.
Rearranging icons
To rearrange an icon inside a menu, touch and hold the icon and then drag it to the new
location. For example, if you frequently use the Copper TDR test on the ONX-580, from
the Copper menu, touch and drag on the TDR icon to the top row.
Connecting to StrataSync from the VIAVI Mobile Tech App
You can connect to StrataSync using your smart phone or tablet anytime, anywhere using the
VIAVI Mobile Tech app.
Mobile Tech supports sync and file management between your OneExpert
and DSP meters and StrataSync using an iOS or Android mobile device. The
application is available on both the App Store and GooglePlay.
Once your instrument is connected to the Mobile Tech app via Bluetooth,
geo location information can be added to reports and files when syncing to
StrataSync. If configuration files or work orders are set to be deployed from
StrataSync to your meter, you can check those here, as well as browsing files from the unit
itself.
Once you download the application, log in to StrataSync just as you do on the website. To
operate the tests, follow the instructions on the application screens. See the user’s guide for
your instrument for details on setup and connecting to StrataSync.
Mobile Tech
Mobile Tech Main menu
Once you log into StrataSync, you will see the Main menu. Here you can see details of
the instrument, sync to StrataSync, manage files on the unit, view documentation, and
even contact product support for more information or to request a repair or calibration.
Near the top of the Main menu, you can click Show more to
see details on your instrument, including all of the installed
options.
yJob Manager – Allows you to see all your current jobs
yInstrument Sync – Sync your instrument to StrataSync and deploy configuration
files
yONX-580 Files and Mobile Tech Files – Manage the files on the unit you can
save to your phone or tablet. Use the ONX-580 Files menu to manage files stored
on your meter, use the Mobile Tech Files menu to manage those stored on your
mobile device.
ySmartAccess Anywhere – Send a secure link to someone to allow them to
connect to your instrument
yRemote Display – Connect directly to the OneExpert remotely to configure your
unit and run tests
yDocumentation – View and download various documentation for your
instrument, including applications notes, software release notes, and quick
reference guides

Other manuals for ONX 580

2

Other Viavi Test Equipment manuals

Viavi T-BERD/MTS-2000 Parts list manual

Viavi

Viavi T-BERD/MTS-2000 Parts list manual

Viavi ComXpert CX100 User manual

Viavi

Viavi ComXpert CX100 User manual

Viavi 8100 V2 Series User manual

Viavi

Viavi 8100 V2 Series User manual

Viavi ONX 580 User manual

Viavi

Viavi ONX 580 User manual

Viavi T-BERD/MTS 5800 User manual

Viavi

Viavi T-BERD/MTS 5800 User manual

Viavi MTS 2000 User manual

Viavi

Viavi MTS 2000 User manual

Viavi 3900 Series User manual

Viavi

Viavi 3900 Series User manual

Viavi IFR 6015 User manual

Viavi

Viavi IFR 6015 User manual

Viavi OneExpert DSL User manual

Viavi

Viavi OneExpert DSL User manual

Viavi FBP-HD4i User manual

Viavi

Viavi FBP-HD4i User manual

Viavi NSC-200 User manual

Viavi

Viavi NSC-200 User manual

Viavi ONX 580 User manual

Viavi

Viavi ONX 580 User manual

Viavi P5000i User manual

Viavi

Viavi P5000i User manual

Viavi MTS 2000 User manual

Viavi

Viavi MTS 2000 User manual

Viavi Certifier40G User manual

Viavi

Viavi Certifier40G User manual

Viavi SmartClass OLP-85 Series User manual

Viavi

Viavi SmartClass OLP-85 Series User manual

Viavi OneAdvisor ONA-800 Technical manual

Viavi

Viavi OneAdvisor ONA-800 Technical manual

Viavi T-BERD/MTS 5800 Installation guide

Viavi

Viavi T-BERD/MTS 5800 Installation guide

Viavi T-BERD MTS 5800 Parts list manual

Viavi

Viavi T-BERD MTS 5800 Parts list manual

Viavi ALT-8000 Parts list manual

Viavi

Viavi ALT-8000 Parts list manual

Viavi T-BERD/MTS 2000 User manual

Viavi

Viavi T-BERD/MTS 2000 User manual

Viavi ONX-220 User manual

Viavi

Viavi ONX-220 User manual

Viavi T-BIRD-4000 Parts list manual

Viavi

Viavi T-BIRD-4000 Parts list manual

Viavi T-BERD/MTS 5800 User manual

Viavi

Viavi T-BERD/MTS 5800 User manual

Popular Test Equipment manuals by other brands

Ambit P.F. Series instruction manual

Ambit

Ambit P.F. Series instruction manual

Megger BMM500 Series user guide

Megger

Megger BMM500 Series user guide

RJG Lynx Sensor Tester operating instructions

RJG

RJG Lynx Sensor Tester operating instructions

Mark-10 TT02 Series user guide

Mark-10

Mark-10 TT02 Series user guide

Martel 3001 Operator's manual

Martel

Martel 3001 Operator's manual

ElproSys DiagProg4 instruction manual

ElproSys

ElproSys DiagProg4 instruction manual

Redtech TRAILERteck T05 user manual

Redtech

Redtech TRAILERteck T05 user manual

Venmar AVS Constructo 1.0 HRV user guide

Venmar

Venmar AVS Constructo 1.0 HRV user guide

Test Instrument Solutions SafetyPAT operating manual

Test Instrument Solutions

Test Instrument Solutions SafetyPAT operating manual

Hanna Instruments HI 38078 instruction manual

Hanna Instruments

Hanna Instruments HI 38078 instruction manual

Kistler 5495C Series instruction manual

Kistler

Kistler 5495C Series instruction manual

Waygate Technologies DM5E Basic quick start guide

Waygate Technologies

Waygate Technologies DM5E Basic quick start guide

StoneL DeviceNet CK464002A manual

StoneL

StoneL DeviceNet CK464002A manual

Seica RAPID 220 Site preparation guide

Seica

Seica RAPID 220 Site preparation guide

Kingfisher KI7400 Series Training manual

Kingfisher

Kingfisher KI7400 Series Training manual

Kurth Electronic CCTS-03 operating manual

Kurth Electronic

Kurth Electronic CCTS-03 operating manual

SMART KANAAD SBT XTREME 3G Series user manual

SMART

SMART KANAAD SBT XTREME 3G Series user manual

Agilent Technologies BERT Serial Getting started

Agilent Technologies

Agilent Technologies BERT Serial Getting started

manuals.online logo
manuals.online logoBrands
  • About & Mission
  • Contact us
  • Privacy Policy
  • Terms and Conditions

Copyright 2025 Manuals.Online. All Rights Reserved.