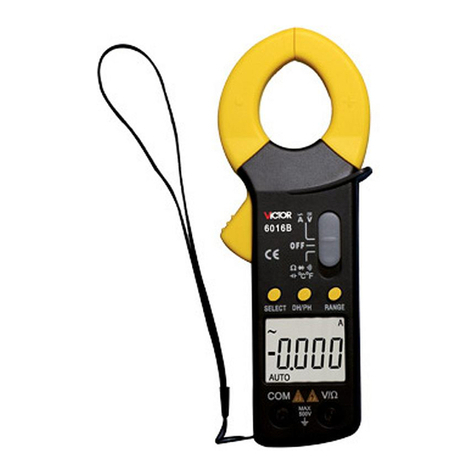
Victor 6000counts User manual

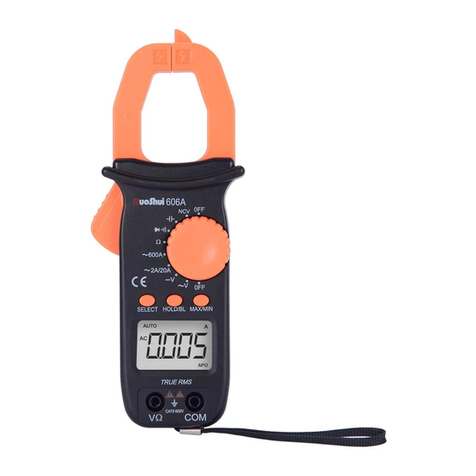
6000CountsAutomatic Identification Digital Clamp Multimeter
6000counts
Automatic Identification Digital Clamp Meter
Instruction Manual

6000CountsAutomatic Identification Digital Clamp Multimeter
1. Overview
The 6000counts is a pocket-sized 3 5/6-digit RMS auto-scanning digital meter that does not require a dial to select a function. The meter will
automatically recognize and measure based on the input voltage/current/resistance/current. It has stable performance, high precision, high reliability,
clear reading and overload protection. Driven by AAA 1.5V battery, the instrument adopts large screen LCD display and adopts boost power supply.
Even at the edge of 2.3V low battery, it can ensure the high brightness of backlight and flashlight. The meter is easy to carry and is very popular
among users. The instrument's backlight can be turned on and off automatically after 15 seconds. This series of instruments can be used to measure
DC voltage and AC voltage, AC current 600A, resistance, capacitance, diode, temperature, continuity test, square wave output, frequency
measurement and true RMS. It is a superior tool and an ideal tool for laboratories, factories, radio enthusiasts and families.
2. Safety Precautions
This series of instruments is designed in accordance with IEC1010 (Safety Standards promulgated by the International Electrotechnical Commission),
please read the safety precautions before use.
1. When measuring voltage, please do not input the limit voltage exceeding the effective value of DC 700V orAC 500V;
2. The voltage below 36V of the current file is a safe voltage;
3.When changing functions and ranges, the test pen should leave the test point;
4. Select the proper function and range, beware of wrong operation, although the series of instruments with a full-range protection, but for safety
reasons, you still pay more attention;
5.Safety Symbol Description: “”Exist dangerous voltage,“ ”Ground ,“ ”Double insulation,“”Operator must
refer to the instruction manual,“ ”Low voltage symbol.
3、Characteristics
1. General Characteristics
1-1. Display: liquid crystal display (LCD);
1-2. Maximum display: 5999 (5 5/6) bit automatic polarity display;
1-3. Measurement method: double integral A/D conversion;
1-4. Sampling rate: about 3 times per second;
1-5. Over range display: The highest position shows “OL”;
1-6. Low voltage display:“ ”symbol appears;
1-7. Working environment:(0~40)℃,relative humidity<80%;
1-8. Power: AAA 2* 1.5V battery;
1-9. Volume (size): 176×67×33mm (L×W×H);
6000CountsAutomatic Identification Digital Clamp Multimeter
1-10. Weight:about 300g(including 1.5V battery);
1-11. Attachment: One instruction manual, one certificate, one outer packaging box, one pair of test leads, two AAA1.5V batteries.
2. Technical characteristics
2-1. Accuracy: ±(a% of reading + least significant digit), to ensure accuracy Ambient temperature: (23±5)℃, relative humidity <75%, calibration
guarantee period from the date of manufacture for one year.
2-2. Performance (Note "▲" indicates that the meter has this function)
Function
DC voltage DCV
▲
AC voltage ACV
▲
DC current DCA
▲
AC current ACA
▲
Resistor / Diode / On-Off Test / Capacitor
▲
Frequency F
Square wave output
NCV
▲
Zero line / Fire line test
Full unit symbol
▲
Backlight manual/Auto off
▲
True RMS measurement
▲
Temperature(℃/℉)
Flashlight lighting
▲

6000CountsAutomatic Identification Digital Clamp Multimeter
3.Technical Specifications
3-1.DC voltage / AC voltage automatic scanning test (DCV / ACV)
Input impedance: 10MΩ; overload protection: 700V DC or 500V AC peak.
The specific operations are as follows:
1. Long press POWER is greater than 2S, the boot display is automatically scanned state "----".
2. Insert the black test lead into the“COM”jack and the red test lead into the “V/Ω”jack; the test leads are reliably in contact with the test point.
3. When the measured voltage between the input port "COM" and "VR" is greater than 0.6V, regardless of the AC voltage or DC voltage, the meter
will compare the DC component with the AC component, take the larger component signal, and then measure according to the measurement. The
value is automatically switched between 6V/60V/600V/DC700V (AC500V) and the measured value is displayed on the LCD.
Note:
1) The input voltage must not exceed DC700V or AC500V. If it exceeds, there is danger of damage to the instrument circuit. When high voltage
circuit, pay special attention to avoid electric shock;
2) After completing all measurement operations, disconnect the test leads from the circuit under test.
3-2. Resistance(Ω)
Accuracy
Range
6000counts
Resolution
DC/AC6V
±(0.5%+3)
0.001V
DC/AC60V
0.01V
DC/700V
0.1V
AC500V
±(0.8%+10)
1V
Accuracy
Range
6000counts
Resolution
600Ω
±(0.8%+5)
0.1Ω
6kΩ
±(0.8%+3)
1Ω
60kΩ
10Ω
600kΩ
100Ω
6MΩ
1kΩ

6000CountsAutomatic Identification Digital Clamp Multimeter
Input impedance: 10MΩ; overload protection: 700V DC or 500V AC peak.
The specific operations are as follows:
1. The boot display is in the automatic scan status "----".
2. Insert the black test lead into the“COM”jack and the red test lead into the “V/Ω”jack; the test leads are reliably in contact with the test point.
3. If the measured resistance at both ends of the test leads is less than 50Ω, the beep will emit a continuous sound, which requires a fast buzzer
measurement. Press the power button to enter the buzzer for quick measurement.
4. If the closed loop resistance is measured, the resistance across the resistance to be measured must be discharged. Otherwise, if the voltage in the
loop is greater than 0.6V,the meter will mistakenly consider the voltage measurement and enter the voltage measurement mode.
5. Input the resistance measurement value between the input port “COM”and “V/Ω”. The meter will automatically switch between 600Ω/6k
Ω/60kΩ600kΩ/6MΩ/60MΩaccording to the measured value of the resistance, and then the measured value will be on the LCD.
Note:
1) When measuring low resistance, the test leads will bring internal resistance. To obtain accurate reading, you can record the short value of the test
lead first, and subtract the value when the test lead is shorted in the measurement reading;
2) When measuring the line resistance, all the power of the circuit under test must be turned off and all capacitors should be completely discharged to
ensure the correct measurement value;
3-3. Fast continuity test / diode / capacitor
Range
display value
test condition
“----”
Diode forward voltage drop
Forward DC current is about 1mA, open circuit
voltage is about 3V
The buzzer sounds long and the resistance of
the test is less than (50±20) Ω.
Open circuit voltage is about 0.4V, press "power"
for two-speed function switching
3-4. Capacitance(C)
60MΩ
±(2.5%+3)
10kΩ
Accuracy
Range
6000counts
Resolution
10nF
±(3.5%+20)
10pF
100nF
100pF

6000CountsAutomatic Identification Digital Clamp Multimeter
Overload protection: 700V DC, 500V AC peak.
1. The boot display is in the automatic scan status "----".
2. Insert the black test lead into the“COM”jack and the red test lead into the “V/Ω”jack; the test leads are reliably in contact with the test point.
3. For fast on/off test/diode/capacitance measurement, continuously trigger the “power”switch to enter the fast on/off test/diode/capacitance
measurement in the second cycle, and select the corresponding function measurement according to the measurement requirements. When measuring
the capacitance, the size of the measured capacitance will automatically select different ranges, and the measured value will be displayed on the
LCD. The capacitance measurement file is 10nF/100nF / 1uF/10uF/100uF/1mF/10mF/60mF.
Note:
1) When measuring capacitance with 10nF file, there may be residual reading on the screen display value. This number is the distributed capacitance
of the test pen. It is an accurate reading and can be subtracted after measurement.
2) When the large capacitance file measures severe leakage or breakdown capacitance, some values will be displayed and unstable; when measuring
large capacitance, the reading takes several seconds to stabilize, which is normal when measuring large capacitance;
3) Please fully discharge the capacitor before testing the capacitor capacity, otherwise it will enter the voltage measurement mode.
4) Unit: 1F=1000mF, 1mF=1000uF, 1uF=1000nF, 1nF=1000pF
3-5. AC and DC current
Maximum measured voltage drop: 600mV; overload protection: 10A
The specific operations are as follows:
1uF
1nF
10uF
10nF
100uF
100nF
1mF
1uF
10mF
10uF
60mF
±(5%+3)
100uF
Accuracy
Range
6000counts
Resolution
60A
±(2%+30)
0.001A
600A
0.01A

6000CountsAutomatic Identification Digital Clamp Multimeter
1. Press the handle 10, slowly open the jaw opening according to the size of the measuring wire diameter, and pass any one of the measured current
wires vertically through the center of the clamp head. The meter will automatically switch to the corresponding according to the measured current. As
shown in Figure 1, the measured current value and the current polarity of the red test point will be displayed on the screen at the same time. The
clamp can only measure one conductor at a time. If two or more conductors are measured at the same time, the measurement reading will be wrong.
2. In the current measurement state, the measurement meter should be unplugged between
“VR”and “COM”due to the large measurement current.
3. The automatic identification current must be greater than 0.2A;
Note:
1) The maximum input current is 600A (depending on the red pen insertion position), and an
excessive current will display OL.
3-6.NCV measurement;
The operation is as follows:
1. Press and hold the “NCV”button; enter the EF measurement.
2. The front end of the meter has NCV test points. As long as the point is close to the AC
voltage, the buzzer will emit different continuations according to the different strength of
the signal, and the LCD will also display according to the strength of the signal. Different
number of segments.
4. Operation panel instructions
1 . Product model and description.
2. LCD display.
3. Trigger
4. NCV measurement button, long press NCV button to measure electric field induction signal.
5. Flashlight switch key.
6. LCD display.
7. COM input; negative input, insert black test pen.
A

6000CountsAutomatic Identification Digital Clamp Multimeter
8. Voltage, resistance, diode, capacitor, buzzer input port;
9. HOLD key is the data hold button, long press for 2 seconds for the flashlight
10. The function selection key SELECT can switch fast buzzer\diode\capacitance
measurement; long press for 2 seconds to turn the power on and off..
11. Pliers opening.
5. Automatic switch machine
When the meter is stopped for about 15 minutes, the meter will automatically power off and enter the sleep state; if you want to restart the power,
press and hold the“power”button for more than 2 seconds, the LCD will display“----”for automatic scanning. The auto power off symbol "APO",
press and hold the "hold" button, and turn on the power switch at the same time, the auto power off function will be canceled, and there is no "APO"
symbol on the screen. When the symbol disappears, the auto power off function will be canceled.
6. Troubleshooting
If your instrument does not work, the following method can help you solve the general problem, if the fault still can not be excluded, please
contact the service center or dealer.
Failure phenomenon
Inspection site and method
Not shown
Battery not connected
Replace the battery
Low battery symbol
Replace the battery
Current is not input
Replace fuse
Resistance display error
The test pen is not in contact
This manual is subject to change without notice;
The contents of this manual are considered correct. If the user finds any errors, omissions, etc., please contact the manufacturer;
The company does not bear the accidents and hazards caused by the user's wrong operation;
The functions described in this manual are not intended to reasons of the product for special purposes.
Other manuals for 6000counts
1
Table of contents
Other Victor Multimeter manuals

Victor
Victor 70D User manual

Victor
Victor VC890D User manual

Victor
Victor 6000counts User manual

Victor
Victor VC9808plus User manual

Victor
Victor VC3280 User manual

Victor
Victor VR-9807A User manual

Victor
Victor VC830L User manual

Victor
Victor 98A User manual

Victor
Victor 8145B User manual

Victor
Victor VC97 User manual

Victor
Victor 6056B User manual

Victor
Victor VC97 User manual

Victor
Victor VC88E User manual

Victor
Victor VC9807A+ User manual

Victor
Victor 8165 User manual

Victor
Victor 81D User manual

Victor
Victor VC9801A User manual

Victor
Victor 606B-II User manual

Victor
Victor 81A User manual

Victor
Victor VC9808+ User manual