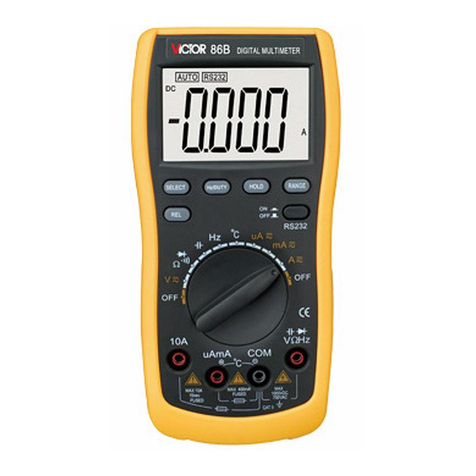
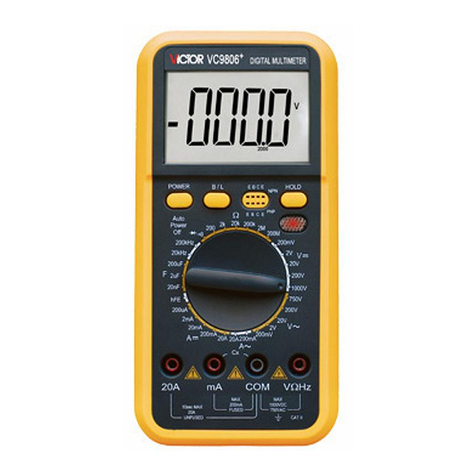
Victor 98A User manual

- 1 -
Chapter
Chapter
Chapter
Chapter
1
1
1
1
Introduction
Introduction
Introduction
Introduction
Warning
Warning
Warning
Warning
Read
Read
Read
Read
Safety
Safety
Safety
Safety
Information
Information
Information
Information
before
before
before
before
using
using
using
using
the
the
the
the
meter.
meter.
meter.
meter.
S
S
S
S
ummarize
ummarize
ummarize
ummarize
The meter is a handled, battery-operated tool for measuring electrical parameters. It has all the features of a digital millimeter
and measure AC voltage, DC voltage, AC current, DC current, resistance, capacitance, frequency , duty cycle ratio , dBm, TC,
RTD, Diode
Diode
Diode
Diode
Test,
Test,
Test,
Test,
and Continuity
Continuity
Continuity
Continuity
Check
Check
Check
Check
.
Besides, it has features like:
Large LCD screen could display the three characteristic of one input signals.
Different referen ce impedance for dB measure function .
AUTO HOLD, DISPLAY HOLD and PEAK HOLD to display the measuring value.
Panel c alibration function.
Three convenient data recording modes: LOG mode, MANUAL mode, and COMP mode.
USB-IR jack to connect with a PC
Open-case
Open-case
Open-case
Open-case
Inspection
Inspection
Inspection
Inspection
Open the case to check, if the meter is damaged or something is missing, contact the place of purchase immediately. Contact
the distributor for information about DMM accessories.
Accessories : A copy of user ’ s manual
A
set of CF-733370 industrial test lead
One USB to UART Bridge Controller ( USB_DMM)
DMMVIEW_ A disk
Options: K-TYPE TC
Safety
Safety
Safety
Safety
Information
Information
Information
Information
The meter complies with IEC61010.1-93 Over voltage ⅡPollution Degree 2. Use the meter only as specified in this manual.
Otherwise, the protection provided by the meter may be impaired.
AWarning
Warning
Warning
Warning
identifies conditions and actions that pose hazards to the user.
ACaution
Caution
Caution
Caution
identifies conditions and actions that may damage the meter or the equipment under test.
A
Notice
Notice
Notice
Notice
identifies symbols of the operation and explanations of the features. International symbols used on the meter and in
this manual are explained in Table 1-1.
Warning
Warning
Warning
Warning
To
To
To
To
avoid
avoid
avoid
avoid
possible
possible
possible
possible
electric
electric
electric
electric
shock
shock
shock
shock
or
or
or
or
personal
personal
personal
personal
injury,
injury,
injury,
injury,
follow
follow
follow
follow
these
these
these
these
guidelines
guidelines
guidelines
guidelines
.
.
.
.
Use
Use
Use
Use
the
the
the
the
meter
meter
meter
meter
as
as
as
as
the
the
the
the
instructions
instructions
instructions
instructions
of
of
of
of
the
the
the
the
producer;
producer;
producer;
producer;
otherwise
otherwise
otherwise
otherwise
,
,
,
,
the
the
the
the
protective
protective
protective
protective
function
function
function
function
shall
shall
shall
shall
be
be
be
be
invalid.
invalid.
invalid.
invalid.
Do
Do
Do
Do
not
not
not
not
use
use
use
use
the
the
the
the
meter
meter
meter
meter
if
if
if
if
it
it
it
it
is
is
is
is
damaged.
damaged.
damaged.
damaged.
Before
Before
Before
Before
you
you
you
you
use
use
use
use
the
the
the
the
meter,
meter,
meter,
meter,
inspect
inspect
inspect
inspect
the
the
the
the
case.
case.
case.
case.
Look
Look
Look
Look
for
for
for
for
cracks
cracks
cracks
cracks
or
or
or
or
missing
missing
missing
missing
plastic.
plastic.
plastic.
plastic.
Pay
Pay
Pay
Pay
particular
particular
particular
particular
attention
attention
attention
attention
to
to
to
to
the
the
the
the
insulation
insulation
insulation
insulation
surrounding
surrounding
surrounding
surrounding
the
the
the
the
connectors.
connectors.
connectors.
connectors.
Take
Take
Take
Take
the
the
the
the
leads
leads
leads
leads
off
off
off
off
the
the
the
the
meter
meter
meter
meter
before
before
before
before
unlock
unlock
unlock
unlock
the
the
the
the
battery
battery
battery
battery
door.
door.
door.
door.
Inspect
Inspect
Inspect
Inspect
the
the
the
the
test
test
test
test
leads
leads
leads
leads
for
for
for
for
damaged
damaged
damaged
damaged
insulation
insulation
insulation
insulation
or
or
or
or
exposed
exposed
exposed
exposed
metal.
metal.
metal.
metal.
Check
Check
Check
Check
the
the
the
the
test
test
test
test
leads
leads
leads
leads
for
for
for
for
continuity.
continuity.
continuity.
continuity.
Replace
Replace
Replace
Replace
damaged
damaged
damaged
damaged
test
test
test
test
leads
leads
leads
leads
before
before
before
before
you
you
you
you
use
use
use
use
the
the
the
the
meter.
meter.
meter.
meter.
Do
Do
Do
Do
not
not
not
not
use
use
use
use
the
the
the
the
meter
meter
meter
meter
if
if
if
if
it
it
it
it
operates
operates
operates
operates
abnormally.
abnormally.
abnormally.
abnormally.
Protection
Protection
Protection
Protection
may
may
may
may
be
be
be
be
impaired.
impaired.
impaired.
impaired.
When
When
When
When
in
in
in
in
doubt,
doubt,
doubt,
doubt,
have
have
have
have
the
the
the
the
meter
meter
meter
meter
serviced.
serviced.
serviced.
serviced.
Do
Do
Do
Do
not
not
not
not
operate
operate
operate
operate
the
the
the
the
meter
meter
meter
meter
around
around
around
around
explosive
explosive
explosive
explosive
gas,
gas,
gas,
gas,
vapor,
vapor,
vapor,
vapor,
or
or
or
or
dust.
dust.
dust.
dust.
Do
Do
Do
Do
not
not
not
not
apply
apply
apply
apply
more
more
more
more
than
than
than
than
the
the
the
the
rated
rated
rated
rated
voltage,
voltage,
voltage,
voltage,
as
as
as
as
marked
marked
marked
marked
on
on
on
on
the
the
the
the
meter,
meter,
meter,
meter,
between
between
between
between
terminals
terminals
terminals
terminals
or
or
or
or
between
between
between
between
any
any
any
any
terminal
terminal
terminal
terminal
and
and
and
and
earth
earth
earth
earth
ground.
ground.
ground.
ground.
Make
Make
Make
Make
sure
sure
sure
sure
the
the
the
the
meter
meter
meter
meter
works
works
works
works
normally
normally
normally
normally
as
as
as
as
per
per
per
per
testing
testing
testing
testing
a
a
a
a
known
known
known
known
voltage.
voltage.
voltage.
voltage.
Do
Do
Do
Do
not
not
not
not
use
use
use
use
the
the
the
the
meter
meter
meter
meter
if
if
if
if
it
it
it
it
operates
operates
operates
operates
abnormally.
abnormally.
abnormally.
abnormally.
When
When
When
When
in
in
in
in
doubt,
doubt,
doubt,
doubt,
have
have
have
have
the
the
the
the
meter
meter
meter
meter
serviced.
serviced.
serviced.
serviced.
To
To
To
To
avoid
avoid
avoid
avoid
possible
possible
possible
possible
electric
electric
electric
electric
shock
shock
shock
shock
caused
caused
caused
caused
by
by
by
by
false
false
false
false
reading
reading
reading
reading
due
due
due
due
to
to
to
to
exist
exist
exist
exist
ting
ting
ting
ting
alternating
alternating
alternating
alternating
voltage
voltage
voltage
voltage
in
in
in
in
all
all
all
all
the
the
the
the
direct
direct
direct
direct
current
current
current
current
functions,
functions,
functions,
functions,
including
including
including
including
manual
manual
manual
manual
and
and
and
and
auto
auto
auto
auto
rang
rang
rang
rang
ing
ing
ing
ing
,
,
,
,
make
make
make
make
sure
sure
sure
sure
whether
whether
whether
whether
there
there
there
there
is
is
is
is
any
any
any
any
alternating
alternating
alternating
alternating
voltage
voltage
voltage
voltage
existing
existing
existing
existing
or
or
or
or
not
not
not
not
before
before
before
before
selecting
selecting
selecting
selecting
a
a
a
a
direct
direct
direct
direct
voltage
voltage
voltage
voltage
range
range
range
range
equals
equals
equals
equals
to
to
to
to
or
or
or
or
higher
higher
higher
higher
than
than
than
than
the
the
the
the
alternating
alternating
alternating
alternating
voltage.
voltage.
voltage.
voltage.
T
T
T
T
o
o
o
o
avoid
avoid
avoid
avoid
false
false
false
false
readings,
readings,
readings,
readings,
which
which
which
which
could
could
could
could
lead
lead
lead
lead
to
to
to
to
possible
possible
possible
possible
electric
electric
electric
electric
shock
shock
shock
shock
or
or
or
or
personal
personal
personal
personal
injury,
injury,
injury,
injury,
replace
replace
replace
replace
the
the
the
the
batteries
batteries
batteries
batteries
as
as
as
as
soon
soon
soon
soon
as
as
as
as
the
the
the
the
low
low
low
low
battery
battery
battery
battery
indicator
indicator
indicator
indicator
appears.
appears.
appears.
appears.
Do
Do
Do
Do
not
not
not
not
touch
touch
touch
touch
the
the
the
the
exposed
exposed
exposed
exposed
wine,
wine,
wine,
wine,
connector
connector
connector
connector
or
or
or
or
unused
unused
unused
unused
input
input
input
input
jack
jack
jack
jack
or
or
or
or
circuit
circuit
circuit
circuit
under
under
under
under
test
test
test
test
when
when
when
when
the
the
the
the
meter
meter
meter
meter
is
is
is
is
working.
working.
working.
working.
Use
Use
Use
Use
only
only
only
only
type
type
type
type
AA
AA
AA
AA
A
A
A
A
batteries,
batteries,
batteries,
batteries,
properly
properly
properly
properly
installed
installed
installed
installed
in
in
in
in
the
the
the
the
meter
meter
meter
meter
case
case
case
case
to
to
to
to
power
power
power
power
the
the
the
the
meter.
meter.
meter.
meter.
Use
Use
Use
Use
caution
caution
caution
caution
when
when
when
when
working
working
working
working
above
above
above
above
30
30
30
30
V
V
V
V
ac
ac
ac
ac
rms,
rms,
rms,
rms,
42
42
42
42
V
V
V
V
peak,
peak,
peak,
peak,
or
or
or
or
60
60
60
60
V
V
V
V
dc.
dc.
dc.
dc.
Such
Such
Such
Such
voltages
voltages
voltages
voltages
pose
pose
pose
pose
a
a
a
a
shock
shock
shock
shock
hazard.
hazard.
hazard.
hazard.
Avoid
Avoid
Avoid
Avoid
working
working
working
working
alone.
alone.
alone.
alone.
When
When
When
When
using
using
using
using
the
the
the
the
probes,
probes,
probes,
probes,
keep
keep
keep
keep
your
your
your
your
fingers
fingers
fingers
fingers
behind
behind
behind
behind
the
the
the
the
finger
finger
finger
finger
guards
guards
guards
guards
on
on
on
on
the
the
the
the
probes.
probes.
probes.
probes.
Connect
Connect
Connect
Connect
the
the
the
the
common
common
common
common
test
test
test
test
lead
lead
lead
lead
before
before
before
before
you
you
you
you
connect
connect
connect
connect
the
the
the
the
live
live
live
live
test
test
test
test
lead.
lead.
lead.
lead.
When
When
When
When
you
you
you
you
disconnect
disconnect
disconnect
disconnect
test
test
test
test
leads,
leads,
leads,
leads,
disconnect
disconnect
disconnect
disconnect
the
the
the
the
live
live
live
live
test
test
test
test
lead
lead
lead
lead
first.
first.
first.
first.
To
To
To
To
avoid
avoid
avoid
avoid
possible
possible
possible
possible
fire
fire
fire
fire
or
or
or
or
electric
electric
electric
electric
shock,
shock,
shock,
shock,
do
do
do
do
not
not
not
not
connect
connect
connect
connect
TC
TC
TC
TC
with
with
with
with
the
the
the
the
live
live
live
live
circuit.
circuit.
circuit.
circuit.
Caution
Caution
Caution
Caution
To
To
To
To
avoid
avoid
avoid
avoid
possible
possible
possible
possible
damage
damage
damage
damage
to
to
to
to
the
the
the
the
meter
meter
meter
meter
or
or
or
or
to
to
to
to
the
the
the
the
equipment
equipment
equipment
equipment
under
under
under
under
test:
test:
test:
test:
Set
Set
Set
Set
the
the
the
the
rotary
rotary
rotary
rotary
switch
switch
switch
switch
on
on
on
on
the
the
the
the
right
right
right
right
range.
range.
range.
range.
Do
Do
Do
Do
cut
cut
cut
cut
off
off
off
off
the
the
the
the
testing
testing
testing
testing
leads
leads
leads
leads
and
and
and
and
circuit
circuit
circuit
circuit
before
before
before
before
switching
switching
switching
switching
.
.
.
.
Forbid
Forbid
Forbid
Forbid
to
to
to
to
switch
switch
switch
switch
during
during
during
during
the
the
the
the
measuring
measuring
measuring
measuring
process.
process.
process.
process.

- 2 -
C
C
C
C
ut
ut
ut
ut
off
off
off
off
the
the
the
the
power
power
power
power
and
and
and
and
complete
complete
complete
complete
discharge
discharge
discharge
discharge
before
before
before
before
measur
measur
measur
measur
ing
ing
ing
ing
resistance,
resistance,
resistance,
resistance,
continuity,
continuity,
continuity,
continuity,
diodes,
diodes,
diodes,
diodes,
or
or
or
or
capacitance
capacitance
capacitance
capacitance
with
with
with
with
the
the
the
the
live
live
live
live
circuit
circuit
circuit
circuit
.
.
.
.
Before
Before
Before
Before
measuring
measuring
measuring
measuring
current,
current,
current,
current,
check
check
check
check
the
the
the
the
meter
meter
meter
meter
’
’
’
’
s
s
s
s
fuses
fuses
fuses
fuses
(see
(see
(see
(see
Chapter
Chapter
Chapter
Chapter
6
6
6
6
“
“
“
“
Testing
Testing
Testing
Testing
the
the
the
the
Fuses
Fuses
Fuses
Fuses
”
”
”
”
).
).
).
).
T
T
T
T
urn
urn
urn
urn
power
power
power
power
OFF
OFF
OFF
OFF
to
to
to
to
the
the
the
the
circuit
circuit
circuit
circuit
before
before
before
before
connecting
connecting
connecting
connecting
the
the
the
the
meter
meter
meter
meter
to
to
to
to
the
the
the
the
circuit.
circuit.
circuit.
circuit.
Remember:
Remember:
Remember:
Remember:
Plug
Plug
Plug
Plug
the
the
the
the
meter
meter
meter
meter
with
with
with
with
the
the
the
the
circuit
circuit
circuit
circuit
when
when
when
when
measuring
measuring
measuring
measuring
current
current
current
current
and
and
and
and
d
d
d
d
o
o
o
o
not
not
not
not
connect
connect
connect
connect
test
test
test
test
lead
lead
lead
lead
in
in
in
in
parallel
parallel
parallel
parallel
with
with
with
with
any
any
any
any
circuit.
circuit.
circuit.
circuit.
Symbols
Symbols
Symbols
Symbols
Symbols used on the meter and in this manual are explained in Table 1- 1 .
Table
Table
Table
Table
1-
1-
1-
1-
1
1
1
1
.International
.International
.International
.International
Electrical
Electrical
Electrical
Electrical
Symbols
Symbols
Symbols
Symbols
Chapter
Chapter
Chapter
Chapter
2
2
2
2
Getting
Getting
Getting
Getting
Acquainted
Acquainted
Acquainted
Acquainted
Introduction
Introduction
Introduction
Introduction
Study this chapter to be acquainted with all the features and functions of the meter.
Turning
Turning
Turning
Turning
the
the
the
the
Meter
Meter
Meter
Meter
On
On
On
On
To turn the meter on, press to power on and press again for more than 2 seconds to power off.
When the power is turned on, the source starts to make self-diagnosis internally and displays on full screen. After this,
appropriate operation should be carried out.
Attention
Attention
Attention
Attention
Power-
Power-
Power-
Power-
on:
on:
on:
on:
To
To
To
To
ensure
ensure
ensure
ensure
the
the
the
the
correct
correct
correct
correct
operation
operation
operation
operation
of
of
of
of
the
the
the
the
meter
meter
meter
meter
with
with
with
with
power
power
power
power
on.
on.
on.
on.
It
It
It
It
is
is
is
is
good
good
good
good
practice
practice
practice
practice
to
to
to
to
turn
turn
turn
turn
off
off
off
off
the
the
the
the
power
power
power
power
supply
supply
supply
supply
pausing
pausing
pausing
pausing
5
5
5
5
seconds,
seconds,
seconds,
seconds,
and
and
and
and
then
then
then
then
restart
restart
restart
restart
the
the
the
the
meter
meter
meter
meter
.
.
.
.
Automatic
Automatic
Automatic
Automatic
Power
Power
Power
Power
Off
Off
Off
Off
T he meter will go into automatic power- off mode if you have not changed the rotary switch position or pressed a button for a set period .
The automatic power off is preset to 10 minutes. From the Setup menu (see Chapter 5 ” Changing the Default Settings ” ), users can
decide whether they want to use the function of the automatic power-off or not.
Backlight
Backlight
Backlight
Backlight
O
O
O
O
n
n
n
n
To turn the backlight on, press to turn on and press again to turn off.
Automatic
Automatic
Automatic
Automatic
backlight
backlight
backlight
backlight
off
off
off
off
The automatic backlight off is preset to 30s. If user doesn ’ t turn off backlight within 30s, the meter will turn off backlight automatically. From the
Setup menu (see Chapter 5 ” Changing the Default Settings ” ), users can decide whether they want to use the function of the automatic
backlight off or not.
Low
Low
Low
Low
Battery
Battery
Battery
Battery
Indicat
Indicat
Indicat
Indicat
or
or
or
or
The battery indicator in the upper right corner of the display notifies you that the batteries are low and should be replaced.
Warning
Warning
Warning
Warning
To
To
To
To
avoid
avoid
avoid
avoid
false
false
false
false
readings,
readings,
readings,
readings,
which
which
which
which
could
could
could
could
lead
lead
lead
lead
to
to
to
to
possible
possible
possible
possible
electric
electric
electric
electric
shock
shock
shock
shock
or
or
or
or
personal
personal
personal
personal
injury,
injury,
injury,
injury,
replace
replace
replace
replace
the
the
the
the
batteries
batteries
batteries
batteries
as
as
as
as
soon
soon
soon
soon
as
as
as
as
the
the
the
the
battery
battery
battery
battery
indicator
indicator
indicator
indicator
appears.
appears.
appears.
appears.
If the battery indicator appears, it will lead to the shut-up of the storage function.
Outer
Outer
Outer
Outer
Structure
Structure
Structure
Structure
See Figure 2-1.
Input
Input
Input
Input
Jack
Jack
Jack
Jack
Figure2-2 and Table2-1 explain the input jacks.
Rotary
Rotary
Rotary
Rotary
Switch
Switch
Switch
Switch
Figure2-3 and Table2-2 explain the measuring functions of the rotary function switch positions.
Symbols
Symbols
Symbols
Symbols
Meaning
Meaning
Meaning
Meaning
Symbols
Symbols
Symbols
Symbols
Meaning
Meaning
Meaning
Meaning
Alternating
current
Earth ground
Direct current
Fuse
Alternating and
direct current
Double
insulated
Important
information
Battery
CAT
CAT
CAT
CAT
II
II
II
II
CAT11 Overvoltage(Installation) Category11,
Pollution Degree 2 per IEC61010 refers to the
level of Impulse Withstand V oltage protection
provided. Typical locations include: plug and
the connecting electric equipments, home
appliance, convenient tools, domestic plug,
plugs 10m distant from type 3 circuit 20m
distant from type 4 circuit.

- 3 -
Display
Display
Display
Display
Unit
Unit
Unit
Unit
Figure 2-4 and Table 2-3 explains the meaning of the every displaying unit.
Communication
Communication
Communication
Communication
interface
interface
interface
interface
You
could use the USB_DMM and the DMMVIEW_A software to transfer the content stored in the meter and real time
measuring value to a PC.(See Chapter 4 ” U sing Memory & Communications Features ” )
Pushbutton
Pushbutton
Pushbutton
Pushbutton
Figure2-5 and Table 2-4 show the pushbutton function.
Figure
Figure
Figure
Figure
2-1.O
2-1.O
2-1.O
2-1.O
uter
uter
uter
uter
Structure
Structure
Structure
Structure
Figure
Figure
Figure
Figure
2-2.Input
2-2.Input
2-2.Input
2-2.Input
Jacks
Jacks
Jacks
Jacks
Table
Table
Table
Table
2-1.Input
2-1.Input
2-1.Input
2-1.Input
Jacks
Jacks
Jacks
Jacks
Item
Function
①
Measuring Signal ( +): direct and alternating current ( A), frequency.
②
Measuring Signal ( +): direct and alternating current ( mA, μ A) , frequency
③
Public ( return) Jacks of all the measurement (-)
④
Measuring Signal ( +): direct voltage, direct mV voltage, alternating voltage, resistance, diodes, continuity, frequency ,
RTD, TC,CAP
C ommunication
interface
Display
screen
Pushbuttons
Rotary
function
Input
jacks
1
2
3
4

- 4 -
Figu
Figu
Figu
Figu
re
re
re
re
2-
2-
2-
2-
3
3
3
3
.
.
.
.
Rotary
Rotary
Rotary
Rotary
Switches
Switches
Switches
Switches
Table
Table
Table
Table
2-
2-
2-
2-
2.Rotary
2.Rotary
2.Rotary
2.Rotary
Switches
Switches
Switches
Switches
NO
NO
NO
NO
Position
Position
Position
Position
Rotary
Rotary
Rotary
Rotary
Switch
Switch
Switch
Switch
Function
Function
Function
Function
Blue
Blue
Blue
Blue
Pushbutton
Pushbutton
Pushbutton
Pushbutton
Function
Function
Function
Function
①
AC Voltage Measurement
d Bm Measurement
②
DC Voltage Measurement
None
③
DC mA Voltage Measurement
TC Measurement
④
Resistance Measurement
Diode testing, continuity testing, RTD
testing
⑤
Capacitance
None
⑥
Direct current measurement
A lternating current measurement
⑦
D irect current measurement
A lternating current measurement
⑧
Direct current measurement
A lternating current measurement
⑨
Read or clear the stored data in the meter . See Chapter 4 for the detailed
information
None
6
5
1
7
3
4
8
9
2

- 5 -
Figure2-4.Display
Figure2-4.Display
Figure2-4.Display
Figure2-4.Display
Unit
Unit
Unit
Unit
Table
Table
Table
Table
2-3.Display
2-3.Display
2-3.Display
2-3.Display
Unit
Unit
Unit
Unit
No.
No.
No.
No.
Unit
Unit
Unit
Unit
Meaning
Meaning
Meaning
Meaning
①
Display Hold :
To
hold present value in the main display
Peak Hold :
Valid
only in DCV position
Auto Hold :To freeze the present value in auto hold mode
②
Toggles in auto-ranging mode
③
To
access yellow button ( ) function
④
Readings are being recorded in logging mode
⑤
Readings are being recorded in comparative mode
⑥
Min.
Max.
Avg.
Limited value measurement ,primary display shows MIN 、MAX 、
AVG
value in cycle
while secondary display shows present reading 。
⑦
Low battery indicator . The indicator in the display notifies you that the batteries are low and
should be replaced.
Warning
To
To
To
To
avoid
avoid
avoid
avoid
false
false
false
false
readings,
readings,
readings,
readings,
which
which
which
which
could
could
could
could
lead
lead
lead
lead
to
to
to
to
possible
possible
possible
possible
electric
electric
electric
electric
shock
shock
shock
shock
or
or
or
or
personal
personal
personal
personal
injury,
injury,
injury,
injury,
replace
replace
replace
replace
the
the
the
the
batteries
batteries
batteries
batteries
as
as
as
as
soon
soon
soon
soon
as
as
as
as
the
the
the
the
low
low
low
low
battery
battery
battery
battery
indicator
indicator
indicator
indicator
appears.
appears.
appears.
appears.
4
1
2
3
12
13
11
9
8
5
6
7
14
17
16
15
10

- 6 -
Table
Table
Table
Table
2-3.
2-3.
2-3.
2-3.
Display
Display
Display
Display
Unit
Unit
Unit
Unit
(Cont.)
(Cont.)
(Cont.)
(Cont.)
Table 2-3. Display Unit (cont.)
Figure
Figure
Figure
Figure
2-5.
2-5.
2-5.
2-5.
Pushbutton
Pushbutton
Pushbutton
Pushbutton
No.
No.
No.
No.
Unit
Unit
Unit
Unit
Meaning
Meaning
Meaning
Meaning
⑧
Ω
Ω
Ω
Ω
、k
k
k
k
Ω
Ω
Ω
Ω
、M
M
M
M
Ω
Ω
Ω
Ω
The unit of resistance: Ohm , K ilohm, M egohm .
Hz
Hz
Hz
Hz
、kHz
kHz
kHz
kHz
、MHz
MHz
MHz
MHz
The unit of frequency: H ertz, K ilohertz, and Megahertz .
A
A
A
A
、mA
mA
mA
mA
、µ
µ
µ
µ
A
A
A
A
The unit of current: Amperes (amps) , Milliamp , Micro amp.
V
V
V
V
、mV
mV
mV
mV
The unit of voltage: Volt , Mill volt
nF
nF
nF
nF
、µ
µ
µ
µ
F
F
F
F
The unit of capacitance : Nanofarad , Microfarad , Millifarad.
°C
C
C
C
、 ° F
F
F
F
Degrees Celsius (default) or Fahrenheit.
dBm
dBm
dBm
dBm
For ac volts functions, reading is shown in decibels of power above or below 1 mW
(dBm) .
AC
AC
AC
AC
DC
DC
DC
DC
Alternating current, direct current.
%
%
%
%
Display the duty cycle ratio of signals when measuring frequency.
⑨
Bar Graph
The polarity indicator both ends of the bar graph show the polarity of the input; the arrow
right of the bar graph indicates an overload condition.
⑩
41000
41000
41000
41000
Range display . Digits display range in use.
11
○
Time d isplay s . In addition, it could be used to temperature display as well.
Unit displays.
NO.
NO.
NO.
NO.
Unit
Unit
Unit
Unit
Meaning
Meaning
Meaning
Meaning
12
○
Elapsed Time Display
13
○
Secondary Display , and could be used to show the sequence number of the stored
information.
Unit Display of the s econdary d isplay
14
○
MEM
MEM
MEM
MEM
Readings are being recorded in manual stored mode
15
○
Primary Display (3 3/4 digital )
16
○
Continuity test function is selected.
>30 V ac and/or dc may be present at the input terminals
Relative measured value
Diodes Test
17
○
In Calibration mode

- 7 -

- 8 -
Table
Table
Table
Table
2-4.Pushbutton
2-4.Pushbutton
2-4.Pushbutton
2-4.Pushbutton
Using
Using
Using
Using
Hold
Hold
Hold
Hold
Mode
Mode
Mode
Mode
In the measuring mode, use to select Display Hold , Auto Hold
or
Peak Hold. Press again
to
exit.
START
START
START
START
HOLD
HOLD
HOLD
HOLD
The above three functions are not available when recording data.
Display
Display
Display
Display
Hold
Hold
Hold
Hold
Mode
Mode
Mode
Mode
(D.H)
(D.H)
(D.H)
(D.H)
The primary display preserves the present value, and displays “ ” (see Figure 2-6 ) .
Figure 2-6. D.H Mode
In MAX, MIN mode, no further minimum, maximum, or average updates occur while the HOLD mode is enabled.
Pushbutton
Pushbutton
Pushbutton
Pushbutton
Description
Description
Description
Description
Yellow
Yellow
Yellow
Yellow
Button
Button
Button
Button
Function
Function
Function
Function
Description
Description
Description
Description
Note
Press to access “ Yellow Button Functions ” , and will be on display
○
Press to access blue functions on the rotary switch.
In Setup and Comparative Mode, use arrow
function ( ) function to select the next digit
( None )
START
START
START
START
HOLD
HOLD
HOLD
HOLD
In measuring mode, s elects between the D .H , A.H and
P.H functions. To cancel functions, press this key once
again.
In Logging mode or Comparative mode, press
to start storage function.
START
START
START
START
HOLD
HOLD
HOLD
HOLD
( None )
In measuring mode , press to exit auto-ranging
and enter manual ranging. In manual, select next
input range.
In C omparative mode ,press to set MAX and
MIN value.
Press to enter Setup mode when turning the
meter on ,and press to select the set value in
the mode.
( None )
In measuring mode , p ress to store the present
reading as an offset reference; subsequent readings
show only the relative difference from this value.
In MEM mode ,press to read the Save Data.
Enter SAVE mode.
In SAVE mode, press to save
present value. Press for more than 2
seconds to exit.
In Setup or comparative mode, increment a digit.
In MEM mode to read the display value ,
press to get the previous record.
In measuring mode
,
press t o
return to A U TO ranging.
In measuring mode, successively press to
select frequency, duty cycle ratio, and voltage
(current) in Voltage and Current position(except
DC mV function)
In MEM mode, press to read LOGGING Data.
Enter LOG mode.
Press for more than 2 seconds to exit.
In measuring mode , press to start retaining
min, max, and average values.
Press successively to display MAX, MIN, and
AVG
value.
Press for more than 2 seconds to stop.
In MEM ,press to read COMP Data.
Enter SAVE mode.
Press for more than 2 seconds to exit.
In Setup or COMP mode, decrement a digit.
In MEM mode ,press to get the next data stored
otherwise to clear off the data if pressing for more
than 2 seconds
(None )
Turn on the power or backlight.
Press for less than 2 seconds to turn on or off the
backlight and more than 2 seconds to power off.
(None )

- 9 -
Auto
Auto
Auto
Auto
HOLD
HOLD
HOLD
HOLD
Mode
Mode
Mode
Mode
(
(
(
(
A.H)
A.H)
A.H)
A.H)
Warning
Warning
Warning
Warning
Auto
Auto
Auto
Auto
HOLD
HOLD
HOLD
HOLD
mode
mode
mode
mode
does
does
does
does
not
not
not
not
capture
capture
capture
capture
unstable
unstable
unstable
unstable
or
or
or
or
noisy
noisy
noisy
noisy
readings.
readings.
readings.
readings.
Do
Do
Do
Do
not
not
not
not
use
use
use
use
Auto
Auto
Auto
Auto
HOLD
HOLD
HOLD
HOLD
mode
mode
mode
mode
to
to
to
to
determine
determine
determine
determine
that
that
that
that
circuits
circuits
circuits
circuits
are
are
are
are
without
without
without
without
power.
power.
power.
power.
Auto HOLD mode freezes the present reading in the primary display (The “ ” is displayed) . New readings now appear in
the secondary display. See Figure 2-7. When the meter detects a new, stable reading (>10% change from last stable reading), it
beeps and displays the new reading in the primary display.
Figure 2- 7 . A .H Mode
If you remove the test leads (open the input), the meter retains the last frozen primary display.
You cannot initiate Auto HOLD while MAX MIN, REL, TC, RTD, dBm, DC mV, AC mV, Diodes, continuity, Capacitance,
Frequency, or Duty cycle ratio function is active.
Peak
Peak
Peak
Peak
HOLD
HOLD
HOLD
HOLD
Mode
Mode
Mode
Mode
(
(
(
(
A.H)
A.H)
A.H)
A.H)
Note
Note
Note
Note
Peak
Peak
Peak
Peak
HOLD
HOLD
HOLD
HOLD
mode
mode
mode
mode
is
is
is
is
only
only
only
only
available
available
available
available
in
in
in
in
(DCV)
(DCV)
(DCV)
(DCV)
.
.
.
.
In Peak HOLD mode, the meter detects, refresh, and displays the peak value in DCV and display “ ” . (See figure 2-8).
Figure 2- 8 .
P
.H Mode
Peak HOLD mode could capture the signals of an imminent of a positive polarity as short as 1 ms except that the accuracy is low .
In Peak HOLD mode, press to calculate the relative value and the screen will show symbol “ ” and the relative peak
value.
Press to clear the value off and the new peak value would be captured .
Using
Using
Using
Using
Relative
Relative
Relative
Relative
Mode
Mode
Mode
Mode
(REL)
(REL)
(REL)
(REL)
In measurement mode, press enter into relative mode and the meter displays the present reading as a reference in the
secondary display and the relative value in the primary display (The difference between the reference and a new measurement).
Press again to exit the mode.
This function is available with all functions except frequency/duty cycle ratio, MAX MIN, TC, RTD, dBm measurement.
Figure2-9 . Relative Mode
Warning
Warning
Warning
Warning
Do
Do
Do
Do
be
be
be
be
careful
careful
careful
careful
for
for
for
for
the
the
the
the
possible
possible
possible
possible
dangerous
dangerous
dangerous
dangerous
voltage
voltage
voltage
voltage
in
in
in
in
the
the
the
the
relative mode.
mode.
mode.
mode.

- 10 -
Selecting
Selecting
Selecting
Selecting
the
the
the
the
Range
Range
Range
Range
Press to select a fixed range.
Auto ranging ( “ ” lighted in the display) always comes on initially when you select a new function. In auto range, the meter
selects the lowest input range possible, ensuring that the reading appears with the highest available precision (resolution).
If AUTO is already on, press to enter MANUAL ranging in the present range. You can then select the next manual range
each time you press . Return to auto ranging by pressing .
Note
You cannot use in conductance, diode test, or with the TC, RTD, and MAX MIN
features. These selections all have a specific fixed range. You cannot use in the
capacitance and frequency measurement functions, which have Auto ranging only. DC
mV has manual ranging only.
Using
Using
Using
Using
MIN
MIN
MIN
MIN
MAX
MAX
MAX
MAX
Mode
Mode
Mode
Mode
Note
The function is invalid in REL, TC, RTD, dBm, DC mV, Diodes, Continuity, Capacitance,
Frequency, Duty cycle ratio features.
The MIN MAX mode stores minimum (MIN) and maximum (MAX) input values . MIN MAX mode also calculates an average
(AVG) of all readings taken since the mode was activated. When the input goes below the stored minimum value or above the
stored maximum value, the meter beeps and stores the new value. In addition , the meter displays the present measurement value
in the secondary display and the new value in the primary display .
Press the MAX, MIN and AVG value will be stored as the present displaying reading, and “ MAX ” will be on display
first. Each subsequent press of steps through the minimum (MIN), average(AVG) and back to the maximum reading.
MAX
MIN AVG
Th e Auto Ranging will be shut off and fixed the present range before enter max min mode. Therefore, set the right range before
choose this mode.
To exit this mode, press for more than 2 seconds or set the rotary switch to any other position.
- 11 -
Chapter
Chapter
Chapter
Chapter
3
3
3
3
Making
Making
Making
Making
Measurements
Measurements
Measurements
Measurements
Introduction
Introduction
Introduction
Introduction
Chapter 3 explains how to make measurements.
Most measurement functions can be selected by using the rotary switch.
White letters or symbols identify primary functions; blue letters or symbols identify alternative functions. Press the blue button
to access these alternate functions. Frequency-related functions can be selected when the rotary switch is in any of the
、
o
r
、 、 position.
Measuring
Measuring
Measuring
Measuring
Voltage
Voltage
Voltage
Voltage
Voltage is the difference in electrical potential between two points. The polarity of ac (alternating current) voltage varies over
time, while the polarity of direct current voltage is constant over time.
Ranges available in volts functions are:
400.0mV ,4.000V ,40.00V ,400.0V ,750V
4.000V ,40.00V ,400.0V ,1000V
40.00mV ,400.0mV
Measuring
Measuring
Measuring
Measuring
AC
AC
AC
AC
Voltage
Voltage
Voltage
Voltage
(
(
(
(
See
See
See
See
Figure 3-1 )
1.
Set the rotary switch to position, and “ AC ” “ V ” will be on display.
2. Insert the black lead into ” COM
COM
COM
COM
“ terminal, and the red lead to into the “ Ω
Ω
Ω
Ω
V
V
V
V
” terminal.
3. Connect the leads to the testing power.
4.
Read the measuring results from the screen.
5.
Press to display the frequency and duty cycle ratio of the tested signals.
Figure 3-1.AC V oltage Measurement

- 12 -
Warning
Warning
Warning
Warning
Do
Do
Do
Do
not
not
not
not
apply
apply
apply
apply
more
more
more
more
than
than
than
than
DC
DC
DC
DC
1000
1000
1000
1000
V
V
V
V
or
or
or
or
AC
AC
AC
AC
750
750
750
750
rms
rms
rms
rms
voltage;
voltage;
voltage;
voltage;
the
the
the
the
meter
meter
meter
meter
will
will
will
will
possibl
possibl
possibl
possibl
e
e
e
e
be
be
be
be
damaged
damaged
damaged
damaged
though
though
though
though
the
the
the
the
value
value
value
value
could
could
could
could
be
be
be
be
displayed.
displayed.
displayed.
displayed.
Indicator
Indicator
Indicator
Indicator
“
“
“
“
” is on
on
on
on
display
display
display
display
for
for
for
for
safety
safety
safety
safety
note
note
note
note
when
when
when
when
30
30
30
30
V
V
V
V
ac
ac
ac
ac
and/or
and/or
and/or
and/or
dc
dc
dc
dc
voltage
voltage
voltage
voltage
present
present
present
present
at
at
at
at
the
the
the
the
input
input
input
input
terminals
terminals
terminals
terminals
The
The
The
The
meter
meter
meter
meter
beeps
beeps
beeps
beeps
constantly
constantly
constantly
constantly
if
if
if
if
the
the
the
the
input
input
input
input
voltage
voltage
voltage
voltage
is
is
is
is
more
more
more
more
than
than
than
than
AC
AC
AC
AC
750V
750V
750V
750V
rms,
rms,
rms,
rms,
which
which
which
which
is
is
is
is
over
over
over
over
the
the
the
the
meter
meter
meter
meter
’
’
’
’
s
s
s
s
range.
range.
range.
range.
dB
dB
dB
dB
m
m
m
m
Measurements
Measurements
Measurements
Measurements
in
in
in
in
AC
AC
AC
AC
Volts
Volts
Volts
Volts
Functions
Functions
Functions
Functions
(See
(See
(See
(See
Figure
Figure
Figure
Figure
3-2)
3-2)
3-2)
3-2)
The ac volts functions allow you to display readings as deviations in dB (decibels) above or below an established level.
Set up dB measurements with the following procedure:
1. Make an ac volt measurement to be used as a reference point.
2. Press to select dB. The dBm value appears in the primary display and the ac volts reading appears in the secondary
display.
3. Press again to turn dB off.
Normally, dB is measured as dBm, which is a measure of decibels relative to 1 milliwatt. The meter assumes a resistance of 600
in making this calculation. This resistance can be set for any value for5 0 Ω
,
75 Ω
,
93 Ω
,
100 Ω
,
150 Ω
,
300 Ω
,
600 Ω ,800 Ω
,
1200 Ω ,2400 Ω , using the meter ’ s setup capabilities (see Chapter 5.) to change the resistance.
Figure 3-2.dBm Measurements
Note
Note
Note
Note
If
If
If
If
dBm
dBm
dBm
dBm
is
is
is
is
displayed,
displayed,
displayed,
displayed,
check
check
check
check
that
that
that
that
the
the
the
the
reference
reference
reference
reference
resistance
resistance
resistance
resistance
value
value
value
value
closely
closely
closely
closely
matches
matches
matches
matches
the
the
the
the
impedance
impedance
impedance
impedance
of
of
of
of
the
the
the
the
system
system
system
system
being
being
being
being
measured.
measured.
measured.
measured.
dB is calculated with the following formula:
1020log
VxdBm
Vr
=
For dBm, Vr is the voltage across the reference resistance at 1mW. For example, Vr would be 0.7746 V with a 600-
Ω reference resistance.
Measuring
Measuring
Measuring
Measuring
DC
DC
DC
DC
Voltage
Voltage
Voltage
Voltage
(
(
(
(
See
See
See
See
Figure
Figure
Figure
Figure
3-3)
3-3)
3-3)
3-3)
1. Set the rotary switch to position, and “ DC ” , “ V ” will be on display.
2. Insert the black lead into “ COM
COM
COM
COM
” terminal, and the red lead to into the “ Ω
Ω
Ω
Ω
V
V
V
V
” terminal.
3. Connect the leads to the tested power.
4. Read the measuring results from the screen.

- 13 -
Figure3-3 . DC Voltage Measurement
Warning
Do
Do
Do
Do
not
not
not
not
apply
apply
apply
apply
more
more
more
more
than
than
than
than
DC
DC
DC
DC
1000
1000
1000
1000
V
V
V
V
or
or
or
or
AC
AC
AC
AC
750
750
750
750
rms
rms
rms
rms
voltage;
voltage;
voltage;
voltage;
the
the
the
the
meter
meter
meter
meter
will
will
will
will
possibl
possibl
possibl
possibl
e
e
e
e
be
be
be
be
damaged
damaged
damaged
damaged
though
though
though
though
the
the
the
the
value
value
value
value
could
could
could
could
be
be
be
be
displayed.
displayed.
displayed.
displayed.
Indicator
Indicator
Indicator
Indicator
“
“
“
“
” is on
on
on
on
display
display
display
display
for
for
for
for
safety
safety
safety
safety
note
note
note
note
when
when
when
when
30
30
30
30
V
V
V
V
ac
ac
ac
ac
and/or
and/or
and/or
and/or
dc
dc
dc
dc
voltage
voltage
voltage
voltage
present
present
present
present
at
at
at
at
the
the
the
the
input
input
input
input
terminals
terminals
terminals
terminals
The
The
The
The
meter
meter
meter
meter
beeps
beeps
beeps
beeps
constantly
constantly
constantly
constantly
if
if
if
if
the
the
the
the
input
input
input
input
voltage
voltage
voltage
voltage
is
is
is
is
more
more
more
more
than
than
than
than
AC
AC
AC
AC
750V
750V
750V
750V
rms,
rms,
rms,
rms,
which
which
which
which
is
is
is
is
over
over
over
over
the
the
the
the
meter
meter
meter
meter
’
’
’
’
s
s
s
s
range.
range.
range.
range.
Measuring
Measuring
Measuring
Measuring
DC
DC
DC
DC
mV
mV
mV
mV
Voltage
Voltage
Voltage
Voltage
(
(
(
(
See
See
See
See
Figure
Figure
Figure
Figure
3-4)
3-4)
3-4)
3-4)
1. Set the rotary switch to position, and “ DC ” “ mV ” will be on display.
2. Insert the black lead into “ COM
COM
COM
COM
” terminal, and the red lead to into the “ Ω
Ω
Ω
Ω
V
V
V
V
” terminal.
Figure3- 4. DC mV Measurement
3. Connect the leads to the tested power.
4. Read the measuring results from the screen.
Measuring
Measuring
Measuring
Measuring
TC
TC
TC
TC
1. Set the rotary switch to position, and press blue button ( ) to select TC measurement.
2. Insert TC into “ COM
COM
COM
COM
” and “ Ω
Ω
Ω
Ω
V
V
V
V
”
”
”
”
terminals, make sure the TC jack with symbol “ + ” is connected into the “ Ω
Ω
Ω
Ω
V
V
V
V
”
terminal.
3 . Read the measuring results from the screen.

- 14 -
Figure3- 5.TC Measurement
The temperature degree is shown on the primary display, the TC value on the secondary display and Fahrenheit degree on
elapsed time display.
When the output jack is open circuit, the screen displays OL.
Warning
Warning
Warning
Warning
To
To
To
To
avoid
avoid
avoid
avoid
possible
possible
possible
possible
electric
electric
electric
electric
shock
shock
shock
shock
or
or
or
or
personal
personal
personal
personal
injury,
injury,
injury,
injury,
do
do
do
do
not
not
not
not
connect
connect
connect
connect
the
the
the
the
TC
TC
TC
TC
with
with
with
with
the
the
the
the
live
live
live
live
circuit.
circuit.
circuit.
circuit.
Measuring
Measuring
Measuring
Measuring
Resistance
Resistance
Resistance
Resistance
(
(
(
(
See
See
See
See
Figure3-6)
Figure3-6)
Figure3-6)
Figure3-6)
Warning
Warning
Warning
Warning
To
To
To
To
avoid
avoid
avoid
avoid
possible
possible
possible
possible
damage
damage
damage
damage
to
to
to
to
the
the
the
the
meter
meter
meter
meter
or
or
or
or
to
to
to
to
the
the
the
the
equipment
equipment
equipment
equipment
under
under
under
under
test,
test,
test,
test,
disconnect
disconnect
disconnect
disconnect
circuit
circuit
circuit
circuit
power
power
power
power
and
and
and
and
discharge
discharge
discharge
discharge
all
all
all
all
high-voltage
high-voltage
high-voltage
high-voltage
capacitors
capacitors
capacitors
capacitors
before
before
before
before
measuring
measuring
measuring
measuring
resistance.
resistance.
resistance.
resistance.
The meter ’ s resistance ranges are 400.0 Ω ,4.000K Ω ,40.00K Ω ,400.0K Ω ,4.000M Ω and 40.00M Ω .
To measure resistance, proceed as follows:
1. Set the rotary switch to position (Default value in this function)
2. Insert the black lead into “ COM
COM
COM
COM
” terminal, and the red lead to into the “ Ω
Ω
Ω
Ω
V
V
V
V
” terminal.
3. Connect the leads to the tested power.
4. Read the measuring results from the screen.
Caution
Caution
Caution
Caution
“
“
“
“
OL
OL
OL
OL
”
”
”
”
appears
appears
appears
appears
on
on
on
on
the
the
the
the
display
display
display
display
if
if
if
if
the
the
the
the
resistance
resistance
resistance
resistance
under
under
under
under
test
test
test
test
is
is
is
is
open
open
open
open
or
or
or
or
the
the
the
the
value
value
value
value
surpasses
surpasses
surpasses
surpasses
the
the
the
the
maxim
maxim
maxim
maxim
range.
range.
range.
range.
The
The
The
The
test
test
test
test
lead
lead
lead
lead
can
can
can
can
add
add
add
add
0.1
0.1
0.1
0.1
Ω
Ω
Ω
Ω
to
to
to
to
0.2
0.2
0.2
0.2
Ω
Ω
Ω
Ω
of
of
of
of
error
error
error
error
to
to
to
to
resistance
resistance
resistance
resistance
measurements.
measurements.
measurements.
measurements.
To
To
To
To
test
test
test
test
the
the
the
the
leads,
leads,
leads,
leads,
touch
touch
touch
touch
the
the
the
the
probe
probe
probe
probe
tips
tips
tips
tips
together
together
together
together
and
and
and
and
read
read
read
read
the
the
the
the
resistance
resistance
resistance
resistance
of
of
of
of
the
the
the
the
leads.
leads.
leads.
leads.
I
I
I
I
f
f
f
f
necessary,
necessary,
necessary,
necessary,
you
you
you
you
can
can
can
can
press
press
press
press
to
to
to
to
automatically
automatically
automatically
automatically
subtract
subtract
subtract
subtract
this
this
this
this
value.
value.
value.
value.
Wait
Wait
Wait
Wait
for
for
for
for
several
several
several
several
seconds
seconds
seconds
seconds
for
for
for
for
stable
stable
stable
stable
reading
reading
reading
reading
when
when
when
when
measuring
measuring
measuring
measuring
resistance
resistance
resistance
resistance
more
more
more
more
than
than
than
than
1
1
1
1
M
M
M
M
Ω
Ω
Ω
Ω
.
.
.
.
Figure3-6.Resistance Measurement
Testing
Testing
Testing
Testing
Diodes
Diodes
Diodes
Diodes
(
(
(
(
See
See
See
See
Figure3-7)
Figure3-7)
Figure3-7)
Figure3-7)
Warning
Warning
Warning
Warning
To
To
To
To
avoid
avoid
avoid
avoid
possible
possible
possible
possible
damage
damage
damage
damage
to
to
to
to
the
the
the
the
meter
meter
meter
meter
or
or
or
or
to
to
to
to
the
the
the
the
equipment
equipment
equipment
equipment
under
under
under
under
test,
test,
test,
test,
disconnect
disconnect
disconnect
disconnect
circuit
circuit
circuit
circuit
power
power
power
power
and
and
and
and
discharge
discharge
discharge
discharge
all
all
all
all
high-voltage
high-voltage
high-voltage
high-voltage
capacitors
capacitors
capacitors
capacitors
before
before
before
before
testing
testing
testing
testing
diodes.
diodes.
diodes.
diodes.
Use the diode test to check diodes, transistors, and silicon-controlled rectifiers (SCR), and other semiconductor devices. The
test sends a current through a semiconductor junction, and then measures the junction ’ s voltage drop. A typical junction drops
0 .5 V to 0.8 V.
To test a diode, proceed as follows:
1. Set the rotary switch to position, and press blue button ( ) to select diodes testing, and the symbol “ ” will be shown
on the left part of the screen.
2. Insert the black lead into “ COM
COM
COM
COM
” terminal, and the red lead to into the “ Ω
Ω
Ω
Ω
V
V
V
V
” terminal. The polarity of the black lead and
red lead is “ - ” and “ + ” respectively.

- 15 -
Figure3- 7 . Diode
Diode
Diode
Diode
Test
Test
Test
Test
In a circuit, a similar diode should still indicate a forward bias reading of 0.5 V to 0.8 V; however, the reverse-bias reading can
vary depending on the resistance of other pathways between the probe tips.
Note
Note
Note
Note
In
In
In
In
the
the
the
the
live
live
live
live
diodes
diodes
diodes
diodes
testing,
testing,
testing,
testing,
the
the
the
the
resistance
resistance
resistance
resistance
of
of
of
of
other
other
other
other
pathways
pathways
pathways
pathways
and
and
and
and
between
between
between
between
the
the
the
the
probe
probe
probe
probe
tips
tips
tips
tips
will
will
will
will
affect
affect
affect
affect
the
the
the
the
reading
reading
reading
reading
of
of
of
of
reverse-bias
reverse-bias
reverse-bias
reverse-bias
voltage.
voltage.
voltage.
voltage.
Testing
Testing
Testing
Testing
for
for
for
for
Continuity
Continuity
Continuity
Continuity
(
(
(
(
See
See
See
See
Figure3-8)
Figure3-8)
Figure3-8)
Figure3-8)
Warning
Warning
Warning
Warning
To
To
To
To
avoid
avoid
avoid
avoid
possible
possible
possible
possible
damage
damage
damage
damage
to
to
to
to
the
the
the
the
meter
meter
meter
meter
or
or
or
or
to
to
to
to
the
the
the
the
equipment
equipment
equipment
equipment
under
under
under
under
test,
test,
test,
test,
disconnect
disconnect
disconnect
disconnect
circuit
circuit
circuit
circuit
power
power
power
power
and
and
and
and
discharge
discharge
discharge
discharge
all
all
all
all
high-voltage
high-voltage
high-voltage
high-voltage
capacitors
capacitors
capacitors
capacitors
before
before
before
before
testing
testing
testing
testing
for
for
for
for
continuity.
continuity.
continuity.
continuity.
Continuity is the presence of a complete path for current flow. The continuity test features a beeper that sounds if a circuit is
complete. The beeper allows you to perform quick continuity tests without having to watch the display.
See
See
See
See
Figure3-8.
Figure3-8.
Figure3-8.
Figure3-8.
Continuity
Continuity
Continuity
Continuity
Test
Test
Test
Test
To test continuity, proceed as follows:
1. Set the rotary switch to position, and press blue button ( ) twice to select continuity
continuity
continuity
continuity
check
check
check
check
and the symbol “ ” will
be shown on the left part of the screen.
2. Insert the black lead into “ COM
COM
COM
COM
” terminal, and the red lead to into the “ Ω
Ω
Ω
Ω
V
V
V
V
” terminal.
3. Connect the leads to the two ends of the tested circuit.
4. The inner beeper sounds when the tested circuit resistance is less than 50 Ω , which indicates the circuit is through.
Measuring
Measuring
Measuring
Measuring
RTD
RTD
RTD
RTD
(
(
(
(
See
See
See
See
Figure3-9)
Figure3-9)
Figure3-9)
Figure3-9)

- 16 -
See
See
See
See
Figure3-9.RTD
Figure3-9.RTD
Figure3-9.RTD
Figure3-9.RTD
Measurement
Measurement
Measurement
Measurement
1. Set the rotary switch to position, and press blue button ( ) three times to select diodes testing.
2. Insert the black lead into “ COM
COM
COM
COM
” terminal, and the red lead to into the “ Ω
Ω
Ω
Ω
V
V
V
V
” terminal.
3. Connect the leads to the tested RTD .
4. Read the measuring results from the screen.
Measuring
Measuring
Measuring
Measuring
Capacitance
Capacitance
Capacitance
Capacitance
(
(
(
(
See
See
See
See
Figure3-10)
Figure3-10)
Figure3-10)
Figure3-10)
Warning
Warning
Warning
Warning
To
To
To
To
avoid
avoid
avoid
avoid
possible
possible
possible
possible
damage
damage
damage
damage
to
to
to
to
the
the
the
the
meter
meter
meter
meter
or
or
or
or
to
to
to
to
the
the
the
the
equipment
equipment
equipment
equipment
under
under
under
under
test,
test,
test,
test,
disconnect
disconnect
disconnect
disconnect
circuit
circuit
circuit
circuit
power
power
power
power
and
and
and
and
discharge
discharge
discharge
discharge
all
all
all
all
high-voltage
high-voltage
high-voltage
high-voltage
capacitors
capacitors
capacitors
capacitors
before
before
before
before
measuring
measuring
measuring
measuring
capacitance.
capacitance.
capacitance.
capacitance.
Use
Use
Use
Use
the
the
the
the
dc
dc
dc
dc
voltage
voltage
voltage
voltage
function
function
function
function
to
to
to
to
confirm
confirm
confirm
confirm
that
that
that
that
the
the
the
the
capacitor
capacitor
capacitor
capacitor
is
is
is
is
discharged.
discharged.
discharged.
discharged.
The meter ’ s capacitance ranges are 50.00nF 、500.0nF 、5.000 µ F 、50.00 µ F 、100.0 µ
F.
To test capacitance, proceed as follows:
1. Set the rotary switch to position to select capacitance measurement.
2. Insert the black lead into “ COM
COM
COM
COM
” terminal, and the red lead to into the “ Ω
Ω
Ω
Ω
V
V
V
V
” terminal.
3. Connect the leads to the tested capacitance.
4. Read the measuring results from the screen.
Caution
Caution
Caution
Caution
OL
OL
OL
OL
appears
appears
appears
appears
on
on
on
on
the
the
the
the
display
display
display
display
if
if
if
if
the
the
the
the
tested
tested
tested
tested
capacitance
capacitance
capacitance
capacitance
is
is
is
is
open
open
open
open
or
or
or
or
the
the
the
the
value
value
value
value
surpasses
surpasses
surpasses
surpasses
the
the
the
the
maxim
maxim
maxim
maxim
range.
range.
range.
range.
If
If
If
If
the
the
the
the
test
test
test
test
ed
ed
ed
ed
capacitance
capacitance
capacitance
capacitance
is
is
is
is
polar
polar
polar
polar
capacitance,
capacitance,
capacitance,
capacitance,
then
then
then
then
connect
connect
connect
connect
the
the
the
the
red
red
red
red
lead
lead
lead
lead
with
with
with
with
the
the
the
the
positive
positive
positive
positive
point
point
point
point
and
and
and
and
the
the
the
the
black
black
black
black
lead
lead
lead
lead
with
with
with
with
the
the
the
the
negative
negative
negative
negative
point.
point.
point.
point.
High
High
High
High
capacitance
capacitance
capacitance
capacitance
test
test
test
test
needs
needs
needs
needs
more
more
more
more
time,
time,
time,
time,
and
and
and
and
30s
30s
30s
30s
is
is
is
is
necessary
necessary
necessary
necessary
in
in
in
in
100
100
100
100
µF
F
F
F
position.
position.
position.
position.
To
To
To
To
improve
improve
improve
improve
the
the
the
the
measurement
measurement
measurement
measurement
accuracy
accuracy
accuracy
accuracy
of
of
of
of
small
small
small
small
value
value
value
value
capacitors,
capacitors,
capacitors,
capacitors,
press
press
press
press
with
with
with
with
the
the
the
the
test
test
test
test
leads
leads
leads
leads
open
open
open
open
to
to
to
to
subtract
subtract
subtract
subtract
the
the
the
the
residual
residual
residual
residual
capacitance
capacitance
capacitance
capacitance
of
of
of
of
the
the
the
the
meter
meter
meter
meter
and
and
and
and
leads.
leads.
leads.
leads.
The
The
The
The
remaining
remaining
remaining
remaining
voltage
voltage
voltage
voltage
of
of
of
of
capacitance
capacitance
capacitance
capacitance
,
,
,
,
insulated
insulated
insulated
insulated
impedance
impedance
impedance
impedance
and
and
and
and
dielectric
dielectric
dielectric
dielectric
absorption
absorption
absorption
absorption
could
could
could
could
cause
cause
cause
cause
measuring
measuring
measuring
measuring
errors.
errors.
errors.
errors.
Only
Only
Only
Only
Auto
Auto
Auto
Auto
r
r
r
r
anging
anging
anging
anging
mode
mode
mode
mode
is
is
is
is
available
available
available
available
in
in
in
in
capacitance
capacitance
capacitance
capacitance
measurement.
measurement.
measurement.
measurement.
See
See
See
See
Figure3-10.
Figure3-10.
Figure3-10.
Figure3-10.
Capacitance
Capacitance
Capacitance
Capacitance
Measurement
Measurement
Measurement
Measurement
Measuring
Measuring
Measuring
Measuring
Current
Current
Current
Current
(
(
(
(
See
See
See
See
Figure3-11,
Figure3-11,
Figure3-11,
Figure3-11,
Figure3-12)
Figure3-12)
Figure3-12)
Figure3-12)
Warning
Warning
Warning
Warning
Never
Never
Never
Never
attempt
attempt
attempt
attempt
an
an
an
an
in-circuit
in-circuit
in-circuit
in-circuit
current
current
current
current
measurement
measurement
measurement
measurement
where
where
where
where
the
the
the
the
open-circuit
open-circuit
open-circuit
open-circuit
potential
potential
potential
potential
to
to
to
to
earth
earth
earth
earth
is
is
is
is
greater
greater
greater
greater
than
than
than
than
1000
1000
1000
1000
V.
V.
V.
V.
You
You
You
You
may
may
may
may
damage
damage
damage
damage
the
the
the
the
meter
meter
meter
meter
or
or
or
or
be
be
be
be
injured
injured
injured
injured
if
if
if
if
the
the
the
the
fuse
fuse
fuse
fuse
blows
blows
blows
blows
during
during
during
during
such
such
such
such
a
a
a
a

- 17 -
measurement.
measurement.
measurement.
measurement.
You
You
You
You
must
must
must
must
open
open
open
open
the
the
the
the
circuit
circuit
circuit
circuit
under
under
under
under
test,
test,
test,
test,
then
then
then
then
place
place
place
place
the
the
the
the
meter
meter
meter
meter
in
in
in
in
series
series
series
series
with
with
with
with
the
the
the
the
circuit.
circuit.
circuit.
circuit.
Caution
Caution
Caution
Caution
To
To
To
To
avoid
avoid
avoid
avoid
possible
possible
possible
possible
damage
damage
damage
damage
to
to
to
to
the
the
the
the
meter
meter
meter
meter
or
or
or
or
to
to
to
to
the
the
the
the
equipment
equipment
equipment
equipment
under
under
under
under
test,
test,
test,
test,
check
check
check
check
the
the
the
the
meter
meter
meter
meter
’
’
’
’
s
s
s
s
fuses
fuses
fuses
fuses
before
before
before
before
measuring
measuring
measuring
measuring
current.
current.
current.
current.
Use
Use
Use
Use
the
the
the
the
proper
proper
proper
proper
terminals,
terminals,
terminals,
terminals,
function,
function,
function,
function,
and
and
and
and
range
range
range
range
for
for
for
for
your
your
your
your
measurement.
measurement.
measurement.
measurement.
Never
Never
Never
Never
place
place
place
place
the
the
the
the
probes
probes
probes
probes
across
across
across
across
(in
(in
(in
(in
parallel
parallel
parallel
parallel
with)
with)
with)
with)
any
any
any
any
circuit
circuit
circuit
circuit
or
or
or
or
component
component
component
component
when
when
when
when
the
the
the
the
leads
leads
leads
leads
are
are
are
are
plugged
plugged
plugged
plugged
into
into
into
into
the
the
the
the
current
current
current
current
terminals.
terminals.
terminals.
terminals.
To measure ac or dc current, proceed as follows:
1. Insert the black lead into the COM terminal. Insert the red lead in an input appropriate for the measurement range as shown
in Table 3-1.
2. When using A
A
A
A
jack, set the rotary switch on position; When using mA
mA
mA
mA
µ
µ
µ
µ
A
A
A
A
jack, set the rotary switch on position if
the current is less than 4000 µ A and position if the current is more than 4000 µ A.
3. The meter is preset to direct current, and the screen shows “ DC ” ; Press blue pushbutton ( ) once to select alternating
current measurement and the screen shows “ AC ” .
4. Open the circuit path to be tested. Touch the red probe to the more positive side of the break; touch the black probe to the
more negative side of the break. Reversing the leads will produce a negative reading, but will not damage the meter.
5. Turn on power to the circuit, and read the measuring results from the screen.
6. Press to toggle between the frequency and duty cycle ratio of the signals under test.
7. Turn off power to the circuit and discharge all high voltage capacitors. Remove the meter and restore the circuit to normal
operation.
Table
Table
Table
Table
3-1.Current
3-1.Current
3-1.Current
3-1.Current
Measurement
Measurement
Measurement
Measurement
Notice
Notice
Notice
Notice
Start
Start
Start
Start
measuring
measuring
measuring
measuring
from
from
from
from
the
the
the
the
high
high
high
high
range
range
range
range
if
if
if
if
the
the
the
the
current
current
current
current
can
can
can
can
’
’
’
’
t
t
t
t
be
be
be
be
evaluated.
evaluated.
evaluated.
evaluated.
For
For
For
For
safety,
safety,
safety,
safety,
the
the
the
the
measuring
measuring
measuring
measuring
time
time
time
time
should
should
should
should
be
be
be
be
limited
limited
limited
limited
within
within
within
within
15s,
15s,
15s,
15s,
while
while
while
while
the
the
the
the
interval
interval
interval
interval
should
should
should
should
be
be
be
be
more
more
more
more
than
than
than
than
10
10
10
10
min
min
min
min
when
when
when
when
measuring
measuring
measuring
measuring
high
high
high
high
current.
current.
current.
current.
If
If
If
If
the
the
the
the
input
input
input
input
current
current
current
current
is
is
is
is
more
more
more
more
than
than
than
than
10.00A,
10.00A,
10.00A,
10.00A,
then
then
then
then
the
the
the
the
inner
inner
inner
inner
beeper
beeper
beeper
beeper
sounds
sounds
sounds
sounds
constantly
constantly
constantly
constantly
indicating
indicating
indicating
indicating
the
the
the
the
value
value
value
value
surpass
surpass
surpass
surpass
the
the
the
the
range.
range.
range.
range.
Figure3-11.DC
Figure3-11.DC
Figure3-11.DC
Figure3-11.DC
Current
Current
Current
Current
Measurement
Measurement
Measurement
Measurement
Rotary
Rotary
Rotary
Rotary
Switch
Switch
Switch
Switch
Input
Input
Input
Input
Ranges
Ranges
Ranges
Ranges
A
4.000A
10.00A
mA
40.00mA
400.0mA
µ A
400.0 µ A
4000 µ A

- 18 -
Figure3-1
Figure3-1
Figure3-1
Figure3-1
2
2
2
2
.
.
.
.
A
A
A
A
C
C
C
C
Current
Current
Current
Current
Measurement
Measurement
Measurement
Measurement
Measuring
Measuring
Measuring
Measuring
Frequency
Frequency
Frequency
Frequency
and
and
and
and
Duty
Duty
Duty
Duty
cycle
cycle
cycle
cycle
ratio
ratio
ratio
ratio
(
(
(
(
See
See
See
See
Figure3-13)
Figure3-13)
Figure3-13)
Figure3-13)
In voltage and current (DC mV excluded) measurement, press to display frequency duty cycle ratio voltage (current),
frequency, duty cycle ratio, and then back to voltage (current).
F requency Duty cycle ratio Voltage (Current) Voltage (Current) F requency
Frequency Duty cycle ratio
Figure3-13.Frequency
and
and
and
and
Duty
Duty
Duty
Duty
cycle
cycle
cycle
cycle
ratio
ratio
ratio
ratio
Notice
Notice
Notice
Notice
Please
Please
Please
Please
select
select
select
select
the
the
the
the
proper
proper
proper
proper
range
range
range
range
in
in
in
in
voltage
voltage
voltage
voltage
or
or
or
or
current
current
current
current
function
function
function
function
before
before
before
before
measuring
measuring
measuring
measuring
frequency
frequency
frequency
frequency
and
and
and
and
duty
duty
duty
duty
cycle
cycle
cycle
cycle
ratio.
ratio.
ratio.
ratio.

- 19 -
Chapter
Chapter
Chapter
Chapter
4
4
4
4
Using
Using
Using
Using
Memory
Memory
Memory
Memory
&
&
&
&
Communications
Communications
Communications
Communications
Features
Features
Features
Features
Introduction
Introduction
Introduction
Introduction
Chapter 4 shows you how to use memory and communication features available on the meters.
Data
Data
Data
Data
Storage
Storage
Storage
Storage
The meter has three types of memory data: SAVE mode, LOG mode and COMP mode.
Notice
Notice
Notice
Notice
Undertake “ clearing memory data ” operation first if the date storage functions are used firstly.
The date storage mode is unavailable when the meter is in D.H, A.H,
P .H,
Hz%
or
MAX MIN function. The COMP mode is
unavailable when measuring capacitance. The range cannot be changed when the date storage functions are active.
In MEM position, “ - - - - ” on the screen indicates data storage is empty and could save the data; “ FULL ” on the screen
indicates data storage is full and will stop saving.
In LOG
or
COMP mode, no data could be saved if there is a recording ( no matter the storage is full
or
not).
The user should clear off the memory and then start
to
save. In LOG
or
COMP mode
,
the meter will return
to
measuring
mode when the storage is full.
Low battery indicator Appears on the screen
to
indicating forbid saving.
Table
Table
Table
Table
4-1.
4-1.
4-1.
4-1.
Memory
Memory
Memory
Memory
Capacity
Capacity
Capacity
Capacity
SAVE
SAVE
SAVE
SAVE
Mode
Mode
Mode
Mode
Proceed as follows:
1. Press
to
save reading, “ MEM
MEM
MEM
MEM
” appears in the display and record number is displayed in the secondary display, the
meter enters into
SAVE
mode.
2. Press
to
save present value in the memory and the record number increments by one.
3. Press for more than 2S o r set the rotary switch to any other position to exit the SAVE mode.
LOG
LOG
LOG
LOG
Mode
Mode
Mode
Mode
Proceed as follows:
1. Set the starting time and interval time of the real time data (see “ Changing the Default Settings ” ) .
2. Press
,
“LOG
LOG
LOG
LOG
” appears on the screen and the recorded number appears in the secondary display; the elapsed time
display shows the time and the meter enters into LOG mode.
3. Press
to
start log mode, and counts the time. On the starting time, the meter begins
to
store the data in the Logging
Saving Memory. The meter exits the mode automatically when the storage is full.
4 . Press for more than 2S
or
change the rotary switch position
to
exit the mode.
COMP
COMP
COMP
COMP
Mode
Mode
Mode
Mode
1. Press
,
“COMP
COMP
COMP
COMP
” appears on the screen and the record number appears in the secondary display; the elapsed time
display shows the time and the meter enters into COMP mode.
2. Set the upper and lower limits. Press
to
set the upper limit and “ MAX
MAX
MAX
MAX
” appears on the screen, and the digit set part in
the primary display flashes. Press the blue button
to
select the set digits. Use
or to
change the numerical value of the
set digit s. Press again
to
set t he lower limit and “ MIN ” display s . The setting way of the lower limit is same as that of the
upper limit. Press for the third time
to
save the set data.
3. Press
to
start COMP mode. If you do not undertake step
2,
then the default value
s
of the upper and lower limits are
zero. Pressing is invalid when setting the upper and lower limit values.
Viewing
Viewing
Viewing
Viewing
Memory
Memory
Memory
Memory
Data
Data
Data
Data
Use the following procedure to view memory data:
1. Disconnect the input leads at the measurement source.
Warning
Warning
Warning
Warning
To
To
To
To
avoid
avoid
avoid
avoid
electric
electric
electric
electric
shock,
shock,
shock,
shock,
disconnect
disconnect
disconnect
disconnect
the
the
the
the
test
test
test
test
leads
leads
leads
leads
when
when
when
when
the
the
the
the
rotary
rotary
rotary
rotary
switch
switch
switch
switch
is
is
is
is
in
in
in
in
the
the
the
the
MEM
MEM
MEM
MEM
position.
position.
position.
position.
Notice
Notice
Notice
Notice
Memory Mode
Memory Capacity
SAVE mode
500
LOG mode
1000
COMP mode
1000

- 20 -
In
In
In
In
MEM
MEM
MEM
MEM
function,
function,
function,
function,
each
each
each
each
operation
operation
operation
operation
could
could
could
could
only
only
only
only
read
read
read
read
or
or
or
or
clear
clear
clear
clear
the
the
the
the
data
data
data
data
of
of
of
of
one
one
one
one
storing
storing
storing
storing
part.
part.
part.
part.
2. Turn the rotary switch to the MEM position and “ ” displays on the screen.
3. Press p ushbutton
to
select a storing data.
Press for saved reading, “ MEM
MEM
MEM
MEM
” appears in the display.
Press for logged reading, “ LOG
LOG
LOG
LOG
” appears in the display.
Press for comparative reading, “ COMP
COMP
COMP
COMP
” appears in the display.
4. Press
or to
view the sequent
or
the previous recording.
5. Turn the rotary switch
to
any other position
to
enter measuring mode.
Clearing
Clearing
Clearing
Clearing
Memory
Memory
Memory
Memory
Use the following procedure to clear memory data:
1. Disconnect the input leads at the measurement source.
Warning
Warning
Warning
Warning
To
To
To
To
avoid
avoid
avoid
avoid
electric
electric
electric
electric
shock,
shock,
shock,
shock,
disconnect
disconnect
disconnect
disconnect
the
the
the
the
test
test
test
test
leads
leads
leads
leads
when
when
when
when
the
the
the
the
rotary
rotary
rotary
rotary
switch
switch
switch
switch
is
is
is
is
in
in
in
in
the
the
the
the
MEM
MEM
MEM
MEM
position.
position.
position.
position.
Notice
Notice
Notice
Notice
In
In
In
In
MEM
MEM
MEM
MEM
function,
function,
function,
function,
each
each
each
each
operation
operation
operation
operation
could
could
could
could
only
only
only
only
read
read
read
read
or
or
or
or
clear
clear
clear
clear
the
the
the
the
data
data
data
data
of
of
of
of
one
one
one
one
storing
storing
storing
storing
part.
part.
part.
part.
2. Turn the rotary switch to the MEM position.
3. Press p ushbutton
to
select a storing data
to
clear.
Press
to
clear saved reading, “ MEM
MEM
MEM
MEM
” appears in the display.
Press
to
clear logged reading, “ LOG
LOG
LOG
LOG
” appears in the display.
Press
to
clear comparative reading, “ COMP
COMP
COMP
COMP
” appears in the display.
4. Press for more than 2S, “ ” appears in the display and press again
to
clear the type of memory presently ; or else
press
to
cancel.
Using
Using
Using
Using
Communications
Communications
Communications
Communications
Notice
Notice
Notice
Notice
Make
Make
Make
Make
sure
sure
sure
sure
your
your
your
your
PC
PC
PC
PC
has
has
has
has
been
been
been
been
connected
connected
connected
connected
with
with
with
with
the
the
the
the
earth
earth
earth
earth
ground
ground
ground
ground
when
when
when
when
employing
employing
employing
employing
this
this
this
this
function.
function.
function.
function.
When using a PC-to-meter IR (infrared) communication link, refer to the DMM VIEW_A Software Guide or the on line help.
You can use the USB to UART Bridge Controller and DMM VIEW_A software to transfer the contents of a meter to a PC.
Table of contents
Other Victor Multimeter manuals

Victor
Victor 86B Parts list manual

Victor
Victor 81A User manual

Victor
Victor VC9808 User manual

Victor
Victor VC9801A User manual

Victor
Victor VC9808plus User manual

Victor
Victor VC890D User manual

Victor
Victor 6000counts User manual

Victor
Victor 6000counts User manual

Victor
Victor VC70D User manual

Victor
Victor 8155 User manual

Victor
Victor VC88E User manual

Victor
Victor VC9807A+ User manual

Victor
Victor VC921 User manual

Victor
Victor VC9808+ User manual

Victor
Victor VR-9807A User manual

Victor
Victor 6056B User manual

Victor
Victor 8165 User manual

Victor
Victor VC97 User manual

Victor
Victor 8145B User manual

Victor
Victor VC3280 User manual