manuals.online logo
Brands
  1. Home
  2. •
  3. Brands
  4. •
  5. Viega
  6. •
  7. Plumbing Product
  8. •
  9. Viega PureFlow Press Zero Lead Instruction sheet

Viega PureFlow Press Zero Lead Instruction sheet

Viega LLC
585 Interlocken Blvd.
Broomfield, CO 80021
Phone (800) 976-9819
www.viega.us
Product Instructions
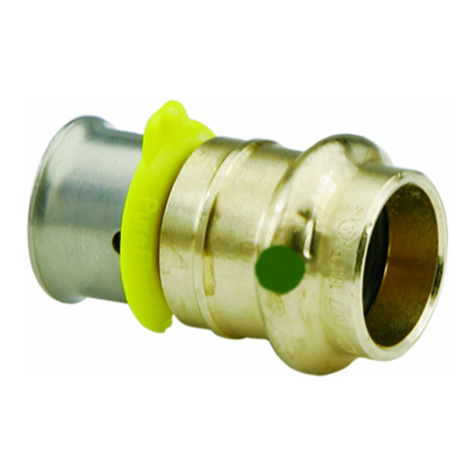
Viega PureFlow®
Press
by ProPress® Adapter
PI-PF 560957 0621 PureFlow Press x ProPress (EN ES FR)
3 Ensurefulltubinginsertionatviewholesin
attachedpresssleeve.Fullinsertionmeanstubing
mustbecompletelyvisibleinatleasttwoview
holesandpartiallyvisibleintheone.
4 PositionpresstoolperpendicularoverPress
Sleeveandclosetooljawstoengageratchet.
5 Closehandles,usingtriggertoreducegripspanif
desired.
6
Extendhandleandcontinueratchetinguntilautomatic
toolreleaseoccursatpropercompressionforce.
7 Turnscrewforemergencyrelease.
EN Product Instructions
Viega PureFlow Press by
ProPress Adapter
Thisdocumentissubjecttoupdates.ForthemostcurrentViega
technicalliteraturepleasevisitwww.viega.us.
6
1 2 34 5
6
6
87 910 11
6
12
13 14 15 16
EN
Viega PureFlow Press Zero Lead by
ProPress Adapter
Making a PureFlow Press with Hand Tool
Viega products are designed to be
installed by licensed and trained plumbing
and mechanical professionals who are
familiar with Viega products and their installation.
Installation by non-professionals may void
Viega LLC’s warranty.
Zero lead identifies Viega products meeting
the lead free requirements of NSF 61-G
through testing under NSF/ANSI 372 (0.25%
or less maximum weighted average lead content).
It may be necessary to rotate the locator
ring to avoid interference between the ring
and tool.
Copper tubing must be free of surface
imperfections, including metal stamped print
lines, before a ProPress fitting is installed
CAUTION!
Do not press twice.
1 Squareofftubingtoproperlength.Uneven,
jaggedorirregularcutswillproduceunsatisfactory
connections.
2 InsertPureFlowPressfittingwithattachedsleeve
intotubingandengagefully.
WARNING!
The connection is not leakproof when the
tool has been opened by emergency release.
WARNING!
Read and understand all instructions for
installing ProPress fittings. Failure to follow
all instructions may result in extensive property
damage, serious injury or death.
Making a ProPress Connection
ForTypesK,LandMHardCopperTubingin½"to2"
andSoftCopperTubingin5"to1¼"
8 Cutcoppertubingatrightanglesusing
displacementtypecutterorfine-toothedsteelsaw.
9 Removeburrfrominsideandoutsideoftubingto
preventcuttingsealingelement.
10 Checksealforcorrectfit.Donotuseoilsor
lubricants.UseonlyProPressShinyBlackEPDM
orDullBlackFKMSealingElements.
11 Markproperinsertiondepthasindicatedbythe
ProPressInsertionDepthChart.Improperinsertion
depthmayresultinimproperseal.
ES Instrucciones del producto
Viega PureFlow Press por
Adaptador ProPress
Estedocumentoestásujetoaactualizaciones.Paraobtenerla
documentacióntécnicamásrecientedeViega,visitewww.viega.us/es.
FR Instructions produit
Viega PureFlow Press
avec adaptateur ProPress
Leprésentdocumentestsoumisàdesmisesàjour.Pourconsulter
lesmanuelstechniquesViegalesplusrécents,veuillezvisiter
www.viega.ca.
12 Whileturningslightly,slidepressfittingontotubing
tothemarkeddepth.Note:Endoftubingmust
contactstop.
13 InsertappropriateViegajawintothepressingtool
andpushinholdingpinuntilitlocksinplace.
14 Openthejawandplaceatrightanglesonthefitting.
Visuallycheckinsertiondepthusingmarkontubing.
15 Startpressingprocessandholdthetriggeruntil
thejawhasengagedthefitting.
16 Afterpressing,thejawcanbeopenedagain.
ES
Viega PureFlow Press Zero Lead
por adaptador ProPress
Realización de PureFlow Press con
herramienta de mano
Los productos de Viega están diseñados
para ser instalados por plomeros y
mecánicos profesionales, capacitados
y con licencia, que estén familiarizados con los
productos Viega y su instalación.La instalación
realizada por personal no profesional puede
anular los términos y condiciones del producto
de Viega LLC.
Zero Lead identifica a los productos
Viega que cumplen los requerimientos de
la NSF 61-G mediante la realización de
ensayos de acuerdo a NSF/ANSI 372 (contenido de
plomo promedio ponderado máximo de 0.25 % o
menos).
es posible que sea necesario girar el anillo
localizador para evitar interferencias entre
el anillo y la herramienta.
¡PRECAUCIÓN!
No prensar dos veces.
1 Cortelatuberíaenángulorecto,alalongitud
correcta.Loscortesdesiguales,serradoso
irregularesproduciránconexionesincorrectas.
2 InserteelaccesorioPureFlowPressenlatubería,
conlamangadeprensarincorporada,yencájelo
porcompleto.
3 Asegúresedequelatuberíaquede
completamenteinsertadamediantelosorificios
deinspecciónsituadosenlamangadeprensar
incorporada.Unainsercióncompletasignifica
quelatuberíadebequedarcompletamente
visiblealmenosendosorificiosdeinspeccióny
parcialmentevisibleenelotro.
4 Coloquelaherramientadeprensadodeforma
perpendicularsobrelamangadeprensarycierre
lasmordazasparaacoplareltrinquete.
5 Cierrelosmangos,usandoelgatilloparareducirla
distanciaentrelosmangos,sisedesea.
6 Extiendaelmangoycontinúepresionandohasta
queseproduzcalaliberaciónautomáticadela
herramientaalaplicarlafuerzadecompresión
correcta.
7 Gireeltornillodeliberaciónencasode
emergencia.
¡ADVERTENCIA!
La unión no queda a prueba de fugas
cuando la herramienta se ha abierto
mediante la liberación de emergencia.
¡ADVERTENCIA!
Leer y entender todas las instrucciones
de instalación de los accesorios ProPress.
Si no se siguen todas las instrucciones, pueden
causarse cuantiosos daños materiales, lesiones
graves o la muerte.
Realización de una conexión ProPress
ParatuberíadecobredurodetiposK,LyMde½"
hasta2"ytuberíadecobreblandode5"hasta1¼"
8 Cortarlatuberíadecobreenángulosrectos
utilizandouncortadortipodesplazamientoouna
sierradeacerocondentadurafina.
9 Eliminelasrebabasdelinterioryexteriordela
tuberíaparaevitarcortesenelelementosellador.
10 Reviseparaversielelementoselladorencaja
correctamente.Noutiliceaceitesnilubricantes.
UtilizarsoloelementosselladoresProPressnegro
brillosoEPDMonegromateFKM.
11 Marcarlaprofundidadcorrectadeinsercióntal
comoseindicaeneldiagramadeprofundidades
deinserciónparaProPress.Unaprofundidadde
inserciónincorrectapuedecausarunsellado
12 Mientrassegiralevemente,desliceelaccesorio
deprensarenlatuberíahastalaprofundidad
marcada.Nota:Elextremodelatuberíadebe
tocareltope.
13 InsertarunamordazaadecuadadeViegaenla
herramientadeprensaryempujarelpasadorde
sujeciónhastaqueencaje.
14 Abralamordazaycolóquelaenángulorectosobre
elaccesorio.Compruebevisualmentelaprofundidad
deinserciónconayudadelamarcaenlatubería.
15 Comienceelprocesodeprensadoymantenga
elgatillooprimidohastaquelamordazahaya
engarzadoelaccesorio.
16 Despuésdehacerelprensado,lamordazapuede
abrirseotravez.
La tubería de cobre no debe tener
imperfecciones en la superficie, incluidas
líneas de impresión estampadas en el metal,
para que se pueda instalar un accesorio ProPress
3 Assurez-vousqueletuyauestcomplètementinséré
envérifiantparlestroussituéssurlemanchonserti.
Uneinsertioncomplètenécessitequelestuyaux
soiententièrementvisiblesdansaumoinsdeuxtrous
devueetpartiellementvisiblesdansuntroudevue.
4 Positionnezl’outildesertissageperpendiculaire-
mentaumanchondesertissageetrefermezles
mâchoiresdel’outilpourengagerlecliquet.
5 Fermezlespoignéesenutilisantlagâchettepour
réduirel’espaceentreelles,lecaséchéant.
6 Étendezlapoignéeetcontinuezàserreràl’aide
d’uncliquetjusqu’àcequelerelâchement
automatiquedel’outilseproduiseàuneforcede
compressionappropriée.

7 Tournezlavispourlerelâchementd’urgence.
FR
Viega PureFlow Press Zero Lead
avec adaptateur ProPress
Sertissage d’une connexion
PureFlow Press à l’aide d’un outil manuel
Les produits Viega sont conçus pour
être installés par des professionnels de
plomberie et de mécanique agréés et
dûment formés, qui sont familiers avec l’utilisation
et l’installation appropriées de nos produits.
L’installation par des non-professionnels
est susceptible d’entraîner l’annulation des
modalités de Viega LLC.
La mention « Zero Lead » identifie les
produits Viega® qui répondent aux exigences
des normes relatives à l’absence de plomb
selon l’annexe G de la norme NSF 61, tels que
testés et homologués selon NSF/ANSI 372 (teneur
moyenne pondérée maximale en plomb de 0,25 %
ou moins).
Il pourrait être nécessaire de faire tourner
l'anneau de repérage pour éviter toute
interférence entre l'anneau et l'outil.
ATTENTION!
Ne sertissez pas à deux reprises.
1 Équarrissezletuyauàlabonnelongueur.Les
coupesinégales,denteléesouirrégulières
causerontdemauvaisesconnexions.
2 InsérezleraccordsertiPureFlowPressavecle
manchonattachédansletuyauetenfoncezcom-
plètement.
AVERTISSEMENT!
Le raccordement n’est pas étanche lorsque
l’outil a été ouvert par le relâchement
d’urgence.
AVERTISSEMENT!
Lire, comprendre et suivre toutes les
instructions pour l'installation des raccords
ProPress. Le non-respect des instructions peut
entraîner des dommages matériels, des blessures
graves ou la mort.
Réaliser une connexion ProPress
Pourlestuyauxencuivredurde½"à2"etencuivre
moude5"à1¼"detypesK,LetM
8 Coupezlestuyauxencuivreàangledroitàl'aide
d'unoutildecoupeàmétauxoud'unescieen
acieràdentfine.
9 Enlevezlesbavuresdel'intérieuretdel'extérieur
dutuyaupouréviterd'entamerl'élément
d'étanchéité.Enlevezlesbavuresdel'intérieur
etdel'extérieurdutuyaupouréviterd'entamer
l'élémentd'étanchéité.
10 Vérifiezquelejointestbienadapté.N’utilisezpas
d’huilesoudelubrifiants.Utilisezuniquementles
élémentsd'étanchéitéEPDMennoirbrillantou
FKMennoirmatdeProPress.
11 Marquezlaprofondeurd'insertioncommeindiqué
dansleTableaudelaprofondeurd'insertionde
ProPress.Uneprofondeurd'insertionincorrecte
peutentraînerunemauvaiseétanchéité.
Les tuyaux en cuivre devront être exempts
d’imperfections de surface comme les
traits d’estampillage métallique avant toute
installation de raccord ProPress
12 Faitesglisserl'extrémitéduraccordserti,toutenle
tournantlégèrement,dansletuyauàlaprofondeur
marquée.Remarque:l'extrémitédutuyaudoit
venirencontactaveclabutée.
13 InsérezlamâchoireViegaappropriéedansl'outil
desertissageetpousseztoutentenantlagoupille
jusqu'àcequelamâchoireseverrouilleenplace.
14 Ouvrezlamâchoireetposez-laperpendiculairement
surleraccord.Vérifiezvisuellementlaprofondeur
d'insertionenutilisantlamarquesurletuyau.
15 Commencezleprocessusdesertissageet
maintenezlagâchettejusqu’àcequelamâchoire
soitsolidementfixéeauraccord.
16 Aprèslesertissage,lamâchoirepeutêtreouverte
ànouveau.

Other Viega Plumbing Product manuals

Viega 8536.31 User manual

Viega

Viega 8536.31 User manual

Viega PureFlow Press Zero Lead Instruction sheet

Viega

Viega PureFlow Press Zero Lead Instruction sheet

Viega Multiplex Trio Visign MT3 User manual

Viega

Viega Multiplex Trio Visign MT3 User manual

Viega 8040.18 User manual

Viega

Viega 8040.18 User manual

Viega Eco Plus User manual

Viega

Viega Eco Plus User manual

Viega 6168.45 User manual

Viega

Viega 6168.45 User manual

Viega 8611.2 User manual

Viega

Viega 8611.2 User manual

Viega Prevista Dry User manual

Viega

Viega Prevista Dry User manual

Viega Profipress G XL User manual

Viega

Viega Profipress G XL User manual

Viega Prevista Dry User manual

Viega

Viega Prevista Dry User manual

Viega 8351.65 User manual

Viega

Viega 8351.65 User manual

Viega Prevista Dry WC User manual

Viega

Viega Prevista Dry WC User manual

Viega ProPress PEX Press x Instruction sheet

Viega

Viega ProPress PEX Press x Instruction sheet

Viega 8159 User manual

Viega

Viega 8159 User manual

Viega Multiplex Trio F Series User manual

Viega

Viega Multiplex Trio F Series User manual

Viega Prevista Dry 8535.32 User manual

Viega

Viega Prevista Dry 8535.32 User manual

Viega Megapress User manual

Viega

Viega Megapress User manual

Viega 8142 User manual

Viega

Viega 8142 User manual

Viega Visign for Style 20 8610.1 User manual

Viega

Viega Visign for Style 20 8610.1 User manual

Viega Simplex 6168.46 User manual

Viega

Viega Simplex 6168.46 User manual

Viega Visign for Public 6 8326.15 User manual

Viega

Viega Visign for Public 6 8326.15 User manual

Viega 2842.5 User manual

Viega

Viega 2842.5 User manual

Viega Prevista Dry 8522.33 User manual

Viega

Viega Prevista Dry 8522.33 User manual

Viega Prevista Dry 8573 User manual

Viega

Viega Prevista Dry 8573 User manual

Popular Plumbing Product manuals by other brands

Moen SANI-STREAM 8797 manual

Moen

Moen SANI-STREAM 8797 manual

Grohe Allure Brilliant 19 784 manual

Grohe

Grohe Allure Brilliant 19 784 manual

Cistermiser Easyflush EVO 1.5 manual

Cistermiser

Cistermiser Easyflush EVO 1.5 manual

Kohler Triton Rite-Temp K-T6910-2A installation guide

Kohler

Kohler Triton Rite-Temp K-T6910-2A installation guide

BEMIS FNOTAB100 Installation instruction

BEMIS

BEMIS FNOTAB100 Installation instruction

Hans Grohe ShowerTablet Select 700 13184000 Instructions for use/assembly instructions

Hans Grohe

Hans Grohe ShowerTablet Select 700 13184000 Instructions for use/assembly instructions

Akw Stone Wash Basin Installation instructions manual

Akw

Akw Stone Wash Basin Installation instructions manual

Enlighten Sauna Rustic-4 user manual

Enlighten Sauna

Enlighten Sauna Rustic-4 user manual

Moen ShowHouse S244 Series quick start guide

Moen

Moen ShowHouse S244 Series quick start guide

Sanela SLWN 08 Mounting instructions

Sanela

Sanela SLWN 08 Mounting instructions

Franke 7612982239618 operating instructions

Franke

Franke 7612982239618 operating instructions

Heritage Bathrooms Granley Deco PGDW02 Fitting Instructions & Contents List

Heritage Bathrooms

Heritage Bathrooms Granley Deco PGDW02 Fitting Instructions & Contents List

Tres TOUCH-TRES 1.61.445 instructions

Tres

Tres TOUCH-TRES 1.61.445 instructions

STIEBEL ELTRON WS-1 Operation and installation

STIEBEL ELTRON

STIEBEL ELTRON WS-1 Operation and installation

Miomare HG00383A manual

Miomare

Miomare HG00383A manual

BELLOSTA revivre 6521/CR1 quick start guide

BELLOSTA

BELLOSTA revivre 6521/CR1 quick start guide

American Standard Heritage Amarilis 7298.229 parts list

American Standard

American Standard Heritage Amarilis 7298.229 parts list

BorMann Elite BTW5024 quick start guide

BorMann

BorMann Elite BTW5024 quick start guide

manuals.online logo
manuals.online logoBrands
  • About & Mission
  • Contact us
  • Privacy Policy
  • Terms and Conditions

Copyright 2025 Manuals.Online. All Rights Reserved.