6
By-alarm Plus
How to create a system
2. How to create a system
Below is a description of the different ways a By-alarm Plus system can be created. In actual fact each method is not mutually exclusive from the next and so the installer
will decide the most appropriate one to use.
IMPORTANT: The By-alarm Plus Manager programming software is always indispensable.
CAUTION: The default PIN for the installer, which is necessary to access via the keypad or the software, is 9999.
2.1 Off-line installation
In this mode, after performing the appropriate surveys at the system installation site, the installer performs the entire configuration of the system on a bench using the
software and so without the need to power the elements/peripherals/devices. The procedure is as follows:
1. The installer has everything they need, all the packs and the Qr-codes of all peripherals/devices
2. None of the devices has been installed, all the peripherals/devices are on the bench
3. Open the By-alarm Plus Manager software and create a new system
4. Perform the configuration of all the wired peripherals using the QR-codes
5. Where present, perform the configuration of all devices radio using the QR-codes
6. Set the parameters for the whole system and save it in the PC, assigning it a name
7. Perform the installation (fixings and wiring) of the control unit and of the peripherals/devices in the site the system is to be created in
8. Power up the system
9. Send the system created previously and saved in the software to the control unit.
The system is now up and running.
2.2 On-site installation and routing of wired and radio peripherals/devices using the By-alarm Plus manager software
In this mode, the installer has already installed (fixed and wired) all the peripherals/devices in the installation site. The procedure is as follows:
1) During installation of the wired peripherals on BUS and of the via-radio devices, keep all the Qr-codes and identify their respective position in the system (for instance,
the keypad with QR-code 2C40000236F032 is the one at the entrance; the magnetic contact with QR-code R03000AKB6F035 is the one for the kitchen window,
etc.)
2) Power up the system
3) Open the By-alarm Plus Manager software and create a new system
4) Use the QR-codes of each peripheral on BUS to assign it to the system
5) Where present, use the QR-codes of each via-radio device to assign it to the system
6) Use the software to set the parameters for the entire system and, as they are gradually defined, send them to the control unit
7) When programming is complete, save the system in the PC and assign it a name
The system is now up and running.
2.3 On-site installation and routing of wired peripherals without software
In this mode, the installer has already installed (fixed and wired) all the peripherals/devices in the installation site.
Consider that the By-alarm Plus Manager software will still be necessary to complete the configuration of the entire system. The procedure described herein only per-
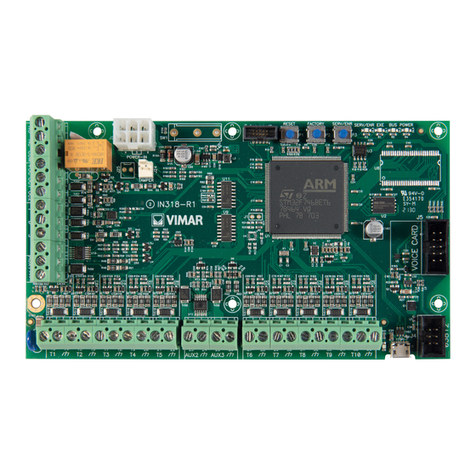
forms rapid routing of the peripherals on BUS using push buttons and LEDs present on the control unit card.
The procedure is as follows:
1) During installation of the wired peripherals on BUS, keep all the QR-codes and identify their respective position in the system (for instance the keypad with QR-code
2C40000236F032 is the one installed at the entrance, etc.)
2) Power up the system
3) Go to the control unit and set it to ENROL status (device routing phase start): press and hold down (approximately 2 s) the SERV/ENR push button until the corre-
sponding red SERV/ENR LED starts flashing
4) In sequence, press the ENROL push button on each expansion (art. 03808 or 03819)
5) In sequence, approach a transponder key to each actuator (art. 03824)
6) In sequence, press the ENROL button on each keypad (art. 03817 or 03818)
7) Press the ENROL button on the transceiver (art. 03831)
8) In sequence, press the ENROL button on each BUS siren (art. 03826)
9) At the end, briefly press the SERV/ENR push button on the control unit to exit the routing phase
i) N.B. Points 4) to 8) do not necessarily need to be performed in sequence; the operation described can be performed using any peripheral, for instance by pressing
the ENROL push button on an expansion, then the ENROL button on a keypad, then the ENROL push button on a siren and so on.
ii) The peripherals are acquired by the control unit and routed via a progressive number (1, 2, 3, etc.) depending on how the installer performs the sequence.
iii) Keep in mind that each type of peripheral is routed starting with index 1 (so it is possible for you to have a keypad, an expansion, a siren and an actuator at the
same logical address, but it is not possible for you to have two keypads at the same logical address).
10) Open the By-alarm Plus Manager software and perform a system reading in order to transfer the programming stored in the control unit to the PC
11) Since you marked the physical position of the peripherals, assign a description/label to each peripheral using the software
12) Use the software to set the parameters for the entire system and, as they are gradually defined, send them to the control unit
13) When programming is complete, save the system in the PC and assign it a name
The system is now up and running.
