manuals.online logo
Brands
  1. Home
  2. •
  3. Brands
  4. •
  5. Vimar
  6. •
  7. Switch
  8. •
  9. Vimar Eikon User manual

Vimar Eikon User manual

Viale Vicenza, 14 - I 36063 Marostica VI
Tel. +39 0424 488 600 - Fax (Italia) +39 0424 488 188 - Fax (Export) +39 0424 488 709
www.vimar.com
Istruzioni •Instruction sheet
Notice technique • Anleitungen
Instrucciones • Οδηγίες
49400424A0 01 1203
VIMAR - Marostica - Italy
ITALIANO
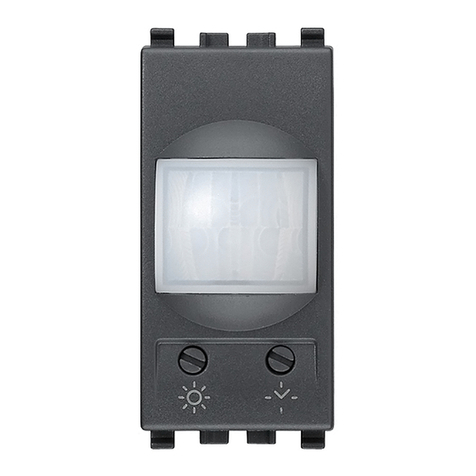
Ricevitore a infrarossi con uscita a relè 4 A 230 V~ per
tapparelle, comando con pulsanti incorporati, con tele-
comando 01849, o da più punti con pulsanti NO, funzio-
namento monostabile o bistabile, individuazione al buio,
alimentazione 230 V~ 50-60 Hz, grigio - 2 moduli.
CARATTERISTICHE.
•Tensionedialimentazione:230V~50-60Hz.
• Funzionamento: monostabile, bistabile o bistabile con spe-
gnimentotemporizzato.
•ComandoadinfrarossisuprotocolloRC5.
•Temperaturadifunzionamento:-5°C-+35°C.
CARICHI COMANDABILI.
•Carichipuramenteresistivi :4A.
•Motori :2Acos 0,6.
FUNZIONAMENTO.
•Aperturaechiusuradellatapparellamediante:
- 2pulsantisulfrontedeldispositivo;
- comando da più punti mediante 2 pulsanti NO (distanza
massima100m);non utilizzare pulsanti con spia luminosa
incorporata;
- comando ad infrarossi mediante 2 tasti del telecomando
(tastosuetastogiù).
•L’apertura elachiusuradellatapparellaavvienepremendo
unodeipulsanticollegati,quelliincorporatisuldispositivooi
tastideltelecomandochesonostatiassociatialricevitore
•Segnalazionedellostatodifunzionamento(daimpostarein
fasediconfigurazione):
- normale:
- LEDsinistroaccesorelè“tapparellasu”ON
- LEDsinistrospentorelè“tapparellasu”OFF
- LEDdestroaccesorelè“tapparellagiù”ON
- LEDdestrospentorelè“tapparellagiù”OFF
- invertita:
- LEDsinistroaccesorelè“tapparellasu”OFF
- LEDsinistrospentorelè“tapparellasu”ON
- LEDdestroaccesorelè“tapparellagiù”OFF
- LEDdestrospentorelè“tapparellagiù”ON
• Funzionamentomonostabilericonoscibileall’accensione:LED
sinistro e destro accesi fissi per circa 10 s allo start, quindi
effettuano3lampeggieiniziailfunzionamentoinmonostabile.
•Funzionamento bistabile riconoscibile all’accensione: LED
sinistro spento per circa 10 s allo start, quindi effettua 3
lampeggieiniziailfunzionamentoinbistabile.
• Funzionamento bistabile OFF dopo 2 minuti riconoscibile
all’accensione:LEDdestrospentopercirca10sallostart,
quindieffettua3lampeggieiniziailfunzionamentoinbistabile
ritardatodi2min.
• Funzionamento bistabile OFF dopo 5 minuti riconoscibile
all’accensione:LEDsinistroedestrospentipercirca10sallo
start,quindieffettuano3lampeggieiniziailfunzionamentoin
bistabileritardatodi5min.
CODIFICA DEL RICEVITORE A INFRAROSSI
E PROGRAMMAZIONE.
•Spegnereilcarico.
•Premerecontemporaneamenteepercirca4siseguentitasti
del telecomando: 1 sinistro e 7 destro. Il LED sinistro del
ricevitoredaconfigurareinizieràalampeggiare(secisonopiù
ricevitoriinunastessastanza,tuttiinizierannoalampeggiare).
•Premereilpulsante“su”delricevitoredaconfigurare;durante
lapressioneditalepulsantesinoterà,perunbreveintervallo
ditempo,unamodificadellampeggiodelLED.
•Premere,sultelecomando,unodeiduetasti(“su”ogiù”)che
sivoglionoassociarealricevitoredicuisopra;sinoteràcheil
LEDlampeggiapiùlentamente.
•Selezionare,sempredatelecomando,lamodalitàdifunzio-
namentoelasegnazionedeiLEDdesiderata:
- monostabile: premere il tasto 1 sinistro per segnalazione
invertitaoiltasto1destropersegnalazionenormale;entram-
biiLEDsiaccenderannofissipercirca10s,effettuerannopoi
3lampeggiequindiinizieràilfunzionamentoinmonostabile;
- bistabile:premereiltasto2sinistropersegnalazioneinvertita
oiltasto2destropersegnalazionenormale;ilLEDsinistro
sispegneràpercirca10s,effettueràpoi3lampeggiequindi
inizieràilfunzionamentoinbistabile;
- bistabile OFF dopo 2 min: premere il tasto 3 sinistro per
segnalazione invertita o il tasto 3 destro per segnalazione
normale;ilLEDdestrosispegneràpercirca10s,effettuerà
poi3lampeggiequindiinizieràilfunzionamentoinbistabile
ritardatodi2min;
- bistabile OFF dopo 5 minuti:premereiltasto4sinistroper
segnalazione invertita o il tasto 4 destro per segnalazione
normale;entrambiiLEDsispegnerannopercirca10s,effet-
tuerannopoi3lampeggiequindiinizieràilfunzionamentoin
bistabileritardatodi5min.
Nota.
Ognunadelleoperazionisopradescrittedeveessereeffettuata
entro30s;alloscadereditaleintervalloditempoildispositivo
escedallamodalitàdiprogrammazione.
AVVERTENZE.
•Non utilizzare pulsanti con spia luminosa incorporata.
•Non interporre oggetti fra ricevitore e telecomando (vedi
figura3).
•Nonesporreilricevitoreallalucesolarediretta,nesottoporlo
all’azionedirettadifontidicalore.
•Collegarel’apparecchiocomeindicatoinfigura2.Ilcircuitodi
alimentazione(L-N)deveessereprotettocontroisovracca-
richidaundispositivo,fusibileointerruttoreautomatico,con
correntenominalenonsuperiorea10A.
REGOLE DI INSTALLAZIONE.
L’installazione deve essere effettuata con l’osservanza delle
disposizioni regolanti l’installazione del materiale elettrico in
vigorenelpaesedoveiprodottisonoinstallati.
CONFORMITÀ NORMATIVA.
DirettivaBT
DirettivaEMC
NormaEN60669-2-1.
ENGLISH
Infrared receiver with 4 A 230 V~ relay output for blinds,
operate by built-in push buttons, 01849 remote control or
from several positions with NO buttons, mono-or-bistable
function, visible in darkness, 230 V~, 50-60 Hz power sup-
ply, grey - 2 module.
CHARACTERISTICS.
•Powersupply:230V~50-60Hz.
•Operation:mono-or-bistableorbistablewithtimedOFF.
•Infraredcontrol,protocolRC5.
•Operatingtemperature:-5°C-+35°C.
LOADS CONTROLLED.
•Resistiveloads :4A.
•Motors :2Acos 0,6.
OPERATION.
•Opensandclosesblindswith:
- 2buttonsonfrontofunit;
- operationfromseveralpositionsusing2NObuttons(max.range
100m); do not use buttons with built-in indicator unit;
- infrared operation with 2 remote control buttons (up and
downbuttons).
•The blind can be opened and closed by pressing one of
theconnectedbuttons,thebuttonsontheunitItselforthe
buttonsontheremotecontrolassignedtothereceiver.
•Operatingstatusindication(reverselogic):(tobesetatthe
timeofconfiguration):
- normal:
- leftLEDON“raiseblind”relayON
- leftLEDOFF“raiseblind”relayOFF
- rightLEDON“lowerblind”relayON
- rightLEDOFF“lowerblind”relayOFF
- inverted:
- leftLEDON“raiseblind”relayOFF
- leftLEDOFF“raiseblind”relayON
- rightLEDON“lowerblind”relayOFF
- rightLEDOFF“lowerblind”relayON
•Monostable operation confirmed by LEDs: left and right
LEDsstayonsteadyfor10secondsatthestart,thenflash3
timesandmonostableoperationisenabled.
•BistableoperationconfirmedbyLEDs:leftLEDstaysofffor
10 seconds at the start, then flashes 3 times and bistable
operationisenabled.
•Bistable operation with automatic OFF after 2 minutes
confirmed by LEDs: right LED stays off for 10 seconds at
the start, then flashes 3 times and bistable operation with
automaticOFFafter2minutesisenabled.
•Bistable operation with automatic OFF after 5 minutes
confirmedbyLEDs:leftandrightLEDsstayofffor10sec-
ondsatthe start,thenflash3timesandbistableoperation
withautomaticOFFafter5minutesisenabled.
CODING THE INFRARED RECEIVER
AND PROGRAMMING.
•Switchofftheload.
• Hold the following remote control buttons down together for 4
seconds:1leftand7right.Thereceiver’sleftLEDwillstartflashing
(Ifthereareseveralreceiversintheroom,theywillallstartflashing).
• Pressthe“raise”buttononthereceiverbeingconfigured;theLED
willflashdifferentlyforashorttimewhenyoupressthebutton.
• On theremotecontrol,pressoneofthetwokeys (upordown)
youwishtoassigntothereceiver;itsLEDwillflashmoreslowly.
•Now,ontheremotecontrol,selectthetypeofoperationand
LEDsignallingyoudesire:
- monostable:presstheleft-handkey1fortheinvertedsignal
orright-handkey1forthenormalsignal;bothLEDswilllight
upsteadyforaround10seconds,flash3times,afterwhich
monostableoperationisenabled;
- bistable:presstheleft-handkey2fortheinvertedsignalor
right-handkey2forthenormalsignal;theleftLEDwillturn
offforaround10seconds,flash3times,afterwhichbistable
operationisenabled;
- bistable with automatic OFF after 2 minutes: press the
left-handkey3fortheinvertedsignalorright-handkey3for
the normal signal; the right LED will turn off for around 10
seconds, flash 3 times, after which bistable operation with
automaticOFFafter2minutesisenabled;
- bistable with automatic OFF after 5 minutes:presstheleft-
handkey4fortheinvertedsignalorright-handkey4forthe
normalsignal;bothLEDswillturnoffforaround10seconds,
flash3times,afterwhich bistableoperationwithautomatic
OFFafter5minutesisenabled.
Note.
Each of the above operations must be completed within 30
seconds,otherwisetheunitwillexitfromprogrammingmode.
WARNINGS.
•Do not use buttons with built-in indicator unit.
•Do not place anything between the receiver and remote
control(seefigure3).
• Donotexposethereceivertodirectsunlightorsourcesofheat.
•Connecttheunitasshowninfigure2.Thepowercircuit(L-N)
must be protected against overloads with a fuse or circuit
breakerwithratedcurrentnohigherthan10A.
INSTALLATION RULES.
The unit must be installed in observance of established local
legislationregardingelectricalinstallations.
CONFORMITY TO STANDARDS.
LVDirective
EMCDirective
EN60669-2-1Standard.
Eikon
20173
Arké
19173
Plana
14173
Idea
16623
signalisation normale; la LED droite s’éteindra pendant 10
s,effectuera3clignotements,lefonctionnementenbistable
démarreretardéde2min;
- bistable OFF après 5 min: appuyer la touche 4 gauche
pour signalisation inversée ou la touche 4 droite pour la
signalisation normale; les LEDs s’éteindront pendant 10 s,
effectueront3clignotements,lefonctionnementenbistable
démarreretardéde5min.
Note.
Chacune des opérations ci-dessus doit être effectuée dans
les30secondes;àlafindecetintervalleledispositifsortdela
modalitédeprogrammation.
AVERTISSEMENTS.
•Ne pas utiliser de poussoirs avec voyant lumineux incor-
poré.
•Nepasplacerd’objetsentrelerécepteuretlatélécommande
(voirfigure3).
•Nepasexposerlerécepteuràlalumièresolairedirecte,ne
pasl’exposeràl’actiondirectedesourcesdechaleur.
•Relierl’appareilcommeindiquéfigure2.Lecircuitd’alimen-
tation (L-N) doit être protégé contre les surcharges par un
dispositif,fusibleouinterrupteurautomatique,aveccourant
nominalnonsupérieurà10A.
REGLES D’INSTALLATION.
L’installationdoitêtreeffectuéedanslerespectdesdispositions
régulantl’installationdumatérielélectriqueenvigueurdansle
paysd’installationdesproduits.
CONFORMITE AUX NORMES.
DirectiveBT
DirectiveEMC
NormeEN60669-2-1.
DEUTSCH
Infrarot-Empfänger mit Relaisausgang 4 A 230 V~ für Rollläden,
Bedienung über eingebaute Drucktasten, mit Fernbedienung
01849 oder Bedienung von mehreren Stellen über Schließtasten
NO, monostabile oder bistabile Funktionsweise, Lokalisierung
im Dunkeln, Versorgung 230 V~ 50-60 Hz, grau - 2 Module.
EIGENSCHAFTEN.
•Versorgungsspannung:230V~50-60Hz.
•Funktionsweise:monostabil,bistabiloderbistabilmitzeitge-
schalteterAusschaltung.
•Infrarot-SteuerungüberProtokollRC5.
•Betriebstemperatur:-5°C-+35°C.
REGELBARE LASTEN.
•ReineWiderstandslasten :4A.
•Motoren :2Acos 0,6.
FUNKTIONSWEISE.
•ÖffnungundSchließungdesRollladensüber:
- 2TastenanFrontseitedesGeräts;
- Bedienung von mehreren Stellen über 2 Schließtasten NO
(max. Abstand 100 m); keine Tasten mit eingebauter
Kontrollleuchte verwenden;
- Infrarot-Steuerung über 2 Tasten der Fernbedienung (Taste
aufwärtsundTasteabwärts).
•Öffnung und Schließung des Rollladens erfolgen durch
BetätigungeinerderangeschlossenenTasten,deramGerät
eingebautenDrucktastenoderderTastenderFernbedienung,
welchedemEmpfängerzugeordnetwurden
•SignalisierungdesBetriebsstatus(WährendderKonfiguration
einstellen):
- normal:
- LEDlinkseingeschaltetRelais“Rollladenaufwärts”ON
- LEDlinksausgeschaltetRelais“Rollladenaufwärts”OFF
- LEDrechtseingeschaltetRelais“Rollladenaufwärts”ON
- LEDrechtsausgeschaltetRelais“Rollladenaufwärts”OFF
- umgekehrt:
- LEDlinkseingeschaltetRelais“Rollladenaufwärts”OFF
- LEDlinksausgeschaltetRelais“Rollladenaufwärts”ON
- LEDrechtseingeschaltetRelais“Rollladenaufwärts”OFF
- LEDrechtsausgeschaltetRelais“Rollladenaufwärts”ON
•Monostabile Funktionsweise durch folgende Einschaltung
erkennbar:linkeundrechteLEDnachStartca.10Sekunden
lang kontinuierlich aufleuchtend, anschließend Ausführung
von3Blinkvorgängen,woraufhinderBetriebinmonostabiler
Funktionsweisebeginnt.
•Bistabile Funktionsweise durch folgende Einschaltung
erkennbar:linkeLEDnachStartca.10Sekundenlangaus-
geschaltet,anschließendAusführungvon3Blinkvorgängen,
woraufhinderBetriebinbistabilerFunktionsweisebeginnt.
•Bistabile Funktionsweise OFF nach 2 Minuten durch fol-
gende Einschaltung erkennbar: rechte LED nach Start ca.
10 Sekunden lang ausgeschaltet, anschließend Ausführung
von 3 Blinkvorgängen, woraufhin der Betrieb in bistabiler
FunktionsweisemiteinerVerzögerungvon2Minutenbeginnt.
•BistabileFunktionsweiseOFF nach 5 Minutendurchfolgende
Einschaltung erkennbar: linke und rechte LED nach Start ca.
10 Sekunden lang ausgeschaltet, anschließend Ausführung
von 3 Blinkvorgängen, woraufhin der Betrieb in bistabiler
FunktionsweisemiteinerVerzögerungvon5Minutenbeginnt.
CODIERUNG DES INFRAROT-EMPFÄNGERS
UND PROGRAMMIERUNG.
•DieLastausschalten.
• Gleichzeitig ca. 4 Sekunden lang folgende Tasten der
Fernbedienungdrücken:1linksund7rechts.DielinkeLEDdes
zukonfigurierendenEmpfängersbeginntzublinken(sindmehrere
EmpfängerineinemRauminstalliert,beginnenallezublinken).
•Die Taste “aufwärts” des zu konfigurierenden Empfängers
drücken;währenddesDrückensdieserTastekannkurzzeitig
eineÄnderungdesLED-Blinkbetriebsfestgestelltwerden.
•AufderFernbedienungeinederzweiTasten(“aufwärts”oder
“abwärts”)drücken,diedembetreffendenEmpfängerzuge-
ordnetwerdensoll;manstelltfest,dassdieLEDdaraufhin
langsameraufblinkt.
•Ebenfalls über die Fernbedienung die gewünschte
FunktionsweiseundLED-Anzeigeanwählen:
- Monostabil:fürumgekehrteAnzeigedielinkeTaste1,bzw.
fürnormaleAnzeigedierechteTaste1drücken;diezweiLED
leuchtenca.10Sekundenlangkontinuierlichaufundführen
anschließend3Blinkvorgängeaus,woraufhinderBetriebin
monostabilerFunktionsweisebeginnt;
- Bistabil: für umgekehrte Anzeige die linke Taste 2, bzw.
für normale Anzeige die rechte Taste 2 drücken; die linke
LED bleibt ca. 10 Sekunden lang ausgeschaltet und führt
anschließend3Blinkvorgängeaus,woraufhinderBetriebin
bistabilerFunktionsweisebeginnt;
- Bistabil OFF nach 2 Minuten:fürumgekehrteAnzeigedie
linke Taste 3, bzw. für normale Anzeige die rechte Taste
3 drücken; die rechte LED bleibt ca. 10 Sekunden lang
ausgeschaltetundführtanschließend 3 Blinkvorgänge aus,
woraufhinder Betrieb in bistabilerFunktionsweise mit einer
Verzögerungvon2Minutenbeginnt;
- Bistabil OFF nach 5 Minuten:fürumgekehrteAnzeigedie
linke Taste 4, bzw. für normale Anzeige die rechte Taste 4
drücken; die zwei LED bleiben ca. 10 Sekunden lang aus-
geschaltet und führen anschließend 3 Blinkvorgänge aus,
woraufhinder Betrieb in bistabilerFunktionsweise mit einer
Verzögerungvon5Minutenbeginnt.
Hinweis.
JederobenbeschriebeneSchrittmussinnerhalbvon30Sekunden
ausgeführt werden; nach Ablauf dieses Zeitintervalls wird der
ProgrammierungsmodusdesGerätsautomatischbeendet.
ZUR BEACHTUNG.
•Keine Tasten mit eingebauter Kontrollleuchte verwenden.
•KeineGegenständezwischenEmpfängerundFernbedienung
positionieren(sieheAbb.3).
•DenEmpfänger weder der direktenSonnenlichtbestrahlung
nochderdirektenWirkungvonWärmequellenaussetzen.
• Den Anschluss des Geräts gemäß den Vorgaben in Abb. 2
ausführen.DerVersorgungskreis(L-N) muss durch ein entspre-
chendes Gerät, eine Sicherung oder einen Schutzschalter mit
Nennstromnichtüber10AgegenÜberlastengeschütztwerden.
INSTALLATIONSVORSCHRIFTEN.
DieInstallationmussgemäßdenimjeweiligenVerwendungsland
derProduktegeltendenVorschriftenzurInstallationelektrischer
Ausrüstungenerfolgen.
NORMKONFORMITÄT.
NS-Richtlinie
EMV-Richtlinie
NormEN60669-2-1.
FRANÇAIS
Récepteur à infrarouges avec sortie à relais 4 A 230 V~
pour rideaux électriques, commande avec boutons incor-
porés et télécommande 01849 ou en différents endroits
par poussoirs NO, fonctionnement monostable ou bistable,
localisation dans l’obscurité, alimentation 230 V~, 50- 60 Hz,
gris - 2 modules.
CARACTÉRISTIQUES.
•Tensiond’alimentation:230V~50-60Hz.
•Fonctionnement: monostable, bistable ou bistable avec
extinctiontemporisée.
•CommandeàinfrarougessurprotocoleRC5.
•Températuredefonctionnement:-5°C-+35°C.
CHARGES COMMANDABLES.
•Chargespurementrésistives :4A.
•Moteurs :2Acos 0,6.
FONCTIONNEMENT.
•Ouvertureetfermeturedurideaupar:
- 2boutonssurledevantdudispositif;
- commandeendifférentsendroitsparboutonsNO(distance
maximum 100 m); ne pas utiliser poussoirs avc voyant
lumineux incorporé;
- commandeàinfrarougespar2touchesdelatélécommande
(touchehautettouchebas).
• L’ouvertureetlafermeturedurideausefaitenappuyantun
des boutons reliés, ceux incorporés sur le dispositif ou les
touchesdelatélécommandeassociéesaurécepteur.
•Signalisationdel’étatdefonctionnement(àréglerenphase
deconfiguration):
- normale:
- LEDgauchealluméerelaisrideauhautON
- LEDgaucheéteinterelaisrideauhautOFF
- LEDdroitealluméerelaisrideaubasON
- LEDdroiteéteinterelaisrideaubasOFF
- inversée:
- LEDgauchealluméerelaisrideauhautOFF
- LEDgaucheéteinterelaisrideauhautON
- LEDdroitealluméerelaisrideaubasOFF
- LEDdroiteéteinterelaisrideaubasON
•Fonctionnement monostable reconnaissable à l’allumage:
LEDgauche et droitealluméesfixespendant 10 secondes
audémarrage,3clignotementsetdémarragedufonctionne-
mentmonostable.
• Fonctionnement bistable reconnaissable à l’allumage: LED
gauche éteinte pendant 10 secondes au démarrage, 3 cli-
gnotementsetdémarragedufonctionnementbistable.
•Fonctionnementbistable OFF après 2 minreconnaissable
à l’allumage: LED droite éteinte pendant 10 secondes au
démarrage, 3 clignotements et démarrage du fonctionne-
mentbistableretardéde2min.
•Fonctionnementbistable OFF après 5 minreconnaissable
à l’allumage: LED gauche et droite éteintes pendant 10
secondesaudémarrage,3clignotements etdémarragedu
fonctionnementbistableretardéde5min.
CODAGE DU RÉCEPTEUR À INFRAROUGES
ET PROGRAMMATION.
•Eteindrelacharge.
•Appuyer simultanément pendant 4 secondes les touches
suivantesdelatélécommande:1gaucheet7droite.LaLED
gauchedurécepteuràconfigurercommenceàclignoter(en
cas de plusieurs récepteurs dans la même pièce, ils com-
mencenttousàclignoter).
•Appuyerleboutonhautdurécepteuràconfigurer;pendantla
pressiondeceboutonnoter,pendantuncourtinstant,une
modificationduclignotementdelaLED.
•Appuyersurlatélécommandeunedesdeuxtoucheshautou
basquel’onveutassocieraurécepteurci-dessus;noterque
laLEDclignotepluslentement.
•Sélectionner toujours par la télécommande la modalité de
fonctionnementetlasignalisationdesLEDvoulues:
- monostable:appuyerlatouche1gauchepoursignalisation
inverséeoulatouche1droitepourlasignalisationnormale;
lesLEDss’allumerontfixependant10s,effectueront3cli-
gnotements,lefonctionnementenmonostabledémarre;
- bistable:appuyerlatouche2gauchepoursignalisationinver-
séeoulatouche2droitepourlasignalisationnormale;laLED
gauches’éteindrapendant10s,effectuera3clignotements,
lefonctionnementenbistabledémarre;
- bistable OFF après 2 min: appuyer la touche 3 gauche
pour signalisation inversée ou la touche 3 droite pour la
ESPAÑOL
Receptor de infrarrojos con salida de relé de 4 A y 230 V~
para persianas, mando con pulsadores incorporados, por
control remoto 01849 o desde varios puntos con pulsadores
NO, funcionamiento monoestable o biestable, identificación
en la oscuridad, alimentación de 230 V~ y 50-60 Hz, gris
- 2 módulos.
CARACTERÍSTICAS.
•Tensióndealimentación:230V~y50-60Hz.
• Funcionamiento: monoestable, biestable o biestable con
apagadotemporizado.
•MandodeinfrarrojosconprotocoloRC5.
•Temperaturadefuncionamiento:de-5a+35°C.
CARGAS QUE SE PUEDEN MANDAR.
•Cargaspuramenteresistivas :4A.
•Motores :2Acos 0,6.
FUNCIONAMIENTO.
•Aperturaycierredelapersianamediante:
- dospulsadoresenlapartefrontaldeldispositivo;
- mando desde varios puntos con dos pulsadores NO (dis-
tancia máxima 100 m); no utilizar pulsadores con piloto
luminoso incorporado;
- mandodeinfrarrojosmediantedosteclasdelmandoadis-
tancia(teclaflechaarribayteclaflechaabajo).
•Lapersianaseabreysecierraaccionandounodelospulsa-
doresconectados,losincorporadosaldispositivoolasteclas
delmandoadistanciaquesehanasociadoalreceptor.
•Señalizacióndelestadodefuncionamiento(seprogramaala
horadelaconfiguración):
- normal:
- LEDizquierdoencendidoreléde“persianaarriba”ON
- LEDizquierdoapagadoreléde“persianaarriba”OFF
- LEDderechoencendidoreléde“persianaabajo”ON
- LEDderechoapagadoreléde“persianaabajo”OFF
- invertida:
- LEDizquierdoencendidoreléde“persianaarriba”OFF
- LEDizquierdoapagadoreléde“persianaarriba”ON
- LEDderechoencendidoreléde“persianaabajo”OFF
- LEDderechoapagadoreléde“persianaabajo”ON
• Funcionamientomonoestablereconocibleporelfuncionamien-
todelosLEDsizquierdoyderechoque,primero,seencienden
de forma fija durante 10 segundos y, luego, parpadean tres
veces,traslocualempiezaelfuncionamientomonoestable.
•Funcionamientobiestablereconocibleporelfuncionamiento
delLEDizquierdoque,primero,seapagadurante10segun-
dos y, luego, parpadea tres veces, tras lo cual empieza el
funcionamientobiestable.
•Funcionamientobiestable con encendido tras dos minu-
tosreconocibleporelfuncionamientodelLEDderechoque,
primerose apagadurante10segundosy,luego,parpadea
tresveces,traslocualtranscurrendosminutosantesdeque
empieceelfuncionamientobiestable.
•Funcionamientobiestable con encendido tras cinco minu-
tos reconocibleporelfuncionamientodelosLEDsizquierdo
yderechoque,primeroseapagandurante10segundosy,
luego,parpadeantresveces, traslocualtranscurrencinco
minutosantesdequeempieceelfuncionamientobiestable.
CODIFICACIÓN DEL RECEPTOR DE
INFRARROJOS Y PROGRAMACIÓN.
•Apagarlacarga.
•Pulsarsimultáneamentedurantecuatrosegundoslassiguien-
testeclasdelmandoadistancia:1izquierday7derecha.El
LEDizquierdodelreceptorquesedebeconfigurarempieza
aparpadeary,sihaymásdeunreceptorenlamismahabi-
tación,todosempiezanaparpadear.
• Accionar la tecla “flecha arriba” del receptor que se desea
configurar;alpresionarestatecla,elparpadeodelLEDvaría
durantealgunossegundos.
•Enelmandoadistancia,pulsarunadelasdosteclas(“flecha
arriba”oflechaabajo”)quesedeseaasociaralreceptor:el
LEDparpadeamáslentamente.
•Seleccionarconeltelemandolamodalidaddefuncionamien-
toylaindicacióndelosLEDdeseada:
- monoestable: pulsar la tecla 1 izquierda para indicación
invertida o la tecla 1 derecha para indicación normal;
los dos LEDs se encienden de manera fija durante 10 s,
parpadean tres veces y, luego, empieza el funcionamiento
monoestable;
- biestable:pulsarlatecla2izquierdaparaindicacióninvertida
olatecla2derechaparaindicaciónnormal;elledizquierdo
seapagadurante10s,parpadeatresvecesy,luego,empie-
zaelfuncionamientobiestable;
- biestable encendido tras dos minutos: pulsar la tecla 3
izquierdaparaindicacióninvertidaolatecla3derechapara
indicaciónnormal;el LED derecho se apaga durante 10s,
y, luego, parpadea tres veces, tras lo cual transcurren dos
minutosantesdequeempieceelfuncionamientobiestable;
- biestable encendido tras cinco minutos:pulsarlatecla4
izquierdaparaindicacióninvertidaolatecla4derechapara
indicaciónnormal;losdosLEDsseapagandurante10s,y,
luego,parpadeantresveces, traslocualtranscurrencinco
minutosantesdequeempieceelfuncionamientobiestable.
Nota.
Todas las operaciones descritas anteriormente se deben
efectuaren30segundosyaque,sisesuperadichoplazo,el
dispositivosaledelamodalidaddeprogramación.
ADVERTENCIAS.
•No utilizar pulsadores con piloto luminoso incorporado
•Nointerponerobjetosentreelreceptoryelmandoadistan-
cia(véasefigura3).
•Noexponerelreceptoralaluzsolardirectanisometerloala
accióndirectadefuentesdecalor.
•Conectarelaparatodelamanerailustradaenlafigura2.El
circuitodealimentación (L-N) se ha de proteger contra las
sobrecargas mediante un dispositivo, fusible o interruptor
automático,concorrientenominalinferiora10A.
NORMAS DE INSTALACIÓN.
Elaparatosehadeinstalarenconformidadconlasdisposicio-
nessobrematerialeléctricovigentesenelpaís.
CONFORMIDAD NORMATIVA.
DirectivaBT
DirectivaEMC
NormaEN60669-2-1.
ΕΛΛΗΝΙΚΑ
Δέκτης υπέρυθρων με έξοδο ρελέ 4 A 230 V~ για ρολά,
χειρισμό με ενσωματωμένα κουμπιά, τηλεχειριστήριο
01849 ή από περισσότερα σημεία με κουμπιά NO, μονο-
σταθή ή δισταθή λειτουργία, εντοπισμό στο σκοτάδι,
τροφοδοσία 230 V~ 50-60 Hz, γκρι - 2 στοιχεία.
ΧΑΡΑΚΤΗΡΙΣΤΙΚΑ.
• Τάσητροφοδοσίας:230V~50-60Hz.
• Λειτουργία:μονοσταθής,δισταθήςήδισταθήςμεχρονοδια-
κόπτη.
• ΧειριστήριουπέρυθρωνβάσειπρωτοκόλλουRC5.
• Θερμοκρασίαλειτουργίας:-5°C-+35°C.
ΕΛΕΓΧΟΜΕΝΑ ΦΟΡΤΙΑ.
• Αμιγώςωμικάφορτία :4A.
• Κινητήρες :2Acos 0,6.
ΛΕΙΤΟΥΡΓΙΑ.
• Άνοιγμακαικλείσιμοτουρολούμέσω:
- 2κουμπιώνστηνπρόσοψητηςδιάταξης;
- χειρισμόςαπόπερισσότερασημείαμέσω2κουμπιώνNO
(μέγιστηαπόσταση100m).Μη χρησιμοποιείτε κουμπιά
με ενσωματωμένη ενδεικτική λυχνία;
- χειριστήριουπέρυθρωνμεδύοκουμπιάτουτηλεχειριστηρί-
ου(κουμπίπάνωκαικάτω).
• Τοάνοιγμακαιτοκλείσιμοτουρολούεπιτυγχάνονταιπιέ-
ζονταςένααπότασυνδεδεμένακουμπιά,ταενσωματωμέ-
νακουμπιάτηςδιάταξηςήτακουμπιάτουτηλεχειριστηρίου
πουέχουναντιστοιχηθείστοδέκτη.
• Σήμανσηκατάστασηςλειτουργίας(ρύθμισηστηφάσηδια-
μόρφωσης):
- κανονική:
- αριστερήλυχνίααναμμένηρελέ“ρολόεπάνωON
- αριστερήλυχνίασβηστήρελέ“ρολόεπάνωOFF
- δεξιάλυχνίααναμμένηρελέ“ρολόκάτω”ON
- δεξιάλυχνίασβηστήρελέ“ρολόκάτω”OFF
- ανεστραμμένη:
- αριστερήλυχνίααναμμένηρελέ“ρολόεπάνωOFF
- αριστερήλυχνίασβηστήρελέ“ρολόεπάνωON
- δεξιάλυχνίααναμμένηρελέ“ρολόκάτω”OFF
- δεξιάλυχνίασβηστήρελέ“ρολόκάτω”ON
• Μονοσταθής λειτουργία αναγνωρίσιμη μετά το άναμμα: η
αριστερήκαιδεξιάλυχνίαπαραμένουνσταθεράαναμμένες
περίπου 10 δευτερόλεπτα μετά το άναμμα, στη συνέχεια
εκτελούν3αναλαμπέςκαιξεκινάημονοσταθήςλειτουργία.
• Δισταθήςλειτουργίααναγνωρίσιμημετάτοάναμμα:ηαρι-
στερήλυχνίαπαραμένεισβηστήπερίπου10δευτερόλεπτα
μετά το άναμμα, στη συνέχεια εκτελεί 3 αναλαμπές και
ξεκινάηδισταθήςλειτουργία.
• Δισταθής λειτουργία OFF μετά από 2 λεπτά αναγνω-
ρίσιμη μετά το άναμμα: η δεξιά λυχνία παραμένει σβηστή
περίπου 10 δευτερόλεπτα μετά το άναμμα, στη συνέχεια
εκτελεί 3 αναλαμπές και ξεκινά η δισταθής λειτουργία με
καθυστέρηση2λεπτών.
• Δισταθής λειτουργία OFF μετά από 5 λεπτάαναγνωρί-
σιμημετάτοάναμμα:ηαριστερήκαιηδεξιάλυχνίαπαρα-
μένουνσβηστέςπερίπου10δευτερόλεπταμετάτοάναμμα,
στησυνέχειαεκτελούν3αναλαμπέςκαιξεκινάηδισταθής
λειτουργίαμεκαθυστέρηση5λεπτών.
ΚΩΔΙΚΟΠΟΙΗΣΗ ΔΕΚΤΗ ΥΠΕΡΥΘΡΩΝ ΚΑΙ
ΠΡΟΓΡΑΜΜΑΤΙΣΜΟΣ.
• Σβήστετοφορτίο.
• Πιέστε ταυτοχρόνως και επί 4 περίπου δευτερόλεπτα τα
ακόλουθακουμπιάτουτηλεχειριστηρίου:1 αριστερόκαι7
δεξιό.Ηαριστερήλυχνίατουδέκτηπροςδιαμόρφωσηαρχί-
ζει να αναβοσβήνει (εάν υπάρχουν περισσότεροι δέκτες
στοίδιοδωμάτιο,αρχίζουννααναβοσβήνουνόλοι).
• Πιέστε το κουμπί “επάνω” του δέκτη προς διαμόρφωση.
Πιέζοντας το κουμπί αυτό θα παρατηρήσετε μια στιγμιαία
αλλαγήστηναναλαμπήτηςλυχνίας.
• Πιέστε στο τηλεχειριστήριο ένα από τα δύο κουμπιά
(“επάνω” ή “κάτω”) που θέλετε να αντιστοιχήσετε στο
συγκεκριμένοδέκτη.Θαπαρατηρήσετεότιηλυχνίααναβο-
σβήνειπιοαργά.
• Επιλέξτε και πάλι από το τηλεχειριστήριο τον τρόπο λει-
τουργίαςκαιτηνεπιθυμητήσήμανσητωνLED:
- μονοσταθής: πιέστε το αριστερό κουμπί 1 για ανεστραμ-
μένησήμανσηήτοδεξιόκουμπί1γιακανονικήσήμανση;
Οιδύολυχνίεςανάβουνσταθεράπερίπουεπί10δευτερό-
λεπτα, εκτελούν 3 αναλαμπές και στη συνέχεια ξεκινά η
μονοσταθήςλειτουργία;
- δισταθής:πιέστετοαριστερόκουμπί2 γιαανεστραμμένη
σήμανση ή το δεξιό κουμπί 2 για κανονική σήμανση; Η
αριστερή λυχνία σβήνει περίπου επί 10 δευτερόλεπτα,
εκτελεί 3 αναλαμπές και στη συνέχεια ξεκινά η δισταθής
λειτουργία;
- Δισταθής λειτουργία OFF μετά από 2 λεπτά: πιέστε το
αριστερόκουμπί3γιαανεστραμμένη σήμανση ή τοδεξιό
κουμπί 3 για κανονική σήμανση; Η δεξιά λυχνία σβήνει
περίπου επί 10 δευτερόλεπτα, εκτελεί 3 αναλαμπές και
στησυνέχειαξεκινάηδισταθήςλειτουργίαμεκαθυστέρηση
2λεπτών;
- Δισταθής λειτουργία OFF μετά από 5 λεπτά: πιέστε το
αριστερόκουμπί4γιαανεστραμμένη σήμανση ή τοδεξιό
κουμπί 4 για κανονική σήμανση; Οι δύο λυχνίες σβήνουν
περίπου επί 10 δευτερόλεπτα, εκτελούν 3 αναλαμπές και
στησυνέχειαξεκινάηδισταθήςλειτουργίαμεκαθυστέρηση
5λεπτών.
Σημείωση.
Κάθε μία από τις παραπάνω ενέργειες πρέπει να εκτελείται
εντός30δευτερολέπτων.Μετάτηνπάροδοτουχρόνουαυτού
ηδιάταξηδιακόπτειτηλειτουργίαπρογραμματισμού.
ΠΡΟΕΙΔΟΠΟΙΗΣΕΙΣ.
• Μη χρησιμοποιείται κουμπιά με ενσωματωμένη ενδεικτική
λυχνία.
• Μην παρεμβάλετε αντικείμενα μεταξύ δέκτη και τηλεχειρι-
στηρίου(βλ.εικ.3).
• Μηνεκθέτετετοδέκτησεάμεσηηλιακήακτινοβολίαήστην
άμεσηδράσηπηγώνθερμότητας.
• Συνδέστετησυσκευήόπωςστηνεικ.2.Τοκύκλωματροφο-
δοσίας(L-N)πρέπειναπροστατεύεταιαπόυπερφορτώσεις
με ασφάλεια ή αυτόματο διακόπτη με ονομαστικό ρεύμα
πουδενθαυπερβαίνειτα10A.
ΚΑΝΟΝΕΣ ΕΓΚΑΤΑΣΤΑΣΗΣ.
Η εγκατάσταση πρέπει να εκτελείται σύμφωνα με τις ισχύ-
ουσεςδιατάξειςσχετικάμετοηλεκτρολογικόυλικόστηχώρα
χρήσηςτωνπροϊόντων.
ΚΑΝΟΝΙΣΜΟΙ ΑΝΑΦΟΡΑΣ.
ΟδηγίαΧΤ
ΟδηγίαEMC
ΠρότυποEN60669-2-1.
10 m max
L
N
MM
3
1
Arké
Eikon
LED
i
C
LED
h
B
A
A: PulsanteSU-UPbutton-BoutonHAUT-TasteAUFWÄRTS-TeclaFLECHAARRIBA - Δέκτηςυπερύθρων
B:PulsanteGIÙ - DOWNbutton-BoutonBAS-TasteABWÄRTS-TeclaFLECHAABAJO - ΚουμπίΚΑΤΩ
C:Ricevitoreainfrarossi - Infraredreceiver-Récepteuràinfrarouges-Infrarot-Empfänger-Receptordeinfrarrojos - Δέκτηςυπέρυθρων
LED
i
C
LED
h
B
A
LED 
C
LED 
B
A
Plana
Idea
2
LED 
C
LED 
B
A

Other manuals for Eikon

18

This manual suits for next models

6

Other Vimar Switch manuals

Vimar Well-contact Plus User manual

Vimar

Vimar Well-contact Plus User manual

Vimar 0K03906 Series User manual

Vimar

Vimar 0K03906 Series User manual

Vimar Arke Series Instruction manual

Vimar

Vimar Arke Series Instruction manual

Vimar 03925 User manual

Vimar

Vimar 03925 User manual

Vimar Eikon TACTIL 21174 User manual

Vimar

Vimar Eikon TACTIL 21174 User manual

Vimar LINEA 30504 User manual

Vimar

Vimar LINEA 30504 User manual

Vimar Eikon 20196 User manual

Vimar

Vimar Eikon 20196 User manual

Vimar ELVOX EZP07.GA User manual

Vimar

Vimar ELVOX EZP07.GA User manual

Vimar Eikon 20520 User manual

Vimar

Vimar Eikon 20520 User manual

Vimar EIKON 20181 User manual

Vimar

Vimar EIKON 20181 User manual

Vimar 0K03925 Series User manual

Vimar

Vimar 0K03925 Series User manual

Vimar ELVOX 6591 Assembly instructions

Vimar

Vimar ELVOX 6591 Assembly instructions

Vimar ELVOX 839/303.06 Assembly instructions

Vimar

Vimar ELVOX 839/303.06 Assembly instructions

Vimar 01798 User manual

Vimar

Vimar 01798 User manual

Vimar Elvox 69AM/T User manual

Vimar

Vimar Elvox 69AM/T User manual

Vimar Eikon 20181 User manual

Vimar

Vimar Eikon 20181 User manual

Vimar Elvox 5590/001 Assembly instructions

Vimar

Vimar Elvox 5590/001 Assembly instructions

Vimar Elvox 3530 Assembly instructions

Vimar

Vimar Elvox 3530 Assembly instructions

Vimar Eikon 20121 User manual

Vimar

Vimar Eikon 20121 User manual

Vimar Eikon TACTIL 21134 User manual

Vimar

Vimar Eikon TACTIL 21134 User manual

Vimar 03906 User manual

Vimar

Vimar 03906 User manual

Vimar by-me Eikon Evo 21588 User manual

Vimar

Vimar by-me Eikon Evo 21588 User manual

Vimar 03925 User manual

Vimar

Vimar 03925 User manual

Vimar 03955 User manual

Vimar

Vimar 03955 User manual

Popular Switch manuals by other brands

Niko 330-00700 manual

Niko

Niko 330-00700 manual

Kinivo 501BN user manual

Kinivo

Kinivo 501BN user manual

Eaton COOPER POWER SERIES Service instructions

Eaton

Eaton COOPER POWER SERIES Service instructions

Di-soric KDCT 08 V 02 G3-T4 manual

Di-soric

Di-soric KDCT 08 V 02 G3-T4 manual

Altronix NetWaySP3WP installation manual

Altronix

Altronix NetWaySP3WP installation manual

NETGEAR GS728TPS Smart Switch Installationsanleitung

NETGEAR

NETGEAR GS728TPS Smart Switch Installationsanleitung

Sony MVS-8000X System user guide

Sony

Sony MVS-8000X System user guide

hager EH712 User instructions

hager

hager EH712 User instructions

Digitus DA-70247 Quick installation guide

Digitus

Digitus DA-70247 Quick installation guide

schmersal RSS 36-D-ST5 manual

schmersal

schmersal RSS 36-D-ST5 manual

Lite-Puter 4 Channel Switch Pack Series user manual

Lite-Puter

Lite-Puter 4 Channel Switch Pack Series user manual

Danfoss RT 262A installation guide

Danfoss

Danfoss RT 262A installation guide

Kopp 8428 Installation and operating manual

Kopp

Kopp 8428 Installation and operating manual

D-Link DKVM-16 - KVM Switch datasheet

D-Link

D-Link DKVM-16 - KVM Switch datasheet

Renkforce RS2W operating instructions

Renkforce

Renkforce RS2W operating instructions

D-Link DKVM-2K Quick installation guide

D-Link

D-Link DKVM-2K Quick installation guide

D-Link DES-3550 user guide

D-Link

D-Link DES-3550 user guide

LEGRAND Pro 21 7756 28 manual

LEGRAND

LEGRAND Pro 21 7756 28 manual

manuals.online logo
manuals.online logoBrands
  • About & Mission
  • Contact us
  • Privacy Policy
  • Terms and Conditions

Copyright 2025 Manuals.Online. All Rights Reserved.