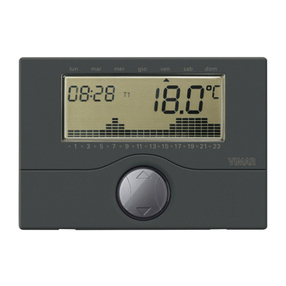
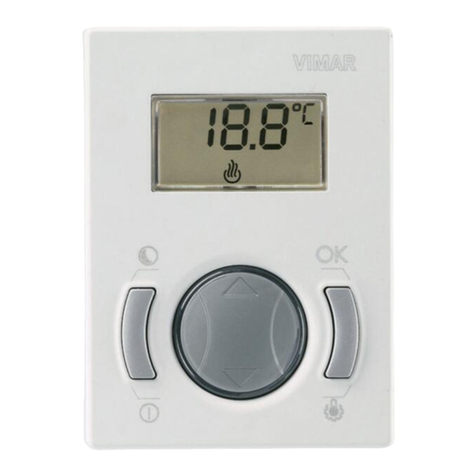
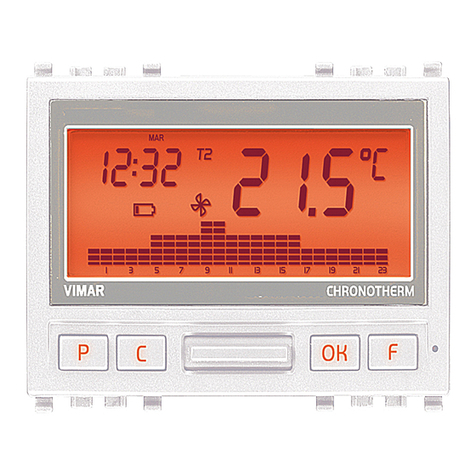
Vimar RADIOCLIMA 01910 User guide

Viale Vicenza, 14 - 36063 Marostica VI - Italy
Tel. +39 0424 488 600 - Fax (Italia) +39 0424 488 188
Fax (Export) +39 0424 488 709
www.vimar.com
49400810B0 01 1512
VIMAR - Marostica - Italy
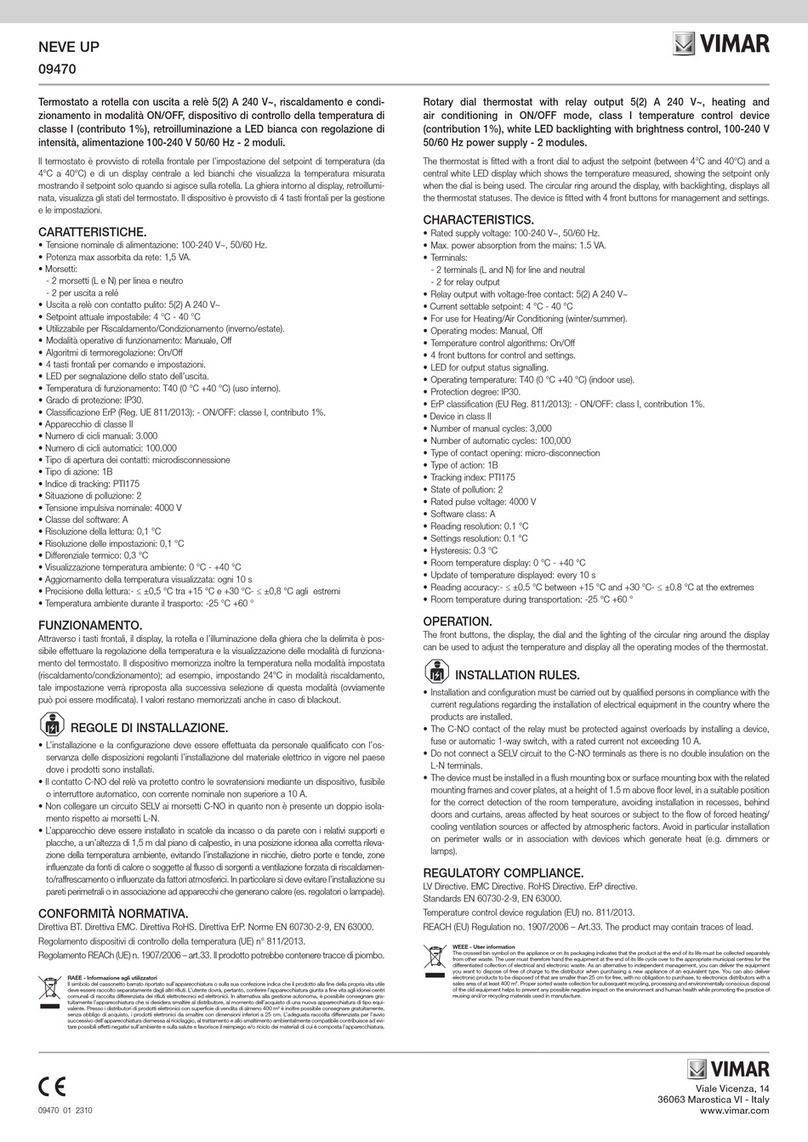
01910
GUIDA RAPIDA INSTALLATORE/UTENTE
Cronotermostato elettronico per controllo ON/OFF della temperatura ambiente (riscalda-
mento e condizionamento), programmazione giornaliera/settimanale, dispositivo di con-
trollo della temperatura di classe I (contributo 1%), uscita a relè in scambio 5(2) A 250 V~,
alimentazione a batterie stilo AA LR6 1,5 V (non fornite), installazione a parete.
PRINCIPALI CARATTERISTICHE.
• Alimentazione: 3 V d.c. mediante 2 batterie stilo AA LR6 1,5 V (non fornite)
• Durata della batteria: superiore ad un anno
• Uscita: a relè con contatto pulito in scambio 5(2) A 250 V~
• Tipo di regolazione: ON/OFF
• Possibilità di collegamento in radiofrequenza ad attuatori 01923 e 01924 previa sostituzione del
modulo relè con il modulo trasmettitore 01921.1
• Aggiornamento della temperatura visualizzata: ogni 20 s
• Visualizzazione temperatura ambiente: 0 °C +40 °C
• Differenziale termico: regolabile da 0,1 °C a 1 °C
• Campo di regolazione:
- +4 °C - +15 °C in antigelo
- +5 °C - +35 °C in riscaldamento o condizionamento
• Funzioni principali:
- impostazione oraria della temperatura con passi da 15 minuti
- 3 livelli di temperatura programmabili per riscaldamento + 3 livelli di temperatura per condizio-
namento + 1 livello antigelo
- programmazione settimanale
- 1 programma automatico impostabile dall’utente (sia per riscaldamento che per condizionamento)
- possibilità di forzare il programma variando manualmente la temperatura
- regolazione per riscaldamento e condizionamento
- funzione antigelo
- possibilità di spegnimento temporizzato
- possibilità di attivazione e disattivazione tramite attuatore telefonico
- possibilità di visualizzazione in gradi Celsius o Fahrenheit
- reset del dispositivo
• Grado di protezione: IP30
• Apparecchio di classe II:
• Temperatura di funzionamento: T40 (0 °C +40 °C)
• Classificazione ErP (Reg. UE 811/2013): classe I, contributo 1%
PRINCIPALI IMPOSTAZIONI.
Ora e data
Premere il tasto ; il display del dispositivo visualizzerà solamente la freccia situata in alto che
indica il giorno e l’ora da impostare.
- Attraverso il tasto spostare la freccia in corrispondenza del giorno corrente.
- Premere il tasto per confermare e passare all’impostazione dell’orario; le due cifre che
indicano l’ora iniziano a lampeggiare.
- Attraverso il tasto impostare l’ora corrente.
- Premere il tasto per confermare e passare all’impostazione dei minuti; le due cifre che
indicano i minuti iniziano a lampeggiare.
- Attraverso il tasto impostare i minuti correnti.
- Premere il tasto per confermare e uscire.
Impostazione funzionamento manuale
- Se il cronotermostato sta funzionando in automatico premere il tasto per passare in
manuale; il display visualizzerà il simbolo .
- Attraverso il tasto selezionare il valore di temperatura desiderato quindi premere il tasto
per confermare.
Eventualmente attendere circa 5 secondi perché l’operazione venga confermata.
Impostazione funzionamento automatico
- Se il cronotermostato sta funzionando in manuale premere il tasto per passare in automa-
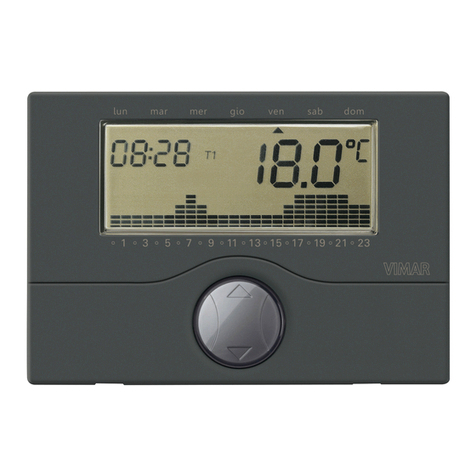
tico; il display visualizzerà l’istogramma grafico relativo all’andamento giornaliero del programma.
In questo caso è possibile passare temporaneamente in modalità manuale, ad esempio nel caso in
cui la temperatura desiderata sia diversa da quella programmata, selezionando il valore da impostare
attraverso il tasto e attendendo circa 5 secondi affinché l’operazione sia confermata.
La nuova impostazione resterà attiva fino al successivo cambio di livello di temperatura program-
mato, dopo di che sarà ripristinato il programma memorizzato.
Per tornare immediatamente nella modalità di funzionamento automatico, premere il tasto .
Spegnimento
- Premere il tasto ; il display visualizzerà, a fianco del valore di temperatura, il simbolo OFF
lampeggiante.
- Premere il tasto per confermare. Per riaccendere il cronotermostato premere il tasto .
Spegnimento a tempo
- Premere il tasto ; il display visualizzerà, a fianco del valore di temperatura, il simbolo OFF
lampeggiante.
- Premere nuovamente il tasto ; il display visualizzerà due cifre lampeggianti che indicano
il numero di ore (h) da impostare.
- Attraverso il tasto selezionare il numero di ore desiderato (da 1 a 99) e premere il tasto
per confermare.
Il cronotermostato rimarrà quindi spento per il periodo di tempo impostato al termine del quale si
attiverà tornando alla precedente modalità di funzionamento (manuale o automatico).
Antigelo
- Premere il tasto ; il display visualizzerà, a fianco del valore di temperatura, il simbolo OFF
lampeggiante.
- Premere nuovamente il tasto ; il display visualizzerà le due cifre lampeggianti da impostare
se si desidera effettuare lo spegnimento temporizzato del dispositivo.
- Premere una terza volta il tasto ; il display visualizzerà 3 cifre lampeggianti che indicano il
valore della temperatura di antigelo da impostare (da 04.0 °C a 15 °C).
- Attraverso il tasto selezionare il valore desiderato e premere il tasto per confermare.
Il display visualizzerà, a impianto di riscaldamento spento, il simbolo di antigelo a fianco del valore
di temperatura misurato.
Selezione estate/inverno
Questo tipo di funzione viene utilizzata solamente nel caso in cui, oltre all’impianto di riscalda-
mento, debba essere gestito anche quello di condizionamento tramite il cronotermostato.
- Premere e mantenere premuto il tasto ; il display visualizzerà il simbolo oppure il simbolo .
- Attraverso il tasto selezionare il simbolo per la stagione invernale o il simbolo per
quella estiva e premere il tasto per confermare.
Nel funzionamento in condizionamento (estate), gli interventi effettuati sul cronotermostato, sono
invertiti rispetto a quelli nel funzionamento in riscaldamento (inverno).
PER L’INSTALLATORE.
Per ulteriori approfondimenti e per i dettagli relativi a tutti gli altri menù del cronotermosta-
to 01910 si veda il manuale installatore scaricabile dal sito www.vimar.com.
Per tutti i dettagli relativi ai prodotti dedicati alla termoregolazione si veda il sito http://
gestione-energia.vimar.it
REGOLE DI INSTALLAZIONE.
L’installazione deve essere effettuata con l’osservanza delle disposizioni regolanti l’installazione
del materiale elettrico in vigore nel paese dove i prodotti sono installati.
CONFORMITA’ NORMATIVA.
Direttiva BT. Direttiva EMC. Norme EN 60730-1, EN 60730-2-7, EN 60730-2-9.
INSTALLER/USER QUICK GUIDE.
Electronic timer-thermostat for ON/OFF ambient temperature control (heating and air-
conditioning), daily/weekly programming, class I temperature control device (contribution
1%), change-over relay output 5(2) A 250 V~, powered by batteries AA LR6 1.5 V (not
supplied), wall mounting.
MAIN CHARACTERISTICS.
• Supply voltage: 3 V d.c. with 2 AA LR6 1,5 V batteries (not included)
• Batteries life: up to 1 year
• Output: 5(2) A 250 V~ change-over relay output
• Type of regulation: ON/OFF
• It is possible to create a radio link with actuators 01923 and 01924 by replacing the relay
module with the transmitter module 01921.1
• Updating of display temperature: every 20 s
• Ambient temperature display range: 0 °C +40 °C
• Hysteresis: adjustable between 0,1 °C and 1 °C
• Thermostat operating range:
- +4 °C - +15 °C in antifreeze mode
- +5 °C - +35 °C in heating or cooling mode
• Principal functions:
- hourly temperature settings in 15-minute steps
- 3 programmable temperature set-points for heating + 3 temperature set-points for cooling +
1 antifreeze level
- weekly programming
- 1 automatic program that may be set by the user (for both heating and air-conditioning)
- possibility of forcing the program by manually adjusting the temperature
- regulation for both heating and cooling systems
- antifreeze function
- possibility of timed switch off
- remote activation option via telephone dialler
- select between display in degrees Celsius and Fahrenheit
- device reset
• Protection degree: IP30
• Class II equipment:
• Operating temperature: T40 (0 °C +40 °C)
• ErP classification (Reg. EU 811/2013): class I, contribution 1%

Viale Vicenza, 14 - 36063 Marostica VI - Italy
Tel. +39 0424 488 600 - Fax (Italia) +39 0424 488 188
Fax (Export) +39 0424 488 709
www.vimar.com
01910
MAIN SETTINGS.
Setting date and time
Before starting to program the timer-thermostat, it is advisable to set the current date and time.
- Press the button; the device’s display will show only the arrow at the top indicating the
date and time to set.
- Using the button, move the arrow onto the current date.
- Press the button to confirm and pass on to set the time; the two digits indicating the
hour will start blinking.
- Set the current hour with the button.
- Press the button to confirm and pass on to set the minutes; the two digits indicating the
minutes will start blinking.
- Set the current minutes with the button.
- Press the button to confirm and quit.
Setting manual operation
- If the timer-thermostat is working in automatic mode, press the button to pass onto
manual mode; the display will show the .
- Using the button, select the desired temperature then press the button to confirm.
If necessary, wait approximately 5 seconds for the operation to be confirmed.
Setting automatic operation
- If the timer-thermostat is working in manual mode, press the button to pass onto
automatic mode; the display will show the histogram for the program’s day selection.
In this case it is possible to pass onto manual mode temporarily, for example when the desired
temperature is not the programmed temperature, by selecting the setting with the button and
waiting approximately 5 seconds for the operation to be confirmed. The new setting will remain
active until the next programmed temperature level change, after which the saved program will
be restored. To go back onto automatic operating mode immediately, press the button.
Switch-off
- Press the button; the display will show the OFF symbol blinking alongside the temperature.
- Press the button to confirm. To switch the timer-thermostat back on, press the button.
Timed switch-off
- Press the button; the display will show the OFF symbol blinking alongside the temperature.
- Press the button again; the display will show two blinking digits indicating the number
of hours (h) to set.
- Using the button, select the desired number of hours (from 1 to 99) and then press the
button to confirm.
The timer-thermostat will then stay off for the set period of time after which it will switch on
going into the prior operating mode (manual or automatic).
Antifreeze
- Press the button; the display will show the OFF symbol blinking alongside the temperature.
- Press the button again; the display will show two blinking digits to set if you want timed
switch-off for the device.
- Press the button a third time; the display will show 3 blinking digits indicating the anti-
freeze temperature to set (from 04.0 °C to 15 °C).
- Using the button, select the desired temperature and then press the button to confirm.
With the heating system off, the display will show the antifreeze symbol next to the measured temperature.
Summer/winter selection
This type of function is only used when, besides the heating system, it is also necessary to
control the air-conditioning system with the timer-thermostat.
- Press and hold down the button; the display will show the symbol or the symbol .
- Using the button, select the symbol for the winter season and the symbol for the
summer and press the button to confirm.
In air-conditioning operation (summer), the steps performed on the timer-thermostat are the
opposite to the ones in heating operation (winter).
FOR THE INSTALLER.
For further information and for details on all the other timer-thermostat 01910 menus plea-
se refer to the installer manual that can be downloaded from the website www. vimar.com.
For all the details about the products dedicated to thermoregulation see the website
http://gestione-energia.vimar.it/en/
INSTALLATION RULES.
Installation should be carried out in compliance with the current regulations regarding the instal-
lation of electrical systems in the country where the products are installed.
REGULATORY COMPLIANCE.
LV Directive. EMC Directive. Standards EN 60730-1, EN 60730-2-7, EN 60730-2-9.
GUIDE RAPIDE INSTALLATEUR/UTILISATEUR
Chronothermostat électronique de contrôle ON/OFF de la température ambiante (chauffage
et climatisation), programmation quotidienne/hebdomadaire, dispositif de contrôle de la
température classe I (contribution 1%), sortie à relais avec contact inverseur 5(2) A 250 V~,
alimentation par piles stylo AA LR6 1,5 V (non livrées), installation en saillie.
CARACTÉRISTIQUES
• Alimentation : 3 V c.c. avec 2 piles alcalines AA LR6 1,5 V (non fournies)
• Autonimie des batteries : au-dessus d’un an
• Sortie : relais inverseur 5(2) A 250 V~
• Type de réglage : ON/OFF
• Possibilité de connexion en radiofréquence avec actuateurs 01923 et 01924 après remplace-
ment du module à relais par le module émetteur 01921.1
• Mise à jour température affichée : chaque 20 s
• Affichage température ambiante : de 0 °C à +40 °C
• Hystérésis : réglable de 0,1 °C à 1 °C
• Plage de réglage :
- +4 °C - +15 °C en horsgel
- +5 °C - +35 °C en chauffage ou climatisation
• Fonctions principales :
- réglage horaire de la température par tranches de 15 minutes
- 3 niveaux de température programmables pour chauffage + 3 niveaux de température pour
climatisation + 1 niveau hors gel
- programmation hebdomadaire
- 1 programme automatique réglable par l’utilisateur (pour le chauffage comme pour la climatisation)
- possibilité de forcer le programme en modifiant la température
- réglage pour chauffage et climatisation
- fonction horsgel
- possibilité d’extinction avec temporisation
- possibilité d’activation grâce au composeur téléphonique
- sélection entre visualisation en degrés Celsius et Fahrenheit
- réinitialisation du dispositif
• Degré de protection : IP30
• Appareil de classe II :
• Température de fonctionnement : T40 (0 °C +40 °C)
• Classification ErP (Règ. UE 811/2013): classe I, contribution 1%
Réglage date et heure
Avant de commencer la programmation du chronothermostat, réglez jour et heure courante.
- Appuyer la touche ; l’afficheur du dispositif visualisera uniquement la flèche située en haut
qui indique le jour et l’heure à régler.
- La touche permet de déplacer la flèche au niveau du jour courant.
- Appuyer la touche pour confirmer et passer au réglage de l’heure; les 2 chiffres qui
indiquent l’heure commencent à clignoter.
- La touche permet de régler l’heure courante.
- Appuyer la touche pour confirmer et passer à la programmation des minutes; les 2 chiffres
qui indiquent les minutes commencent à clignoter.
- La touche permet de régler les minutes courantes.
- Appuyer la touche pour confirmer la programmation et sortir.
Programmation fonctionnement manuel
- Si le chronothermostat fonctionne en automatique appuyer la touche pour passer en
manuel; l’afficheur visualise le symbole .
- Par la touche sélectionner la valeur de température voulue et appuyer la touche pour confirmer.
Attendre environ 5 secondes pour que l’opération soit confirmée.
Programmation fonctionnement automatique
- Si le chronothermostat fonctionne manuellement appuyer la touche pour passer en automa-
tique; l’afficheur visualisera l’histogramme graphique relatif à la courbe journalière du programme.
Dans ce cas il est possible de passer simultanément en mode manuel, par exemple au cas où
la température voulue est différente de la température programmée, en sélectionnant la valeur à
programmer par la touche et en attendant environ 5 secondes que l’opération soit confirmée.
La nouvelle programmation restera active jusqu’au changement suivant de niveau de tempéra-
ture programmée, après quoi le programme mémorisé sera rétabli.
Pour revenir immédiatement en mode fonctionnement automatique, appuyer la touche .
Extinction
- Appuyer la touche ; l’afficheur visualisera à côté de la valeur de température le symbole
OFF clignotant.
- Appuyer la touche pour confirmer.
Pour rallumer le chronothermostat appuyer la touche .
Extinction temporisée
- Appuyer la touche ; l’afficheur visualisera à côté de la valeur de température le symbole
OFF clignotant.

Viale Vicenza, 14 - 36063 Marostica VI - Italy
Tel. +39 0424 488 600 - Fax (Italia) +39 0424 488 188
Fax (Export) +39 0424 488 709
www.vimar.com
01910
KURZANLEITUNG FÜR DEN INSTALLATIONSTECHNIKER/BENUTZER.
Elektronischer Uhrenthermostat für die ON/OFF-Raumtemperaturregelung (Heizung und
Klimaanlage), Tages/Wochenprogrammierung, Temperaturregler der Klasse I (Beitrag 1%),
Wechselrelaisausgang 5(2) A 250 V~, Stromversorgung über Akkus AA LR6 1,5 V (nicht
mitgeliefert), Wandinstallation.
HAUPTEIGENSCHAFTEN.
• Elektroanschluss: 3 V d.c. durch 2 Stiftbatterien AA LR6 1,5 V (nicht mitgeliefert)
• Batteriedauer: über 1 Jahr
• Ausgang: Austauschrelais mit sauberem Kontakt 5(2) A 250 V~
• Regulierungsart: ON/OFF
• Bei Austausch des Relais-Moduls gegen das Sendermodul 01921.1 kann das Gerät zur Fern-
steuerung über Funkfrequenz an die Stellglieder 01923 und 01924 angeschlossen werden
• Aktualisierung der angezeigten Temperatur: alle 20 s
• Anzeige der Raumtemperatur: 0 °C +40 °C
• Hysterese: regulierbar von 0,1 °C bis 1 °C
• Regulierbereich:
- +4 °C - +15 °C bei Frostschutz
- +5 °C - +35 °C bei Heizung oder Klimaanlage
• Die wesentlichen Funktionen:
- Einstellung der Temperatur nach Stunden, mit Zeitstufen von 15 Minuten
- 3 programmierbare Temperaturhöhen für die Heizung + 3 Temperaturhöhen für die Klima-
anlage + 1 Stufe Frostschutz
- Programmierung nach Wochen
- 1 vom Bediener einstellbares Automatikprogramm (sowohl für Heizung als auch für Klimaanlage)
- Möglichkeit einer Programmintensivierung durch Temperaturänderung
- Regelung für Heizung und Klimaanlage
- Frostschutzfunktion
- Möglichkeit der zeitlich gesteuerten Ausschaltung
- Möglichkeit der Einschaltung durch Telefontrieb
- Selektion Abbildung °Celsius / °Fahrenheit
- Zurücksetzen der Vorrichtung
• Schutzstufe: IP30
• Geräte der Klasse II:
• Betriebstemperatur: T40 (0 °C +40 °C)
• ErP Klassifikation (Verord. EU 811/2013): Klasse I, Beitrag 1%
HAUPTEINSTELLUNGEN.
Einstellung von Datum und Uhrzeit
Vor der Programmierung des Uhrenthermostats sollten das aktuelle Datum und die Uhrzeit
eingestellt werden.
- Die Taste ; drücken, auf dem Display des Geräts erscheint nur der obere Pfeil, der Tag und
Uhrzeit anzeigt.
- Den Pfeil mit der Taste auf den aktuellen Tag setzen.
- Mit bestätigen und auf die Einstellung der Uhrzeit wechseln; die zwei Ziffern, die die
Stunden anzeigen, beginnen zu blinken.
- Mit der Taste die aktuellen Stunden einstellen.
- Mit bestätigen und auf die Einstellung der Minuten wechseln; die zwei Ziffern, die die
Minuten anzeigen, beginnen zu blinken.
- Mit der Taste die aktuellen Minuten einstellen.
- Mit bestätigen und beenden.
Einstellung des Manualbetriebs
- Wenn der Uhrenthermostat im Automatikbetrieb funktioniert, die Taste drücken, um auf
Manualbetrieb zu wechseln; auf dem Display wird das Symbol angezeigt.
- Mit der Taste den gewünschten Temperaturwert wählen und mit bestätigen.
Eventuell etwa 5 Sekunden warten, bis der Vorgang bestätigt wird.
Einstellung des Automatikbetriebs
- Wenn der Uhrenthermostat im Manualbetrieb funktioniert, die Taste drücken, um auf
Automatikbetrieb zu wechseln; auf dem Display wird das Histogramm und der Tagesverlauf
des Programms angezeigt.
In diesem Fall kann kurzfristig auf Manualbetrieb gewechselt werden, zum Beispiel wenn eine
andere Temperatur als programmiert gewünscht wird. Dazu den gewünschten Wert mit der
Taste wählen und 5 Sekunden warten, bis der Vorgang bestätigt wird. Die neue Einstellung
bleibt bis zum nächsten programmierten Wechsel der Temperaturstufe aktiv, danach folgt der
Betrieb wieder dem gespeicherten Programm. Um sofort zum Automatikbetrieb zurückzukeh-
ren, die Taste drücken.
Ausschalten
- Die Taste ; drücken; auf dem Display wird neben dem Temperaturwert das blinkende
Symbol OFF angezeigt.
- Mit bestätigen. Um den Uhrenthermostat wieder einzuschalten, die Taste .
Vorübergehende Ausschaltung
- Die Taste drücken; auf dem Display wird neben dem Temperaturwert das blinkende
Symbol OFF angezeigt.
- Die Taste erneut drücken; auf dem Display werden zwei blinkende Ziffern angezeigt, die
die Anzahl der Stunden (h) angeben.
- Mit der Taste die gewünschte Stundenzahl (1 bis 99) wählen und mit bestätigen.
Der Uhrenthermostat bleibt daraufhin für die eingestellte Dauer ausgeschaltet, danach kehrt er
zur vorherigen Funktionsweise (Manual- oder Automatikbetrieb) zurück.
Frostschutz
- Die Taste drücken; auf dem Display wird neben dem Temperaturwert das blinkende
Symbol OFF angezeigt
- Die Taste erneut drücken; auf dem Display werden die zwei blinkenden Ziffern angezeigt,
die eingestellt werden müssen, wenn das Gerät vorübergehend ausgeschaltet werden soll.
- Die Taste ein drittes Mal drücken; auf dem Display werden 3 blinkende Ziffern ange-
zeigt, die den Wert der einzustellenden Frostschutztemperatur (04.0 °C bis 15 °C) angeben.
- Mit der Taste den gewünschten Wert wählen und mit bestätigen.
Bei ausgeschalteter Heizanlage zeigt das Display neben dem gemessenen Temperaturwert
das Frostschutzsymbol an.
Betriebsartenwahl Sommer/Winter
Diese Funktion wird nur benutzt, wenn außer der Heizanlage auch die Klimaanlage über den
Uhrenthermostat geregelt werden soll.
- Die Taste drücken und gedrückt halten; auf dem Display wird das Symbol oder das
Symbol angezeigt.
- Mit der Taste das Symbol für Winter-, bzw. das Symbol für Sommerbetrieb wählen
und mit bestätigen.
Im Klimatisierungsbetrieb (Sommer) erfolgen die Eingriffe am Uhrenthermostat umgekehrt im
Vergleich zu jenen im Heizbetrieb (Winter).
FÜR DEN INSTALLATIONSTECHNIKER.
Für nähere Angaben und Details zu den anderen Menüs des Uhrenthermostats 01910
wird auf das Handbuch des Installationstechnikers verwiesen, das von der Website
www.vimar.com heruntergeladen werden kann.
- Appuyer de nouveau la touche ; l’afficheur visualisera 2 chiffres clignotants qui indiquent
le nombre d’heures (h) à programmer.
- Par la touche sélectionner le nombre d’heures (de 1 à 99) et appuyer pour confirmer.
Le chronothermostat restera éteint pendant le temps programmé à la fin duquel il sera activé et
reviendra au mode de fonctionnement précédent (manuel ou automatique).
Antigel
- Appuyer la touche ; l’afficheur visualisera à côté de la valeur de température le symbole
OFF clignotant.
- Appuyer de nouveau la touche ; l’afficheur visualisera les 2 chiffres clignotants à pro-
grammer si on désire effectuer l’extinction temporaire du dispositif.
- Appuyer une troisième fois ; l’afficheur visualisera 3 chiffres qui indiquent la valeur de la
température antigel à programmer (de 04.0 °C à 15 °C).
- Par la touche sélectionner la valeur et appuyer pour confirmer.
L’afficheur visualisera avec l’installation de chauffage éteint le symbole d’antigel à côté de la
valeur de température mesurée.
Sélection été/hiver
Ce type de fonction est utilisé seulement au cas où, outre l’installation de chauffage, il faut gérer
également celle de climatisation par le chronothermostat.
- Appuyer et maintenir appuyé la touche ; l’afficheur visualisera le symbole ou .
- Par la touche sélectionner le symbole pour la saison d’hiver ou le symbole pour
celle d’été et appuyer la touche pour confirmer. En fonctionnement climatisation (été),
les interventions effectuées sur le chronothermostat sont inversées par rapport à celles du
fonctionnement en chauffage (hiver).
POUR L’INSTALLATEUR
Pour en savoir plus et pour connaître en détails les autres menus du chronothermostat
01910, voir le manuel installateur à télécharger sur le site www.vimar.com.
Pour tous les détails sur les produits dédiés à la thermorégulation voir le site http://
gestione-energia.vimar.it/en/
RÈGLES D’INSTALLATION
Le circuit doit être réalisé conformément aux dispositions qui régissent l’installation du matériel
électrique en vigueur dans le pays concerné.
CONFORMITÉ AUX NORMES
Directive BT. Directive EMC. Normes EN 60730-1, EN 60730-2-7, EN 60730-2-9.

Viale Vicenza, 14 - 36063 Marostica VI - Italy
Tel. +39 0424 488 600 - Fax (Italia) +39 0424 488 188
Fax (Export) +39 0424 488 709
www.vimar.com
01910
Für alle Details über die Produkte, um die Thermoregulation gewidmet auf der Website
http://gestione-energia.vimar.it/en/
INSTALLATIONSVORSCHRIFTEN.
Die Installation hat nach den im Anwendungsland des Produkts geltenden Vorschriften über die
Installation elektrischen Materials zu erfolgen.
NORMKONFORMITÄT.
Richtlinie BT. Richtlinie EMC. Normen EN 60730-1, EN 60730-2-7, EN 60730-2-9.
GUÍA RÁPIDA PARA INSTALADOR/USUARIO
Cronotermostato electrónico para control ON/OFF de la temperatura ambiente (calefac-
ción y aire acondicionado), programación diaria/semanal, dispositivo de control de la tem-
peratura de clase I (aportación 1%), salida de relé conmutada 5(2) A 250 V~, alimentación
con pilas AA LR6 1,5 V (no suministradas), montaje de superficie.
CARACTERÍSTICAS PRINCIPALES.
• Alimentación: 3 V d.c. mediante 2 baterías estilo AA LR6 1,5 V (se compran por separado)
• Autonomía de las baterías: mayor de un año
• Salida: mediante relé por contacto de intercambio 5(2) A 250 V~
• Tipo de regulación: ON/OFF
• El artefacto se puede conectar en radiofrecuencia, con los accionadores 01923 y 01924. A estos
efectos, primeramente, es menester cambiar el modulo de relé por el modulo transmisor 01921.1
• Puesta al día de la temperatura visualizada: cada 20 s
• Visualización de la temperatura ambiente: 0 °C +40 °C
• Diferencial térmico: se puede regular de 0,1 °C a 1 °C
• Campo de regulación:
- +4 °C - +15 °C en el antihielo
- +5 °C - +35 °C en la calefacción o el acondicionador de aire
• Funciones principales:
- ajuste horario de la temperatura con pasos de 15 minutos
- 3 niveles de temperatura programables para la calefacción + 3 niveles de temperatura para
el acondicionamiento + 1 nivel de antihielo
- programación semanal
- 1 programa automático que ajusta el usuario (tanto para la calefacción como para el acondi-
cionador de aire)
- el programa se puede forzar, variando la temperatura a mano
- regulación para la calefacción y el acondicionamiento
- función antihielo
- se puede utilizar el apagado temporizado
- se puede accionar por medio de un actuador telefónico
- se puede seleccionar la visualización en grados Celsius o Fahrenheit
- puesta a cero del dispositivo
• Grado de protección: IP30
• Artefactos de clase II:
• Temperatura de funcionamiento: T40 (0 °C +40 °C)
• Clasificación ErP (Reg. UE 811/2013): clase I, contribución 1%
PRINCIPALES CONFIGURACIONES.
Configuración de la fecha y hora
Antes de empezar a programar el cronotermostato, se aconseja configurar el día y la hora actuales.
- Pulsar la tecla ; el display del dispositivo solamente visualiza la flecha situada arriba que
indica el día y la hora por configurar.
- Con la tecla desplazar la flecha hasta el día actual.
- Pulsar la tecla para confirmarlo y pasar a la configuración de la hora; las dos cifras que
indican la hora empiezan a parpadear.
- Con la tecla configurar la hora actual.
- Pulsar la tecla para confirmarla y pasar a la configuración de los minutos; las dos cifras
que indican los minutos empiezan a parpadear.
- Con la tecla configurar los minutos actuales.
- Pulsar la tecla para confirmarlos y salir.
Configuración del funcionamiento manual
- Si el cronotermostato está funcionando en automático, pulsar la tecla para pasar a
manual; el display visualiza el símbolo .
- Con la tecla seleccionar el valor de temperatura deseado y pulsar la tecla para confirmarlo.
Eventualmente, esperar a que transcurran cinco segundos para que se confirme la operación.
Configuración del funcionamiento automático
- Si el cronotermostato está funcionando en manual, pulsar la tecla para pasar a automáti-
co; el display visualiza el histograma gráfico correspondiente al desarrollo diario del programa.
En este caso, es posible pasar temporalmente a la modalidad manual, por ejemplo, si la tempe-
ratura deseada es diferente a la programada, seleccionando el valor por configurar con la tecla
y esperando a que transcurran cinco segundos para que la operación se confirme.
La nueva configuración permanece activa hasta el siguiente cambio de nivel de temperatura
programado, tras lo cual se restablece el programa memorizado.
Para volver inmediatamente a la modalidad de funcionamiento automático, pulsar la tecla .
Apagado
- Pulsar la tecla ; el display visualiza el símbolo OFF parpadeante al lado del valor de
temperatura.
- Pulsar la tecla para confirmarlo.
Para encender de nuevo el cronotermostato, apretar la tecla .
Apagado temporizado
- Pulsar la tecla ; el display visualiza el símbolo OFF parpadeante al lado del valor de
temperatura.
- Pulsar de nuevo la tecla ; el display visualiza dos cifras parpadeantes que indican el
número de horas (h) por configurar.
- Con la tecla seleccionar el número de horas deseado (de 1 a 99) y pulsar la tecla
para confirmarlo.
El cronotermostato permanece apagado durante el tiempo configurado y, una vez transcurrido,
se activa y vuelve a la precedente modalidad de funcionamiento (manual o automático).
Antihielo
- Pulsar la tecla ; el display visualiza el símbolo OFF parpadeante al lado del valor de
temperatura.
- Pulsar de nuevo la tecla ; el display visualiza las dos cifras parpadeantes, que se han
de configurar si se desea efectuar el apagado temporizado del dispositivo.
- Pulsar una tercer vez la tecla ; el display visualiza tres cifras parpadeantes que indican
el valor de la temperatura antihielo por configurar (de 04.0 °C a 15 °C).
- Con la tecla seleccionar el valor deseado y pulsar la tecla para confirmarlo.
Con la calefacción apagada, el display visualiza el símbolo antihielo al lado del valor de tem-
peratura medido.
Selección verano/invierno
Este tipo de función se utiliza solamente si, además de la calefacción, se ha de gestionar el aire
acondicionado mediante el cronotermostato.
- Pulsar y mantener pulsada la tecla ; el display visualiza el símbolo o el símbolo .
- Con la tecla seleccionar el símbolo para la estación invernal o el símbolo para la
estiva y pulsar la tecla para confirmarlo.
En el funcionamiento del aire acondicionado (verano), las intervenciones efectuadas en el cro-
notermostato están invertidas con relación a las del funcionamiento de la calefacción (invierno).
PARA EL INSTALADOR
Para más información y los detalles correspondientes a todos los demás menús del crono-
termostato 01910, consulte el manual de instalador que se puede descargar desde la página
www.vimar.com. Para todos los detalles acerca de los productos dedicados a la termo-
rregulación consulte el sitio web http://gestione-energia.vimar.it/en/
NORMAS DE INSTALACIÓN.
La instalación debe realizarse cumpliendo con las disposiciones en vigor que regulan el mon-
taje del material eléctrico en el país donde se instalen los productos.
CONFORMIDAD CON LA NORMATIVA.
Directiva BT. Directiva EMC. Normas EN 60730-1, EN 60730-2-7, EN 60730-2-9.
ΓΡΗΓΟΡΟΣ ΟΔΗΓΟΣ ΤΕΧΝΙΚΟΥ ΕΓΚΑΤΑΣΤΑΣΗΣ/ΧΡΗΣΤΗ.
Ηλεκτρονικός χρονοθερμοστάτης για τον έλεγχο ON/OFF της θερμοκρασίας περι-
βάλλοντος (θέρμανση και κλιματισμός), ημερήσιος/εβδομαδιαίος προγραμματισμός,
μηχανισμός ελέγχου θερμοκρασίας κατηγορίας Ι (συνεισφορά 1%), έξοδος με ρελέ
ανταλλαγής 5(2) A 250 V~, τροφοδοσία με μικρές μπαταρίες AA LR6 1,5 V (δεν παρέ-
χονται), επιτοίχια εγκατάσταση.
ΚΥΡΙΑ ΧΑΡΑΚΤΗΡΙΣΤΙΚΑ.
• Τροφοδοσία:3Vd.c.με2μπαταρίεςAALR61,5V(δενπαρέχονται)
• Διάρκειαμπαταρίας:πάνωαπόέναέτος
• Έξοδος:ρελέμεκαθαρήεπαφήμεταγωγής5(2)A250V~
• Τύποςρύθμισης:ON/OFF
• Δυνατότητασύνδεσηςμέσωραδιοσυχνοτήτωνμεεκκινητές01923και01924αντικαθιστώ-
νταςτημονάδαρελέμετονπομπό01921.1
• Ανανέωσηεμφανιζόμενηςθερμοκρασίας:ανά20s
• Εμφάνισηθερμοκρασίαςπεριβάλλοντος:0°C+40°C
• Θερμικήδιαφορά:ρυθμιζόμενηαπό0,1°Cέως1°C
• Εύροςρύθμισης:
-+4°C-+15°Cμελειτουργίααντίψυξης
-+5°C-+35°Cμεθέρμανσηήκλιματισμό
• Βασικέςλειτουργίες:
- ωριαίοςπρογραμματισμόςτηςθερμοκρασίαςμεβήματατων15λεπτών
- 3προγραμματιζόμεναεπίπεδαθερμοκρασίαςγιαθέρμανση+3επίπεδαθερμοκρασίας
γιακλιματισμό+1επίπεδολειτουργίαςαντίψυξης
INSTALLAZIONE ●INSTALLATION ●INSTALLATION ●INSTALLATION ●INSTALACIÓN ●ΕΓΚΑΤΑΣΤΑΣΗ
83,5 mm
60 mm
- εβδομαδιαίοςπρογραμματισμός
- 1προγραμματιζόμενοαυτόματοπρόγραμμααπότοχρήστη(γιαθέρμανσηκαικλιματισμό)
- δυνατότηταχειροκίνητηςμεταβολήςτηςθερμοκρασίαςτουπρογράμματος
- ρύθμισηγιαθέρμανσηκαικλιματισμό
- λειτουργίααντίψυξης
- δυνατότητασβησίματοςμεχρονοδιακόπτη
- δυνατότηταενεργοποίησηςκαιαπενεργοποίησηςμέσωτηλεφώνου
- δυνατότηταεμφάνισηςσεβαθμούςΚελσίουήΦαρενάιτ
- επαναφοράτηςρυθμίσεων
• Βαθμόςπροστασίας:IP30
• ΣυσκευήκλάσηςII:
• Θερμοκρασίαλειτουργίας:T40(0°C+40°C)
•ErPΤαξινόμηση(KανονισμόΕΕ811/2013):τάξηI,μερίδιο1%
Ρύθμιση ώρας και ημερομηνίας
Πρινξεκινήσετετονπρογραμματισμότουχρονοθερμοστάτη,συνιστάταιναπρογραμματίσε-
τετηντρέχουσαημερομηνίακαιώρα.
- Πιέστετοπλήκτρο .Στηνοθόνητουσυστήματοςεμφανίζεταιμόνοτοβέλοςστοπάνω
μέροςπουυποδεικνύειτηνημερομηνίακαιτηνώραγιαρύθμιση.
- Χρησιμοποιήστετοπλήκτρο γιαναμετακινήσετετοβέλοςστηθέσημετηντρέχουσα
ημερομηνία.
- Πιέστε το πλήκτρο για επιβεβαίωση και μετάβαση στη ρύθμιση της ώρας. Τα δύο
ψηφίατηςένδειξηςτηςώραςαρχίζουννααναβοσβήνουν.
- Χρησιμοποιήστετοπλήκτρο γιαναρυθμίσετετηντρέχουσαώρα.
- Πιέστετοπλήκτρο γιαεπιβεβαίωσηκαιμετάβασηστηρύθμισητωνλεπτών.Ταδύο
ψηφίατηςένδειξηςτωνλεπτώναρχίζουννααναβοσβήνουν.
- Χρησιμοποιήστετοπλήκτρο γιαναρυθμίσετεταλεπτάτηςώρας.
- Πιέστετοπλήκτρο γιαεπιβεβαίωσηκαιέξοδο.
Επιλογή χειροκίνητης λειτουργίας
- Εάνοχρονοθερμοστάτηςλειτουργείαυτόματα,πιέστετοπλήκτρο γιαμετάβασηστη
χειροκίνητηλειτουργία.Στηνοθόνηεμφανίζεταιτοσύμβολο .
-Χρησιμοποιήστετοπλήκτρο γιαναεπιλέξετετηνεπιθυμητήτιμήθερμοκρασίαςκαιστη
συνέχειαπιέστετοπλήκτρο γιαεπιβεβαίωση.Περιμένετεπερίπου5δευτερόλεπταγια
ναολοκληρωθείηδιαδικασία.
Επιλογή αυτόματης λειτουργίας
- Εάνέχειεπιλεχθείηχειροκίνητηλειτουργία,πιέστετοπλήκτρο γιαμετάβασηστη
αυτόματηλειτουργία.Στηνοθόνηεμφανίζεταιτοιστόγραμματηςημερήσιαςεξέλιξηςτου
προγράμματος.
Στην περίπτωση αυτή μπορείτε να περάσετε προσωρινά στη χειροκίνητη λειτουργία, για
παράδειγμαεάνη επιθυμητή θερμοκρασία διαφέρει από τηνπρογραμματισμένη,επιλέγο-
νταςτηνεπιθυμητήτιμήμετοπλήκτρο καιπεριμένονταςπερίπου5δευτερόλεπταγιανα
ολοκληρωθείηδιαδικασία.Ηνέαρύθμισηδιατηρείταιέωςτηνεπόμενηπρογραμματισμένη
αλλαγήεπιπέδουθερμοκρασίας,οπότεενεργοποιείταιτοαποθηκευμένοπρόγραμμα.
Γιαάμεσηεπιστροφήστηναυτόματηλειτουργίαπιέστετοπλήκτρο .
Σβήσιμο
- Πιέστετοπλήκτρο .ΣτηνοθόνηαναβοσβήνειτοσύμβολοOFFδίπλαστηντιμήτης
θερμοκρασίας.
- Πιέστετοπλήκτρο γιαεπιβεβαίωση.
Γιαάναμματουχρονοθερμοστάτηπιέστετοκουμπί .
Σβήσιμο με χρονοδιακόπτη
- Πιέστετοπλήκτρο .ΣτηνοθόνηαναβοσβήνειτοσύμβολοOFFδίπλαστηντιμήτης
θερμοκρασίας.
- Πιέστεπάλιτοπλήκτρο .Στηνοθόνηαναβοσβήνουνταδύοψηφίατηςώρας(h)για
προγραμματισμό.
- Χρησιμοποιήστετοπλήκτρο γιαναεπιλέξετετονεπιθυμητόαριθμόωρών(από1έως
99)καιστησυνέχειαπιέστετοπλήκτρο γιαεπιβεβαίωση.
Ο χρονοθερμοστάτης παραμένει σβηστός όλη την προγραμματισμένη περίοδο, μετά την
πάροδο της οποίας ενεργοποιείται αποκαθιστώντας τον προηγούμενο τρόπο λειτουργίας
(χειροκίνητηήαυτόματη).
Αντίψυξη
- Πιέστετοπλήκτρο .ΣτηνοθόνηαναβοσβήνειτοσύμβολοOFFδίπλαστηντιμήτης
θερμοκρασίας.
- Πιέστεπάλιτοπλήκτρο .Στηνοθόνηαναβοσβήνουνταδύοψηφίαγιαπρογραμμα-
τισμόεάνθέλετετοσβήσιμομεχρονοδιακόπτη.
- Πιέστεγιατρίτηφοράτοπλήκτρο .Στηνοθόνηαναβοσβήνουν3ψηφίαγιατονπρο-
γραμματισμότηςθερμοκρασίαςαντίψυξης(από04,0°Cέως15°C).
- Χρησιμοποιήστε το πλήκτρο για να επιλέξετε την επιθυμητή τιμή και στη συνέχεια
πιέστετοπλήκτρο γιαεπιβεβαίωση.
Μετηνεγκατάστασηθέρμανσηςσβηστή,στηνοθόνηεμφανίζεταιτοσύμβολοτηςλειτουργί-
αςαντίψυξηςδίπλαστημετρούμενητιμήτηςθερμοκρασίας.
Επιλογή θερινής/χειμερινής λειτουργίας
Ηλειτουργίααυτήεμφανίζεταιμόνοσεπερίπτωσηπουοχρονοθερμοστάτης,εκτόςαπότην
εγκατάστασηθέρμανσηςελέγχεικαιτοσύστημακλιματισμού.
- Πιέστεκαικρατήστεπατημένοτοπλήκτρο .Στηνοθόνηεμφανίζεταιτοσύμβολο ή
τοσύμβολο .
- Χρησιμοποιήστετοπλήκτρο γιαναεπιλέξετετοσύμβολο γιαχειμερινήλειτουργίαή
τοσύμβολο γιαθερινήλειτουργίακαιπιέστετοπλήκτρο γιαεπιβεβαίωση.
Στηλειτουργίακλιματισμού(θερινή),οιεπεμβάσειςστοχρονοθερμοστάτηαντιστρέφονταισε
σχέσημετηλειτουργίαθέρμανσης(χειμερινή).
ΓΙΑ ΤΟΝ ΤΕΧΝΙΚΟ ΕΓΚΑΤΑΣΤΑΣΗΣ.
Για περισσότερες πληροφορίες και λεπτομέρειες σχετικά με όλα τα υπόλοιπα μενού
του χρονοθερμοστάτης 01910, ανατρέξτε στο εγχειρίδιο τεχνικού εγκατάστασης που
διατίθεται για λήψη από την ιστοσελίδα www.vimar.com.
Για όλες τις λεπτομέρειες σχετικά με τα προϊόντα αφιερωμένη στην θερμορύθμιση
δείτε την ιστοσελίδα http://gestione-energia.vimar.it/en/
ΚΑΝΟΝΕΣ ΕΓΚΑΤΑΣΤΑΣΗΣ.
Ηεγκατάστασηπρέπειπάντοτεναπραγματοποιείταισύμφωναμετουςκανονισμούςεγκατά-
στασηςηλεκτρολογικούυλικούπουισχύουνστηνχώρατοποθέτηοηςτουυλικού.
ΠΡΟΔΙΑΓΡΑΦEΣ.
ΟδηγίαBT.ΟδηγίαEMC.
ΠρότυπαEN60730-1,EN60730-2-7,EN60730-2-9.

Collegamento con attuatore telefonico con contatto pulito
Connection to a telephone actuator with clean contact
Connexion avec actuateur téléphonique avec contact vierge
Verbindung durch Telefontrieb mit sauberem Kontakt
Conexión con el actuador telefónico mediante un contacto limpio
Σύνδεσημετηλέφωνομέσωκαθαρήςεπαφής
INSERIMENTO/SOSTITUZIONE BATTERIE DI ALIMENTAZIONE ●FITTING/REPLACING POWER BATTERIES
INTRODUCTION/REMPLACEMENTBATTERIESALIMENTATION●EINSATZ /AUSTAUSCHDERBATTERIENZURSPANNUNGSVERSORGUNG
MONTAJE/CAMBIO DE LAS BATERÍAS DE ALIMENTACIÓN ● ΤΟΠΟΘΕΤΗΣΗ/ΑΝΤΙΚΑΤΑΣΤΑΣΗ ΜΠΑΤΑΡΙΏΝ ΤΡΟΦΟΔΟΣΙΑΣ
1.
AA LR6 1,5 V
2.
ATTENZIONE! In caso di sostituzione, smaltire le batterie negli appositi cassonetti per la raccolta differenziata.
ATTENTION! After replacing the battery, dispose of the old battery in the appropriate sorted refuse bins.
ATTENTION! En cas de remplacement, les batteries usées devront être jetées dans des poubelles ou des conteneurs spéciaux de collecte sélective.
ACHTUNG! Bei Austausch der Batterien diese in den entsprechenden Trennmüll-Tonnen entsorgen.
¡CUIDADO! Cuando cambie las baterías, recuerde que las viejas se tiran en los cajones de la basura ad hoc, de la recogida selectiva.
ΠΡΟΣΟΧΗ!Σεπερίπτωσηαντικατάστασης,οιμπαταρίεςπρέπεινααπορρίπτονταιστουςειδικούςκάδουςδιαφοροποιημένηςσυλλογής.
Valvole motorizzate
Motor-operated valves
Vannes motorisées
Gesteuerte Ventile
Válvulas con motor
Μηχανοκίνητες βαλβίδες
COLLEGAMENTI ●CONNECTIONS●CONNEXIONS●ANSCHLÜSSE ●CONEXIONES ●
ΣΥΝΔΕΣΕΙΣ
Pompe di circolazione, bruciatori, elettrovalvole
Circulation pumps, burners, solenoid valves
Pompes de circulation, brûleurs, électrovannes
Umlaufpumpen, Brenner, Magnetventile
Bombas de circulación, quemadores, electroválvulas
Κυκλοφορητές, καυστήρες, ηλεκτροβαλβίδες
L
N
U1
L
N
U1
Comando tramite combinatore telefonico •Phone dialler control •Commande par composeur téléphonique
Steuerung über Telefonschaltung • Mando con marcador telefónico • Έλεγχος μέσω τηλεφώνου
CHIUDE-CLOSES-FERMÉE
SCHLIESSEN-CERRAR-ΚΛΕΙΣΙΜΟ
APRE-OPENS-OUVERTE
ÖFFNEN-ABRIR-ΑΝΟΙΓΜΑ
Other manuals for RADIOCLIMA 01910
2
Table of contents
Languages:
Other Vimar Thermostat manuals

Vimar
Vimar Eikon 20446 manual

Vimar
Vimar 02900.1 User manual

Vimar
Vimar By-me Eikon 20513 User manual

Vimar
Vimar 2911 User manual

Vimar
Vimar Eikon 20440 manual

Vimar
Vimar 2950 User manual

Vimar
Vimar 02972 User guide

Vimar
Vimar RADIOCLIMA 01910 manual

Vimar
Vimar Eikon 20441 manual

Vimar
Vimar RADIOCLIMA 01910 manual
Popular Thermostat manuals by other brands

White Rodgers
White Rodgers TYPE 151 installation instructions

Immergas
Immergas SMARTECH PLUS EXPANSION KIT manual

Theben
Theben VARIA Series Installation and operating instructions

Lennox
Lennox icomfort Touch Thermostat Homeowner's manual

Honeywell
Honeywell TB7600 Integration manual

ABB
ABB 6134/10 Technical manual