manuals.online logo
Brands
  1. Home
  2. •
  3. Brands
  4. •
  5. Vision Fitness
  6. •
  7. Treadmill
  8. •
  9. Vision Fitness T9250 User manual

Vision Fitness T9250 User manual

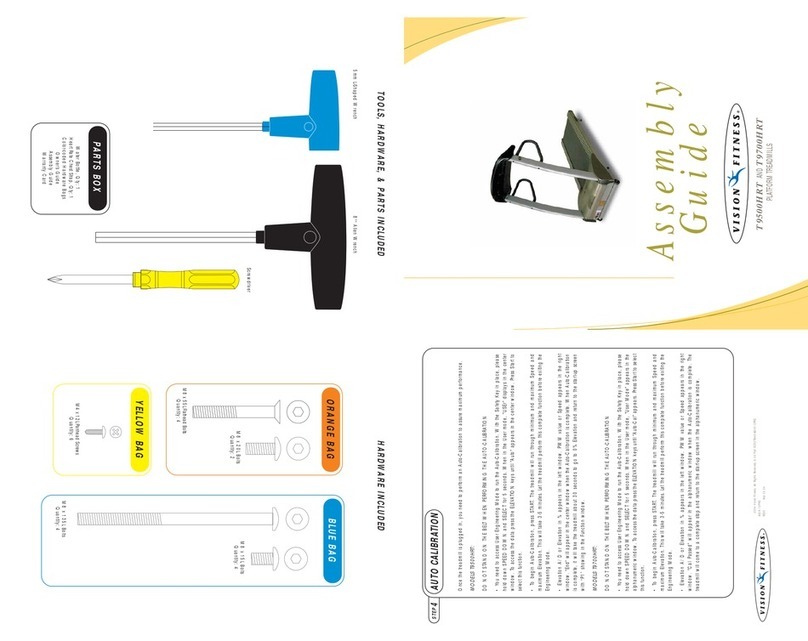
HARDWARE INCLUDED
5mm L-Shaped Wrench
Screwdriver
TOOLS, HARDWARE, & PARTS INCLUDED
PARTS BOX
Water Bottle, Qty: 1
Safety Magnet Key, Qty: 1
Color-coded Hardware Bags
8mm T-Shaped Wrench
ORANGE BAG PINK BAG
M8x20L Flat Head Bolt
Quantity: 8
5
STEP
Once the Treadmill is plugged in, you need to configure the Treadmill and perform auto-calibration for maximum performance.
PREMIER and DELUXE CONSOLE:
DO NOT STAND ON THE BELT WHEN PERFORMING THE AUTO-CALIBRATION
Once the treadmill is plugged in, you will need to configure and run auto-calibration. With the safety key in place, turn the
treadmill on. A setup screen should appear on the console. Set your treadmill to the correct model number (9250 or 9550)
using the ELEVATION arrow keys and the correct units (MI [miles]/KM [kilometers]) using the SPEED arrow keys. If you are
unsure of the model number, you can locate the number on the console masts. Once you have located the model number and
units with the arrow keys, press and hold ENTER. Now you can perform auto-calibration by pressing START.
The treadmill will run through minimum and maximum speed and elevation. This will take 3 to 5 minutes. Let the treadmill
perform this complete function. “END” will appear when auto-calibration is complete. When auto-calibration is complete, the
treadmill will reboot and return to the start-up screen.
SIMPLE CONSOLE:
DO NOT STAND ON THE BELT WHEN PERFORMING THE AUTO-CALIBRATION
Once the treadmill is plugged in, you will need to configure and run auto-calibration. With the safety key in place, turn the
treadmill on. A setup screen should appear on the console. The large LED window displays the model number and the small
LED window displays the units. Set your treadmill to the correct model number (9250 or 9550) using the ELEVATION arrow
keys and the correct units (0 for miles and 1 for kilometers) using the SPEED arrow keys. If you are unsure of the model
number, you can locate the number on the console masts. Once you have located the model number and units with the arrow
keys, press and hold ENTER. Now you can perform auto-calibration by pressing START.
The treadmill will run through minimum and maximum speed and elevation. This will take 3 to 5 minutes. Let the treadmill
perform this complete function. “END” will appear in the window when auto-calibration is complete. When auto-calibration
is complete, the treadmill will reboot and return to the start-up screen.
MODEL CONFIGURATION & AUTO-CALIBRATION
simple reliable customizable
500 South CP Avenue • P.O. Box 280 • Lake Mills, WI 53551
toll free 800.335.4348 • phone 920.648.4090 • fax 920.648.3373
www.visionfitness.com
©2008 Vision Fitness. All Rights Reserved.
May be covered by one or more patents or patents pending:
US 6273843, US 7104930, TW 586429, CN 03206094.7
9.08
AG18.31PRD
REV8
5mm T-Shaped Wrench
GREEN BAG
8.2x15x1.5T
Arc Washer
Quantity: 4
M8x15L Button Head Bolt
Quantity: 4
8.2x15.4x2.0T
Lock Washer
Quantity: 3
M8x60L Button Head Bolt
Quantity: 3
M4x15L Flat Head
Pointed Screw
Quantity: 2
M4x15L Button Head Screw
Quantity: 6
8.2x15x2.0T
Flat Washer
Quantity: 3
5.3x14x1.0T Washer
Quantity: 4
M5x15L Flat Head Bolt
Quantity: 4
M5x15L Button Head Bolt
Quantity: 4
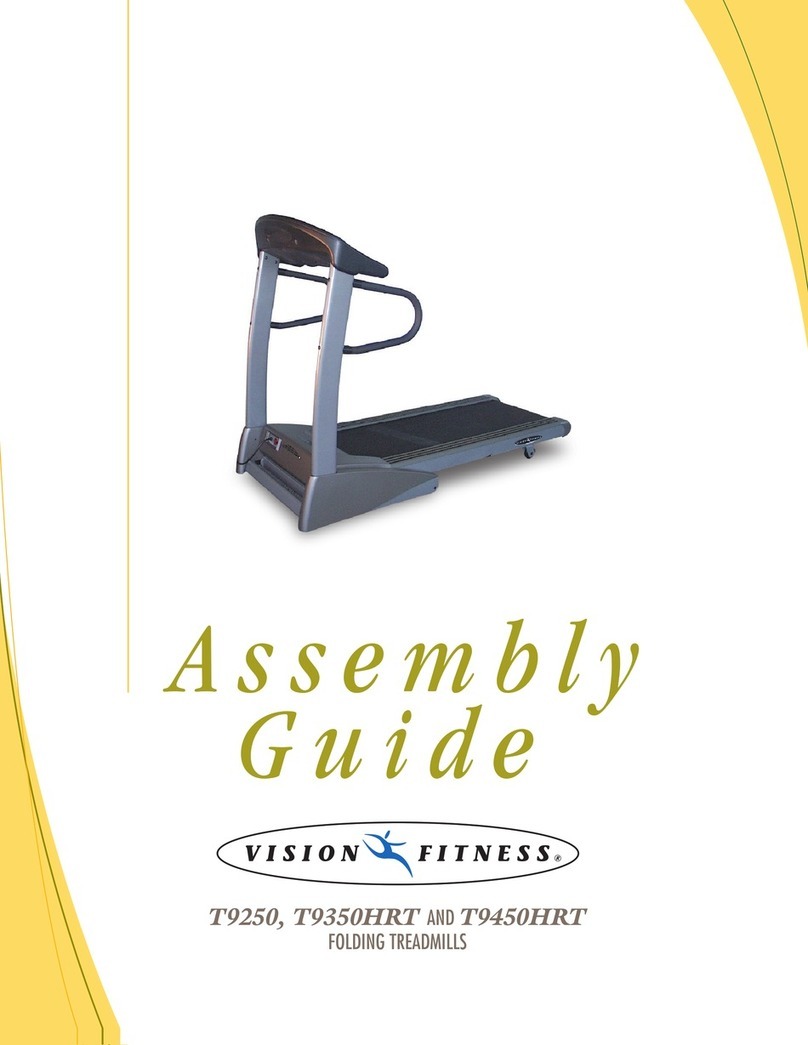
ASSEMBLY
GUIDE
T9250 AND T9550
FOLDING TREADMILLS
BLUE BAG
8.2x15.4x2.0T
Lock Washer
Quantity: 8
8.2x15x1.5T
Arc Washer
Quantity: 4
M8x20L Button Head Bolt
Quantity: 4
8.2x15x1.4T
Flat Washer
Quantity: 8
M8x15L Flat Head Bolt
Quantity: 4
M8x15L Button Head Bolt
Quantity: 4
M4x15L Flat Head Bolt
Quantity: 4
B
VIEW BVIEW B
VIEW CVIEW C
C
Assembly
Guide
To avoid possible damage to this Folding Treadmill, please follow these assembly steps in the correct order.
Before proceeding though, find your new Folding Treadmill’s 2 serial numbers, located on the
front of the main frame and on the bottom of the console, and enter here:
Refer to these numbers when calling for service, and also enter these serial numbers on your Warranty Card
and in your own records. Be sure to read your Owner’s Guide before using your new Folding Treadmill.
If any parts, hardware or tools are missing, please call 1.800.335.4348
NOTE: It is recommended that you apply grease to the threads of each bolt as you assemble your Folding
Treadmill, to prevent loosening and noise. Also, during each assembly step, ensure that ALL nuts and bolts
are in place and partially threaded in before completely tightening any ONE bolt.
1
STEP
• Slide lower console mast covers
over right and left console masts and
secure to frame using four flat head
bolts (M8x20L) on each side and two
button head bolts (M8x15L) and arc
washers (8.2x15x1.5T) on the back
of the console mast. Screw in all
hardware but DO NOT tighten.
PLEASE NOTE:
Right console mast
will have an access port for data
cable at the front of the console mast.
Be careful not to pinch data cable
when attaching right console mast to
frame.
ORANGE BAG
1
STEP
2
STEP
3
STEP
• Attach wire tie at center of console
mast support tube to data cable from
console and feed through support
tube opening to the right side of the
support tube.
• Attach console to support tube using
three long button head bolts (M8x60L),
lock washer (8.2x15.4x2.0T) and flat
washer (8.2x15x2.0T).
• Attach wire tie from top of right
console mast to data cable and feed
through console mast opening and
connect data cable to female data
cable connector.
PINK BAG
6
STEP
T9250 AND T9550
FOLDING TREADMILLS
6
STEP
• If the running belt slips when used,
use the supplied 8mm Allen wrench to
turn the left and right tension bolts
clockwise 1
/4-turn at a time until the
belt no longer slips.
• Run the treadmill at 2.0 mph. If the
running belt is too far to the
right
side,
use the supplied 8mm Allen wrench to
turn the
right
tension bolt
clockwise
1
/4-turn at a time until the belt remains
centered during use.If the running belt
is too far to the
left
side, turn the
left
tension bolt clockwise 1
/4-turn at a
time until the belt remains centered
during use.
BELT TENSION
5
STEP
Please refer to back cover for this
procedure, then return to Step 6.
AUTO-CALIBRATION
A
3
STEP
4
STEP
• Position upper console mast covers
over the console mast on each side and
match to outside covers. Secure with
three button head screws (M4x15L).
• Attach right and left side bottle
holders with two flat head bolts
(M5x15L) on top and two button head
bolts (M5x15L) and flat washers
(5.3x14x1.0T) on the bottom of each
bottle holder.
• Tighten all console mast hardware
at the base of each console mast.
• Position treadmill deck in upright
position by carefully lifting the back of
the treadmill until the latch engages.
Lock the transport wheels by pressing
the lower lever on lock. Secure the right
console mast cover with two flat head
bolts (M4x15L) for the front of the cover
and one flat head pointed screw
(M4x15L) for the rear of the cover.
• Repeat on left side.
• Unfold the treadmill.
GREEN BAG
4
STEP
Frame Serial Number Console Serial Number
B
VIEW B
VIEW B
VIEW C
C
VIEW A
VIEW A
2
STEP
•
Attach right and left handlebars to
console masts with two button head bolts
(M8x15L), lock washer (8.2x15.4x2.0T)
and flat washer (8.2x15x1.4T) on the
sides of the handlebar and two flat head
bolts (M8x15L) and arc washers on the
underside of the handlebar.
• Slide right and left console mast
covers over support tube.
• Attach support tube to console
masts and secure with two button
head bolts (M8x20L), lock washers
(8.2x15.4x2.0T), and flat washers
(8.2x15x1.4T) on each side. Make
sure all four bolts are screwed in
before tightening any of the bolts.
BLUE BAG

Other manuals for T9250

4

This manual suits for next models

1

Other Vision Fitness Treadmill manuals

Vision Fitness Platform Treadmill T9700 Runne User manual

Vision Fitness

Vision Fitness Platform Treadmill T9700 Runne User manual

Vision Fitness TF20 User manual

Vision Fitness

Vision Fitness TF20 User manual

Vision Fitness T9800 Series User manual

Vision Fitness

Vision Fitness T9800 Series User manual

Vision Fitness T9450HRT User manual

Vision Fitness

Vision Fitness T9450HRT User manual

Vision Fitness Platform Treadmill T9700 Runne User manual

Vision Fitness

Vision Fitness Platform Treadmill T9700 Runne User manual

Vision Fitness T1450 User manual

Vision Fitness

Vision Fitness T1450 User manual

Vision Fitness T9600HRT Comfort User manual

Vision Fitness

Vision Fitness T9600HRT Comfort User manual

Vision Fitness T9800 Series User manual

Vision Fitness

Vision Fitness T9800 Series User manual

Vision Fitness T9700 Simple User manual

Vision Fitness

Vision Fitness T9700 Simple User manual

Vision Fitness T8400HRC User manual

Vision Fitness

Vision Fitness T8400HRC User manual

Vision Fitness T9250 User manual

Vision Fitness

Vision Fitness T9250 User manual

Vision Fitness T600 User manual

Vision Fitness

Vision Fitness T600 User manual

Vision Fitness Treadmill T8600S-S/P Configuration guide

Vision Fitness

Vision Fitness Treadmill T8600S-S/P Configuration guide

Vision Fitness T970HRT Service User manual

Vision Fitness

Vision Fitness T970HRT Service User manual

Vision Fitness T9800 Series User manual

Vision Fitness

Vision Fitness T9800 Series User manual

Vision Fitness T9700HRT Use and care manual

Vision Fitness

Vision Fitness T9700HRT Use and care manual

Vision Fitness T9600 Use and care manual

Vision Fitness

Vision Fitness T9600 Use and care manual

Vision Fitness T80 User manual

Vision Fitness

Vision Fitness T80 User manual

Vision Fitness T9700HRT User manual

Vision Fitness

Vision Fitness T9700HRT User manual

Vision Fitness Treadmill TM357 User manual

Vision Fitness

Vision Fitness Treadmill TM357 User manual

Vision Fitness Vision Series User manual

Vision Fitness

Vision Fitness Vision Series User manual

Vision Fitness TF40 User manual

Vision Fitness

Vision Fitness TF40 User manual

Vision Fitness T1450 User manual

Vision Fitness

Vision Fitness T1450 User manual

Vision Fitness T7200 User manual

Vision Fitness

Vision Fitness T7200 User manual

Popular Treadmill manuals by other brands

Tunturi Cardio Fit T40 user manual

Tunturi

Tunturi Cardio Fit T40 user manual

SportsArt Fitness T620 Repair manual

SportsArt Fitness

SportsArt Fitness T620 Repair manual

Sunny Health & Fitness SF-T1407M user manual

Sunny Health & Fitness

Sunny Health & Fitness SF-T1407M user manual

NordicTrack T7 Ze Treadmill manual

NordicTrack

NordicTrack T7 Ze Treadmill manual

NordicTrack T20.0 Treadmill manual

NordicTrack

NordicTrack T20.0 Treadmill manual

Precor M9.41si owner's manual

Precor

Precor M9.41si owner's manual

Smooth Fitness FX20HR user manual

Smooth Fitness

Smooth Fitness FX20HR user manual

iFIT NordicTrack COMMERCIAL 1250 user manual

iFIT

iFIT NordicTrack COMMERCIAL 1250 user manual

Johnson JET7000 Service manual

Johnson

Johnson JET7000 Service manual

NordicTrack COMMERCIAL 1500 owner's guide

NordicTrack

NordicTrack COMMERCIAL 1500 owner's guide

Domyos INTENSE RUN manual

Domyos

Domyos INTENSE RUN manual

NordicTrack NTL19011.1 user manual

NordicTrack

NordicTrack NTL19011.1 user manual

Johnson T8000E owner's manual

Johnson

Johnson T8000E owner's manual

Christopeit Sport TM350S Assembly and exercise instructions

Christopeit Sport

Christopeit Sport TM350S Assembly and exercise instructions

Smooth Fitness SMOOTH 9.6H owner's manual

Smooth Fitness

Smooth Fitness SMOOTH 9.6H owner's manual

Fit4Home TF-D1451 user manual

Fit4Home

Fit4Home TF-D1451 user manual

NordicTrack WalkFit owner's guide

NordicTrack

NordicTrack WalkFit owner's guide

FitLux 365 owner's manual

FitLux

FitLux 365 owner's manual

manuals.online logo
manuals.online logoBrands
  • About & Mission
  • Contact us
  • Privacy Policy
  • Terms and Conditions

Copyright 2025 Manuals.Online. All Rights Reserved.