manuals.online logo
Brands
  1. Home
  2. •
  3. Brands
  4. •
  5. Vision Fitness
  6. •
  7. Treadmill
  8. •
  9. Vision Fitness T10 User manual

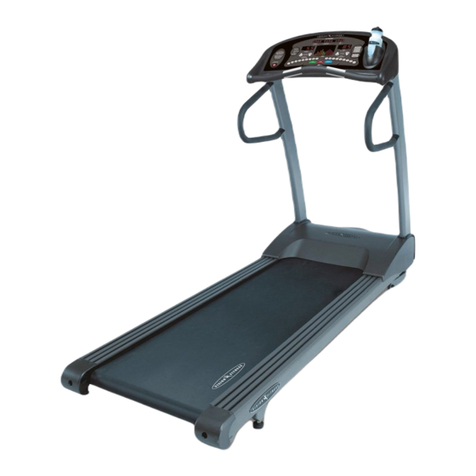
Vision Fitness T10 User manual

T10
Non-Folding Treadmill
ASSEMBLY GUIDE
HARDWARE INCLUDED
1600 Landmark Drive • Cottage Grove, WI 53527
toll free 800.335.4348 • fax 608.839.8731
www.visionfitness.com
©2012 Vision Fitness. All Rights Reserved.
2012.04.17
REV1
Once the Treadmill is plugged in, you need to configure the Treadmill and perform an auto-calibration to assure maximum
performance.
DO NOT STAND ON THE BELT WHEN PERFORMING THE AUTO-CALIBRATION
Once the treadmill is plugged in, you will need to configure and run auto-calibration. With the safety key in place, turn
the treadmill on. A setup screen should appear on the console. The large LED window displays the model number and
the small LED window displays the units. Set your treadmill to the correct model number (T10, 9200, 9500, or 9600)
using the ELEVATION arrow keys and the correct units (0 for miles and 1 for kilometers) using the SPEED arrow keys.
Once you have located the model number and units with the arrow keys, press and hold ENTER. Now you can perform
auto-calibration by pressing START.
The treadmill will run through minimum and maximum speed and elevation. This will take 3 to 5 minutes. Let the treadmill
perform this complete function. “END” will appear in the window when auto-calibration is complete. When auto-
calibration is complete, the treadmill will reboot and return to the start-up screen.
MODEL CONFIGURATION & AUTO-CALIBRATION
STEP 5
M4x15L Black
Button Head Screw
Quantity: 6
M4x15L Silver
Button Head Screw
Quantity: 5
M5x15L Button Head Bolt
Quantity: 4
8.2x15.4x2.0T Flat
Washer
Quantity: 12
8.2x15.4x2.0T Lock
Washer Quantity: 12
M8x20L Socket Head Bolt
Quantity: 8
M8x35L Socket Head Bolt
Quantity: 4
8.2x15.4x2.0T Flat
Washer
Quantity: 3
8.2x15.4x2.0T Lock
Washer Quantity: 3
M8x60L Button Head Bolt
Quantity: 3
5.3x10x1.0T Flat Washer
Quantity: 4
M5x15L Flat Head Bolt
Quantity: 4
8.2x15.4x2.0T Lock
Washer
Quantity: 8
8.2x15x1.5T
Arc Washer
Quantity: 4
M8x20L Button Head Bolt
Quantity: 4
8.2x15x1.4T
Flat Washer
Quantity: 8
M8x15L Flat Head Bolt
Quantity: 4
M8x15L Button Head Bolt
Quantity: 4
ORANGE BAG
BLUE BAG
GREEN BAG
PINK BAG
Screwdriver
8mm T-Shaped Wrench
5mm L-Shaped Wrench
6mm L-Shaped Wrench
5mm T-Shaped Wrench
TOOLS, HARDWARE, & PARTS INCLUDED
Safety Magnet Key, Qty: 1
Color-coded Hardware Bags
Console Mast Covers, Qty: 2
PARTS BOX
T10 ASSEMBLY GUIDE
Assembly
Guide
To avoid possible damage to this treadmill, please follow these assembly steps in the correct
order. Before proceeding though, find your new treadmill’s 2 serial numbers, located on the
underside of the main frame, and on the bottom of the console, and enter here:
Refer to these numbers when calling for service. Be sure to read your Owner’s Guide before using your new
treadmill. If any parts, hardware or tools are missing, please call 1.800.335.4348
NOTE: It is recommended that you apply grease to the threads of each bolt as you assemble your treadmill,
to prevent loosening and noise. Also, during each assembly step, ensure that ALL nuts and bolts are in place
and partially threaded in before completely tightening any ONE bolt.
T10
Non-Folding Treadmill
Frame Serial Number Console Serial Number
STEP 1
STEP 2
STEP 3
STEP 4
STEP 6
• Remove motor cover.
• Attach the right console mast to the
frame using two socket head bolts
(M8x35L) with lock washers and flat
washers in the upper holes of the
console mast, and two socket head
bolts (M8x20L) with lock washers and
flat washers in the lower holes of the
console mast. Attach the L-bracket
to the frame using two socket head
bolts (M8x20L) with lock washers and
flat washers. Screw in all hardware but
DO NOT tighten. Repeat these steps
on the left side.
• PLEASE NOTE: The right console
mast will have an access port for data
cable on the interior surface of the
console mast. Make sure the wire tie
does not get pinched between the
frame and console mast. You must
undo the wire tie before mounting the
right console mast. When the console
mast is secure you can pull the wire
tie through the data cable port.
ORANGE BAG
STEP 1
• Attach right and left handlebars to
console masts with two button
head bolts (M8x15L), lock washer
(8.2x15.4x2.0T) and flat washer
(8.2x15x1.4T) on the sides of the
handlebar and two flat head bolts
(M8x15L) and arc washers on the
underside of the handlebars.
• Slide right and left console mast
covers over support tube.
• Attach support tube to console
masts and secure with two button
head bolts (M8x20L), lock washers
(8.2x15.4x2.0T), and flat washers
(8.2x15x1.4T) on each side. Make sure
all four bolts are screwed in before
tightening any of the bolts.
BLUE BAG
STEP 2
• Attach wire tie at center of console
mast support tube to data cable from
console and feed through support
tube opening to the right side of the
support tube.
• Attach console to support tube
using three long button head bolts
(M8x60L), lock washer (8.2x15x2.0T)
and flat washer (8.2x15x2.0T).
• Attach wire tie from top of right
console mast to data cable and feed
through console mast opening and
connect data cable to Lower Control
Board.
PINK BAG
STEP 3
• Position upper console mast covers
over the console mast on each side
and match to outside covers. Secure
with three black button head screws
(M4x15L).
• Attach right and left side bottle
holders with two flat head bolts
(M5x15L) on top and two button
head bolts (M5x15L) and flat washers
(5.3x10x1.0T) on the bottom of each
bottle holder.
• Tighten all console mast hardware at
the base of each console mast.
• Position motor cover over motor
compartment and secure with five
silver button head screws (M4x15L).
GREEN BAG
STEP 4
Please refer to back cover for this
procedure, then return to Step 6.
AUTO-CALIBRATION
STEP 5
• If the running belt slips when used,
run the treadmill at 2.0 mph and use
the supplied 8mm Allen wrench to
turn the left and right tension bolts
clockwise 1/4-turn at a time until the
belt no longer slips.
• If the running belt is too far to the
right side, run the treadmill at 2.0
mph and use the supplied 8mm Allen
wrench to turn the right tension bolt
clockwise 1/4-turn at a time until
the belt remains centered during use.
If the running belt is too far to the left
side, run the treadmill at 2.0 mph and
turn the left tension bolt clockwise
1/4-turn at a time until the belt remains
centered during use.
BELT TENSION
STEP 6

Other manuals for T10

1

Other Vision Fitness Treadmill manuals

Vision Fitness Folding Treadmill. T9350HRT T9350HRT User manual

Vision Fitness

Vision Fitness Folding Treadmill. T9350HRT T9350HRT User manual

Vision Fitness T9200 User manual

Vision Fitness

Vision Fitness T9200 User manual

Vision Fitness T1450 User manual

Vision Fitness

Vision Fitness T1450 User manual

Vision Fitness T600 User manual

Vision Fitness

Vision Fitness T600 User manual

Vision Fitness T10 User manual

Vision Fitness

Vision Fitness T10 User manual

Vision Fitness T9200 DELUXE User manual

Vision Fitness

Vision Fitness T9200 DELUXE User manual

Vision Fitness T9300 User manual

Vision Fitness

Vision Fitness T9300 User manual

Vision Fitness T600E User manual

Vision Fitness

Vision Fitness T600E User manual

Vision Fitness T9700HRT User manual

Vision Fitness

Vision Fitness T9700HRT User manual

Vision Fitness T9500 DELUXE Use and care manual

Vision Fitness

Vision Fitness T9500 DELUXE Use and care manual

Vision Fitness T9000 User manual

Vision Fitness

Vision Fitness T9000 User manual

Vision Fitness T80 User manual

Vision Fitness

Vision Fitness T80 User manual

Vision Fitness T9700HRT Use and care manual

Vision Fitness

Vision Fitness T9700HRT Use and care manual

Vision Fitness T9400HRT User manual

Vision Fitness

Vision Fitness T9400HRT User manual

Vision Fitness T9000 User manual

Vision Fitness

Vision Fitness T9000 User manual

Vision Fitness T9250 User manual

Vision Fitness

Vision Fitness T9250 User manual

Vision Fitness T9250 User manual

Vision Fitness

Vision Fitness T9250 User manual

Vision Fitness T8100 User manual

Vision Fitness

Vision Fitness T8100 User manual

Vision Fitness T7200 User manual

Vision Fitness

Vision Fitness T7200 User manual

Vision Fitness T8400HRC User manual

Vision Fitness

Vision Fitness T8400HRC User manual

Vision Fitness T9200 User manual

Vision Fitness

Vision Fitness T9200 User manual

Vision Fitness Treadmill TM357 User manual

Vision Fitness

Vision Fitness Treadmill TM357 User manual

Vision Fitness Treadmill T8600S-S/P Configuration guide

Vision Fitness

Vision Fitness Treadmill T8600S-S/P Configuration guide

Vision Fitness T9350 User manual

Vision Fitness

Vision Fitness T9350 User manual

Popular Treadmill manuals by other brands

NordicTrack EXP2000 NCTL11992 user manual

NordicTrack

NordicTrack EXP2000 NCTL11992 user manual

NordicTrack T 22.5 user manual

NordicTrack

NordicTrack T 22.5 user manual

Weslo Cadence G-40 Treadmill manual

Weslo

Weslo Cadence G-40 Treadmill manual

NordicTrack Elite 2900 NTL16905.0 user manual

NordicTrack

NordicTrack Elite 2900 NTL16905.0 user manual

Decathlon DOMYOS COMFORT RUN Original instructions

Decathlon

Decathlon DOMYOS COMFORT RUN Original instructions

NordicTrack C2255 Treadmill user manual

NordicTrack

NordicTrack C2255 Treadmill user manual

Xterra TR6.8 owner's manual

Xterra

Xterra TR6.8 owner's manual

Horizon Fitness Adventure 1 Plus Operation guide

Horizon Fitness

Horizon Fitness Adventure 1 Plus Operation guide

Darwin DF-TM40 Assembly and operating instructions

Darwin

Darwin DF-TM40 Assembly and operating instructions

Insportline inCondi T5000+ user manual

Insportline

Insportline inCondi T5000+ user manual

Weslo Cadence 500 Treadmill Manuel de l'utilisateur

Weslo

Weslo Cadence 500 Treadmill Manuel de l'utilisateur

Weslo Cadence 70 Treadmill Manuel de l'utilisateur

Weslo

Weslo Cadence 70 Treadmill Manuel de l'utilisateur

Trojan STAMINA 320 user manual

Trojan

Trojan STAMINA 320 user manual

ICON Health & Fitness PRO-FORM SPORT 9.0 user manual

ICON Health & Fitness

ICON Health & Fitness PRO-FORM SPORT 9.0 user manual

Techness RUN1000 user guide

Techness

Techness RUN1000 user guide

Christopeit Sport TM 1 Assembly and exercise instructions

Christopeit Sport

Christopeit Sport TM 1 Assembly and exercise instructions

Weslo Cadence 900 Treadmill Gebruiksaanwijzing

Weslo

Weslo Cadence 900 Treadmill Gebruiksaanwijzing

Weslo Cadence 6.0 Treadmill manual

Weslo

Weslo Cadence 6.0 Treadmill manual

manuals.online logo
manuals.online logoBrands
  • About & Mission
  • Contact us
  • Privacy Policy
  • Terms and Conditions

Copyright 2025 Manuals.Online. All Rights Reserved.