manuals.online logo
Brands
  1. Home
  2. •
  3. Brands
  4. •
  5. Vivo
  6. •
  7. Indoor Furnishing
  8. •
  9. Vivo DESK-V000KL User manual

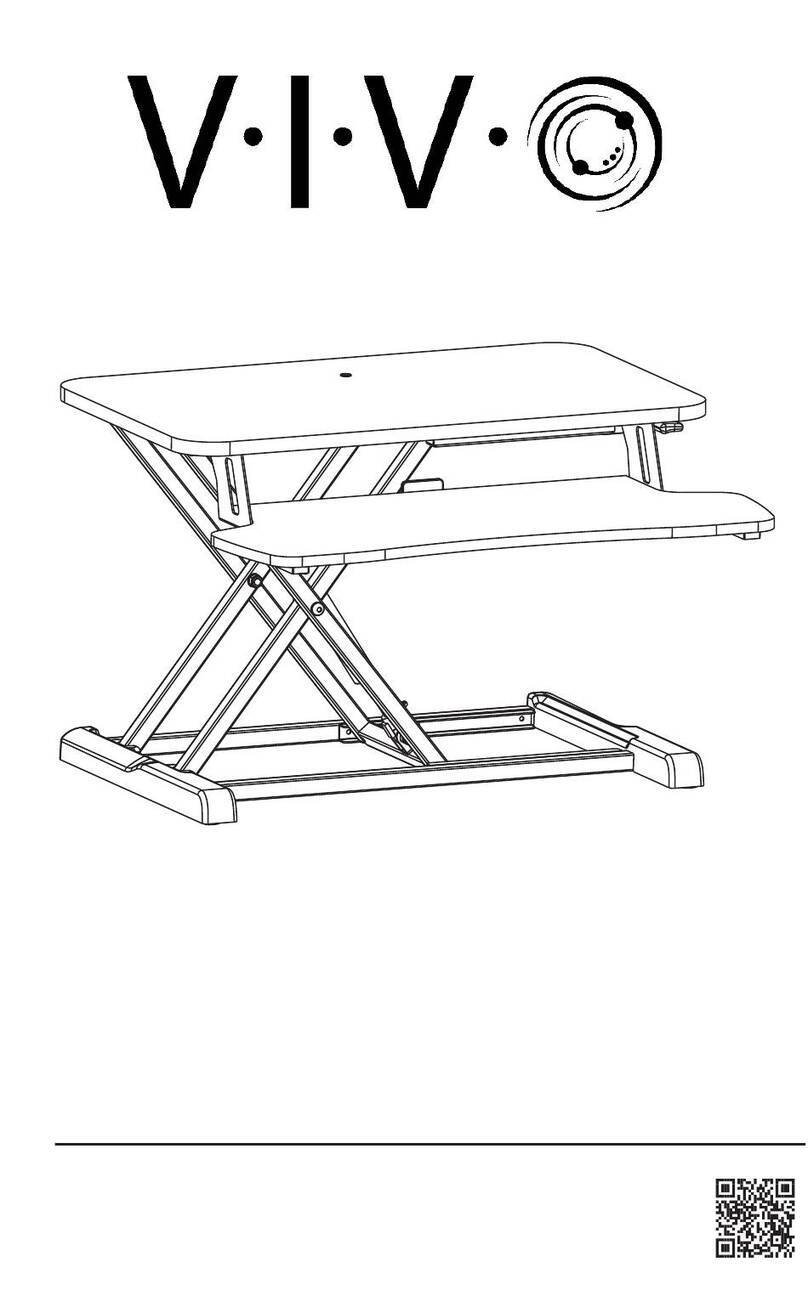
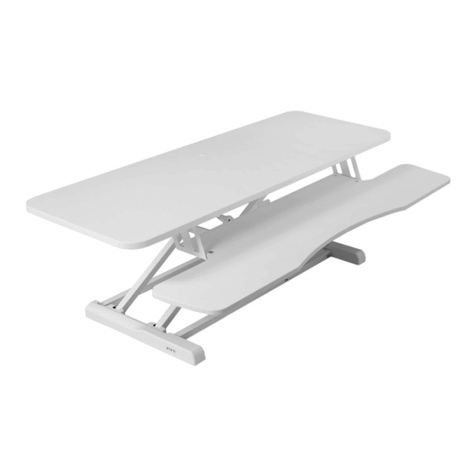
Vivo DESK-V000KL User manual

Other Vivo Indoor Furnishing manuals

Vivo DESK-V101EB User manual

Vivo

Vivo DESK-V101EB User manual

Vivo DESK-TOP3 User manual

Vivo

Vivo DESK-TOP3 User manual

Vivo BEE-HV04C User manual

Vivo

Vivo BEE-HV04C User manual

Vivo DESK-V000KL/W User manual

Vivo

Vivo DESK-V000KL/W User manual

Vivo DESK-GME2B User manual

Vivo

Vivo DESK-GME2B User manual

Vivo DESK-V037KF User manual

Vivo

Vivo DESK-V037KF User manual

Vivo DESK-V000V Series User manual

Vivo

Vivo DESK-V000V Series User manual

Vivo DESK-E-D60B User manual

Vivo

Vivo DESK-E-D60B User manual

Vivo DESK-V101EW User manual

Vivo

Vivo DESK-V101EW User manual

Vivo DESK-EP40TB User manual

Vivo

Vivo DESK-EP40TB User manual

Vivo DESK-M051MW User manual

Vivo

Vivo DESK-M051MW User manual

Vivo DESK-E347B User manual

Vivo

Vivo DESK-E347B User manual

Vivo DESK-V110EW User manual

Vivo

Vivo DESK-V110EW User manual

Vivo DESK-AC03C-B User manual

Vivo

Vivo DESK-AC03C-B User manual

Vivo STAND-TV07W-S User manual

Vivo

Vivo STAND-TV07W-S User manual

Vivo DESK-E355B User manual

Vivo

Vivo DESK-E355B User manual

Vivo DESK-V111V User manual

Vivo

Vivo DESK-V111V User manual

Vivo DESK-TOP43C User manual

Vivo

Vivo DESK-TOP43C User manual

Vivo DESK-KN01C User manual

Vivo

Vivo DESK-KN01C User manual

Vivo DESK-V111VT User manual

Vivo

Vivo DESK-V111VT User manual

Vivo DESK-V201B/G/P User manual

Vivo

Vivo DESK-V201B/G/P User manual

Vivo DESK-V048V/W User manual

Vivo

Vivo DESK-V048V/W User manual

Vivo DESK-SF01W User manual

Vivo

Vivo DESK-SF01W User manual

Vivo DESK-V026KB Series User manual

Vivo

Vivo DESK-V026KB Series User manual

Popular Indoor Furnishing manuals by other brands

Regency LWMS3015 Assembly instructions

Regency

Regency LWMS3015 Assembly instructions

Furniture of America CM7751C Assembly instructions

Furniture of America

Furniture of America CM7751C Assembly instructions

Safavieh Furniture Estella CNS5731 manual

Safavieh Furniture

Safavieh Furniture Estella CNS5731 manual

PLACES OF STYLE Ovalfuss Assembly instruction

PLACES OF STYLE

PLACES OF STYLE Ovalfuss Assembly instruction

Trasman 1138 Bo1 Assembly manual

Trasman

Trasman 1138 Bo1 Assembly manual

Costway JV10856 manual

Costway

Costway JV10856 manual

moss DESIGN Caisson Credenza Assembly instructions

moss DESIGN

moss DESIGN Caisson Credenza Assembly instructions

Aquaglide FULL DECK 15.0 owner's manual

Aquaglide

Aquaglide FULL DECK 15.0 owner's manual

AREBOS AR-HE-SW30 user manual

AREBOS

AREBOS AR-HE-SW30 user manual

Till-Hilft Fulda 87005.330 Assembly instructions

Till-Hilft

Till-Hilft Fulda 87005.330 Assembly instructions

Twoey Outside 2010 quick start guide

Twoey Outside

Twoey Outside 2010 quick start guide

Hettich Easys 200 operating instructions

Hettich

Hettich Easys 200 operating instructions

The bedboss RELAX 404 Series owner's manual

The bedboss

The bedboss RELAX 404 Series owner's manual

Oeseder Möbelindustrie Bern 991 720 Assembly instructions

Oeseder Möbelindustrie

Oeseder Möbelindustrie Bern 991 720 Assembly instructions

Costway HW68469 user manual

Costway

Costway HW68469 user manual

Next ALIX A27743 Assembly instructions

Next

Next ALIX A27743 Assembly instructions

BROSA Hans Assembly guide

BROSA

BROSA Hans Assembly guide

Prodigg MINIKA PBA015T-FUR installation manual

Prodigg

Prodigg MINIKA PBA015T-FUR installation manual

manuals.online logo
manuals.online logoBrands
  • About & Mission
  • Contact us
  • Privacy Policy
  • Terms and Conditions

Copyright 2025 Manuals.Online. All Rights Reserved.

1
- Si San Desko
Worksaion
Instruction Manual
Email: [email protected]
Live chat: www.vivo-us.com
Call: 1-800-371- 6 4
-Moel DES V000L
WARNING: Impact
Hazard! Moving parts
can crush and cut!
EN
Read the entire instruction manual before you start installation and assembly. If you have any questions regarding any of the
instructions or warnings, please contact us for assistance hel[email protected].
CAUTION: Using with products heavier than the rated weights may result in Instability causing possible Injury.
• Mounts must be attached as specified in assembly instructions. Improper installation may result in damage or serious personal
injury.
Safety gear and proper tools must be used. This product should only be installed by professionals.
• Make sure that the supporting surface will safely support the combined welght of the equipment and all attached hardware and
components.
Use the mounting screws provided and DO NOT OVER TIGHTEN mounting screws . This product contains small items that could
be a choking hazard if swallowed. Keep these items away from children. This product is intended for Indoor use only. Using this
product outdoors could lead to product fallure and personal Injury.
IMPORTANT: Ensure that you have received all parts according to the component checklist prior to installation. If any parts are
missing or faulty, contact us for a replacement [email protected]
MAINTENANCE: Check that the bracket is secure and safe to use at regular Intervals (at least every three months).
FR
Lisez entièrement le gulde d'utilisateur avant de commencer l'installation et le montage. Si vous avez des questions concernant les
Instructions ou les avertissements, veuillez contacter votre distributeur local pour une assistance.
ATTENTION: L'utilisation de produits plus lourds que les polds nominaux Indiqués peut entraîner une instabilité causant des
blessures potentielles. . Les supports doivent être joints comme spécifié dans les instructions de montage. Une mauvaise
installation peut entraîner des dommages ou de graves blessures aux
personnes.
• Un équipement de sécurité et les outils appropriés dolvent être utilisés. Ce produit devrait être Installé unlquement par des
professionnels.
• Assurez-vous que la surface de soutien supporte en sécurité le poids combiné de l'équipement et de tous les matériaux et
composantes associés. . Utilisez les vis de montage fournies et NE SERREZ PAS TROP les vis de montage
Ce produit contient de petites plèces qui peuvent causer un étouffement si elles sont avalées. Elolgnez ces plèces des enfants. . Ce
produit est prévu uniquement pour une utilisation à l'intérieur. L'utilisation de ce produit à l'extérieur peut entraîner une défaillance
du produit ou des blessures aux
personnes
IMPORTANT: Avant l'installation, assurez-vous que vous avez reçu toutes les pièces selon la liste de vérification des composants. Si
une pièce est manquante ou endommagée, téléphonez à votre distributeur local pour qu'il la remplace.
MAINTENANCE: A intervalles réguliers (au moins tous les trois mois) vérifiez que le support est d'utilisation sôre et fiable
ES
Lea todo el manual de instrucciones antes de comenzar la instalación y ensemble de la unidad. Si tiene alguna inquietud con
respecto a las instrucciones o advertencias, comuníquese con su distribuidor local.
PRECAUCION: utilizar con productos de mayor peso al indicado en los límites de peso podría ocasionar inestabilidad y posibles
heridas personales.
• Los soportes deben acoplarse tal como se indica en las instrucciones de ensamble. Una incorrecta instalación podra ocasionar
daños y serias heridas personales.
• Utilice las herramientas y equipo de seguridad adecuados. Este producto solo debe ser Instalado por profesionales.
• Asegúrese de que la superficie de fijación sostenga de manera segura el peso total del equipo y todos sus componentes y
hardware.
• Utilice los tomillos de ensamble suministrados y NO aplique demasiada tensión a los tomillos. . Este producto contiene piezas
pequeñas que representan un riesgo de asfixia. Mantenga estas piezas fuera del alcance de los niños. . Este producto está
diseñado para uso en interiores solamente. Utilizar este producto en exteriores podría ocasionar fallas y heridas personales.
IMPORTANTE: Asegúrese de que haya recibido todas las piezas según la lista de verificación de componentes para la instalación.
Si falta alguna de las partes, o está dañada, comuníquese con su distribuidor.
MANTENIMIENTO: Compruebe periódicamente que el soporte esté asegurado y listo para usar (al menos cada tres meses).
Imoran Safe Informaion
READ AND FOLLOW ALL SAFE ! REQUIREMEN S
2
Email: help@vivo-us.com
Live chat: www.vivo-us.com
Call: 1-800-371- 6 4
For more VIVO products, check out our website at
www.vivo-us.com.
If any parts are received damaged or defective, please contact us. We
are happy to replace parts to ensure you have a fully functional product.
Conac us a
Last updated: 08/20/18
Online Version
Step 3: Cut the large plastic tie beneath
desk (A). Raise the desk by squeezing
the handles underneath the desk. Cut
the four plastic ties on the base of the
desk.
Keep monitor and laptop
base fully on the work
surface. Allowing any part
of base or stand to hang
off the edge may result in
property damage and/or
personal injury.
Raise work surface
slowly. Raising work
surface too fast may
create an unstable
situation resulting in
property damage and/or
personal injury.
Leave enough slack in cable
to allow for full range of
vertical motion (16.7”/42.4
cm). Failure to heed this
warning may result in
property damage and/or
personal injury.
To avoid the potential to
pinch cables, it is important
to follow the cable routing
instructions in this manual.
Failure to follow these
instructions may result in
equipment damage or
personal injury.
Step 1: Separate parts D into D1 and D2.
Step 2: Press D1 into holes on top of
keyboard tray (B). Apply pads (F) to
underside of keyboard tray.
Assembl Ses
Scan the QR code with your mobile device or follow the link to helpful videos and
specifications related to this product.
Package Conens
Weigh Caaci
33 lbs 14.9 k
CAUTION: DO NOT EXCEED MAXIMUM LISTED WEIGHT CAPACITY, SERIOUS
INJURY OR PROPERTY DAMAGE MAY OCCUR!
https://vivo-us.com/products/desk-v000kl
F (x3)
E (x2)
D (x4)B (x1) C (x3)
G (x1)
A (x1)
Step : Apply cable clips (E) to underside of desk and manage cables.
Step 4: Place keyboard tray (B) on metal brackets on desk (A). Secure keyboard tray
to brackets using screws (D2) and screwdriver.