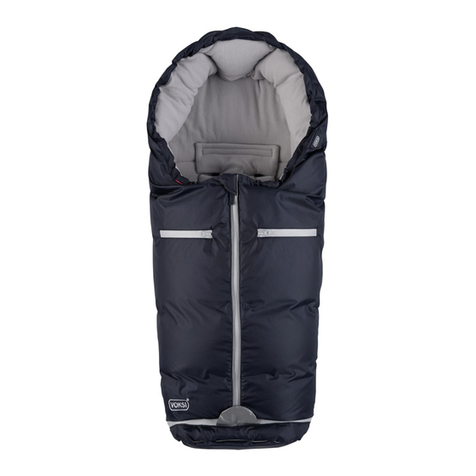
Voksi Classic Multifunction User manual

NO - Bruksanvisning
VoksiClassicMultifunction
GB - Usermanual
VoksiClassicMultifunction
SE - Instruktionsbok
VoksiClassicMultifunction
DK - Brugsanvisning
VoksiClassicMultifunction
DESIGNFORYOUR BABY!

NO-Side6-11
Voksi ClassicMultifunctionharulike brettemetoder
avhengigav lengdepå barnetog temperatur.Dendeles
inni babybretting, standardbrettingopp tilca toårog
treårsbretten.I tillegghar visommerbretten.Produktet
kanved hjelpav enbæreplategjøresomtilenpraktisk
bærebagfor barnopptil9kg.I tilleggkanenbytteut
ulldynenmed ensommerdyneirenbomull.
GB- Page12-17
Voksi ClassicMultifunction bagshave severalfolding
methodsthat aredependentonthelengthofthechild
andthe temperature,i.e.ababyfold, astandardfoldfor
childrenup totheageofaround 2andafoldforthree-
year-olds.Thereisalsoasummerfold.isproductcan be
transformedinto apractical carryingbag forchildren
weighingup to9kgwith thehelp ofa carryingboard.
Thewoollen duvetcanalsobereplacedwith apure
cottonsummer duvet.
SE- Sidan20-25
Voksi ClassicMultifunction harolika vikningsmetoder
beroendepå temperaturochbarnetslängd.De delasin
iBabyvikning,standardvikningoch treårsvikning.Föru-
tom dessa nns sommarvikningen. Produkten kan med
hjälpav enbärplatta görasom tillen praktiskbabyliftför
barnupp till9 kg. Mankan ävenbyta utulldynan moten
sommardynai renbomull.
DK- Side26-31
Voksi ClassicMultifunction harforskellige foldevari-
anterafhængig afbarnets størrelseogtemperatur.Man
skelnermellem babyfoldning, standardfoldningoptil
ca.to årog treårsfoldning. Herud overharvi sommer-
foldning.Voksi ClassicMultifunction kanved hjælpaf
enbæreplade fungeresom enpraktisk liftfor børnop
til9 kg. Omsommeren kanmanudskiftevinterdynenud
medlet sommerdyneirenbomuld.

ILL.1
ILL.2
InnsideavVoksiposen / Inside and underside of the Voksibag
InsidaavVoksipåsen / Inderside af Voksiposen
InnsideavVoksiposen / Inside and underside of the Voksibag
InsidaavVoksipåsen / Inderside af Voksiposen
* Snorpar8erplassert inne i dynen og må tasutvedtreårsbretten.
* Thepairofnr.8tieshavebeenplacedinsidethe duvet. They need
tobe takenoutifusingthe fold for three-year-olds.
* Snörningspar8ärplaceradeinutidynanochskadrasutvidtreårsvikning.
* Snorpar8 er placeretindeidynen og må strækkes udgennemde
forberedtehuller nårmanskallavetreårsfoldningen.
ILL.3
3

ILL.4
ILL.5
ILL.6
ILL.7
ILL.8
ILL.9
4

ILL.10
ILL.11
ILL.12
ILL.13
ILL.14
ILL.15 ILL. 16
ILL.3
5

NO
Monteringsvideo
Monteringsvideo av brettemetodene nner du på
www.voksi.com
1.0 BABYBRETTEN
1.1 Legg posen ut på et att underlag. Se ill. 1
1.2 Fotdelenbrettesinn tilder konturenepå
sideklaene begynner.
1.3 Endenav fotdelenbrettestilbaketil snorpar1 som
erpåsydd stolpenpåtrekketsutside.
1.4 Knyten enkelknute(medsnorpar1)til stolpeni
endenav fotdelen.Se ill.2
1.5 Brett sideklaene på begge sider inn. Se ill. 3
1.6 Knytderettersnorene2-2, understolpen,ibunn
sammenmed ensløyfe. Seill. 4
1.7 Snorene3-3tresunderstolpenog knyttesien
sløfeknutesammen medløkke4.Se ill.5
1.8 Knytt derettersnorene5-5sammen medløkke 6i
ensløyfe. Seill. 6
1.9 Snoreneihodeenden7-7strammes innmot
babyenshode ogknyttes slikat detblir luntfor
barnet.Plasseralltidsnorene7-7 tilbakeilommen
slikat babyenikkekan fåtak idisse. Seill. 7
2.0 STANDARDBRETT
2.1 Legg posen ut på et att underlag. Se ill. 1
2.2 Fotdelenbrettesinn. Seill.8
2.3 Brett sideklaene på begge sider inn. Se ill. 3
2.4 Snorene2-2 tresunderstolpen,over snorpar1og
knyttesmedensløfeknute.Se ill.4
2.5 Snorene3-3 tresunderstolpenog knyttesien
sløfeknutesammen medløkke4.Se ill.5
2.6 Knyttderettersnorene5-5sammen medløkke 6.
Seill. 6
2.7 Snorenei hodeenden7-7 strammesinn mot
barnetshode ogknyttesslik atbarnet ikkekanfalle
utav Voksiposen. Plasseralltid snorene7-7tilbakei
lommenslik atbarnet ikkekanfåtakidisse.Seill.7
3.0 TREÅRSBRETTEN
3.1 Legg posen ut på et att underlag. Se ill. 1
3.2 Fotdelenbrettesopp tilsnorpar 1-1. Seill. 9
3.3 Brett sideklaene på begge sider inn. Se ill. 3
3.4 Snorpar 8-8er plassert innei trekket,på dynen.
Seill. 1Tasnorene utav trekket.
Knyt derettersnorene8-8ibunnunderstolpen,
sammenmed ensløfeknute. Seill. 10
3.5 Snorene22tresunder stolpenogfestesmed en
sløyfe.Se ill.11
6

NO 3.6 Snorene3-3 tresunderstolpen ogknyttesi en
sløfeknutesammen medløkke4.Se ill.12
3.7 Knyttderettersnorene5-5 sammenmed løkke6.
Seill. 13
1.6 Snoreneihodeenden7-7 strammesinn mot
barnetshode ogknyttesslik atbarnet ikkekanfalle
utav Voksiposen. Plasseralltid snorene7-7tilbakei
lommenslik atbarnet ikkekanfåtakidisse.Seill.7
4.0 SOMMERBRETTEN
4.1 Brettutposen.Seill.1
4.2 Åpne lommentil innerdynen.Se ill.1 nr11
4.3 Løsndynen påinnsiden avtrekketi nederkant
(2knuter)
4.4 Brett innerdyneninnenfor posen.Se ill.14
Dablir detdobbel bunnog kunet tynttrekkover
barnetsom passergodttilmilde temperaturer.
4.5 Fortsett monteringetterønsketvalg;Babybretten,
StandarbrettenellerTreårsbretten.
5.0 VINTERBRETTEN
5.1 Følgmontering etterønsketvalg: Babybretten,
StandarbrettenellerTreårsbretten
5.2 Løsn løkke4 og6, knyttderettersnorparene uten
løkkene.Festsnorpar 3under stolpen.
5.3 Løkke6 og9skalsammenpåfølgendemåte:
Treløkke6 inni løkke9.Derettertresløkke9inni
løkke6.Se ill.15
5.4 Fest løkke4 påtreproppen10.Se ill.16
6.0 HULLTILVOGNSELER
6.1 Det ersyddforsterkninger rundtseks muligehuller
tilseler.
6.2 Forsterkningeneer syddinn påundersiden av
yttertrekket,iinnerdynen(ulldynen og
sommerdynen)og påinnsidenavyttertrekket.
6.3 Finnut hvilkehullplasseringer sompasser tildin
sele.
6.4 Klippkun dehullene sompasser dinsele.
6.5 Klippen rettlinje innenfordesydde
forsterkningene,både påundersiden avytter
trekket,i innerdynenog påinnsidenavtrekket.
6.6 Ved åklippe hulli Voksiposen,kandetblinoe
varmetapder denye hulleneer laget.Forå unngå
detteanbefaler viat detlegges etteppe mellom
barnetog hullene.
7

7.0 VASKEANVISNINGYTTERTREKK
BOMULL
Kontrolleralltidvaskeanvisningpå produktet.
7.1 Yttertrekketkan vaskespå 60grader.
7.2 Bruk ikkevaskemidlersom inneholderblekemiddel.
7.3 Trekketvrenges ogvaskesmed vaskemiddelfor
fargedetekstiler.
8.0 RENGJØRING YTTERTREKKSKINN
Kontrolleralltidvaskeanvisningpå produktet.
8.1 Yttertrekkav skinnskaltørkesmed envåt klut.
Innerdelenav trekketkan løsnesmed glidelåsenog
vaskes,se 7.0.
9.0 RENGJØRING AV ULLDYNEN.
Kontrolleralltidvaskeanvisningpå produktet.
9.1 Ved lettererengjøringav ulldynen,legges dennei
fryserenover natten,ien tettplastpose.
9.2 Deretterstøvsuges dynen.
9.3 Dynenluftesså oftesom muligi tørt vær.Åpne
posenetter brukslik atden fårtørkeså fort som
mulig.
10.0RENSAVSKITTEN ULLDYNE
Kontrolleralltidvaskeanvisningpå produktet.
1o.1 Er dynenskitten skaldenne renses.
11.0 VASKEANVISNINGSOMMERDYNE
BOMULL
Kontrolleralltidvaskeanvisningpå produktet.
11.1 Sommerdynen kanvaskespå40gradereller renses.
11.2 Denskal ikkeklorblekes.
11.3 Sommerdynenkantørketromles.
11.4 Sommerdynenskal vaskesfør bruk.
12.0 VASKEANVISNING SOMMERDYNE
SILKE
Kontrolleralltidvaskeanvisningpå produktet.
12.1 Sommerdynenmårenses.
13.0 RENGJØRINGAVBÆREPLATE
Kontrolleralltidvaskeanvisningpå produktet.
13.1 Ved vaskav bæreplatentaes trekketav platen.
13.2 Trekketskal vaskespå sammemåtesom
ulldynen.Se 9.0 og10.0
13.3 Skalikketørketromles.Lesmer omvasking
avdin Voksi posepå www.voksi.com.
8

14.0DEMONTERINGAVINNERDYNEFØR
RENGJØRING
14.1 Løsnalle knutenepå snorene.
14.2 Voksiposener ogsåfestet itrekketmed tresnorer
påinnsiden avtrekket.Toer ifotenden ogeneri
toppenav hodeenden.
14.3 Nåralle snorererløsnettrekkesdynenutavtrekket.
14.4 Vrengtrekketslik atalle snoreneblirliggendeinni,
oglukk borrelåsen.Davildetbliminstmuligslitasje
på stoargen og på snorene.
15.0MONTERINGAVINNERDYNEETTER
RENGJØRING
15.1 Etter vask legges dynen att, se ill 1:
15.2 Løsn alleknutenepåsnorene.
15.3 Leggdynen inni trekket.
15.4 Festsnorenepå innsidenav dynen,to ifotendenog
eni toppenav hodeenden.
15.5 Trekkde6(eller8vedbruk avtreårsbretten)
snoreneut avhullene.Passpåatsnorenekommer
utav riktigehull. Huskå trekkeut snor4 ivenstre
sømside.
16.0ADVARSEL
16.1 Vedbruk avVoksiposener detviktig atute
temperaturog værforhold alltidtaes tilvurdering,
slikat barneter riktigkledd nårbarnet liggeri
Voksiposen.
16.2 Snorpar7 kanknyttes slikat hodeendenskaper en
beskyttendekant.
16.3 Snorpar7 skalalltid puttestilbakei lommenslik at
barnetikke kanlekemed ellersvelge disse.
16.4 Ved brukav voksiposenskal alltidinnerdyneni
hodeendenvære festetitrekkemeden
sløyfepå innsidenav trekket.
16.5 Ved knytting avvoksiposenskalalltidsnorene
gjennomstolpen. Vianbefaler atman fester
snorpareneovernærmeste sømpå stolpen.
16.6 Ved vaskav Voksiposensdeler,les alltid
vaskeanvisningennøye.Voksiposener lagetav ull,
somkrever kunrens.
16.7 Ved brukav sommerdyneskaldennevaskesfør
brukfor åpasseoptimalt tilvoksiposen.
16.8 Væroppmerksom påfareved åpenild ellerandre
varmekilderslik somelektriskeovner,gassovner
etc.i nærhetenavVoksiposen.
16.9 Benyttkun reservedelerogtilbehørleverteller
godkjentav produsent.
16.10 Forbruk avvoksiposen sombærebag,kan denne
ogsålastes nedpå www.voksi.com
16.11 Kun babybrettenskal benyttesnår Voksiposen
brukessom bærebag.
9

10
BÆREPLATEN
Ved brukav bæreplatenforvandlesdinVoksipose raskttil
ensmart ogpraktisk bærebag.
Avsikkerhetsmessige grunnerfesterviselenetil plateni
stedetfor iposetrekket!Pass derfor påat selenesomer
festeti platenerpåundersidennårbæreplatenmonteres
innog utav Voksiposen.
Bæreplaten er 28 x 76 cm og passer de este typer vog-
ner. Bærebagenkanbrukesopp tilbarnet veiermaks9kg.
Viktig:Detersværtviktigåalltidfølgemonteringsanvisning.
Hvisdu ikkeharbruksanvisningkandennelastesned på
www.voksi.com.Bruksanvisning beholdesfor senere
bruk.
Hvisdu hartatt utbæreplatenut avposen:
1. Legginn bæreplatenmedselene underbæreplaten,
ogmed platenunder ulldynen,mellom dynenog
yttertrekket.
Denavrundede endenpå bæreplatenerhodeenden,
somskal øversti Voksiposen. Ladetgjenståca15cm
frabæreplatenskantogopptiltoppen av
Voksiposen liggende att. Pass på at båndet på
innsidenav yttertrekket,itoppen avposen erknyttet
fasti ulldynen.
2. Dra selene ut gjennom de re hullene i sidesømmen
påposen, toper side.Den lengsteselenskaluti de
toøverstehullet.Viktig:Påseatselene kommerrett
utav hulleneog ikkepåskrå.Deterlikeviktig atselene
innei posenhar sammeretningsomhullene.Dahar
bæreplatenriktigplasseringogbarnetsvektblir riktig
fordeltslik athodeterhøyereenn bena.Førlåsene
påden korteoglangeselen sammenpå utsidenav
posen”klikk”. Passpå atremmeneikkeer vridd.
3. VedmonteringavposenfølgVoksi
monteringsanvisning,har duden ikke,kanduhente
denpå www.voksi.com.I kombinasjonmed bærebag
skalkun babyversjon brukes.
4. Det ersværtviktigåstrammesnøringenrundthodet
ikombinasjon medbærebag,slik atposens
hodeendefungerer somenbeskyttendekant ogat
barnetikke glirutvedbæring.Til sluttkan du
etterskyve bæreplatenhelt inni posensende.

NYTTIGE OG
VIKTIGETIPS
NårVoksiposenbrukessom
bærebager detviktigat
tyngdepunktetpå posener
nederst,altsåved benatil barnet.
Dettemedføreratbarnetshode
alltider dethøyestepunktet.
• Bærebagen eregnet forbarnsomikkekan sittepå
egen hånd, rulle seg rundt eller reise seg opp på alle re.
• Barnetsmaksimumsvekt vedbrukavbæreplateer 9kg.
• Bærebagenbør kunligge påfast, horisontaltog tørt
underlag.
• Unngåat andrebarnlekeruten oppsyni nærhetenav
bærebagen.
• Benytt ikke bærebagen dersom en eller ere deler er
revnet,ødelagt ellermangler.
• Benytt kunreservedelerlevert ellergodkjent av
produsent.
• Væroppmerksompåfarevedåpenildellerandre
varmekilderslik somelektriskeovner,gassovner etc.i
nærhetenav bærebagen.
• Bæreplatenmedselerskalkontrolleresregelmessig
forslitasje ogeller skade.
• Påseat platener riktigplassert, Voksiposen erriktig
brettetogatsnøringenihodeendenerknyttetstramt.
• Babyen skal ligge innenfor bæreplatens ate. Pass
spesielt på at hode er innenfor bæreplatens ate.
• Posenskalikkebrukesaleneibil.Derskalbarnetsikres i
nødvendigsikkerhetsutstyrsomf.eks BeSafebilstoler.
11

GB
Assemblyvideo
Anassemblyvideoshowingvarious foldingmethods is
availableon www.voksi.com
1.0 BABYFOLD
1.1 Lay the bag out on a at surface. See ill. 1.
1.2 Foldin thefoot pieceuptothe pointwhere the
contours of the side aps begin.
1.3 Theend ofthe footpieceshouldbefoldedback
tothe pairof no.1 tiesthat havebeensewnon to
thebar onthe undersideof thecover.
1.4 Fasten(the pairof no.1 ties)using asingle tieto the
barat theend ofthe footpiece. Seeill.2.
1.5 Fold the side aps in on both sides. See ill. 3.
1.6 Then fastenthepairofno. 2ties ina bowbeneath
thebar atthe bottom.See ill.4.
1.7 Thepair ofno.3 tiesshould befedbeneaththebar
andfastened usinga singletie toloopno. 4.Seeill.5.
1.8 Thepair ofno.5 tiesshould thenbe fastenedina
bowto loopno.6.See ill.6.
1.9 Thepair ofno.7 tiesat theheadendshouldbe
pulledin towardsthe baby’sheadandfastenedso
itis warmand comfortable forthe child.
Alwaysplace theno.7 tiesback inthe pocketso
thatthe babycannot gethold ofthem. Seeill.7.
2.0 STANDARDFOLD
2.1 Lay the bag out on a at surface. See ill. 1.
2.2 Thefoot pieceshould befolded in.See ill.8.
2.3 Theend ofthefootpieceshould befolded back
tothe pairof no.1 tiesthat havebeensewnon to
thebar onthe undersideof thecover.
2.4 Thepair ofno.2 tiesshould befed beneaththe bar
abovethe pairofno. 1ties andfastened ina bow.
Seeill. 4.
2.5 Fold the side aps in on both sides. See ill. 3.
2.6 Then fastenthepairofno. 2ties ina bowbeneath
thebar atthe bottom.See ill.4.
2.7 Thepairofno.3tiesshouldbefedbeneath thebar
andfastened usinga singletie toloopno. 4.Seeill.5.
2.8 Thepair ofno.5 tiesshould thenbe fastenedina
bowto loopno.6.See ill.6.
2.6 Thepair ofno.7 tiesat thehead endshould be
pulledin towardsthe baby’sheadandfastenedso
thatthe babycannot fallout ofthe Voksibag.
Alwaysplace theno.7 tiesback inthe pocketso
thatthe babycannot gethold ofthem. Seeill.7.
12

3.0 FOLDFORTHREE-YEAR-OLDS
3.1 Lay the bag out on a at surface. See ill. 1.
3.2 Thefootpieceshouldbe foldedup tothepairof
no.1ties. Seeill. 9.
3.3 Theendof thefoot pieceshouldbefoldedbackto
thepairof no. 1ties thathavebeensewnontothe
baronthe undersideof thecover.
3.4 Thepairofno.8tieshavebeenplacedinsidethe
coveroftheduvet.See ill.1.Removethe tiesfrom
thecoverandthenfastentheno.8tiesinabowat
thebottombeneaththebar.Seeill.10.
4.0 SUMMERFOLD
4.1 Foldout thebag.Seeill.1.
4.2 Openup thepocketof theinner duvet.Seeill.1,no.11.
4.3 Loosenthe duvetontheinsideofthecover
attheloweredge(2ties).
4.4 Foldthe innerduvetinsidethebag.Seeill.14.
Therewill thenbe adouble bottomandjustone
thincoveroverthechildwhich iseminently suitable
formildweather.
4.5 Continueassembly asdesired:babyfold,standard
foldorfold forthree-year-olds.
5.0 WINTERFOLD
5.1 Followtheassemblyinstructions asdesired:
babyfold,standardfoldorfold forthree-year-olds.
5.2 Loosenloopnos. 4and 6and thenfastenthepairof
tieswithoutthe loops.Fastenthepairofno. 3ties
beneaththebar.
5.3 Loopnos. 6and 9should beplacedtogetheras
follows:feedloopno.6intoloop no. 9and then
loopno.9 shouldbe fedintoloopno.6.Seeill.15.
5.4 Attachloopno.4tothewoodenpeg,no.10.Seeill.16.
6.0 HOLESFORTRAVELSYSTEM
HARNESSES
6.1 Reinforcementshavebeensewnaroundsix
possibleharness holes.
6.2 Reinforcementshavebeensewnonthe underside
oftheoutercover,insidetheinnerduvet(woollen
andsummerduvets)andontheinsideoftheouter
cover.
6.3 Findoutwhich holelocations aremostsuitable
foryourharness.
6.4 Only cut the holes which t your harness.
6.5 Cutastraightlineinsidethesewnreinforcements
ontheunderside ofthe outercover,intheinner
duvetandontheinsideofthecover.
6.6 IfyoucutaholeinyourVoksibagtheremay be
somelossofheatwhere thenew holeshave been
made.In ordertopreventthis werecommend
placinga rugbetween thechild andthe holes.
13

7.0 WASHINGINSTRUCTIONSFOR
COTTONOUTERCOVERS
Alwayscheckthewashinginstructionsontheproduct.
7.1 Outercoverscan bewashed at60oC.
7.2 Do notuse detergentsthat containbleach.
7.3 Thecoveris tobeturnedinsideout andwashed with
detergentforcoloredfabrics.
8.0 CLEANING LEATHEROUTERCOVERS
Alwayscheckthewashinginstructionsontheproduct.
8.1 Leatheroutercoversshouldbewipedusinga
dampcloth. Theinside part ofthe covercanbe
unzippedand washed,see Item7.
9.0 CLEANING WOOLLENDUVETS
Alwayscheckthewashinginstructionsontheproduct.
9.1 Simple cleaningof woollenduvetscan be
undertaken byplacingthemina sealedplastic bag
inthe freezerovernight.
9.2 Theyshould thenbe vacuumcleaned.
9.3 Theduvetshould beairedasoftenas possibleindry
weather. Openthe bagafterusesothat itwill dryas
quicklyas possible.
10.0CLEANINGDIRTY WOOLLENDUVETS
Alwayscheckthewashinginstructionsontheproduct.
1o.1 If aduvet isdirty itshould becleaned.
11.0 WASHINGINSTRUCTIONSSUMMER
DUVETCOTTON
Alwayscheckthewashinginstructionsontheproduct.
11.1 Summer duvetscan bewashed at40°C orcleaned.
11.2 Theyshouldnotbebleached.
11.3 Summerduvetscanbetumble-dried.
11.4 Summerduvetsshouldbewashedbeforeuse.
12.0 WASHINGINSTRUCTIONSSUMMER
DUVETSILK
Alwayscheckthewashinginstructionsontheproduct.
12.1 The duvetshould becleaned.
13.0 CLEANINGCARRYINGBOARDS
Alwayscheckthewashinginstructionsontheproduct.
13.1 Beforewashing acarrying boardthecovershould
beremovedfrom theboard.
13.2 Thecovershouldbewashedinthe sameway as
woollenduvets, seeItems9.0and 10.0.
13.3 Theyshould notbe tumble-dried.Further details
aboutwashing yourVoksibag areavailable on
www.voksi.com
14

14.0DISMANTLINGOFINNERDUVETS
BEFORECLEANING
14.1 Loosenalltheties.
14.2 Voksibag coversalsohave threetieson theinside
ofthe cover,two atthe footend andone atthetop
ofthe headend.
14.3 Onceall theties havebeenloosenedtheduvetcan
bepulled outof thecover.
14.4 Turnthe coversothatallthe stringsare leftinside,
andfasten theVelcrofastener. Thenthere isminimal
wearon thefabric colorandstrings.
15.0ASSEMBLYOFINNERDUVETSAFTER
CLEANING
15.1 Inner duvets should be laid at after washing, see ill. 1.
15.2 Loosenall theties.
15.3 Insert theduvet insidethe cover.
15.4 Fasten theties ontheinsideoftheduvet,two atthe
footend andone atthe topof theheadend.
15.5 Pullthe 6ties outof theholes (8ties ifyouareusing
aboard forthree-year-olds).
Ensurethat thetiescomeoutof theright holes.
Remembertopullouttieno.4on theleft-hand side
seam.
16.0WARNING
16.1 When usingaVoksibagitis important thatyou
alwaystake theoutdoortemperatureand weather
conditionsinto account,ensuring thatthe childis
wearingthe correctclothing whenit liesinside its
Voksi bag.
16.2 Thepair ofno.7tiescanbefastenedso thatthe
headend createsaprotectiveedge.
16.3 Thepair ofno.7 tiesshould alwaysbe putback
insidethe pocketsothatthechildcannotplaywith
orswallow them.
16.4 Whenusing aVoksibagthe headend ofthe inner
duvetshould alwaysbe tiedtotheinsideofthe
coverusingabow.
16.5 Whenusing theties onyour Voksi bagthey should
alwayspassthroughthe bar. We recommend
fasteningthe tiesoverthenearestseam onthebar.
16.6 Whenwashing parts ofyourVoksibag youshould
alwaysread thewashinginstructionscarefully.
Voksi bagsaremadeofwoolwhich requirescleaning.
16.7 Summerduvets, whenused, shouldbe washed
before use in order to ensure an optimal t inside
theVoksibag.
16.8 Forinformation aboutusingyourVoksi bagas a
carrying bagpleasedownloadfromwww.voksi.com.
15

16
CARRYINGBOARD
Byusing acarryingboard yourVoksibag isquickly
transformedinto apractical carryingbag.For safety
reasonsweattachthestrapstothe boardandnotto
thecover!Forthis reason,pleasealwaysseetothat the
strapsattached tothe boardareon theundersidewhen
youpush theboardintothe Voksi bag.
The carrying board is 28 x 76 cm and ts into most prams.
Thecarryingboardcan beused uptomaximum9kg
weight.
Important: itis veryimportant, alwaysto followthe
instructionmanual. Ifyou donot haveit,itcanbe down-
loadedat www.voksi.com
Theinstruction manualis tobe keptfor lateruse.
Ifyou havetakenthe carryingboardout ofthe bag:
1. Placethe carrierboardwiththetheharnessplaced
underneathand theboardwiththewoolduvet,
betweenthe duvetandtheoutercover. Therounded
endof theboardistheheadpart,whichisto bein the
topof theVoksibag.Leaveaspaceof about15 cm
between the edge of the board and the top of the at
Voksi bag.Make surethattheribbon insidethe duvet
coveratthetopof thebag is‘ tiedtotheduvet.
2. Pullthe strapsthroughthefourholesintheseemon
theside ofthe bag,two oneach side.The longer
strapis tocomeoutoftheupperhole.Important:
Seeto thatthe strapsarenot twistedwhen they
comeout ofthe holesand thatthey passstraightly
fromthe boardthrough theholes. Inthiswaythe
carrying boardis correctlyplacedand thechild’s
weightis evenlydistributedsothattheheadishigher
thanthe legs.Click thelock ofthe shorter strapinto
thelonger strap.Make surethat thestraps arenot
twisted.
3. WhenfoldingtheVoksibag,please followthe
instructionsin themanual. Ifyou donot haveit,it can
bedownloaded atwww.voksi.com
Asa carryingbag, onlythe babyversionistobe used.
4. It isvery important thatthe strapsarelaced up
properlyaroundthe child’shead, whenused asa
carrying bagsothattheheadendofthebag servesas
aprotectingedgeandthechilddoes notslip out
whencarried inthe bag.Finally,pushtheboard an
extra time rmly into the end of the bag.

USEFULAND
IMPORTANTTIPS
WhenVoksiisusedasa
carrying bagitisimportant
thatthe centreofgravityisat
thebottom ofthe bag,i.e. atthe
child’slegs. Thismeans thatthe
child’shead alwayswill bethe
highestpoint.
• The carrying board is 28 x 76 cm and ts into most
prams.
• Theproduct, usedasacarrying bag,is suitablefor
childrenthat cannotyetsitontheir own,rolloveror
standon allfours.
• Stopusing thecarrying boardwhen thechild’sweight
exceeds9 kg.
• TheVoksicarrying bagshould onlybe putonasteady,
horizontaland drysurface.
• Avoidthat otherchildrenplay unattendednear the
Voksi bag.
• Donot usethe carryingbagifoneormore ofthe parts
aretorn,dammagedormissing.
• Useonly originalsparepartsorspareparts
acknowledgedby theproducer.
• Be aware of danger near open re or other sources of
heatsuch asradiant heatersand soon.
• Thecarryingboardis tobe examinedregularelyto
detectdammage orsigns ofwear.
• Makesurethat theboardiscorrectlyplaced,theVoksi
bagcorrectlyfoldedandthestrapslaced upproperlyin
thehead area.
• Thebaby mustlie withinthe areaof theboard, thisis
especiallyimportant whenit comestothehead.
• TheVoksibagisnotto beused incars asthe only
equipment.In thecar alwaysuse aproperchild
restraintsystem,asforinstanceBesafe carseats.
17


Monteringsvideo
Monteringsvideo med vikningsmetoderna nns
påwww.voksi.com
1.0 BABYVIKNING
1.1 Läggpåsenpåettplantunderlag.Se ill.1
1.2 Fotändanviks inmot därkonturenav
sidostyckenabörjar.
1.3 Ändenav fotändanviks tillbakatill snörningspar
1som ärfastsydd ikanalen påklädselns utsida.
1.4 Knyt enenkelknut(medsnörningspar1)ikanaleni
ändenav fotändan.Se ill.2
1.5 Vikin sidostyckenapå bådasidorna. Seill. 3
1.6 Knytdäreftersnöre2-2, underkanalen, meden
dubbelknut.Se ill.4
1.7 Snöre3-3träsunderkanalenochknytesihopmed
ögla4 meden dubbelknut.Se ill.5
1.8 Knyt därefterihop snörena5-5med ögla6 meden
dubbelknut.Se ill.6
1.9 Snörenaihuvudändan7-7dras åtrunt barnets
huvudoch knyts förattdetskavaravarmtför
barnet. Stoppa alltid ner snöre 7-7 i ckan så att
barnetinte fårtag idem. Seill. 7
2.0 STANDARDVIKNING
2.1 Läggpåsen påett plantunderlag.Se ill.1
2.2 Vikin fotändan.Se ill.8
2.3 Vikin sidostyckenapå bådasidorna. Seill. 3
2.4 Snöre2-2 träsunder kanalen,översnörningspar
1och knyts medendubbelknut.Seill.4
2.5 Snöre3-3träsunderkanalenochknyts medögla4
meden dubbelknut.Se ill.5
2.6 Knytihop snöre5-5 medögla 6.Seill.6
2.7 Snörenai huvudändan7-7 drasåt runtbarnets
huvudoch knyts såattbarnetintekan ramlaur
påsen. Stoppa alltid ner snöre 7-7 i ckan så att
barnetinte fårtag idem. Seill. 7
3.0 TREÅRSVIKNING
3.1 Läggpåsen påett plantunderlag.Se ill.1
3.2 Fotändanviks upptill snörningspar1-1.
Seill. 9
3.3 Vikin sidostyckenapå bådasidorna. Seill. 2
3.4 Snörningspar 8är placeradeinutidynanochska
drasut vidtreårsvikning,seill.1.Knyt däreftersnöre
8-8under kanalenmed endubbelknut. Seill. 11.
20
SE
Table of contents
Languages:
Other Voksi Baby Accessories manuals

Voksi
Voksi CLASSIC+ User manual

Voksi
Voksi Active User manual

Voksi
Voksi City Wool/down User manual

Voksi
Voksi Active User manual

Voksi
Voksi CLASSIC+ CARRYING BOARD User manual

Voksi
Voksi Sky Light User manual

Voksi
Voksi Move User manual

Voksi
Voksi Dream User manual

Voksi
Voksi Breeze Light User manual

Voksi
Voksi Baby Nest User manual