2) Fix the GPS module to a proper place on your motorcycle with the double-sided foam
tape. Please note the “GPS” icon must face the sky directly without any barrier, in case
of the signal is shielded.
GPS
GPS
Double-sided tape
“GPS” icon needs to face to the sky
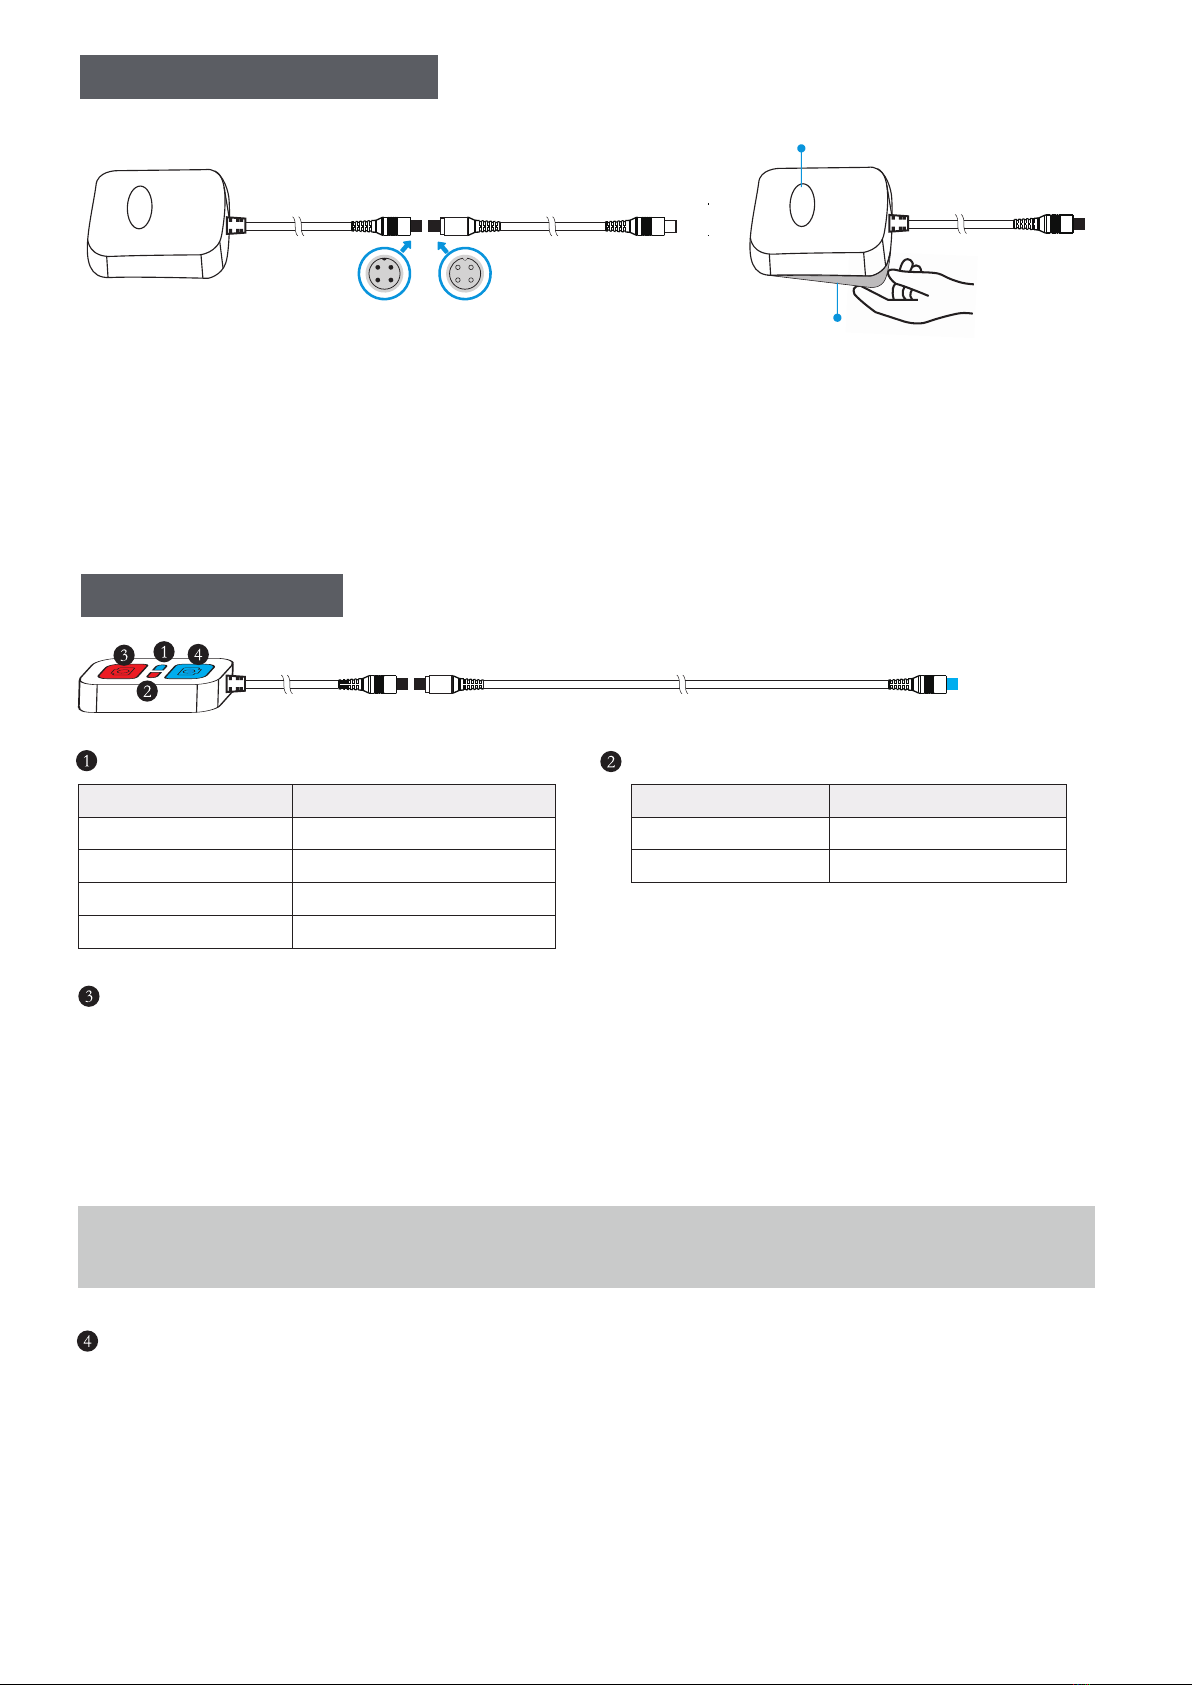
The concave and convex bayonet of the joint shall be matched correctly
1) You can go to our official website to download the GV player.www.szv-sys.com
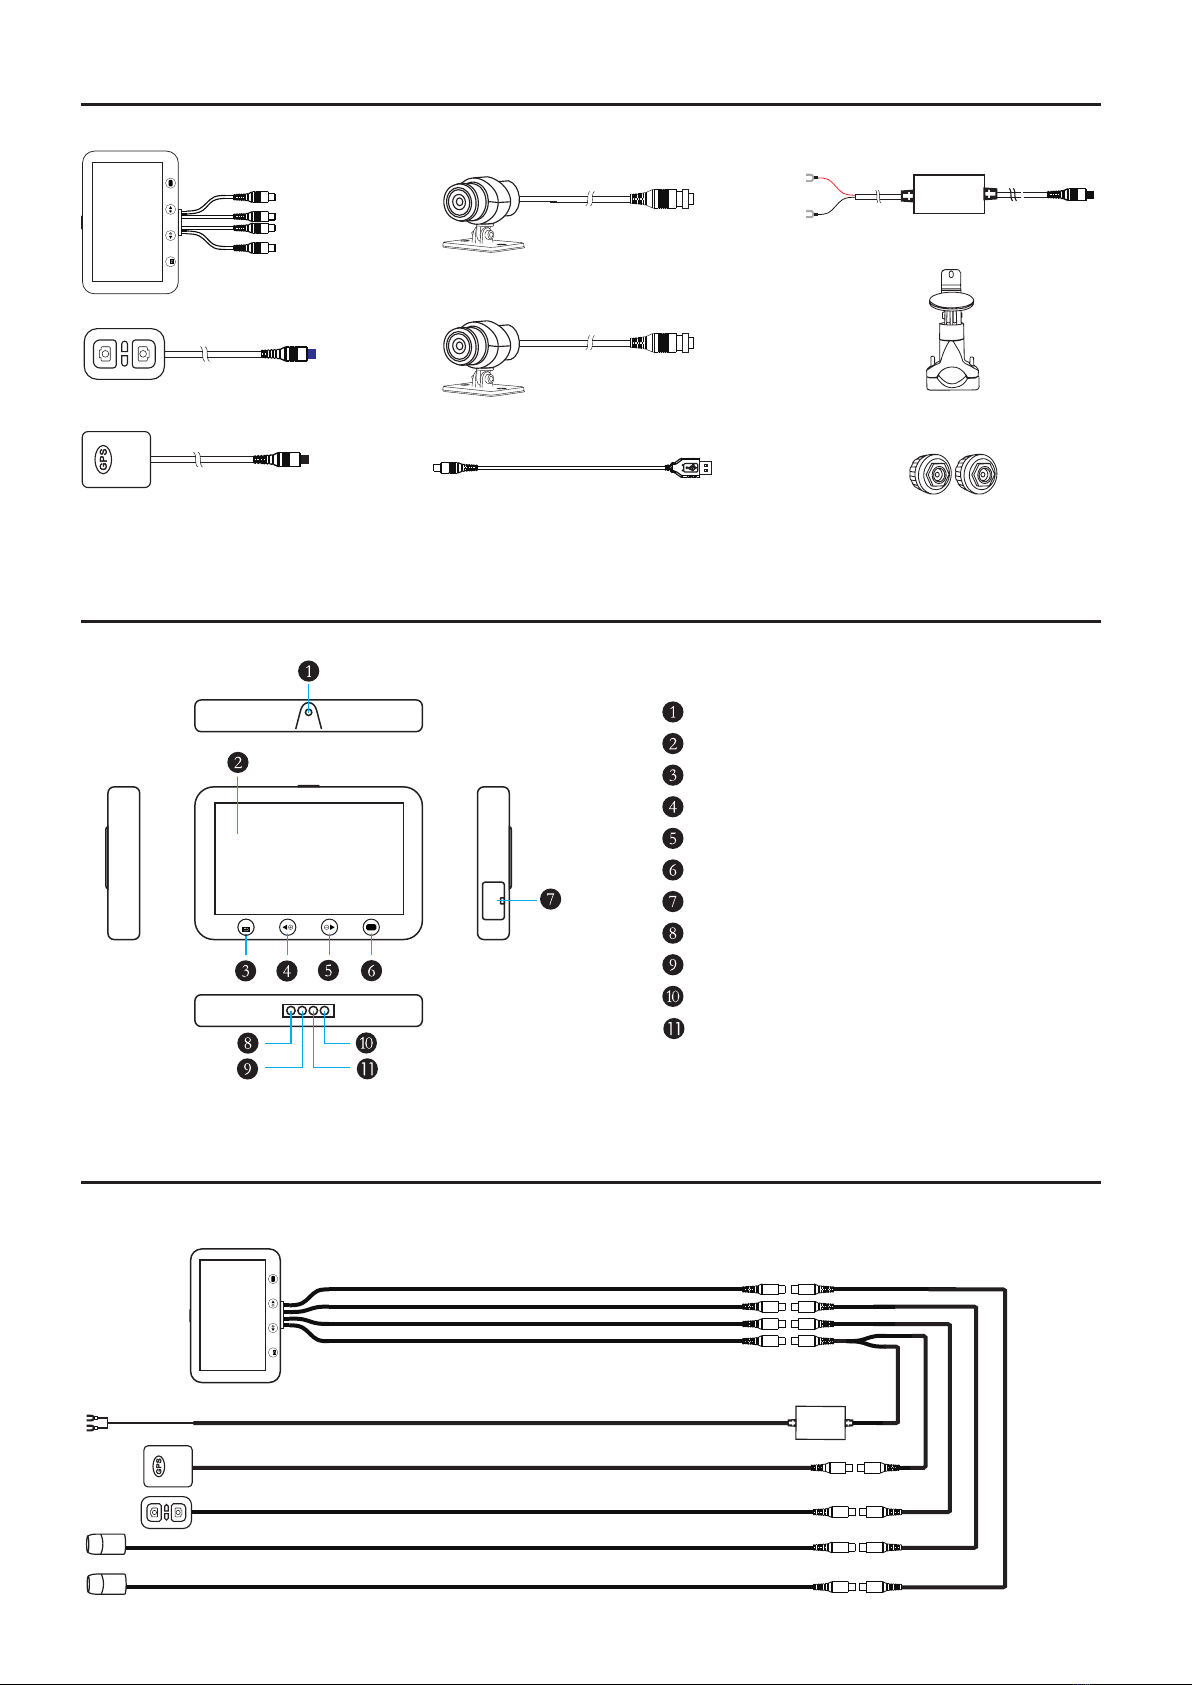
GPS Module Installation
- 7 -
Wired Controller
NOTE: It will lock the latest 10 emergency videos(KEY_XXX) in emergency recording mode from being overwritten,
and after more than 10, the recorder will automatically start to overwrite the earliest locked emergency video.
LED Light Frequency DVR Status
Slow blinking Recording properly
Fast blinking Emergency record mode
Steady (light on) Stop recording
Off (light off) Power off
Red LED Light
2) Long press the red button in Video Mode to enter Drag Racing Mode. And then:
• Short press the red button in Drag Racing Mode to start racing.
• Long press the red button in Drag Racing Mode to switch different modes.
1) Short press the red button of the wired controller in Video Mode to activate Emergency
Recording Mode and take the snapshot.
LED Light Frequency GPS Status
Slow blinking Searching for GPS signal
GPS working properly
Steady (light on)
1) Short press the blue button in Video Mode to switch the display to the rear camera in
full screen.
2) Long press the blue button in Video Mode to enter Smart Gauge Mode. And then:
• Short press the blue button in Smart Gauge Mode to switch different information.
Long press the blue button in Smart Gauge Mode to quit Smart Gauge Mode. •
3) Long press the blue button in to quit Drag Racing Mode Drag Racing Mode.
Blue LED Light
LED Light Frequency DVR Status
Slow blinking Recording properly
Fast blinking Emergency record mode
Steady (light on) Stop recording
Off (light off) Power off
Red LED Light
• Short press the red button in Drag race mode to start racing.
• Long press the red button in Drag race mode to switch different modes.
2) Long press the red button of the wired controller during the recording to enter
Drag Racing Mode. And:
1) Short press the red button of the wired controller in video mode to activate
emergency recording mode and take the snapshot.
LED Light Frequency GPS Status
Slow blinking Searching for GPS signal
GPS working properly
Steady (light on)
1) Short press the blue button in video mode to switch the display to the rear camera
in full screen.
2) Long press in video mode to enter Smart Gauge Mode. And:
• Short press in Smart Gauge Mode to switch different information.
Long press it again to quit Smart Gauge Mode. •
Blue LED Light
Red Buttons
Blue Buttons