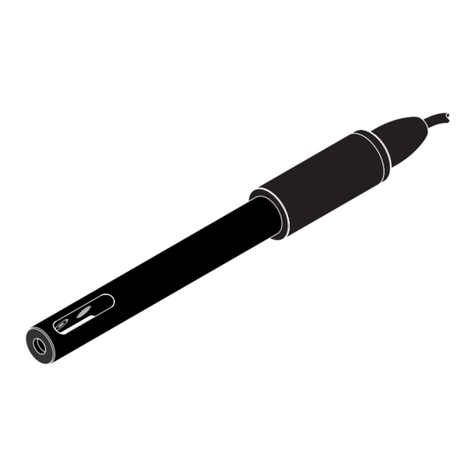
VWR Avantor OXY 11 User manual

ba75842y04 05/2021
VWR®OXY 11 - D.O. Sensor
Operating manual
EU cat. no NA cat. no
664-0042 76470-820

OXY 11
2ba75842y04 05/2021
Legal Address of Manufacturer:
Country of origin: Germany.
Europe
VWR International BV
Researchpark Haasrode 2020
Geldenaaksebaan 464
B-3001 Leuven
+32 16 385011
http://be.vwr.com
United States
VWR International LLC
100 Matsonford Rd
Radnor, PA 19087
+1 800-932-5000
www.vwr.com
Importer to UK:
VWR International Ltd
Hunter Boulevard, Magna Park
Lutterworth, Leicestershire, LE17 4XN
http://uk.vwr.com

Contents
3
ba75842y04 05/2021
OXY 11 Contents
EN English - - - - - - - - - - - - - - - - - - - - - - - - - - - - - - - - - - - - - - - - 5
1 Overview . . . . . . . . . . . . . . . . . . . . . . . . . . . . . . . . . . . . . . . 5
2 Safety instructions. . . . . . . . . . . . . . . . . . . . . . . . . . . . . . . . 6
3 Commissioning . . . . . . . . . . . . . . . . . . . . . . . . . . . . . . . . . . 6
4 Measuring / Operation. . . . . . . . . . . . . . . . . . . . . . . . . . . . . 6
5 Maintenance, cleaning, replacement . . . . . . . . . . . . . . . . . 8
6 What to do if ... . . . . . . . . . . . . . . . . . . . . . . . . . . . . . . . . . 14
7 Technical data. . . . . . . . . . . . . . . . . . . . . . . . . . . . . . . . . . 15
8 Wear parts and accessories . . . . . . . . . . . . . . . . . . . . . . . 16
DE Deutsch - - - - - - - - - - - - - - - - - - - - - - - - - - - - - - - - - - - - - - 17
1 Überblick . . . . . . . . . . . . . . . . . . . . . . . . . . . . . . . . . . . . . . 17
2 Sicherheit . . . . . . . . . . . . . . . . . . . . . . . . . . . . . . . . . . . . . 18
3 Inbetriebnahme . . . . . . . . . . . . . . . . . . . . . . . . . . . . . . . . . 18
4 Messen / Betrieb . . . . . . . . . . . . . . . . . . . . . . . . . . . . . . . . 18
5 Wartung, Reinigung, Ersatzbedarf . . . . . . . . . . . . . . . . . . 19
6 Was tun, wenn ... . . . . . . . . . . . . . . . . . . . . . . . . . . . . . . . 26
7 Technische Daten . . . . . . . . . . . . . . . . . . . . . . . . . . . . . . . 27
8 Zubehör. . . . . . . . . . . . . . . . . . . . . . . . . . . . . . . . . . . . . . . 28
ES Español- - - - - - - - - - - - - - - - - - - - - - - - - - - - - - - - - - - - - - - 29
1 Sumario. . . . . . . . . . . . . . . . . . . . . . . . . . . . . . . . . . . . . . . 29
2 Seguridad . . . . . . . . . . . . . . . . . . . . . . . . . . . . . . . . . . . . . 30
3 Puesta en funcionamiento. . . . . . . . . . . . . . . . . . . . . . . . . 30
4 Medición / funcionamiento . . . . . . . . . . . . . . . . . . . . . . . . 31
5 Mantenimiento, limpieza, repuestos necesarios . . . . . . . . 32
6 Diagnóstico y corrección de fallas. . . . . . . . . . . . . . . . . . . 38
7 Especificaciones técnicas . . . . . . . . . . . . . . . . . . . . . . . . . 39
8 Piezas de desgaste y accesorios . . . . . . . . . . . . . . . . . . . 40

Contents OXY 11
4ba75842y04 05/2021
FR Français - - - - - - - - - - - - - - - - - - - - - - - - - - - - - - - - - - - - - - 41
1 Vue d'ensemble. . . . . . . . . . . . . . . . . . . . . . . . . . . . . . . . . 41
2 Sécurité . . . . . . . . . . . . . . . . . . . . . . . . . . . . . . . . . . . . . . . 42
3 Mise en service . . . . . . . . . . . . . . . . . . . . . . . . . . . . . . . . . 42
4 Mesure / fonctionnement. . . . . . . . . . . . . . . . . . . . . . . . . . 43
5 Maintenance, nettoyage, pièces
et fournitures de rechange . . . . . . . . . . . . . . . . . . . . . . . . 44
6 Que faire, si... . . . . . . . . . . . . . . . . . . . . . . . . . . . . . . . . . . 50
7 Caractéristiques techniques . . . . . . . . . . . . . . . . . . . . . . . 51
8 Pièces d'usure et accessoires . . . . . . . . . . . . . . . . . . . . . . 52
IT Italiano - - - - - - - - - - - - - - - - - - - - - - - - - - - - - - - - - - - - - - - - 53
1 Descrizione generale. . . . . . . . . . . . . . . . . . . . . . . . . . . . . 53
2 Sicurezza. . . . . . . . . . . . . . . . . . . . . . . . . . . . . . . . . . . . . . 54
3 Messa in funzione . . . . . . . . . . . . . . . . . . . . . . . . . . . . . . . 54
4 Misurare / funzionamento . . . . . . . . . . . . . . . . . . . . . . . . . 54
5 Manutenzione, pulizia, pezzi di ricambio. . . . . . . . . . . . . . 55
6 Cosa fare se... . . . . . . . . . . . . . . . . . . . . . . . . . . . . . . . . . . 62
7 Dati tecnici. . . . . . . . . . . . . . . . . . . . . . . . . . . . . . . . . . . . . 64
8 Accessori. . . . . . . . . . . . . . . . . . . . . . . . . . . . . . . . . . . . . . 65
PT Português - - - - - - - - - - - - - - - - - - - - - - - - - - - - - - - - - - - - - 66
1 Visão geral . . . . . . . . . . . . . . . . . . . . . . . . . . . . . . . . . . . . 66
2 Segurança . . . . . . . . . . . . . . . . . . . . . . . . . . . . . . . . . . . . . 67
3 Colocação em funcionamento. . . . . . . . . . . . . . . . . . . . . . 67
4 Medição / operação. . . . . . . . . . . . . . . . . . . . . . . . . . . . . . 68
5 Manutenção, limpeza, sobressalentes necessárias . . . . . 69
6 O que fazer em caso de ... . . . . . . . . . . . . . . . . . . . . . . . . 75
7 Dados técnicos . . . . . . . . . . . . . . . . . . . . . . . . . . . . . . . . . 76
8 Acessórios. . . . . . . . . . . . . . . . . . . . . . . . . . . . . . . . . . . . . 77
OXY 11 English
5
ba75842e04 05/2021
EN
EN English 1Overview
Structure
Recommended
fields of
application
On site measurements in rivers, lakes and wastewater
1Connection head
2Shaft housing
3Temperature sensor and auxiliary electrode
4Ventilation area
5Lead counter electrode (anode)
6Insulator
7Gold working electrode (cathode)
8WP-D membrane cap (filled with electrolyte solution)
9Protective hood
7
6
5
3
1
2
4
89

English OXY 11
6ba75842e04 05/2021
EN
2 Safety instructions
This operating manual contains special instructions that must be followed during
the operation of the D.O. sensor.
Always keep this operating manual in the vicinity of the sensor.
Special user
qualifications
The membrane cap of the D.O. sensor is filled with a small amount of an alkaline
electrolyte solution. All maintenance work that requires dealing with the
electrolyte solution must only be carried out by persons who know how to safely
deal with chemicals.
General safety
instructions
The individual chapters of this operating manual use safety labels like the one
below to indicate danger:
CAUTION
indicates instructions that must be followed precisely in order to avoid
slight injuries or damage to the instrument or the environment.
3 Commissioning
Scope of
delivery
D.O. sensor OXY 11, filled with electrolyte solution and ready to operate
Calibration and storage vessel
1 exchange membrane cap, WP-D
Electrolyte solution, ELY/G
Cleaning solution, RL/G
Polishing strip, SF 300
Operating manual
Note
The membrane cap that is mounted on the sensor for delivery serves mainly as
a transport protection. Depending on the duration of the transport and storage
period, it may have a shortened operational lifetime. If the measuring system
cannot be calibrated (error message of the instrument), please proceed
according to section REPLACING THE ELECTROLYTE SOLUTION AND MEMBRANE CAP.
Preparing the
sensor for
measurement
Connect the sensor to the measuring instrument. The sensor is immediately
ready to measure. It is not necessary to polarize the sensor.
4 Measuring / Operation
4.1 Calibration
Note
For calibration, please refer to the operating manual of the measuring
instrument.

OXY 11 English
7
ba75842e04 05/2021
EN
4.2 Measuring
Note the required minimum depth of immersion and minimum approach flow
(see chapter 7 TECHNICAL DATA).
The minimum flow can be provided in different ways, e. g.:
The flow of the water to be measured is sufficient (aeration tank, water pipe,
stream)
Slowly pull the sensor through the water by hand (lake, container), or
Use a flow aid, e.g. stirrer.
4.3 Storage
Always store the sensor in the calibration and storage vessel at a temperature
in the range 0 ... +50 °C (32 ... 122 °F). Make sure that the sponge in the
calibration and storage vessel is always moist.
Calibration and
storage vessel
Moisten the sponge:
Pull out the insert (1).
Take out the sponge (2), wet it, then slightly squeeze it out.
Put in the sponge and install the insert in the calibration and storage vessel
again.
12

English OXY 11
8ba75842e04 05/2021
EN
5 Maintenance, cleaning, replacement
5.1 General maintenance notes
For your safety Note the following safety instructions when handling electrolyte and cleaning
solutions:
CAUTION
The ELY/G electrolyte solution and RL-G cleaning solution irritate the eyes
and skin. Note the following points when dealing with these solutions:
During working activities, always wear suitable protective gloves and
protective goggles/face shield.
If it comes into contact with the skin, rinse thoroughly with water and
immediately change contaminated clothing.
If it comes into contact with the eyes, rinse thoroughly with water and
consult a doctor.
Note the safety datasheets.
CAUTION
Before all maintenance activities, disconnect the sensor from the
instrument.
Note
Information on how to order wear parts and maintenance equipment can be
found in chapter 8 WEAR PARTS AND ACCESSORIES.
5.2 Outside cleaning
Cleaning agents
After cleaning, thoroughly rinse with deionized water and recalibrate if
necessary.
Contamination Cleaning procedure
Lime sediments Immerse in acetic acid for 1 minute (volume
share = 10 %)
Fat/oil Clean with warm water that contains
washing-up liquid

OXY 11 English
9
ba75842e04 05/2021
EN
5.3 Changing the electrolyte and membrane cap
CAUTION
Before starting to work with the sensor, please note the GENERAL
MAINTENANCE INSTRUCTIONS on page 8.
General
information
WTW delivers the sensor ready to operate (see section 3). The electrolyte
solution and membrane cap must only be replaced if:
a calibration error occurs and the membrane is heavily contaminated
the membrane is damaged
the electrolyte solution is exhausted.
Changing the electrolyte and membrane cap
Unscrew the membrane cap.
Caution: Electrolyte solution!
For disposal of the membrane
head and electrolyte solution,
see section 5.6.
Rinse the sensor head with
deionized water.
Carefully rub and dry the
counter electrode with a lint-
free paper towel.
Immerse the sensor head
including the counter
electrode in RL/G cleaning
solution.
Allow to react for 1 to 3
minutes.
Thoroughly rinse the sensor
head with deionized water.
Water the counter electrode in
deionized water for at least
10 minutes.
RL/G
H O
2

English OXY 11
10 ba75842e04 05/2021
EN
Carefully shake off the drops
of water.
Fill a new membrane cap with
ELY/G electrolyte solution.
Remove any air bubbles by
carefully tapping the
membrane head. Additionally,
you can prevent air bubbles
by throwing the first filling
away and refilling the
membrane cap.
Thoroughly rinse the sensor
head with electrolyte solution.
Hold the sensor inclined and
screw on the membrane head
fingertight using a paper
towel. Excess electrolyte
solution is forced out of the
ventilation area.
Check the filling:
Inspect the face surface. No
air bubbles may be present
within the dashed circle. Air
bubbles outside this area do
not interfere.
Note
For measurements under high pressure the filling must be
completely free of air bubbles.
Readiness to measure After approx. 30 to 50 minutes, the sensor is ready for operation.
Subsequently calibrate the sensor.
Note
If you want to measure very low oxygen concentrations (< 0.5 %
saturation), we recommend to let the sensor rest overnight and
then calibrate it.
ELY/G
ELY/G
Ventilation area
points upwards
3 mm

OXY 11 English
11
ba75842e04 05/2021
EN
5.4 Cleaning the electrodes
CAUTION
Before starting to work with the sensor, please note the GENERAL
MAINTENANCE INSTRUCTIONS on page 8.
General
information
Cleaning is only required in cases of slopes too low or too high (sensor cannot
be calibrated) that cannot be resolved by changing the membrane head and
electrolyte solution.
Cleaning the electrodes
Unscrew the membrane cap.
Caution: Electrolyte solution!
For disposal of the membrane
head and electrolyte solution,
see section 5.6.
Rinse the sensor head with
deionized water.
Using the rough side of the
wet SF 300 polishing strip,
polish off any contamination
from the gold working
electrode using light pressure.
Caution: Do not use any
conventional sandpaper or
glass-fiber brushes.
Rinse the sensor head with
deionized water.
Wipe the counter electrode
with a lint-free paper towel
and carefully remove any
loose white deposits.
Immerse the sensor head
including the counter
electrode in RL/G cleaning
solution.
Allow to react for 1 to 3
minutes.
SF 300
RL/G

English OXY 11
12 ba75842e04 05/2021
EN
Thoroughly rinse the sensor
head with deionized water.
Water the counter electrode in
deionized water for at least
10 minutes.
Carefully shake off the drops
of water.
Fill a new membrane cap with
ELY/G electrolyte solution.
Remove any air bubbles by
carefully tapping the
membrane head. Additionally,
you can prevent air bubbles
by throwing the first filling
away and refilling the
membrane cap.
Rinse the sensor head with
electrolyte solution.
Hold the sensor inclined and
screw on the membrane head
fingertight using a paper
towel. Excess electrolyte
solution is forced out of the
ventilation area.
Check the filling:
Inspect the face surface. No
air bubbles may be present
within the dashed circle. Air
bubbles outside this area do
not interfere.
H O
2
ELY/G
ELY/G
Ventilation area
points upwards
3 mm

OXY 11 English
13
ba75842e04 05/2021
EN
5.5 Checking the sensor for freedom from zero-current
The sensor is zero-current free. Checking the module for freedom from zero-
current is only necessary in the case of malfunctions that cannot be remedied
by exchanging the electrolyte solution and membrane cap or by cleaning the
electrodes.
There are 2 possibilities to check the sensor for freedom from zero-current:
Measurement in a nitrogen atmosphere (recommended method)
Measurement in a sodium sulfite solution according to DIN EN 25814/
ISO 5814.
CAUTION
If you check the sensor according to DIN EN 25814/ISO 5814, do not leave
the sensor in the sodium sulfite solution for more than 2 minutes. Danger
of sensor poisoning!
Test criterion The sensor is OK if the measuring instrument displays < 1.5 % D.O. saturation
after 2 minutes.
5.6 Disposal
CAUTION
The ELY/G electrolyte solution irritates the eyes and skin. When dealing
with the ELY/G electrolyte solution, observe the following points:
During working activities, always wear suitable protective gloves and
protective goggles/face shield.
If it comes into contact with the skin, rinse thoroughly with water and
immediately change contaminated clothing.
If it comes into contact with the eyes, rinse thoroughly with water and
consult a doctor.
Follow the safety datasheet.
Note
For measurements under high pressure the filling must be
completely free of air bubbles.
Readiness to measure After approx. 30 to 50 minutes, the sensor is ready for operation.
Subsequently calibrate the sensor.
Note
If you want to measure very low oxygen concentrations (< 0.5 %
saturation), we recommend to let the sensor rest overnight and
then calibrate it.

English OXY 11
14 ba75842e04 05/2021
EN
Sensor and
membrane cap
For disposal, unscrew the membrane head and rinse the sensor and membrane
head with water. We recommend disposing of the sensor without the membrane
cap as electronic refuse. The membrane head may be disposed of with the
household refuse.
Electrolyte
solution
Disposal according to the safety data sheet.
6 What to do if ...
Error symptom Cause Remedy
The sensor is in the air
and the display shows
0.00 mg/l or 0.0 % O2
– No connection between
measuring instrument and sensor
– No electrolyte in the membrane
head
– Cable defective
– Check connection between
measuring instrument and sensor
– Replace and refill the membrane
cap (see section 5.3)
– Return the sensor
The sensor cannot be
calibrated
– Contaminated membrane head
– Electrolyte depleted
– Membrane damaged
– Membrane cap not screwed on
tight enough
– Replace and refill the membrane
cap (see section 5.3)
Subsequently, wait for 30 to
50 min and recalibrate.
– Screw membrane head tighter
The sensor still cannot
be calibrated after
changing the electrolyte
and membrane head
– Contaminated electrodes or
sensor toxification
– Clean the electrodes (see section
5.4)
Incorrect temperature
display
– Temperature sensor defective – Return the sensor
Mechanical damage to
the sensor
– Return the sensor
Meter displays OFL
(display range exceeded)
– Short-circuit between working
electrode and counter electrode
– Clean the electrodes (see section
5.4). If the meter still displays
OFL, return the sensor.

OXY 11 English
15
ba75842e04 05/2021
EN
7 Technical data
General features Measuring principle Membrane covered galvanic sensor
Temperature
compensation
Calculated by the meter
Temperature sensor Integrated NTC 30 (30 kat 25 °C / 77 °F)
Dimensions
(in mm)
Weight 310 g (with 2 m cable)
Materials Working electrode Gold
Counter electrode Lead
– Shaft housing
– Connection head
– Membrane head
– Cable screw joint
POM
Membrane FEP
Sensor head Epoxy, PEEK
Insulator PEEK
Thermistor housing VA steel 1.4571
Seals FPM (Viton)
Connection cable Lengths 3 m
Diameter 6 mm
Smallest allowed
bend radius
Fixed installation: 50 mm
Flexible use: 80 mm
Plug type Socket, 7 pins
Pressure
resistance
Sensor IP 68 (6 bar)
Sensor cable IP 68 (2 bar)
Plug IP 67 (when plugged in)
The OXY 11 meets the requirements according to article 3(3) of the
97/23/EC directive ("Pressure equipment directive").
49
110
17,5

English OXY 11
16 ba75842e04 05/2021
EN
8 Wear parts and accessories
Measurement
conditions
Measuring ranges at 20 °C
(68 °F)
0 ... 50 mg/l D.O.
0 ... 600 % D.O.saturation
0 ... 1250 mbar D.O. partial pressure
Temperature range 0 ... 40 °C (32 ... 104 °F)
Depth of immersion min. 4 cm
max. 6 m (depending on the cable length)
Operating position Any
Approach flow > 2,5 cm/s with 10 % measurement accuracy
5 cm/s with 5 % measurement accuracy
Storage
conditions
Recommended storing
method
in the calibration and storage vessel (moist)
Storage temperature 0 ... 40 °C (32 ... 104 °F)
Characteristics
when delivered
Zero signal < 1 % of the saturation value
Response time of D.O.
measurement at 20 °C
(68 °F)
t90 (90 % of the final value display after) < 25 s
t95 (95 % of the final value display after) < 40 s
t99 (99 % of the final value display after)
< 125 s
Own consumption of
oxygen at 20 °C (68 °F)
0.006 μg·h-1 (mg/l)-1
Drift Approx. 3 % per month in the operating
condition
Response time of
temperature measurement
t99 (99 % of the final value display after) < 60 s
Precision of temperature
measurement
± 0.2 K
Working life min. 6 months with one electrolyte filling
Accessories Description
MAINTENANCE KIT OXY:
– 3 exchange membrane caps, WP-D
– Electrolyte solution ELY/G
– Cleaning solution, RL/G
– Polishing strip, SF 300

OXY 11 Deutsch
17
ba75842d04 05/2021
DE
DE
Deuts
ch
1 Überblick
Aufbau
Empfohlene
Einsatzbereiche
Vor-Ort-Messungen in Flüssen, Seen und Abwasser
1Abschlusskopf
2Schaftgehäuse
3Temperaturmessfühler und Hilfselektrode
4Entlüftungsfläche
5Blei-Gegenelektrode (Anode)
6Isolator
7Gold-Arbeitselektrode (Kathode)
8Membrankopf WP-D (mit Elektrolytlösung gefüllt)
9Schutzkorb
7
6
5
3
1
2
4
89

Deutsch OXY 11
18 ba75842d04 05/2021
DE
2Sicherheit
Diese Betriebsanleitung enthält spezielle Hinweise, die beim Betrieb des Sauer-
stoffsensors zu beachten sind.
Halten Sie diese Betriebsanleitung immer in der Nähe des Sensors verfügbar.
Besondere
Benutzerqualifi-
kationen
Die Membrankappe des Sauerstoffsensors ist mit einer geringen Menge einer
alkalischen Elektrolytlösung gefüllt. Alle Wartungsarbeiten, die einen Umgang
mit der Elektrolytlösung erfordern, dürfen nur von Personen durchgeführt
werden, die den sicheren Umgang mit Chemikalien beherrschen.
Sicherheits-
hinweise
In den einzelnen Kapiteln dieser Betriebsanleitung weisen Sicherheitshinweise
wie der folgende auf Gefahren hin:
VORSICHT
kennzeichnet Hinweise, die genau beachtet werden müssen, um mögliche
leichte Verletzungen oder Schäden am Gerät oder der Umwelt zu vermei-
den.
3 Inbetriebnahme
Lieferumfang Sauerstoffsensor OXY 11, betriebsfertig mit Elektrolytlösung befüllt
Kalibrier- und Aufbewahrungsgefäß
1 Austausch-Membrankopf WP-D
Elektrolytlösung ELY/G
Reinigungslösung RL/G
Schleiffolie SF 300
Bedienungsanleitung
Hinweis
Der bei der Auslieferung auf dem Sensor montierte Membrankopf dient in erster
Linie als Transportschutz und kann je nach Transport- und Lagerdauer eine ver-
minderte Reststandzeit aufweisen. Ist das Messsystem nicht mehr kalibrierbar
(Fehlermeldung am Gerät), verfahren Sie bitte gemäß Abschnitt ELEKTROLYTLÖ-
SUNG UND MEMBRANKOPF WECHSELN.
Herstellung der
Messbereitscha
ft
Den Sensor an das Messgerät anschließen. Der Sensor ist sofort messbereit.
Ein Polarisieren des Sensors ist nicht erforderlich.
4 Messen / Betrieb
4.1 Kalibrieren
Hinweis
Lesen Sie bitte die Kalibrierung in der Bedienungsanleitung des Messgeräts

OXY 11 Deutsch
19
ba75842d04 05/2021
DE
nach.
4.2 Messen
Beachten Sie die erforderliche Mindesteintauchtiefe und die Mindestan-
strömung (siehe Kapitel 7 TECHNISCHE DATEN).
Die Mindestanströmung ist auf verschiedenen Wegen erreichbar, z. B.:
Die Strömungsgeschwindigkeit des zu messenden Wassers reicht bereits
aus (Belebungsbecken, Wasserleitung, Bach)
Den Sensor langsam mit der Hand durch das Wasser ziehen (See, Wasser-
behälter), oder
Anströmhilfe verwenden, z. B. Rührer.
4.3 Aufbewahren
Bewahren Sie den Sensor immer im Kalibrier- und Aufbewahrungsgefäß bei ei-
ner Temperatur von 0 bis +50 °C (32 bis 122 °F) auf. Sorgen Sie dafür, dass der
Schwamm im Kalibrier- und Aufbewahrungsgefäß stets feucht ist.
Kalibrier- und
Aufbewah-
rungsgefäß
Schwamm anfeuchen:
Einsatz (1) herausziehen.
Schwamm (2) herausnehmen, befeuchten, und anschließend leicht ausdrüc-
ken.
Schwamm wieder einlegen und Einsatz wieder in das Kalibrier- und Aufbe-
wahrungsgefäß einsetzen.
5 Wartung, Reinigung, Ersatzbedarf
5.1 Allgemeine Wartungshinweise
Zu Ihrer
Sicherheit
Beachten Sie beim Umgang mit der Elektrolytlösung ELY/G und Reinigungs-
lösung RL/G folgenden Sicherheitshinweis:
VORSICHT
Die Elektrolytlösung ELY/G und die Reinigungslösung RL-G reizen Augen
und Haut. Beachten Sie folgende Punkte beim Umgang mit den Lösungen:
Bei der Arbeit geeignete Schutzhandschuhe und Schutzbrille/Gesichts-
12

Deutsch OXY 11
20 ba75842d04 05/2021
DE
schutz tragen.
Nach Hautkontakt gründlich abwaschen und benetzte Kleidung sofort
wechseln.
Bei Berührung mit den Augen gründlich mit Wasser spülen und Arzt
konsultieren.
Sicherheitsdatenblätter beachten.
VORSICHT
Bei allen Wartungsarbeiten den Sensor vom Gerät abziehen.
Hinweis
Bestellinformationen zu Verschleißteilen und Wartungsmitteln finden Sie im Ka-
pitel 8 ZUBEHÖR.
5.2 Äußere Reinigung
Reinigungsmitt
el
Nach dem Reinigen gründlich mit entionisiertem Wasser spülen und gegebe-
nenfalls neu kalibrieren.
Verunreinigung Reinigungsverfahren
Kalkablagerung 1 Minute in Essigsäure (Volumenanteil =
10 %) tauchen
Fett/Öl mit warmen spülmittelhaltigen Wasser
spülen
Table of contents
Languages:
Other VWR Accessories manuals

VWR
VWR INCU-Line Tower User manual

VWR
VWR Incubating Mini Shaker User manual

VWR
VWR avantor INCU-Line Premium Series User manual

VWR
VWR Flow Through User manual

VWR
VWR 2005 User manual

VWR
VWR Avantor VWR OPOX 11-3 User manual

VWR
VWR VWR51014991 User manual

VWR
VWR INCU-Line Premium User manual

VWR
VWR INCU-Line IL 23R Cool User manual

VWR
VWR CO2 Incubator Basic User manual

VWR
VWR INCU-Line Series User manual

VWR
VWR avantor IL 56PR Premium User manual

VWR
VWR symphony 5.3 A User manual

VWR
VWR 89511-416 User manual

VWR
VWR pHenomenal IDP 761-C User manual

VWR
VWR INCU-Line 390-1346 User manual

VWR
VWR VWR INCU-Line IL 10 User manual

VWR
VWR Thermal Shake lite User manual

VWR
VWR INCU-Line User manual