manuals.online logo
Brands
  1. Home
  2. •
  3. Brands
  4. •
  5. Walter
  6. •
  7. Lighting Equipment
  8. •
  9. Walter WALU STAR AIR Owner's manual

Walter WALU STAR AIR Owner's manual

Couverture d’hivernage gonable
Aufblasbare Winterabdeckung
Inatable winter cover
WALU STAR AIR &
WALU SAND AIR
Notice technique
1. Liste des éléments constitutifs de la WALU STAR AIR/
WALU SAND AIR
- Une couverture WALU STAR AIR ou WALU SAND AIR
- Un sachet contenant les accessoires de fixation de la
couverture : les cabiclics double embouts (WALU SAND
AIR) ou les sangles et les ressorts dynamométriques
(WALU STAR AIR)et les pitons fixes P inox Ø 6 mm
- Un embout de gonflage Ø 21 mm
- La présente notice
Selon les options choisies :
- Les pitons escamotables à douille Ø 10 mm (en lieu et
place des pitons fixes P inox Ø 6 mm)
- Le gonfleur électrique 220 V
- 2 kits vents composés de : 1 sangle de 35 mm, 1 tendeur à
cliquet, 2 anneaux D et 2 pitons Ø 12 mm
2. Nécessaire d’installation
Matériel :
- 1 perceuse à percussion (impérativement sans fil)
- 1 forêt béton Ø 6 mm pour les pitons fixes P inox, Ø 10 mm
pour les pitons escamotables à douille et Ø 12 mm pour les
pitons des kits vents
- 1 maillet
- 1 mètre
Nombre de personnes nécessaires : 2
3. Installation de la couverture
Positionner la WALU STAR AIR ou la WALU SAND AIR sur une
des largeurs du bassin. Déplier la couverture et la centrer
sur le bassin en respectant un débord identique sur tout le
pourtour. La maintenir aux 4 coins à l’aide d’objets lourds.
Tracer au cordeau un trait à 40 cm du bord de la couverture
et sur tout son pourtour. Percer sur ce trait à l’aide du forêt
approprié à vos pitons sur une profondeur de 80 mm, en veillant
à positionner les pitons exactement en face et au milieu des
doubles oeillets. La fixation de la couverture commence par
les 4 angles. Installer les cabiclics ou les sangles/ressorts en
les passant dans les oeillets. S’assurer que la couverture est
bien tendue.
Important : Respecter impérativement la distance de perçage
pour une bonne tension de la couverture.
Pour les bassins de plus de 8 x 4 m (option kits sangles):
Avant d’installer votre couverture : positionner les 2 sangles
sur la longueur de la piscine, chacune à 1 m du bord intérieur
du bassin, et les fixer à l’aide des pitons Ø 12 mm compris dans
les kits sangles.
Technische Anleitung
1. Liste der Bestandteile Ihrer WALU STAR AIR/WALU
SAND AIR
- Eine WALU STAR AIR oder WALU SAND AIR
Schwimmbadabdeckung
- Eine Tasche mit den Befestigungselementen der
Abdeckung: Cabiblic-Spannbänder mit doppelter
Befestigung (WALU SAND AIR) oder Gurte und
Dynamometerfedern (WALU STAR AIR) und feststehende
P-Edelstahlstifte, Ø 6 mm
- Aufblas Adapter, Ø 21 mm
- Die vorliegende Anleitung
Je nach ausgewählter Optionen:
- Herausziehbare Edelstahlstifte mit Hülse, Ø 10 mm
(anstatt der feststehende P-Edelstahlstifte, Ø 6 mm)
- 220 V elektrisches Aufblasesystem
- 2 Wind-Kits (Inhalt: 1 Gurt 35 mm, 1 Spanner mit Ratsche,
2 D-Ringe und 2 Stifte, Ø 12 mm)
2. Zur Installation wird benötigt
:
Material:
- 1 Schlagbohrmaschine (obligatorisch als Akkugerät)
- 1 Steinbohrer, Ø 6 mm für die feststehende
P-Edelstahlstifte, Ø 10 mm für die herausziehbare
Edelstahlstifte mit Hülse und Ø 12 mm für die Stifte der
Wind-Kits
- 1 Holzhammer
- 1 Zollstock
Zur Montage erforderliche Anzahl Personen : 2
3. Installation der Abdeckung
WALU STAR AIR oder WALU SAND AIR an einer Breitseite
des Beckens positionieren. Abdeckung ausbreiten und mittig
auf das Becken ausrichten, wobei rund um das Becken a
uf einheitliche Überlappung zu achten ist. Abdeckung an
allen 4 Ecken beschweren, um sie in dieser Position zu
sichern. Mittels Richtschnur einen Strich in 40 cm Abstand
vom Rand der Schwimmbadabdeckung rund um das Becken
anzeichnen. Entlang dieses Strichs, Befestigungslöcher
für die Edelstahlstifte genau gegenüber der Doppelösen
einmessen und 80 mm tiefe Löcher bohren. Die Befestigung
der Schwimmbadabdeckung beginnt in den 4 Ecken. Cabiclic
Spannbänder mit doppelter Befestigung oder Gurte und
Dynamometerfedern durch die Ösen führen. Sicherstellen,
dass die Abdeckung einwandfrei gespannt ist.
Wichtig: Der Bohrabstand ist obligatorisch einzuhalten, um die
richtige Spannung für die Abdeckung herzustellen.
Für Becken über de 8 x 4 m (Option Gurte-Kits):
Bevor Sie die Abdeckung installieren: platzieren Sie die 2 Gurte
in die Länge des Beckens, mit 1 m Abstand vom inneren Rand.
Befestigen Sie die Gurte mit die mitgeliferten Ø 12 mm Stifte.
Technical instructions
1. List of parts that make up your WALU STAR AIR / WALU
SAND AIR
- A WALU STAR AIR or WALU SAND AIR cover
- A plastic packet containing the cover’s fastening systems:
double-ended cabiclic cords (WALU SAND AIR) or Straps
and drawbar springs (WALU STAR AIR) and standard
stainless steel P-shaped pegs, Ø 6 mm
- An inflation nozzle, Ø 21 mm
- These technical instructions
According to selected features:
- Stainless steel pop-up anchors with bushing, Ø 10 mm
(instead of standard stainless steel P-shaped pegs, Ø 6
mm)
- Electric inflator (220 V)
- 2 high wind kits containing: one 35 mm strap, 1 fastener, 2
D rings and two pegs, Ø 12 mm
2. Required for installation
Equipment:
- 1 hammer drill (must be cordless)
- 1 drills Ø 6 mm for the standard stainless steel P-shaped
pegs, Ø 10 mm for the stainless steel pop-up anchors with
bushing and Ø 12 mm for the high wind kit pegs
- 1 mallet
- 1 metering rule
Number of people needed: 2
3. Installation of the cover
Place your WALU STAR AIR or your WALU SAND AIR cover on
one of the pool width. Unfold the cover and center it on the pool,
be careful to observe a regular overlap all around the pool. Use
heavy objects on each corner to keep it in position. With a chalk
line, mark a line at 40 cm from the edge of the cover and all
around it. Drill 80 mm deep holes on this line with the suitable
drill; take care to center the pegs with the double eyelets. To
fasten the cover, begin with the 4 corners. Put the doubleended
cabiclic cords or Straps and drawbar springs through
the eyelets. Check if the cover is tightly tensioned.
Important: Strictly observe the drilling distance for an effective
tension of the cover.
For pools over 8 x 4 m (option Straps kits):
Before installing your cover: place the 2 straps on the length of
the pool, at 1 m from the inner edge of the pool, and fix them
with the Ø 12 mm pegs included in the straps kits.
FR DE GB
FR DE GB
Conforme à la norme
NF P 90-308
Typengeprüft nach
Norm NF P 90-308
Compliant with
standard NF P 90-308
1
Sangles
1 m
Bord intérieur bassin
Gurte Straps
Beckenrand Inner edge of the pool
1 m
1 m
1 m
1 m
1 m
Pour les bassins de plus de 8 x 4 m (option kits sangles):
Avant d’installer votre couverture : positionner les 2 sangles
sur la longueur de la piscine, chacune à 1 m du bord intérieur
du bassin, et les fixer à l’aide des pitons Ø 12 mm compris dans
les kits sangles.
Nota : Pour les pitons fixes P inox, il est important de percer
le dallage avec une légère inclinaison extérieure. Pour les
pitons escamotables à douille présentant un léger jeu dû au
perçage, il est recommandé d’ovaliser légèrement la douille
avec un marteau. L’ensemble des pitons doit être fixé dans un
dallage suffisamment solide (par exemple une dalle en béton)
afin d’assurer sa fonction sécuritaire.
4. Mise en position sécurité de la couverture
Attacher la couverture à l’aide des pitons et des cabiclics
(ou des sangles/ressorts) en commençant par une largeur,
continuer avec les longueurs en équilibrant la tension,
terminer par la deuxième largeur. Veiller à ce que la couverture
soit bien centrée sur le bassin. Procéder de même dans le cas
d’un escalier.
Für Becken über de 8 x 4 m (Option Gurte-Kits):
Bevor Sie die Abdeckung installieren: platzieren Sie die 2 Gurte
in die Länge des Beckens, mit 1 m Abstand vom inneren Rand.
Befestigen Sie die Gurte mit die mitgeliferten Ø 12 mm Stifte.
Hinweis: Bei P-Edelstahlstiften ist es wichtig, die Bohrungen in
den Bodenplatten leicht schräg nach außen gerichtet zu bohren.
Bei Edelstahlstiften mit Hülse, die ein geringes Spiel aufgrund
der Bohrung aufweisen, ist die Hülse mittels Hammer leicht
oval zu schlagen. Sämtliche Stifte sind an einem hinreichend
stabilen Plattenboden zu befestigen, beispielsweise an einer
Betonplatte, um ihre Sicherheitsfunktion zu gewährleisten.
4. Einstellung der Abdeckung in Sicherheitsposition
Abdeckung mit Hilfe von Edelstahlstiften und Cabiclic-
Spannbänder mit doppelter Befestigung oder Gurte
und Dynamometerfedern befestigen; hierbei an einer
Breitseite beginnen, dann die Längsseiten spannen, wobei
auf einwandfreien Spannungsausgleich zu achten ist.
Anschließend die zweite Breitseite befestigen. Sicherstellen,
dass die Abdeckung einwandfrei mittig am Pool ausgerichtet
ist. Bei einer Treppe ist ebenso zu verfahren.
For pools over 8 x 4 m (option Straps kits):
Before installing your cover: place the 2 straps on the length of
the pool, at 1 m from the inner edge of the pool, and fix them
with the Ø 12 mm pegs included in the straps kits.
Advice : Regarding to the standard stainless steel P-shaped
pegs, it is important to drill the paving with a slight outward
incline. For the stainless steel pop-up anchors with bushing
having a light slack due to the drilling, we recommand to
ovalize slightly the bushing with a hammer. All the pegs must
be grounded in a sufficiently solid surface (e.g. concrete
pavement) in order to ensure its safety function.
4. Setting the cover in safety position
Fasten the cover with the pegs and the double-ended cabiclic
cords, first on one width, then on both lengths by balancing
tension, and finally on the second width. Be sure that the is
well centered on the pool. Do the same if the pool has steps.
2
Couverture d’hivernage gonable
Aufblasbare Winterabdeckung
Inatable winter cover
Couverture d’hivernage gonable
Aufblasbare Winterabdeckung
Inatable winter cover
WALU STAR AIR WALU STAR AIR WALU STAR AIR
WALU SAND AIR WALU SAND AIR WALU SAND AIR
5. Gonflage de la couverture
Dévisser le bouchon de la valve. Assurez-vous que le bouchon
central soit ouvert (mettre en position enfoncé). Connecter
le gonfleur à la valve à l’aide du tuyau et de l’embout de
gonflage, puis procéder au gonflage. Arrêtez la pompe quand
la couverture atteint 1m de hauteur. La couverture doit rester
souple et doit pouvoir s’enfoncer à la pression d’une main.
Fermez la valve en pressant sur le bouton central (mettre en
position haute). Revisser le bouchon de la valve. Une enveloppe
en PVC n’est jamais étanche à 100%, contrôlez et ajustez le
gonflage une fois par mois.
Attention : Un sur-gonflage pourrait endommager les soudures
de la couverture et occasionner des dégâts irréversible qui ne
serons pas pris en charge par la garantie.
Important : Rester à proximité de la couverture pendant la
phase de gonflage pour éviter tout sur-gonflage ou autre
incident risquant de l’endommager.
6. Démontage de la couverture
Sortir simplement les cabiclics ou des ressorts des pitons, puis
les démonter de la couverture. Nettoyer la couverture à l’aide
d’un produit de nettoyage pour toile PVC, la laisser sécher, la
plier et la stocker dans un endroit sec, si possible à l’abri de
la lumière.
Important : Toujours garder la vue sur le bassin pendant le
montage et le démontage de la couverture. Ces manoeuvres
doivent être effectuées par deux adultes responsables après
contrôle du bassin, dans lequel ne doit se trouver aucun
baigneur ou corps étanger.
7. Notice d’entretien
Le nettoyage de la couverture doit être effectué par vos soins
au minimum une fois par an (de préférence après l’hivernage
au moment du démontage de la couverture et de la mise en
route du bassin), à l’aide d’un produit de nettoyage spécifique
pour toile PVC. Le nettoyage courant s’effectue par simple
nettoyage au jet. Dans tous les cas, éviter les produits agressifs,
moussants ou solvants, ainsi que les éponges abrasives.
8. Notice de maintenance
L’ensemble de la couverture, y compris les fixations, doit être
inspecté tous les 3 mois. Une vérification supplémentaire est
nécessaire si la couverture a du être utilisée dans sa fonction
sécuritaire ou après une période où celle-ci a pu être sollicitée
dans des conditions extrêmes (vent fort, tempête, importante
chute de neige...). Suite à ces différentes vérifications, il
est impératif de remplacer tout élément présentant une
détérioration ou une usure quelconque. En cas de doute,
veuillez vous adresser à votre installateur piscinier.
Nota : Toutes les pièces détachées de remplacement doivent
être de provenance WALTER afin que votre couverture respecte
son cahier des charges initial, sa garantie et sa conformité à
la Norme. Prendre toutes les mesures afin d’empêcher l’accès
du bassin aux jeunes enfants et ce, jusqu’à la réparation de
la couverture ou lors d’un constat de dysfonctionnement
empêchant la fermeture et la sécurisation du bassin. Le service
après-vente est assuré en priorité par votre revendeur. Pour
tout autre renseignement notre SAV est à votre disposition au
numéro de téléphone suivant 03 90 29 51 17.
9. Spécifications particulières en période hivernale
WALU STAR AIR / WALU SAND AIR vous donnera toute
5. Aufblasen der Abdeckung
Ventildeckel abschrauben. Überzeugen Sie sich, daß der
zentrale Knopf geöffnet ist (Knopf eindrücken). Aufblasesystem
mittels Rohr und Aufblas Adapter auf dem Ventil anschließen,
und mit Luft befüllen. Halten Sie die Pumpe an, sobald die
Decke 1m erreicht. Die Abdeckung soll weich bleiben und
nachgiebig sein. Schließen Sie das Ventil, in dem Sie auf den
mittleren Knopf decken (legen in die hohe Lage). Der Knopf
des Ventils wieder festschrauben. Eine Schutzhülse aus PVC ist
wie 100 prozentig wasserdicht das Aufblasen einmal monatlich
nachprüfen.
Achtung: Ein Überdruck könnte die Schweißnähte der
Abdeckung beschädigen und dies könnte unumkehrbar wirken,
Garantie diese werden nicht der übernommen.
Wichtig: Beim Aufblasverfahren ist das Becken stets im Auge
zu halten, um Überdruck in der Abdeckung oder irgendein
anderen Vorfall, der diese Abdeckung beschädigen könnte, zu
vermeiden.
6. Demontage der Abdeckung
Cabiclic-Spannbänder mit doppelter Befestigung oder Feder
von den Edelstahlstiften abhängen und anschließend von
der Abdeckung demontieren. Abdeckung mit einem Reiniger
für PVC-Folie reinigen, trocknen lassen, falten und an einem
trockenen und möglichst lichtgeschützten Ort lagern.
Wichtig: Bei Montage und Demontage der Abdeckung ist das
Becken stets im Auge zu halten. Montage und Demontage der
Abdeckung sind nach Sichtprüfung des Beckens durch zwei
verantwortliche Erwachsene vorzunehmen, wobei sich weder
ein Schwimmer noch ein Fremdkörper vor oder während des
Vorgangs im Becken befinden darf.
7. Pflegeanleitung
Die Abdeckung ist mindestens einmal jährlich (vorzugsweise
nach der Überwinterung, bei Demontage der Abdeckung und
Inbetriebnahme des Pools) mit Hilfe eines spezifischen PVC
Folienreinigers zu reinigen. Die laufende Reinigung erfolgt
einfach durch Abspritzen mit dem Gartenschlauch. Ätzende,
schaumbildende und lösemittelhaltige Produkte sowie
scheuernde Schwämme sind auf jeden Fall zu vermeiden.
8. Wartungsanleitung
Die gesamte Abdeckung nebst Befestigungselementen
ist mindestens alle 3 Monate zu inspizieren. Eine
zusätzliche Überprüfung ist geboten, wenn die Abdeckung
zu Sicherheitszwecken dient, oder nach extremen
Witterungseinflüssen (starker Wind, Sturm, starke Schneefäll
usw.). Im Rahmen dieser Überprüfungen sind beschädigt
Bestandteile oder solche mit Verschleißerscheinungen
unverzüglich auszutauschen. Im Zweifelsfalle wenden Sie sich
an Ihren Pool-Installateur.
Hinweis: Es sind ausschließlich original WALTER-Ersatzteile zu
verwenden, damit die Vorgaben des Abdeckungs-Lastenhefts
eingehalten werden und die Garantiebedingungen sowie die
Übereinstimmung mit der Norm gewährleistet sind. Sollt
sich ein Defekt herausstellen, der den Verschluss und die
Absicherung des Beckens verhindert, sind alle gebotenen
Vorkehrungen zu treffen, um Kleinkindern den Zugang zum
Becken bis zur Reparatur der Abdeckung zu verwehren. Der
Kundendienst wird in erster Linie durch Ihre Vertriebsfirma
wahrgenommen.
9. Besondere Spezifikationen in der Überwinterungsphase
WALU STAR AIR / WALU SAND AIR wird Ihnen bei der
Überwinterung hervorragende Dienste leisten, vorausgesetzt,
5. Inflation of the cover
Unscrew the valve cap. Assure that the central cork is opened
(put in position pushed). Connect the inflator to the valve using
the pipe and the nozzle, and proceed to inflation. Stop the pump
when the cover achieves 1m of height. Once inflated, the cover
should remain flexible and shall not provide any resistance
to hand pressure. Close the valve by pressing on the central
button (put in high position). A PVC envelope is never a 100%
tight. Control and adjust the inflating once a month.
Warning: Overinflating could damage the cover’s welded
seams and cause irreversible damages which won’t fall under
guarantee.
Important: Always keep an eye on the cover while inflating it in
order to prevent any overinflating or incident that could damage
it.
6. Dismantlement of the cover
Simply take the cabiclic cords or springs out of the pegs, then
remove them from the cover. Clean the cover with a cleaning
product specifically suitable for PVC sheet, let it dry, fold it and
store it in a dry and preferably dark place.
Important: Always keep an eye on the pool during the assembly/
disasembly of the cover. These actions should be carried out
by two responsible adults after checking that no swimmer or
foreign body is still in the pool before and during the operation.
7. Care instructions
You should clean the cover at least once a year (preferably
after winterising when dismantling the cover while the
recommissioning of the pool), with a cleaning product
specifically suitable for PVC. Day-to-day cleaning can be made
using a simple water jet. Always avoid using harsh or foam
products, or those that contain solvents, as well as scouring
pads.
8. Maintenance instructions
The whole cover as well as its fastening systems should be
inspected every three months. Additional checks are necessary
if the safety function of the cover has been called on, or after
a period of stress under extreme conditions (storm, heavy
snowfall...). After carrying out these various checks it is
essential to replace any items subject to damage. In case of
doubt, please contact your pool installer.
Advice: All spare parts must be made by WALTER so that
your cover complies with its initial specification, the validity
of its guarantee is retained and it remains compliant with the
standard. Take all measures necessary to prevent access to
the pool by young children until the cover has been repaired or
when checking faults that prevent closure and the pool being
made secure. After sales service is provided by the reseller in
the first instance.
9. Special winter specifications
WALU STAR AIR / WALU SAND AIR will prove completely
satisfactory for use over winter as long as you follow the few
rules listed below:
- As it is essential that the water level in the pool is always
at its operational height (2/3 the height of the skimmers),
you should take precautions to ensure that the embedded
parts and pipework do not freeze. In order to achieve
Couverture d’hivernage gonable
Aufblasbare Winterabdeckung
Inatable winter cover
WALU STAR AIR
WALU SAND AIR
3
4
Losberger France S.A.S.
WALTER PISCINE
Z.I. BP 58 - F-67172 BRUMATH Cedex - France
Tel: +33 390 29 51 00 - Fax: +33 390 29 51 19
www.walter-piscine.com - walterpiscine@walter.fr
Document à conserver sans limite de temps pour une consultation ultérieure.
Diese Anleitung ist für spätere Einsicht zeitlich unbegrenzt aufzubewahren.
Please keep this document for future reference.
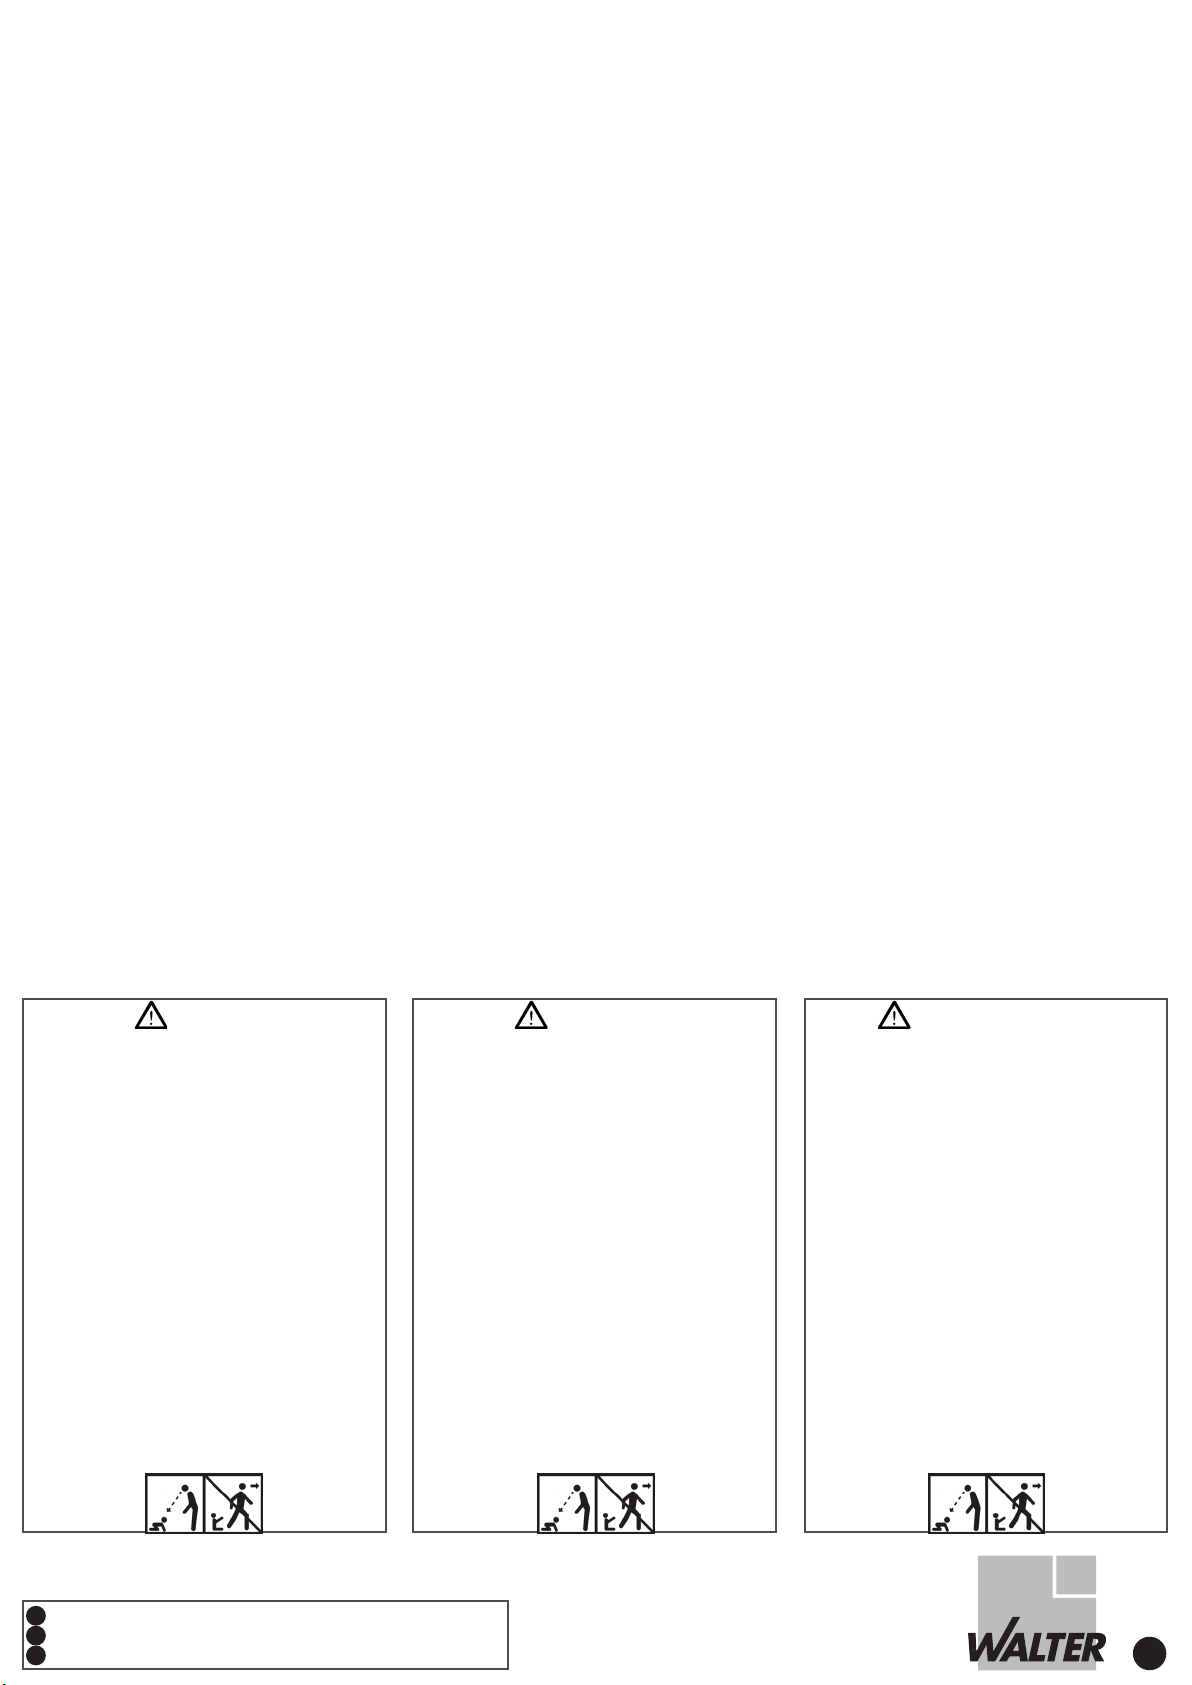
• Avertissement
La piscine peut constituer un danger grave pour vos enfants.
Une noyade est très vite arrivée. Des enfants à proximité
d’une piscine réclament votre constante vigilance et votre
surveillance active, même s’ils savent nager.
La présence physique d’un adulte responsable est
indispensable lorsque le bassin et ouvert.
• Consignes de sécurité
-La sécurité n’est assurée qu’avec une couverture fermée,
verrouillée et correctement installée conformément à nos
instructions.
-La couverture doit être systématiquement installée en cas
d’absence même momentanée du domicile.
-Toujours garder la vue sur le bassin pendant les opérations de
montage et de démontage de la couverture.
-Cette couverture ne se substitue pas au bon sens ni à la
responsabilité individuelle. Elle n’a pas pour but de se substituer
à la vigilance des parents et/ou des adultes responsables qui
demeure le facteur essentiel pour la protection des jeunes
enfants.
-Le montage et le démontage de la couverture doivent être
effectués par deux adultes responsables et après contrôle du
bassin dans lequel ne doit se trouver aucun baigneur ou corps
étrangers avant et pendant la manoeuvre.
-Cette couverture ne doit en aucun cas être considérée comme
une aire de circulation ; en conséquence, ne jamais monter,
marcher ou sauter intentionnellement sur la couverture de
sécurité !
-Apprenez les gestes qui sauvent.
• Warnhinweis
Das Schwimmbad kann eine schwere Gefahr für Ihre Kinder
darstellen. Schnell kann es zu Ertrinken kommen. Kinder
in der Nähe eines Schwimmbeckens erfordern Ihre volle
Aufmerksamkeit und aktive Überwachung, auch wenn sie
schwimmen können. Die körperliche Anwesenheit eines
verantwortlichen Erwachsenen ist daher unerlässlich, sobald das
Schwimmbecken aufgedeckt ist.
• Sicherheitsratschläge
-Die Sicherheit ist nur bei geschlossener, verriegelter
und nach unseren Anweisungen korrekt installierter
Schwimmbadabdeckung gewährleistet.
-Die Abdeckung ist bei momentanem Verlassen des Hauses
systematisch zu installieren.
-Bei Montage und Demontage der Abdeckung ist das Becken stets
im Auge zu halten.
-Die Abdeckung ist kein Ersatz für vernünftiges und
verantwortungsbewusstes Verhalten der anwesenden
Personen. Sie soll nicht als Ersatz für die Wachsamkeit der
Eltern / verantwortlichen Erwachsenen dienen. Diese ist ein
maßgebender Faktor zum Schutz kleiner Kinder.
-Montage und Demontage der Abdeckung sind nach Sichtprüfung
des Beckens durch zwei verantwortliche Erwachsene
vorzunehmen, wobei sich weder ein Schwimmer noch ein
Fremdkörper vor oder während des Vorgangs im Becken
befinden darf.
-Diese Abdeckung ist keinesfalls als begehbare Fläche zu
betrachten; daher ist absichtliches Betreten, Überqueren oder
Bespringen der Sicherheitsabdeckung unbedingt zu vermeiden!
-Erlernen Sie lebensrettende Erste-Hilfe-Maßnahmen.
• Warning
A swimming pool can be very dangerous for children. Drowning
accidents happen quickly. Children playing in or near a swimming
pool require constant vigilance and your active supervision even if
they know how to swim.
The physical presence of a responsible adult is indispensable at
all times when the pool is open.
• Safety recommendations
-Safety is only guaranteed with a closed, locked cover correctly
installed in accordance with our instructions.
-The cover must systematically be put back in place even if you
only leave the pool unattended for a few moments.
-Always keep an eye on the pool while opening or closing the pool
cover.
-This cover is no substitute for common sense and individual
responsibility. It is not intended to replace the vigilance of
parents and/or responsible adults, whose role in the protection
of children remains essential.
-The cover must only be wound or unwound by a responsible
adult, checking the pool to ensure that there are no bathers or
foreign bodies in the water before and during the operation.
-On no account may this cover be considered as a surface for
walking on; therefore, never intentionally climb, walk or jump
on the safety cover!
-Learn life-saving techniques.
FR
DE
GB
satisfaction en utilisation hivernale sous couvert du respect
des quelques règles énoncées ci-après :
- Le niveau d’eau dans le bassin étant impérativement
toujours à hauteur d’utilisation (2/3 haut des skimmers),
veiller à que les pièces à sceller et tuyauteries ne gèlent
pas ; pour ce faire, il est conseillé d’utiliser les gizzmos
et bouchons appropriés, ainsi qu’une ligne de flotteurs
d’hivernage en bout de bassin, sur une largeur, pour
éviter toute détérioration du bassin. Demander conseil
auprès de votre installateur piscinier.
- Au-dessus de 10 cm de neige, déneiger la couverture.
- Au cours de l’hiver, selon les conditions climatiques, il
peut être nécessaire de regonfler la couverture.
10. Garantie
Conditions de garantie :
- Les couvertures d’hivernage WALU STAR AIR / WALU
SAND AIR sont garanties 3 ans en utilisation normale,
sur les éléments suivants : Toile PVC, oeillets, cabiclics
et pitons.
La garantie est notamment exclue dans le cas de :
- Mauvais montage, non respect de la notice d’installation
et détériorations en résultant,
- Fausses manoeuvres ou utilisation anormales et
détériorations en résultant,
- Usure normale des composants de la couverture,
- Usure de la toile PVC due à une margelle rugueuse,
abrasive ou bombée,
- Sur-gonflage de la couverture
- Nettoyage avec un produit autre que celui recommandé
(voir notice d’entretien),
- Détériorations dues au transport,
- Baisse du niveau d’eau,
- Vent fort, très fort, tempête,
- Surcharge de neige (plus de 10 cm).
Nota : Les couvertures WALU STAR AIR / WALU SAND AIR étant
fabriquées sur mesure, toute erreur dans les dimensions ou
le coloris communiqués par le client ne pourra nous incomber
Les couvertures WALU STAR AIR / WALU SAND AIR doivent
être installées et utilisées suivant «la notice d’installation».
Toute réclamation doit être faite par lettre recommandée avec
accusé de réception et le matériel incriminé tenu à disposition
de nos experts ou ceux de nos compagnies d’assurance pour
expertise. Le service après-vente est assuré en priorité par le
revendeur. La garantie couvre uniquement le remplacement
des pièces ou ensembles reconnus défectueux, à l’exclusion
de toute responsabilité, indemnité, frais de transport, à
quelque titre que ce soit. Toute modification de la couverture
et de l’utilisation de pièces détachées de remplacement autres
que celles fournies par WALTER entraîne l’annulation de la
garantie et de la conformité de la couverture à la Norme. La
garantie sera accordée pour une installation où la pose a été
effectuée suivant les règles de l’art, en respect des normes en
vigueur et conformément à nos notices techniques.
die wenigen nachstehenden Regeln werden eingehalten:
- Der Wasserspiegel im Pool hat stets die gewöhnliche
- Nutzungshöhe zu betragen (2/3 Oberflächensaugerplatte).
- Einbauteile und Rohrleitungen dürfen nicht einfrieren.
- Dafür sind Gizzmos und geeignete Stopfen sowie eine
- Leine mit Eisdruckpolstern an einer Breitseite des
- Pools zu verwenden. Lassen Sie sich von Ihrem Pool
Installateur beraten.
- Ab 10 cm Schneefall ist der Schnee auf der Abdeckung zu
räumen.
- Während der Wintermonate, je nach den klimatischen
Verhältnissen, könnte ein gelegentlichen Nachfüllen der
Luft nötig sein.
10. Gewährleistung
Garantiebedingungen:
- Auf die Winterabdeckung WALU STAR AIR / WALU SAND
AIR leisten wir
3 Jahre Garantie bei normaler Nutzung auf folgende
Bestandteile : PVC-Folie, Ösen, Cabiclic-Spannbänder mit
doppelter Befestigung und Edelstahlstifte.
Garantieausschluss gilt für folgende Schäden:
- unsachgemäße Montage, Missachtung der
Installationsanleitung und hierdurch verursachte
Beschädigungen,
- Bedienfehler oder anormale Nutzung sowie hierdurch
verursachte Beschädigungen,
- normaler Verschleiß der Abdeckungs-Bestandteile,
- Verschleiß der PVC-Folie durch Reibung an rauem,
scheuerndem oder gewölbtem Schwimmbeckenrand,
- Überdruck
- Reinigung mit anderem als dem empfohlenen
Reinigungsprodukt (siehe Pflegeanleitung),
- transportbedingte Beschädigungen,
- Absinken des Wasserspiegels,
- starker, sehr starker Wind oder Sturm,
- Schneelast (über 10 cm).
Hinweis: Die Schwimmbadabdeckung WALU STAR AIR/
WALU SAND AIR ist eine Maßanfertigung. Irrtümer in den
vom Kunden übermittelten Abmessungen oder Farben sind
nicht durch uns zu vertreten. Die Schwimmbadabdeckungen
WALU STAR AIR / WALU SAND AIR sind nach Maßgabe der
«Installationsanleitung» zu installieren und zu verwenden.
Reklamationen sind per Einschreiben mit Rückschein
geltend zu machen. Die strittigen Ausrüstungen sind unseren
Sachverständigen bzw. denjenigen unserer Versicherer
zur Begutachtung bereit zu halten. Der Kundendienst wird
in erster Linie durch die Vertriebsfirma wahrgenommen.
Die Gewährleistung beinhaltet lediglich den Austausch von
anerkanntermaßen defekten Teilen oder Baugruppen, unter
Ausschluss jeglicher Haftung sowie ausschließlich etwaiger
Entschädigungen oder Transportkosten aller Art. Eine
Veränderung der Abdeckung oder der Einsatz von Ersatzteilen,
die nicht von WALTERstammen, wird die Garantie und die
Übereinstimmung der Abdeckung mit den Vorgaben der Norm
hinfällig. Die Gewährleistung gilt nur für Installationen nach
den Regeln der Kunst, unter Wahrung der gültigen Normen
und nach Maßgabe unserer technischen Anleitungen.
this, we recommend using the appropriate gadgets and
stoppers, as well as a line of winter floats to avoid any
damage to the pool. In case of doubt, please contact your
pool installer.
- When there is more than 10 cm of snow, remove it from
the cover.
- During winter, according to the climatic conditions, you
may need to reinflate the cover.
10. Warranty
Warranty terms:
- Our WALU STAR AIR / WALU SAND AIR winter safety
cover carries a 3-year warranty, subject to normal use,
on following parts: PVC membrane, eyelets, cabiclic cords
and pegs.
The warranty shall not apply to:
- Improper assembling, failure to comply with the
instructions and resulting damages,
- Manoeuvring errors or abnormal use and resulting
damages,
- Normal component wear and tear,
- Wear due to friction of the membrane against rough
edges,
- Over-inflation of the cover
- Cleaning with another product than recommended
product (see care instructions),
- Damages due to transport,
- Non respect of the water level,
- Strong, very strong wind, storm,
- Snow accumulation (more than 10 cm).
Advice: As WALU STAR AIR / WALU SAND AIR covers are
made to order, we shall not be liable for any error in the size
or colour provided by the client. The WALU STAR AIR / WALU
SAND AIR covers should be installed under the instructions
provided in the «installation inctructions» delivered with
the cover. Complaints are to be sent by registered mail with
acknowledgement of receipt, and the equipment at issue made
available to our experts or those of our insurance companies,
for inspection purposes. After sale service is provided by the
retailer. The warranty only covers the replacement of parts
and units acknowledged as defective, exclusive of any liability
or compensation whatsoever. Any modification of the cover or
the use of replacement parts other than those manufactured
by WALTER causes the cancellation of the warranty and
conformity of the swimming pool cover. The warranty will
be granted for covers that have been installed according the
established rules, in compliance with existing standards and in
accordance with our technical instructions.

This manual suits for next models

1

Other Walter Lighting Equipment manuals

Walter WALU POOL ADVANTAGE User manual

Walter

Walter WALU POOL ADVANTAGE User manual

Walter Junior Silver User manual

Walter

Walter Junior Silver User manual

Walter Walu Cool User manual

Walter

Walter Walu Cool User manual

Walter WaluCover User manual

Walter

Walter WaluCover User manual

Walter Walu Roll Banc Mobil Solario User manual

Walter

Walter Walu Roll Banc Mobil Solario User manual

Walter MANOTOP User manual

Walter

Walter MANOTOP User manual

Walter AXIO User manual

Walter

Walter AXIO User manual

Popular Lighting Equipment manuals by other brands

ETC XDLT 26 installation guide

ETC

ETC XDLT 26 installation guide

Vision & Control DL60x60-IR850/UDC/-a Instructions for use

Vision & Control

Vision & Control DL60x60-IR850/UDC/-a Instructions for use

Iluminarc Colorist Panel 36Qa Quick reference guide

Iluminarc

Iluminarc Colorist Panel 36Qa Quick reference guide

Griven Capital 600 Series user manual

Griven

Griven Capital 600 Series user manual

Hero Electronix Qubo QBOOK HLB06 user manual

Hero Electronix

Hero Electronix Qubo QBOOK HLB06 user manual

Viabizzuno Mosaico Installing instructions

Viabizzuno

Viabizzuno Mosaico Installing instructions

Novolink Lightscape CSL-12-5-BLE quick start guide

Novolink

Novolink Lightscape CSL-12-5-BLE quick start guide

Godox LP75R instruction manual

Godox

Godox LP75R instruction manual

Viking Stage Lighting VK660 user manual

Viking Stage Lighting

Viking Stage Lighting VK660 user manual

Trix 66740 quick start guide

Trix

Trix 66740 quick start guide

Waldmann ATARO DUW 2/D Series Instructions for use

Waldmann

Waldmann ATARO DUW 2/D Series Instructions for use

ProLights PANORAMA IP AIRBEAM user manual

ProLights

ProLights PANORAMA IP AIRBEAM user manual

kim lighting 4300 Series installation instructions

kim lighting

kim lighting 4300 Series installation instructions

Commercial Electric 1004 105 594 Use and care guide

Commercial Electric

Commercial Electric 1004 105 594 Use and care guide

Würth WLH 1+1 Premium operating instructions

Würth

Würth WLH 1+1 Premium operating instructions

Lumatek Pro DE Reflector Assembly Instructions & Parts List

Lumatek

Lumatek Pro DE Reflector Assembly Instructions & Parts List

Federal Signal Corporation 121X Series Installation and service instructions

Federal Signal Corporation

Federal Signal Corporation 121X Series Installation and service instructions

Chauvet Lrgrnd 300E Beam user manual

Chauvet

Chauvet Lrgrnd 300E Beam user manual

manuals.online logo
manuals.online logoBrands
  • About & Mission
  • Contact us
  • Privacy Policy
  • Terms and Conditions

Copyright 2025 Manuals.Online. All Rights Reserved.