manuals.online logo
Brands
  1. Home
  2. •
  3. Brands
  4. •
  5. Waterpik
  6. •
  7. Accessories
  8. •
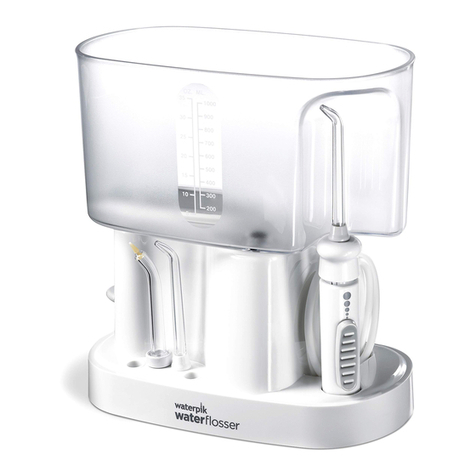
  9. Waterpik WP-100 Series User manual

Waterpik WP-100 Series User manual

3 4
1 2
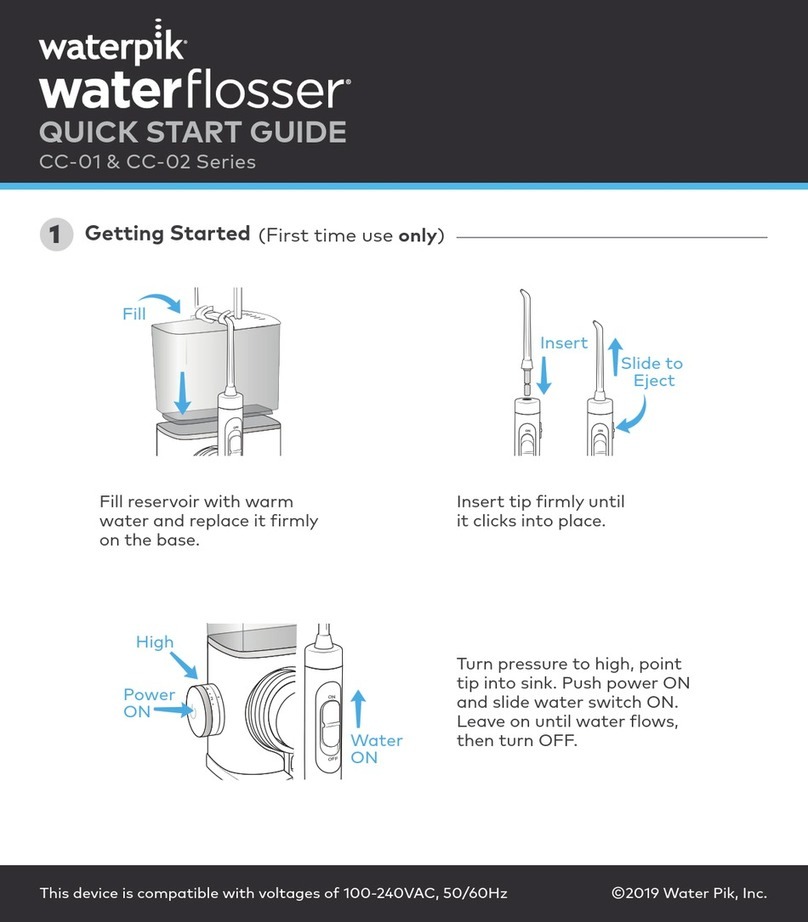
High
Élevée
Replace
Remise
en place
Fill
Remplissage
Insert
Insertion
NO
Gap
PAS
d’espace
Low
Basse
Remove the reservoir from base
and fill with lukewarm water.
Ôter le réservoir de sa base et le
remplir d’eau tiède.
Replace the reservoir onto
the base, PRESSING DOWN
FIRMLY to ensure full seating.
Remettre le réservoir en place sur
sa base en APPUYANT FERMEMENT
vers le bas jusqu’à insertion complète.
This device is only compatible with a voltage system of 120VAC, 60Hz. Do not plug this device into a voltage system that is different.
Cet appareil est uniquement compatible avec un système de tension de 120 VCA, 60 Hz. Ne pas le brancher dans un système de tension différent.
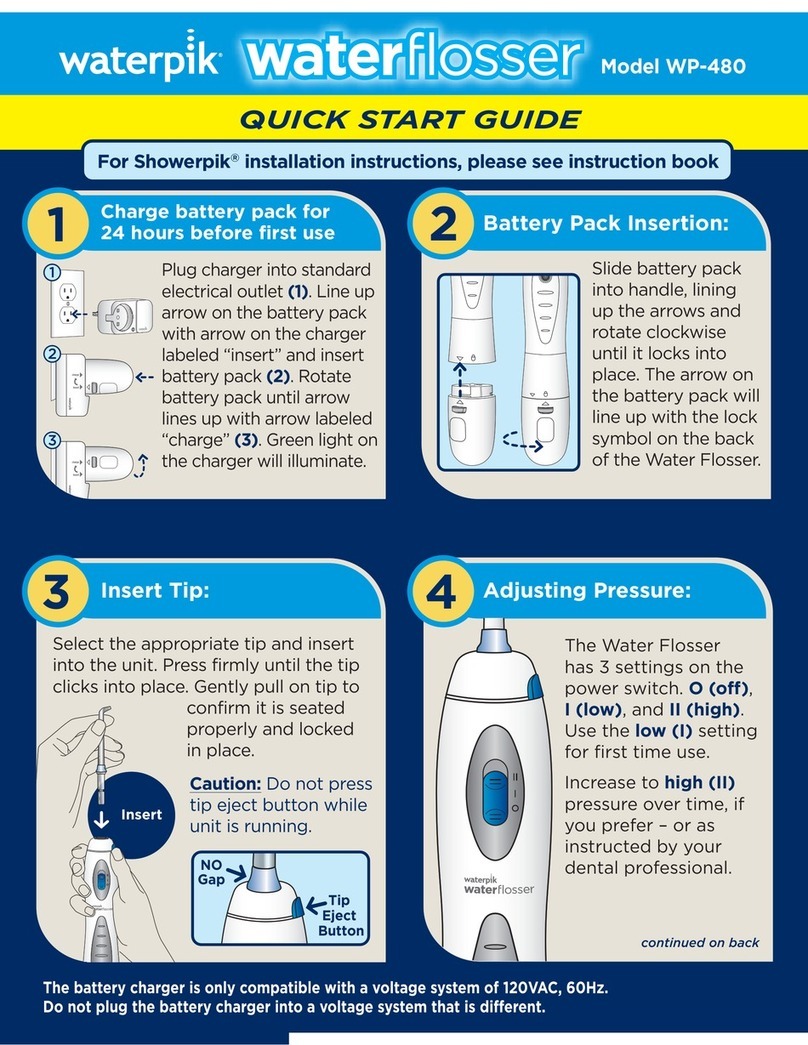
QUICK START GUIDE/
GUIDE DE DÉMARRAGE RAPIDE
Modèle WP-100/105/110/112
Model WP-100/105/110/112
Insert Tip:
Insertion de l’embout :
Prepare the Reservoir:
Préparation du réservoir :
Press tip firmly into handle. When tip is
properly inserted there should be no gap
between handle and colored tip ring.
Enfoncer fermement l’embout dans
la poignée. Une fois l’embout
correctement inséré, il ne doit pas y
avoir d’espace entre la poignée et
l’anneau avec embout coloré.
Prior to Very First Use of Unit, Prime
Unit: Set pressure control dial on base
to high, point the handle and tip into
sink. Turn unit ON until water flows
from the tip, turn unit OFF.
Avant une première utilisation,
préparez l’appareil : Placer la
commande de contrôle de la pression
située sur la base sur high (élevé), en
orientant la poignée et l’embout vers le
lavabo. Mettre l’appareil en MARCHE
jusqu’à ce que de l’eau s’écoule par
l’embout. ÉTEINDRE l’appareil.
Prime Unit (First Time Use Only):
Préparation de l’appareil
(première utilisation uniquement) :
For first time users, adjust pressure control
to lowest position. Gradually increase
pressure to your liking.
Lors de la première utilisation, régler la
pression de façon à ce qu’elle soit la plus
basse possible. Augmenter graduellement
la pression en fonction de vos préférences.
You can temporarily stop water flow by
pressing the pause button on the handle.
Vous avez la possibilité d’interrompre
temporairement le débit d’eau en
appuyant sur le bouton pause qui se
trouve sur la poignée.
Adjust Pressure and Pause Control:
Réglage de la pression et de la commande
de pause :
Pause
Pause
continued on back / Suite au verso
5
6 7
Remove
Retirer
Tip
Eject
Button
Bouton
d’éjection
de l’embout
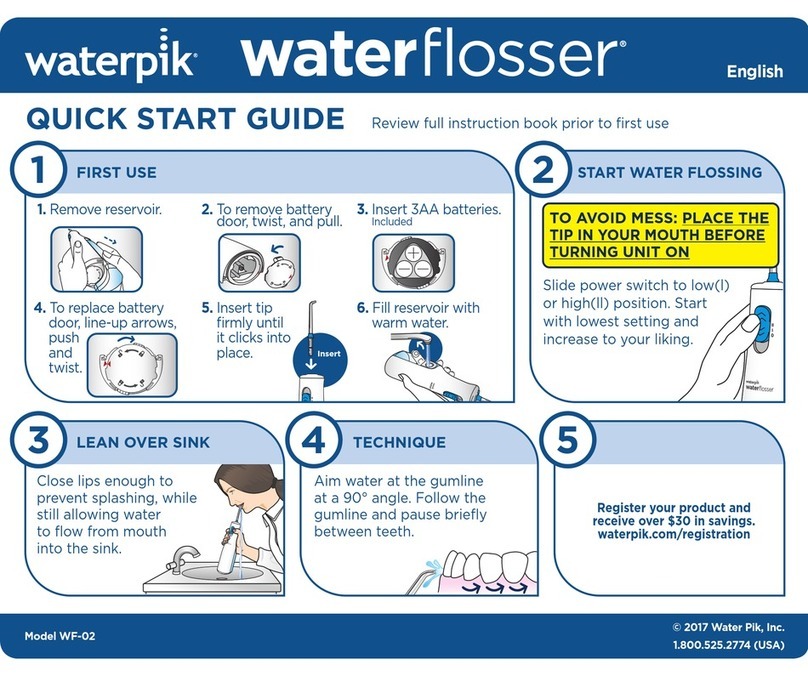
Lean over sink and close lips enough to prevent splashing, while still
allowing water to flow from mouth into the sink. Turn unit ON.
Se pencher au-dessus du lavabo et pincer les lèvres suffisamment
pour éviter toute éclaboussure, tout en permettant à l’eau de
s’écouler de la bouche dans le lavabo. Mettre l’appareil en MARCHE.
Always PAUSE or turn unit OFF before removing tip from mouth.
Toujours appuyer sur PAUSE ou arrêter l’appareil avant de RETIRER
l’embout de la bouche.
Technique Tips for Best Results:
Conseils d’utilisation pour un
résultat optimal :
Tip Removal:
Retrait de l’embout :
20019139-FAA
Water Pik, Inc.
1.888.226.3042 • www.waterpik.com
1730 East Prospect Road, Fort Collins, CO 80553-0001 USA ©2014 Water Pik, Inc.
On/Off Procedure:
Procédure de mise en marche/arrêt :
Always place tip in mouth before turning unit on.
Toujours placer l’embout dans la bouche avant de
mettre l’appareil en marche.
Aim the tip just above the gum line at a 90 degree angle.
Pointer l’embout juste au-dessus de la ligne gingivale à
un angle de 90 degrés.
Starting with the
back teeth, follow
the gum line and
pause briefly
between teeth.
Continue until all
areas around and
between teeth
have been cleaned.
Suivre la ligne gingivale en faisant une courte pause
entre chaque dent. Commencer par les dents du fond.
Continuer ainsi jusqu’à ce que les zones entre et autour
de chaque dent aient été nettoyées.
Push the tip eject button on the
handle. The control knob will rise,
releasing the tip. Remove the tip.
Enfoncer le bouton d’éjection de
l’embout sur la poignée. Le bouton
de commande se soulèvera, en
dégageant l’embout. Retirer
l’embout.
Caution: Do not press tip eject
button while unit is running.
Mise en garde :
Ne pas appuyer
sur le bouton
d’éjection de
l’embout lorsque
l’appareil est en
marche.

Other manuals for WP-100 Series

13

This manual suits for next models

3

Other Waterpik Accessories manuals

Waterpik WP-120 User manual

Waterpik

Waterpik WP-120 User manual

Waterpik WP-200 Series User manual

Waterpik

Waterpik WP-200 Series User manual

Waterpik WP-320 Series User manual

Waterpik

Waterpik WP-320 Series User manual

Waterpik WP-100 Series User manual

Waterpik

Waterpik WP-100 Series User manual

Waterpik WP-600 Series User manual

Waterpik

Waterpik WP-600 Series User manual

Waterpik Water Flosser CC-01 Series User manual

Waterpik

Waterpik Water Flosser CC-01 Series User manual

Waterpik WP-112 User manual

Waterpik

Waterpik WP-112 User manual

Waterpik WP-250 User manual

Waterpik

Waterpik WP-250 User manual

Waterpik WF-05 User manual

Waterpik

Waterpik WF-05 User manual

Waterpik WP-160 User manual

Waterpik

Waterpik WP-160 User manual

Waterpik Water Flosser WF-06 User manual

Waterpik

Waterpik Water Flosser WF-06 User manual

Waterpik WP-662UK User manual

Waterpik

Waterpik WP-662UK User manual

Waterpik WF-20 Series User manual

Waterpik

Waterpik WF-20 Series User manual

Waterpik 600 Series User manual

Waterpik

Waterpik 600 Series User manual

Waterpik Waterflosser WP-950 Series User manual

Waterpik

Waterpik Waterflosser WP-950 Series User manual

Waterpik Waterflosser WP-950 Series User manual

Waterpik

Waterpik Waterflosser WP-950 Series User manual

Waterpik Models WF-11 User manual

Waterpik

Waterpik Models WF-11 User manual

Waterpik WP-400 Series User manual

Waterpik

Waterpik WP-400 Series User manual

Waterpik Water Flosser WP-560 User manual

Waterpik

Waterpik Water Flosser WP-560 User manual

Waterpik WP-500 Series User manual

Waterpik

Waterpik WP-500 Series User manual

Waterpik Water Flosser WF-06 User manual

Waterpik

Waterpik Water Flosser WF-06 User manual

Waterpik WP-250 User manual

Waterpik

Waterpik WP-250 User manual

Waterpik WP-70 Series User manual

Waterpik

Waterpik WP-70 Series User manual

Waterpik WP-440 User manual

Waterpik

Waterpik WP-440 User manual

Popular Accessories manuals by other brands

Oregon Scientific Wireless Outdoor Temperature and Humidity Sensor THGR 238... user manual

Oregon Scientific

Oregon Scientific Wireless Outdoor Temperature and Humidity Sensor THGR 238... user manual

S+S Regeltechnik KYMASGARD AFTF-HK-FSE Operating Instructions, Mounting & Installation

S+S Regeltechnik

S+S Regeltechnik KYMASGARD AFTF-HK-FSE Operating Instructions, Mounting & Installation

Navitel PWR10 AL SILVER user manual

Navitel

Navitel PWR10 AL SILVER user manual

Sure Electronics 2X15W user guide

Sure Electronics

Sure Electronics 2X15W user guide

Puretec R Series user guide

Puretec

Puretec R Series user guide

CORNING LSE 71L instruction manual

CORNING

CORNING LSE 71L instruction manual

Abus FUHA35000C quick start guide

Abus

Abus FUHA35000C quick start guide

Livoo TEA305 user manual

Livoo

Livoo TEA305 user manual

Kistler 4007 Series instruction manual

Kistler

Kistler 4007 Series instruction manual

OTIS GenII WireFree OI-6900 Operation manual

OTIS

OTIS GenII WireFree OI-6900 Operation manual

Blickfeld Cube 1 Technical manual

Blickfeld

Blickfeld Cube 1 Technical manual

LSLIDAR M10 manual

LSLIDAR

LSLIDAR M10 manual

Enerwave ZW15R-N installation instructions

Enerwave

Enerwave ZW15R-N installation instructions

hillvert HT-IRI-01 user manual

hillvert

hillvert HT-IRI-01 user manual

Lightolier 1101HLIE specification

Lightolier

Lightolier 1101HLIE specification

MyCharge AMPxt 6000 owner's manual

MyCharge

MyCharge AMPxt 6000 owner's manual

XLAYER Plus Solar user guide

XLAYER

XLAYER Plus Solar user guide

BEA Falcon installation manual

BEA

BEA Falcon installation manual

manuals.online logo
manuals.online logoBrands
  • About & Mission
  • Contact us
  • Privacy Policy
  • Terms and Conditions

Copyright 2025 Manuals.Online. All Rights Reserved.