manuals.online logo
Brands
  1. Home
  2. •
  3. Brands
  4. •
  5. WeatherTech
  6. •
  7. Automobile Accessories
  8. •
  9. WeatherTech No-Drill MudFlap User manual

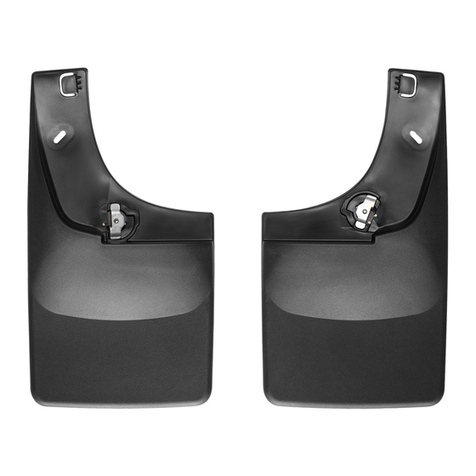
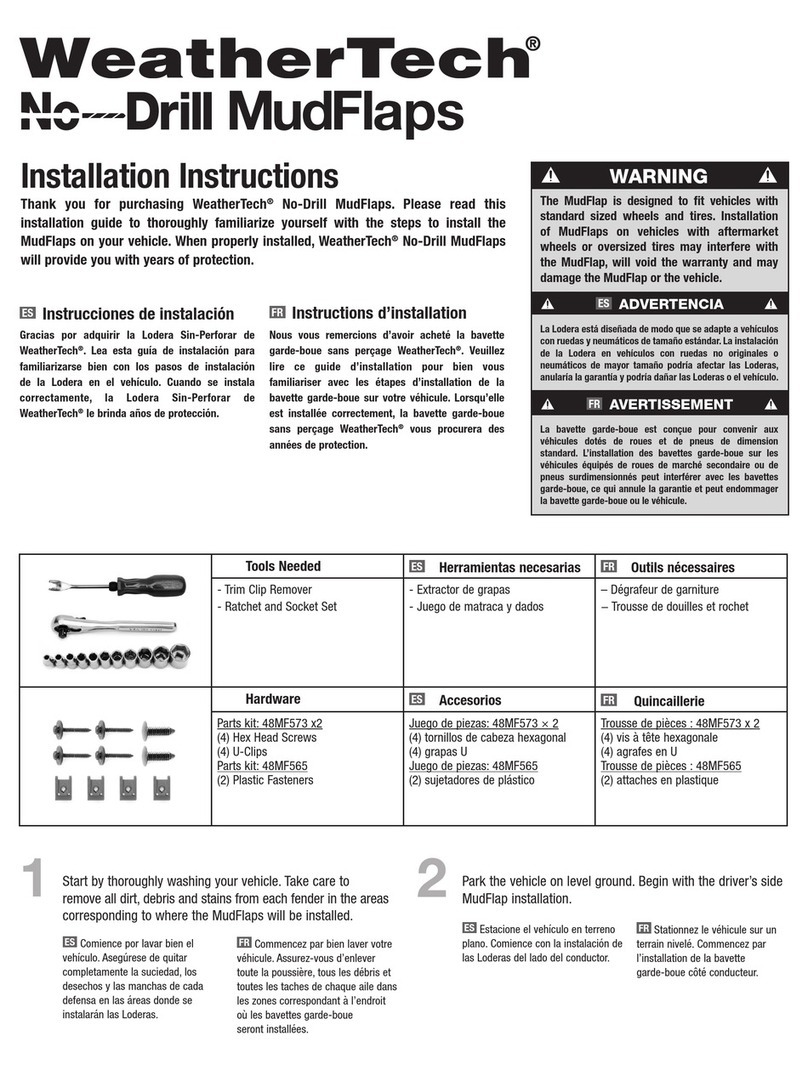
WeatherTech No-Drill MudFlap User manual

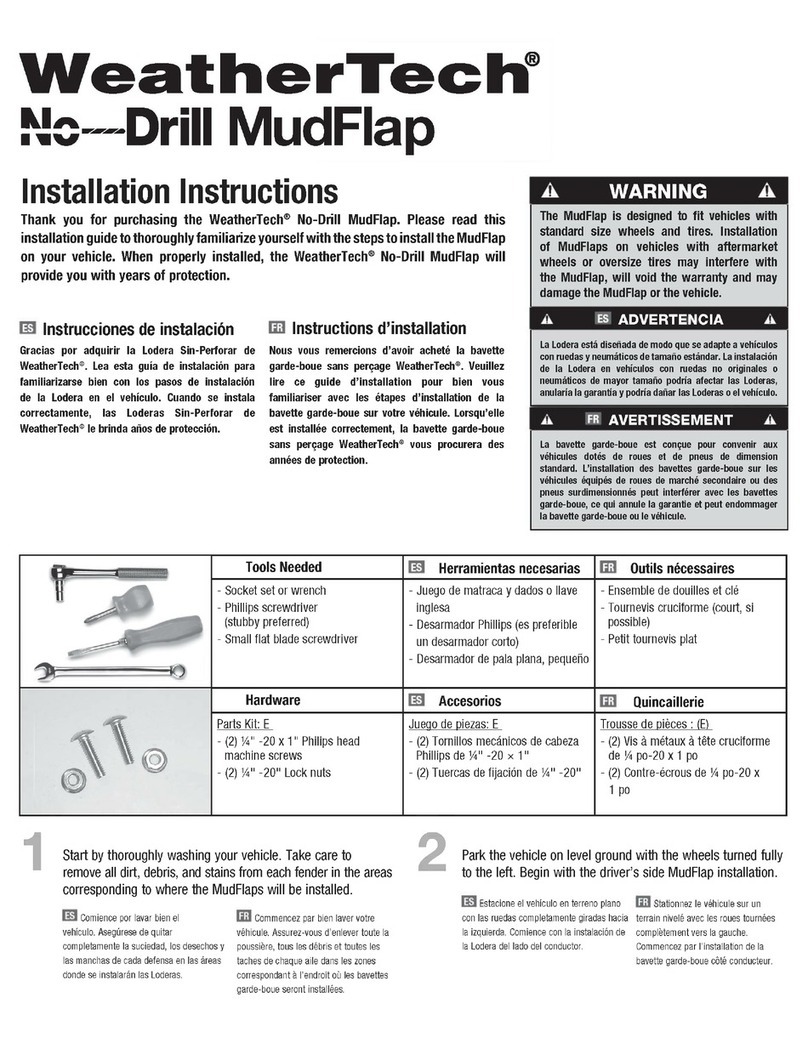
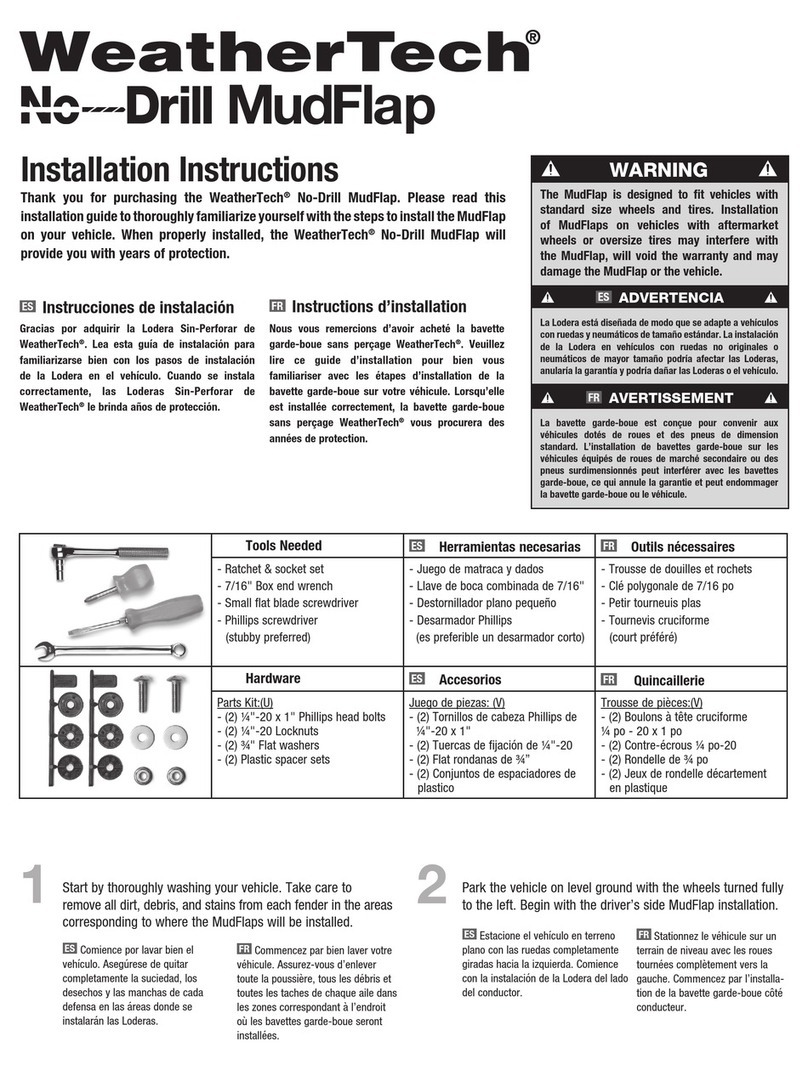
Installation
Instructions
Thank
you
for
purchasing
the
WeatherTech
®
No-Drill
MudFlap.
Please
read
this
installation
guide
to
thoroughly
familiarize
yourself
with
the
steps
to
install
the
MudFlap
on
your
vehicle.
When
properly
installed,
the
WeatherTech
®
No-Drill
MudFlap
will
provide
you
with
years
of
protection.
Instrucciones
de
instalación
Gracias
por
adquirir
la
Lodera
Sin-Perforar
de
WeatherTech
®
.
Lea
esta
guía
de
instalación
para
familiarizarse
bien
con
los
pasos
de
instalación
de
la
Lodera
en
el
vehículo.
Cuando
se
instala
correctamente,
las
Loderas
Sin-Perforar
de
WeatherTech
®
le
brinda
años
de
protección.
Instructions
d
’
installation
Nous
vous
remercions
d
’
avoir
acheté
la
bavette
garde-boue
sans
perçage
WeatherTech
®
.
Veuillez
lire
ce
guide
d
’
installation
pour
bien
vous
familiariser
avec
les
étapes
d
’
installation
de
la
bavette
garde-boue
sur
votre
véhicule.
Lorsqu
’
elle
est
installée
correctement,
la
bavette
garde-boue
sans
perçage
WeatherTech
®
vous
procurera
des
années
de
protection.
WARNING
The
MudFlap
is
designed
to
fit
vehicles
with
standard
size
wheels
and
tires.
Installation
of
MudFlaps
on
vehicles
with
aftermarket
wheels
or
oversize
tires
may
interfere
with
the
MudFlap,
will
void
the
warranty
and
may
damage
the
MudFlap
or
the
vehicle.
A
ES
ADVERTENCIA
A
La
Lodera
está
diseñada
de
modo
que
se
adapte
a
vehículos
con
ruedas
y
neumáticos
de
tamaño
estándar.
La
instalación
de
la
Lodera
en
vehículos
con
ruedas
no
originales
o
neumáticos
de
mayor
tamaño
podría
afectar
las
Loderas,
anularía
la
garantía
y
podría
dañar
las
Loderas
o
el
vehículo.
A
FR
AVERTISSEMENT
A
La
bavette
garde-boue
est
conçue
pour
convenir
aux
véhicules
dotés
de
roues
et
des
pneus
de
dimension
standard.
L
’
installation
de
bavettes
garde-boue
sur
les
véhicules
équipés
de
roues
de
marché
secondaire
ou
des
pneus
surdimensionnés
peut
interférer
avec
les
bavettes
garde-boue,
ce
qui
annule
la
garantie
et
peut
endommager
la
bavette
garde-boue
ou
le
véhicule.
Tools
Needed
-
1/4"
Ratchet
socket
set
-
Phillips
screwdriver
(stubby
preferred)
-
7/16"
Box
end
wrench
Hardware
Parts
Kit:
(V)
-
(2)
3/4"
Washers
-
(2)
1/4"-
20
x
1"
Truss
head
bolts
-
(2)
1/4"-
20
Locknuts
-
(2)
#12-24
Locknuts
-
(2)
#12-24
x
3/4"
Phillips
head
machine
screws
Herramientas
necesarias
-
Juego
de
matraca
y
dados
de
1/4"
-
Desarmador
Phillips
(es
preferible
un
desarmador
corto)
-
Llave
de
boca
combinada
de
7/16"
Accesorios
Juego
de
piezas:
(V)
-
(4)
Rondanas
de
3/4"
-
(2)
Tornillos
de
cabeza
segmentada
1/4"-20
x
1"
-
(2)
Tuercas
de
fijación
de
1/4-20
-
(2)
Tornillos
mecánicos
de
cabeza
Phillips
#
12-24
x
3/4"
Outils
nécessaires
-
Trousse
de
douilles
et
rochets
à
prise
1/4
po
-
Tournevis
cruciforme
(court
préféré)
-
Clé
polygonale
de
7/16
po
Quincaillerie
Trousse
de
pièces:
(V)
-
(2)
Rondelles
de
3/4
po
-
(2)
Boulons
à
tête
bombée
1/4"-20
x
1"
-
(2)
Contre-écrous
1/4
po
-
20
-
(4)
Contre-écrous
#12-24
-
(2)
vis
à
métaux
à
tête
cruciforme
de
no
12-24
x
3/4
po
1
Start
by
thoroughly
washing
your
vehicle.
Take
care
to
remove
all
dirt,
debris,
and
stains
from
each
fender
in
the
areas
corresponding
to
where
the
MudFlaps
will
be
installed.
Comience
por
lavar
bien
el
vehículo.
Asegúrese
de
quitar
completamente
la
suciedad,
los
desechos
y
las
manchas
de
cada
defensa
en
las
áreas
donde
se
instalarán
las
Loderas.
Commencez
par
bien
laver
votre
véhicule.
Assurez-vous
d
’
enlever
toute
la
poussière,
tous
les
débris
et
toutes
les
taches
de
chaque
aile
dans
les
zones
correspondant
à
l
’
endroit
où
les
bavettes
garde-boue
seront
installées.
2
Park
the
vehicle
on
level
ground
with
the
wheels
turned
fully
to
the
left.
Begin
with
the
driver
’
s
side
MudFlap
installation.
Estacione
el
vehículo
en
terreno
plano
con
las
ruedas
completamente
giradas
hacia
la
izquierda.
Comience
con
la
instalación
de
la
Lodera
del
lado
del
conductor.
Stationnez
le
véhicule
sur
un
terrain
de
niveau
avec
les
roues
tournées
complètement
vers
la
gauche.
Commencez
par
l
’
installation
de
la
bavette
garde-boue
côté
conducteur.
3
Locate
the
fastener
holding
inner
plastic
liner
to
fender
lip.
Using
the
appropriate
socket,
remove
this
fastener.
This
fastener
will
be
re-used.
R
Localisez
l
’
attache
qui
maintient
en
place
le
revêtement
intérieur
de
l
’
aile
en
plastique
à
la
lèvre
de
l
’
aile.
Utilisez
la
douille
appropriée
pour
retirer
cette
attache.
Cette
attache
sera
réinstallée.
4
Place
the
MudFlap
marked
"LH"
in
place
on
the
fender.
Line
up
the
holes
in
the
MudFlap
with
the
holes
in
the
fender
lip
and
the
plastic
liner
behind
it.
Coloque
la
lodera
que
presenta
la
marca
"LH"
(lado
izquierdo)
donde
corresponde,
sobre
la
defensa.
Alinee
los
orificios
de
la
lodera
con
los
orificios
del
borde
de
la
defensa
y
el
revestimiento
de
plástico
que
se
encuentra
detrás
de
este.
Placez
la
bavette
garde-boue
marquée
"LH"
à
l
’
emplacement
approprié
sur
l’
aile.
Alignez
les
trous
de
la
bavette
sur
les
trous
de
la
lèvre
de
l
’
aile
et
de
la
garniture
en
plastique
à
l’
arrière
de
celle-ci.
5
Using
the
sheet
metal
screw
(previously
removed),
put
the
screw
through
the
MudFlap
and
fender
lip,
then
thread
into
the
clip
on
the
plastic
liner.
Do
not
tighten
at
this
time.
Inserte
el
tornillo
de
metal
(que
había
extraído
previamente)
a
través
de
la
lodera
y
el
borde
de
la
defensa,
y
luego
páselo
por
la
grapa
del
revestimiento
de
plástico.
No
ajuste
todavía.
Insérez
la
vis
à
métaux
(retirée
précédemment)
à
travers
la
bavette
garde-boue
et
la
lèvre
de
l
’
aile,
puis
vissez-la
dans
l
’
agrafe
sur
la
garniture
en
plastique.
Ne
serrez
pas
pour
l
’
instant.
6
Using
the
box
end
wrench,
hold
the
nut
for
the
smaller
machine
screw
behind
the
hole
in
the
fender.
Attach
the
machine
screw
with
washer
through
the
MudFlap.
Utilizando
la
llave
de
boca
combinada,
sostenga
la
tuerca
del
tornillo
mecánico
más
pequeño
detrás
del
orificio
de
la
defensa.
Sujete
el
tornillo
mecánico
a
la
lodera
con
la
Rondana.
R
À
l
’
aide
de
la
clé
polygonale,
maintenez
l
’
écrou
destiné
à
la
plus
petite
vis
à
métaux
à
l
’
arrière
du
trou
dans
l’
aile.
Vissez
la
vis
à
métaux
avec
la
rondelle
à
travers
la
bavette
garde-boue.
Localice
el
sujetador
que
fija
el
revestimiento
interno
de
plástico
al
borde
de
la
defensa.
Extraiga
este
sujetador
empleando
la
llave
adecuada.
Tenga
en
cuenta
que
deberá
volver
a
utilizarlo.
7
While
holding
the
MudFlap
firmly
against
the
fender,
tighten
the
(2)
fasteners.
Sosteniendo
la
Lodera
firmemente
contra
la
defensa,
ajuste
los
(2)
sujetadores.
Tout
en
maintenant
la
bavette
garde-boue
fermement
contre
l
’
aile,
serrez
les
(2)
attaches.
8
(Optional)
For
additonal
support,
a
1/4"
hole
can
be
drilled
or
cut
into
the
plastic
liner
behind
the
3
rd
hole
provided
in
the
MudFlap.
Once
the
(2)
fasteners
have
been
tightened,
use
the
3
rd
hole
in
the
MudFlap
as
the
guide
to
drill
an
additional
hole
(this
hole
will
only
be
in
the
plastic).
(Opcional)
Para
brindar
mayor
soporte,
se
puede
perforar
o
cortar
el
revestimiento
de
plástico
para
realizar
un
orificio
de
1/4
”
detrás
del
tercer
orificio
de
la
lodera.
Una
vez
que
haya
ajustado
los
sujetadores
(2),
utilice
el
tercer
orificio
de
la
lodera
como
guía
para
perforar
otro
orificio
(este
último
solo
se
realizará
en
el
plástico).
(Facultatif)
Pour
retenir
plus
solidement
la
bavette
garde-boue,
un
trou
de
1/4
po
peut
être
percé
ou
découpé
à
travers
la
garniture
en
plastique
sous
le
3e
trou
de
la
bavette.
Lorsque
les
(2)
attaches
sont
serrées,
utilisez
le
3e
trou
de
la
bavette
comme
guide
pour
percer
un
nouveau
trou
(ce
trou
ne
traversera
que
la
garniture
en
plastique).
9
Install
the
passenger
side
MudFlap
marked
"RH",
repeating
steps
3-8.
i
nstale
la
Lodera
del
lado
del
pasajero
que
tiene
la
marca
"RH",
girando
completamente
las
ruedas
hacia
la
derecha
y
repitiendo
los
pasos
del
3
al
9.
Installez
la
bavette
garde-boue
côté
passager
marquée
"RH"
en
tournant
les
roues
complètement
vers
la
droite,
puis
répétez
les
étapes
3
à
9.
Congratulations!
Your
new
WeatherTech
®
No-Drill
MudFlaps
have
been
installed!
¡Felicitaciones!
¡Sus
nuevas
Loderas
Sin-Perforacion
de
WeatherTech
®
están
instaladas!
Félicitations!
Vos
nouvelles
bavettes
garde-boue
sans
perçage
WeatherTech
®
sont
installées!
WeatherTec
h
USA
Questions?
(630)
769-1500
WeatherTech.com
For
warranty
information,
please
visit
www.WeatherTech.com/warranty
or
contact
our
customer
support
team
at
(630)
769-1500
or
(800)
441-6287.
¿Preguntas?
(630)
769-1500
WeatherTech.com
Para
información
sobre
la
garantía,
por
favor
visite
www.WeatherTech.com/espanol/warranty
o
póngase
en
contacto
con
nuestro
equipo
de
servicio
al
cliente
a
(630)
769-1500
o
al
(800)
441-6287.
México
¿Preguntas?
001
6307691500
WeatherTech.mx
Para
información
sobre
la
garantía,
por
favor
visite
www.Weathertech.mx/warranty
o
póngase
en
contacto
con
nuestro
equipo
de
servicio
al
cliente
a
001
6307691500.
Canada
Questions?
(888)
905-6287
WeatherTech.ca
For
warranty
information,
please
visit
www.WeatherTech.ca/warranty
or
contact
our
customer
support
team
at
(888)
905-6287
or
(905)
549-2761
Made
in
the
USA
MF112
©
2017
by
MacNeil
IP
LLC
Questions?
(888)
905-6287
WeatherTech.ca
Pour
plus
d
’
informations
sur
la
garantie,
svp
visite
www.WeatherTech.ca/fr/warranty
ou
contactez
notre
service
à
la
clientele
au
(888)
905-6287
ou
(905)
549-2761

Other WeatherTech Automobile Accessories manuals
WeatherTech No-Drill MudFlap User manual

WeatherTech

WeatherTech No-Drill MudFlap User manual

WeatherTech No-Drill MudFlaps User manual

WeatherTech

WeatherTech No-Drill MudFlaps User manual

WeatherTech No-Drill MudFlap User manual

WeatherTech

WeatherTech No-Drill MudFlap User manual

WeatherTech 88TG07 User manual

WeatherTech

WeatherTech 88TG07 User manual

WeatherTech BMW E71 X6 SAC User manual

WeatherTech

WeatherTech BMW E71 X6 SAC User manual

WeatherTech No-Drill MudFlap User manual

WeatherTech

WeatherTech No-Drill MudFlap User manual

WeatherTech MudFlap User manual

WeatherTech

WeatherTech MudFlap User manual

WeatherTech No Drill MudFlap User manual

WeatherTech

WeatherTech No Drill MudFlap User manual

WeatherTech No-Drill MudFlap User manual

WeatherTech

WeatherTech No-Drill MudFlap User manual

WeatherTech MF110 User manual

WeatherTech

WeatherTech MF110 User manual

WeatherTech No-Drill MudFlap User manual

WeatherTech

WeatherTech No-Drill MudFlap User manual

WeatherTech No-Drill MudFlap User manual

WeatherTech

WeatherTech No-Drill MudFlap User manual

WeatherTech No-Drill MudFlap User manual

WeatherTech

WeatherTech No-Drill MudFlap User manual

WeatherTech No-Drill MudFlap User manual

WeatherTech

WeatherTech No-Drill MudFlap User manual

WeatherTech AlloyCover Quick start guide

WeatherTech

WeatherTech AlloyCover Quick start guide

WeatherTech 82562 User manual

WeatherTech

WeatherTech 82562 User manual

WeatherTech No-Drill MudFlap User manual

WeatherTech

WeatherTech No-Drill MudFlap User manual

WeatherTech No-Drill MudFlap User manual

WeatherTech

WeatherTech No-Drill MudFlap User manual

WeatherTech Truck Bed Cover Quick start guide

WeatherTech

WeatherTech Truck Bed Cover Quick start guide

WeatherTech No-Drill MudFlap User manual

WeatherTech

WeatherTech No-Drill MudFlap User manual

WeatherTech 110071 User manual

WeatherTech

WeatherTech 110071 User manual
WeatherTech MudFlap User manual

WeatherTech

WeatherTech MudFlap User manual

WeatherTech No-Drill MudFlap User manual
WeatherTech

WeatherTech No-Drill MudFlap User manual

WeatherTech No-Drill MudFlap User manual

WeatherTech

WeatherTech No-Drill MudFlap User manual

Popular Automobile Accessories manuals by other brands

Bestop Tigertop Installation instructions and owner's manual

Bestop

Bestop Tigertop Installation instructions and owner's manual

Carefree MARQUEE Service manual

Carefree

Carefree MARQUEE Service manual

Dakota Digital LED Tail Lights for 1965 Nova LAT-NR130 installation instructions

Dakota Digital

Dakota Digital LED Tail Lights for 1965 Nova LAT-NR130 installation instructions

Quadratec Ski & Snowboard Rack installation manual

Quadratec

Quadratec Ski & Snowboard Rack installation manual

Warn 103209 installation instructions

Warn

Warn 103209 installation instructions

Flash Cover MN006 installation manual

Flash Cover

Flash Cover MN006 installation manual

VDO VIEWLINE VOLTMETER Product information

VDO

VDO VIEWLINE VOLTMETER Product information

iDataLink ADS-TBSL-FM-EN install guide

iDataLink

iDataLink ADS-TBSL-FM-EN install guide

travall TDG 1168 FITTING INSTRUCTION

travall

travall TDG 1168 FITTING INSTRUCTION

ARB 10900013 installation guide

ARB

ARB 10900013 installation guide

Lippert RV Guideline

Lippert

Lippert RV Guideline

BMW E65 installation instructions

BMW

BMW E65 installation instructions

Ecor Tech Advanced Driving Assistant System user manual

Ecor Tech

Ecor Tech Advanced Driving Assistant System user manual

VXI VoxStar user guide

VXI

VXI VoxStar user guide

DEFA 423873 Fitting instructions

DEFA

DEFA 423873 Fitting instructions

Samsung EB-HN910I user manual

Samsung

Samsung EB-HN910I user manual

Directed DS3+ installation guide

Directed

Directed DS3+ installation guide

Road Armor STEALTH 5203R0B Install instructions

Road Armor

Road Armor STEALTH 5203R0B Install instructions

manuals.online logo
manuals.online logoBrands
  • About & Mission
  • Contact us
  • Privacy Policy
  • Terms and Conditions

Copyright 2025 Manuals.Online. All Rights Reserved.