Visit our website at www.earwash.welchallyn.com for more information.
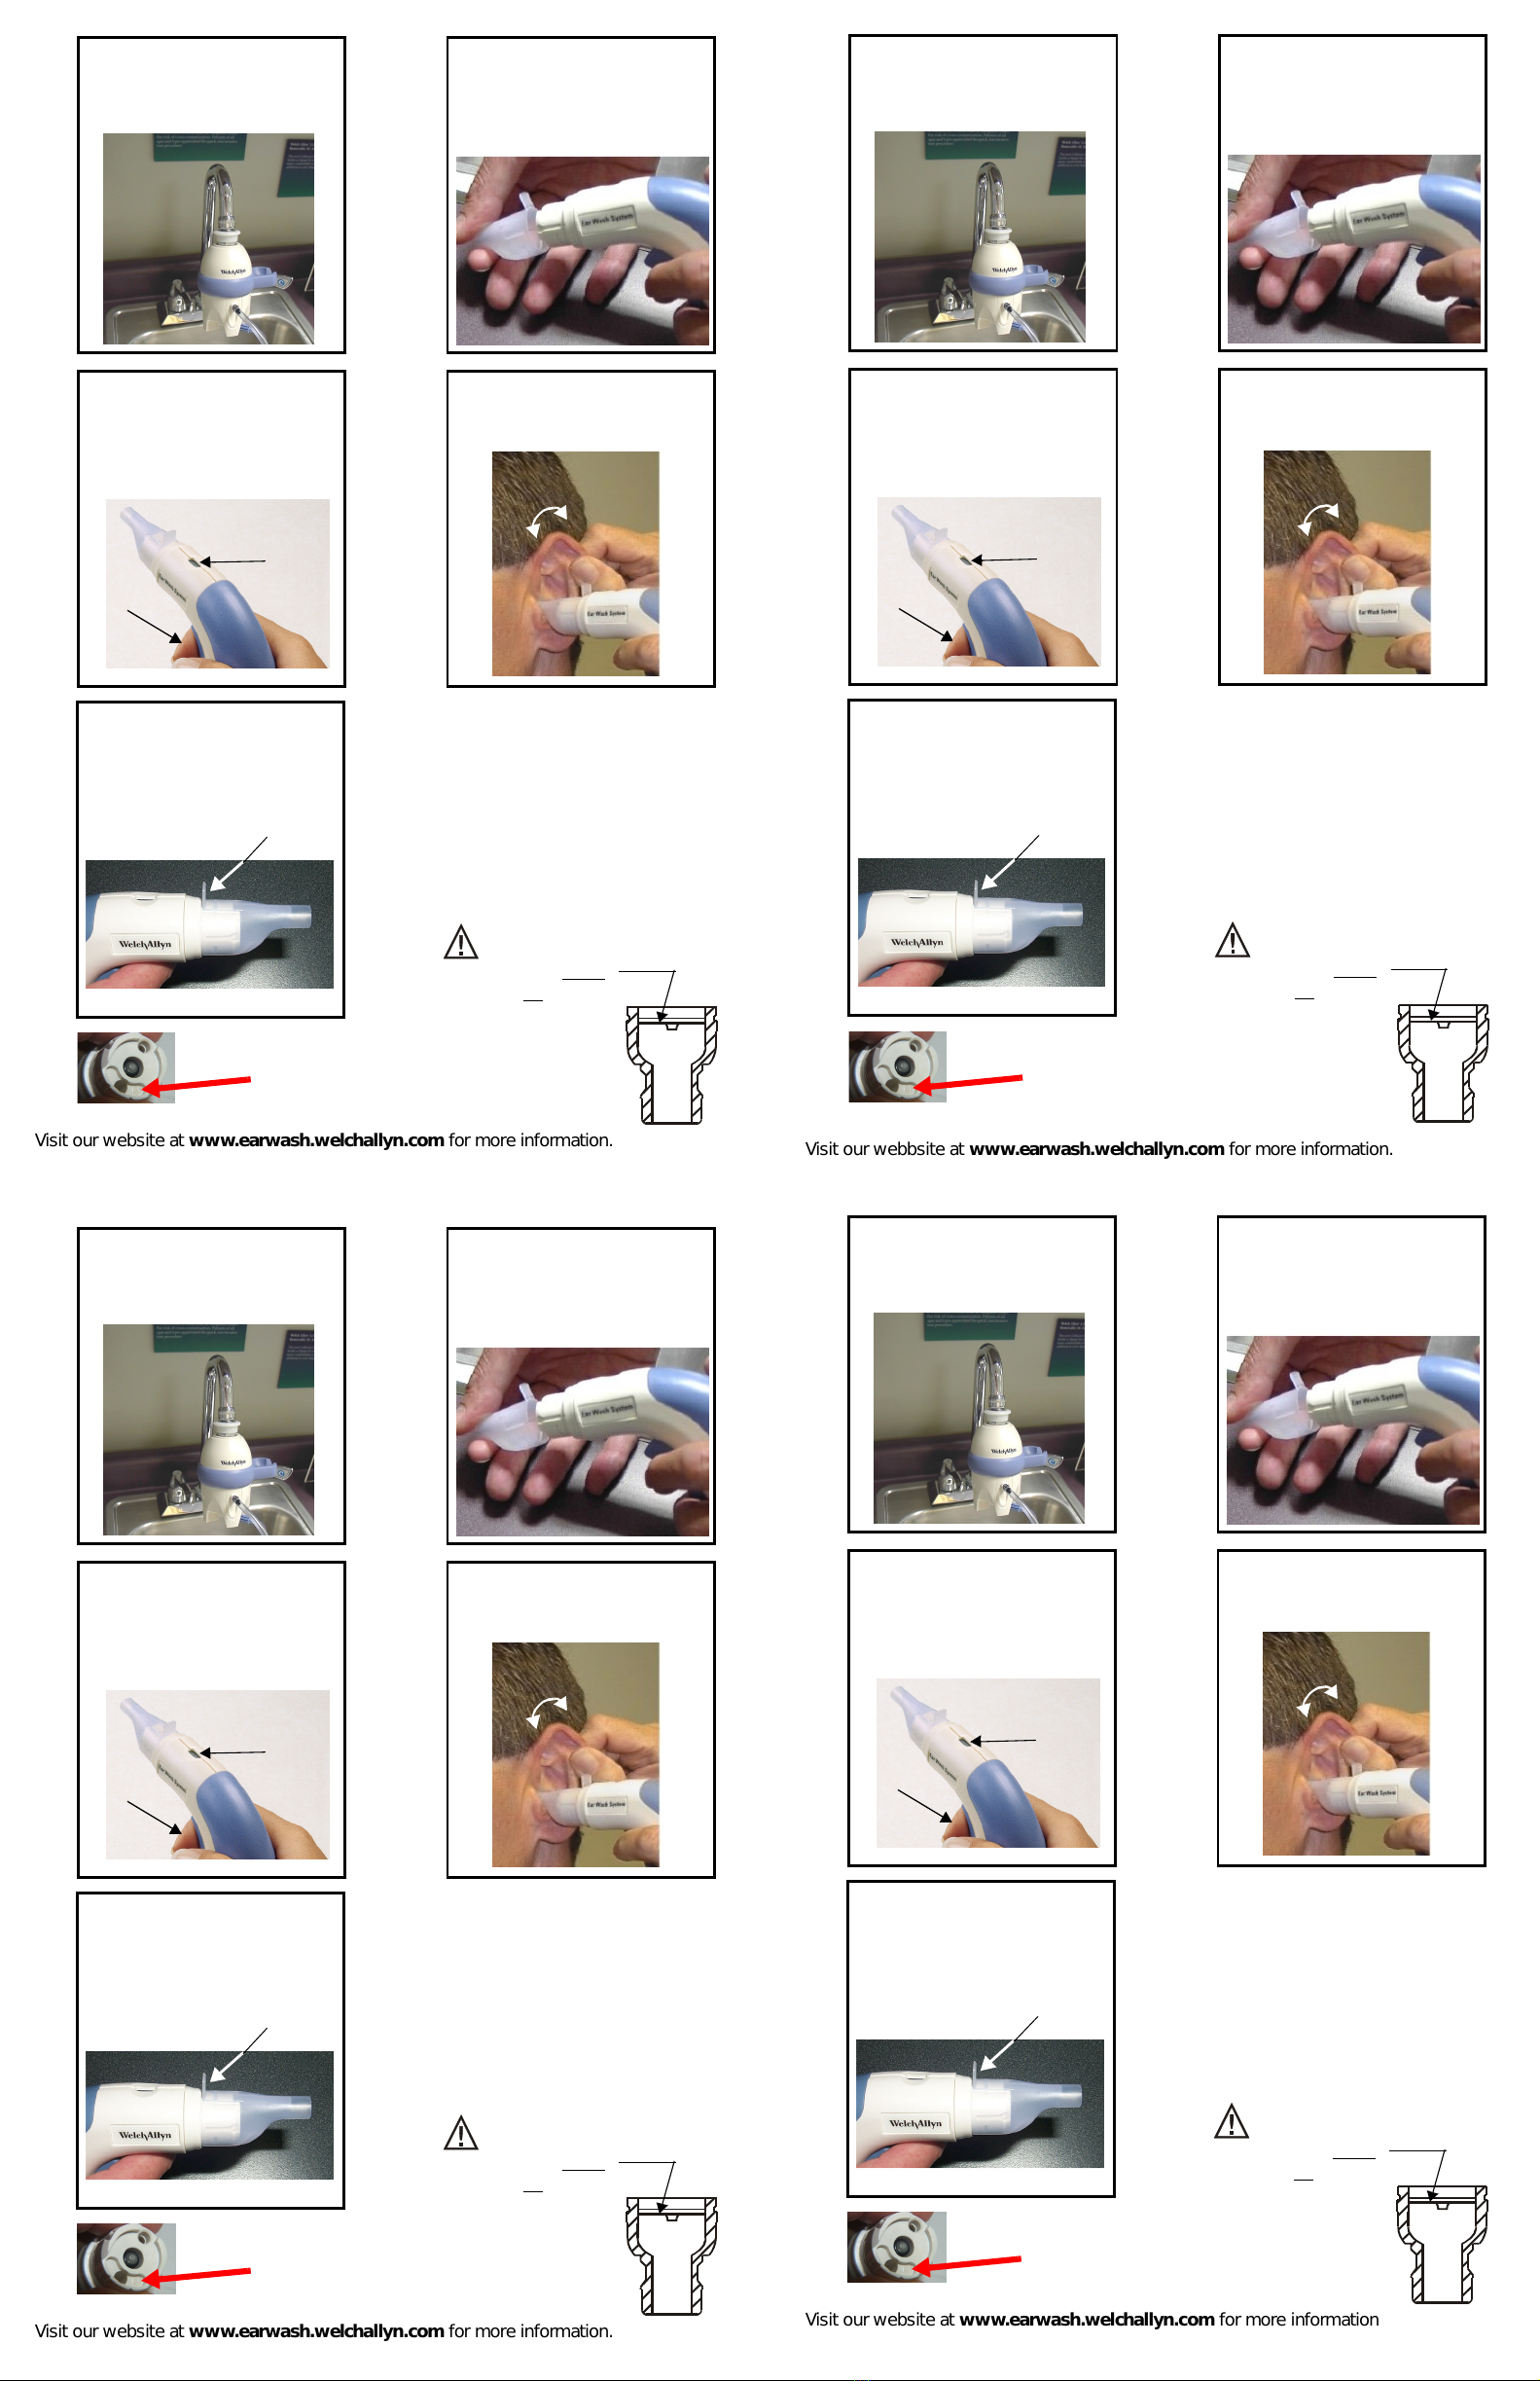
Rotating the handle during the
procedure while holding the pinna
encourages wax removal.
(B)
Turn the hot and cold water on
full power. Adjust by turning the
cold down until the water is warm.
TIP: Hotter water is better.
Pull tabto remove the ear tip
from the handle and dispose of
properly.
Squeeze the Actuator (A) and
begin irrigating the ear when the
blue temperature sensor (B)
changes to white.
(A)
Attach the ear tip to the handle.
Verify the tab is on the top.
34
56
7
The water chamber is designed for
use ONLY with handle dated AFTER
02 (YEAR)
03 (MONTH)
Pull Tab
Always inspect the ear before
attempting any irrigation. If
perforation is suspected and
the tympanic membrane is
not visible, do not irrigate
with this device.
Refer to page 2 of Operating
Instruction Manual for further
information.
Plastic flow limiter must
be in place for allaerators.
See page 4 in manual.
For Safe Use
Visit our webbsite at www.earwash.welchallyn.com for more information.
Rotating the handle during the
procedure while holding the pinna
encourages wax removal.
(B)
Turn the hot and cold water on
full power. Adjust by turning the
cold down until the water is warm.
TIP: Hotter water is better.
Pull tabto remove the ear tip
from the handle and dispose of
properly.
Squeeze the Actuator (A) and
begin irrigating the ear when the
blue temperature sensor (B)
changes to white.
(A)
Attach the ear tip to the handle.
Verify the tab is on the top.
34
56
7
The water chamber is designed for
use ONLY with handle dated AFTER
02 (YEAR)
03 (MONTH)
Pull Tab
Always inspect the ear before
attempting any irrigation. If
perforation is suspected and
the tympanic membrane is
not visible, do not irrigate
with this device.
Refer to page 2 of Operating
Instruction Manual for further
information.
Plastic flow limiter must
be in place for allaerators.
See page 4 in manual.
For Safe Use
Visit our website at www.earwash.welchallyn.com for more information.
Rotating the handle during the
procedure while holding the pinna
encourages wax removal.
(B)
Turn the hot and cold water on
full power. Adjust by turning the
cold down until the water is warm.
TIP: Hotter water is better.
Pull tabto remove the ear tip
from the handle and dispose of
properly.
Squeeze the Actuator (A) and
begin irrigating the ear when the
blue temperature sensor (B)
changes to white.
(A)
Attach the ear tip to the handle.
Verify the tab is on the top.
34
56
7
The water chamber is designed for
use ONLY with handle dated AFTER
02 (YEAR)
03 (MONTH)
Pull Tab
Always inspect the ear before
attempting any irrigation. If
perforation is suspected and
the tympanic membrane is
not visible, do not irrigate
with this device.
Refer to page 2 of Operating
Instruction Manual for further
information.
Plastic flow limiter must
be in place for allaerators.
See page 4 in manual.
For Safe Use
Visit our website at www.earwash.welchallyn.com for more information
Rotating the handle during the
procedure while holding the pinna
encourages wax removal.
(B)
Turn the hot and cold water on
full power. Adjust by turning the
cold down until the water is warm.
TIP: Hotter water is better.
Pull tabto remove the ear tip
from the handle and dispose of
properly.
Squeeze the Actuator (A) and
begin irrigating the ear when the
blue temperature sensor (B)
changes to white.
(A)
Attach the ear tip to the handle.
Verify the tab is on the top.
34
56
7
The water chamber is designed for
use ONLY with handle dated AFTER
02 (YEAR)
03 (MONTH)
Pull Tab
Always inspect the ear before
attempting any irrigation. If
perforation is suspected and
the tympanic membrane is
not visible, do not irrigate
with this device.
Refer to page 2 of Operating
Instruction Manual for further
information.
Plastic flow limiter must
be in place for allaerators.
See page 4 in manual.
For Safe Use


