Westlab 665-106 User manual

1
PRODUCT MANUAL
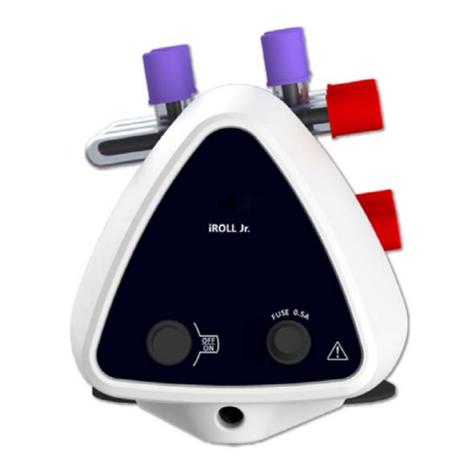
Digital Disc
Rotator Set
300 - 4200RPM
Code 665-106

2
PRODUCT MANUAL
1800 358 101
sales.au@westlab.com
www.westlab.com.au
+64 9 553 3677
sales.nz@westlab.com
www.westlab.co.nz
646 568 5391
sales.us@westlab.com
www.westlab.com
1 877 822 1455
sales.ca@westlab.com
www.westlab.com
Australia New Zealand United StatesCanada
1. Product Description
1.1 Introduction
Powered with a BLDC motor, the disc rotator guarantees maintenance-free longevity and
quiet performance. The intuitive digital display allows for the quick and easy setting of
parameters without compromising on convenience.
With a variable speed ranging from 10 to 80 RPM, the disc rotator has a variable time
setting of one to 99 minutes and an innite mode. Furthermore, the user-programmable
mode enables the user to set up to nine user-dened programs for unprecedented
convenience.
A microprocessor-based closed-loop operation allows for exact speed control under
varied load conditions. In addition, the pulse mode with the Run-Pause-Run function
allows for thorough mixing of the solution.
The auto power on feature starts the device automatically after a power failure and runs
for the remaining left time. Furthermore, the tool free removal and/or installation of the
disc plates allows for proper cleaning and improved contamination protection.
1.2 Intended Use
The disc rotator is used in laboratories for mixing blood samples, viscous samples,
and for liquid-solid suspensions.
1.3 Features
• Brushless DC Motor
• Digital Display, Microprocessor Controlled
• Suitable for 1.5ml, 2ml, 5ml, 15ml & 50ml Centrifuge Tubes
• Nine User-Programmable Modes
• Adjustable Speed 10 to 80 RPM
• Last Run Memory Feature
• Gentle Rotating Motion
• Auto Power On Feature
• Pulse Mode Function
TABLE OF CONTENT
1. Product Description
1.1 Introduction
1.2 Intended Use
1.3 Features
1.4 Accessories
2. Technical Specications
3. Safety Precautions
4. Maintenance & Cleaning
5. Installation
6. Operation
7. Troubleshooting
8. Product Disposal
PRODUCT CODE
665-106
PLEASE READ THESE INSTRUCTIONS BEFORE USE.

3
PRODUCT MANUAL
1800 358 101
sales.au@westlab.com
www.westlab.com.au
+64 9 553 3677
sales.nz@westlab.com
www.westlab.co.nz
646 568 5391
sales.us@westlab.com
www.westlab.com
1 877 822 1455
sales.ca@westlab.com
www.westlab.com
Australia New Zealand United StatesCanada
1.4 Accessories
• 5ml Attachment
• 15ml Attachment
• 50ml Attachment
• Power Adaptor:
• Input 100 - 240 VAC, 50/60 Hz
Output 24V 1.5A
2. Technical Specications
Motor Type Brushless DC motor
Motion Type Rocking
Digital Display Yes
Programmable Mode Set and save up to nine user-dened
programs
Pulse Mode Alternates between clockwise and
anticlockwise motion with two
second stops.
Speed Setting Variable 10 to 80 RPM, Steps of 1 RPM
Timer Setting 1 to 99 minutes and innite mode
Disc Plate Angle Adjustable from 0° to 90°
Speed Accuracy ± 1 RPM
Permissible Ambient Temperature 5°C to 40°C
Permissible Relative Moisture < 80%
Load Capacity 2kg
Protection Class IP 21
Power Consumption 4.5 W
Input Voltage 24 V
Unit Dimensions 383 x 330 x 325mm
Unit Weight 4.5kg

4
PRODUCT MANUAL
1800 358 101
sales.au@westlab.com
www.westlab.com.au
+64 9 553 3677
sales.nz@westlab.com
www.westlab.co.nz
646 568 5391
sales.us@westlab.com
www.westlab.com
1 877 822 1455
sales.ca@westlab.com
www.westlab.com
Australia New Zealand United StatesCanada
3. Safety Precautions
Read the following safety precautions prior to using the disc rotator.
Never use the unit in any manner not specied in this manual.
• Wear personal protective equipment during the operation of the unit.
• Always install the unit on a at, stable, and non-slippery surface.
• Always unplug the power adaptor before cleaning the unit.
• Never touch moving parts. Do not move the unit during operation.
• The unit is not to be operated in a hazardous, explosive, or ammable environment
and not to be used to mix explosive or highly reactive material. Do not use the unit
under water.
• Do not use the disc rotator if it shows signs of electrical of mechanical damage.
If any damage is found, contact your supplier immediately.
• Ensure that the attachments are secured properly prior to operation.
• Do not use without appropriate training. Always follow the installation instructions.
• Do not stop the disc plate by blocking or holding it. Do not attempt to remove the
disc plate during operation.
• If liquids are spilled on the disc plate, the unit must be cleaned properly before
being used again.
• Prior to mixing, the tubes should be visually inspected for material damage.
Damaged tubes must not be used as this can result in sample loss and the
contamination of the product.
• The maximum loading capacity of 2kg cannot be exceeded.
• Do not place potentially hazardous material within the clearance area or envelope.
• Load the tubes safely and evenly. Always distribute the samples evenly on the unit.
Do not ll the tubes near the unit.
• Ensure that the knob is tightened before operating the disc rotator.
• Only used closed tubes are used for mixing.
• Do not lean on the unit. It may damage the disc rotator or harm the operator.
• In the event of contamination caused by aggressive agents, the unit must be cleaned
immediately using a natural cleaning liquid. If any damage is seen, contact the
service technician.
• The power adaptor provided with the disc rotator is designed to be used with this
unit. Do not use with any other power adaptor.
• Only process media which will not react dangerously to the extra energy produce
by mixing.
The safety of the user cannot be guaranteed if the unit:
• Is operated with accessories that are not supplied with the unit.
• Is operated with accessories that are not supplied or recommended by
the manufacturer.
• Is operated improperly or contrary to the manufacturer’s specications.

•
5
PRODUCT MANUAL
1800 358 101
sales.au@westlab.com
www.westlab.com.au
+64 9 553 3677
sales.nz@westlab.com
www.westlab.co.nz
646 568 5391
sales.us@westlab.com
www.westlab.com
1 877 822 1455
sales.ca@westlab.com
www.westlab.com
Australia New Zealand United StatesCanada
4. Maintenance & Cleaning
• Always unplug the power adaptor before cleaning the unit.
• Wear protective gloves and safety glasses while cleaning the unit.
• In the event of contamination caused by aggressive agents, the unit must be cleaned
immediately using a natural cleaning liquid. If any damage is seen, contact the
service technician.
• Excessive amounts of liquid should be avoided. Liquids must not contact the motor.
• After cleaning, ensure that all the parts are dried.
• If repairs are performed by unauthorised personnel, the product warranty may
become void.
5. Installation
1. Open the packaging and gently remove the disc rotator from the box.
2. Place the unit gently onto a rm and levelled surface.
3. Unpack every individual component.
4. Assemble the components as instructed in this manual for optimal performance.
ATTENTION: The manual should be kept with the device and all the packaging should be
kept in safe storage for at least two years for warranty purposes.
Location and mounting
Place the disc rotator on a at, solid, and levelled surface. Ensure that all four feet stand
on the surface rmly. Avoid installing on a slippery surface or a bench prone to vibration.
• The ideal ambient temperature is 20°C ± 5°C. Do not place the unit in direct sunlight.
• Keep a minimum clearance of 300mm from all directions to guarantee safe operation.
• Keep the unit away from heat or water to avoid sample temperature errors.
• Do not place the disc rotator in an area that makes it dicult to operate the unit.

6
PRODUCT MANUAL
1800 358 101
sales.au@westlab.com
www.westlab.com.au
+64 9 553 3677
sales.nz@westlab.com
www.westlab.co.nz
646 568 5391
sales.us@westlab.com
www.westlab.com
1 877 822 1455
sales.ca@westlab.com
www.westlab.com
Australia New Zealand United StatesCanada
Removing the disc plates
The disc plate can be removed by turning the knob in a counter clockwise direction.
Then remove the disc plate as shown below:
Installing the disc plates
To install a disc plate, use the reverse process of the above. Follow the below diagram:

•
7
PRODUCT MANUAL
1800 358 101
sales.au@westlab.com
www.westlab.com.au
+64 9 553 3677
sales.nz@westlab.com
www.westlab.co.nz
646 568 5391
sales.us@westlab.com
www.westlab.com
1 877 822 1455
sales.ca@westlab.com
www.westlab.com
Australia New Zealand United StatesCanada
Connecting the power adaptor
1. Connect one side of the power adaptor to the rear side of the unit and the other
side to the power supply.
2. Ensure that the power switch is OFF when connecting to the power adaptor.
Ensure that the tubes are loaded properly before use.
6. Operation
User interface and display

•
8
PRODUCT MANUAL
1800 358 101
sales.au@westlab.com
www.westlab.com.au
+64 9 553 3677
sales.nz@westlab.com
www.westlab.co.nz
646 568 5391
sales.us@westlab.com
www.westlab.com
1 877 822 1455
sales.ca@westlab.com
www.westlab.com
Australia New Zealand United StatesCanada
Number Name Description
1Display The display shows the set speed as well as the time
value. It also displays the selected program when in
Prog Mode.
2Speed Press the ‘Speed’ button to select the speed value and
use the increment and decrement buttons to set the
required speed.
3Time Press the ‘Time’ button to select the time value and
use the increment and decrement buttons to set the
required run time.
4Increment Press the increment button to set the required value
of the speed, time, or program.
5Decrement Press the decrement button to set the required value
of the speed, time, or program.
6Start/Stop Press the ‘Start/Stop’ button to start the operation or
to stop the ongoing operation.
7Pulse & LED Press the ‘Pulse’ button once to start the pulse operation
and press it again to stop the operation. The pulse LED
will glow to indicate that the pulse mode is activated.
8Prog Hold down the ‘Prog’ button to activate the program
mode and use the speed, time, and increment/
decrement buttons to set the required parameters
for the selected program.
Setting the speed
Press the ‘Speed’ button to select the speed value and then press the increment and
decrement buttons to set the required speed. The speed range for this unit is from
10 RPM to 80 RPM in steps of 1 RPM. The speed value will be saved after blinking
ve times.
Setting the time
Press the ‘Time’ button and then press the increment and decrement buttons to set
the required run time. The time setting ranges from one minute to 99 minutes in a
step of one minute. Alternatively, the time value can be set as innite mode which is
indicated by ‘][’ in the time display. The value will be saved after ve blinks. Note that
the countdown timer will be activated as soon as the operation begins, and the time
value cannot be modied once the unit is in operation.
Starting and stopping the operation
Once the required speed and time values are set, press the ‘Start/Stop’ button to start
the unit’s operation. The speed will gradually increase from the lower RPM to the set
RPM while the time takes effect as the operation begins.
Press the ‘Start/Stop’ button again to stop the ongoing operation at any time. The
speed will gradually decrease from the set RPM to zero [0] and stops in a few seconds.
ATTENTION: The speed and time values cannot be changed during operation.
•
9
PRODUCT MANUAL
1800 358 101
sales.au@westlab.com
www.westlab.com.au
+64 9 553 3677
sales.nz@westlab.com
www.westlab.co.nz
646 568 5391
sales.us@westlab.com
www.westlab.com
1 877 822 1455
sales.ca@westlab.com
www.westlab.com
Australia New Zealand United StatesCanada
Default pulse mode
The pulse mode is ideal for vigorous mixing of samples by rolling with a momentary
clockwise and counter clockwise pause every 30 seconds. The default cycle time set
for the pulse mode is 30 seconds.
Set the required speed and time values before activating the pulse mode to ensure
that the unit starts the pulse mode operation for that speed and total run time. Once
the speed and total run time are set, press the ‘Pulse’ button to start the pulse mode
operation. In pulse mode, the pulse LED will glow indicating that the pulse mode
operation is activated.
Press the ‘Pulse’ button again to stop ongoing pulse mode operation. The user can
also press the ‘Start/Stop’ button to stop the operation.
Example: The speed value is set as 50 RPM and the total run time is set to two minutes.
Once the pulse mode has been activated, the unit will rotate in a clockwise direction for
30 seconds [cycle time] before pausing for 60 seconds [two cycles]. Next, the unit will
rotate in the counter clockwise direction. This entire process constitutes one pulse cycle.
Program mode
The program mode operation feature allows the user to save nine customised
programs with different speed and time values. These programmed parameters can be
used by simply activating the program mode.
To activate the program mode, hold down the ‘Prog’ button until ‘Prog on’ displays.
After a few seconds, the display will show ‘P1’ and the speed and time parameters
alternatively. This shows that the current program is P1 with the displayed RPM and
time values.

•
10
PRODUCT MANUAL
1800 358 101
sales.au@westlab.com
www.westlab.com.au
+64 9 553 3677
sales.nz@westlab.com
www.westlab.co.nz
646 568 5391
sales.us@westlab.com
www.westlab.com
1 877 822 1455
sales.ca@westlab.com
www.westlab.com
Australia New Zealand United StatesCanada
Press the ‘Prog’ button to select any program from ‘P1’ to ‘P9’. The programs can also
be selected by pressing increment and decrement buttons. Once the desired program
is selected, press the ‘Speed’ button to select and set the speed value. Next, press the
‘Time’ button to select and set the run time.
The speed and time values for that program are now saved. Press the ‘Start/Stop’
button to start the program mode operation. Once the set RPM is reached, the
program ‘Px’ [with x = 1 to 9] and its speed and time values will display alternatively.

•
11
PRODUCT MANUAL
1800 358 101
sales.au@westlab.com
www.westlab.com.au
+64 9 553 3677
sales.nz@westlab.com
www.westlab.co.nz
646 568 5391
sales.us@westlab.com
www.westlab.com
1 877 822 1455
sales.ca@westlab.com
www.westlab.com
Australia New Zealand United StatesCanada
To stop the unit’s operation, press the ‘Start/Stop’ button.
To leave the program mode, hold down the ‘Prog’ button again to deactivate the mode.
It will display ‘Prog off’.
ATTENTION: On every restart, the disc rotator automatically exits program mode.
It will show the last run default speed and time value.
Power mode
In case of power failure, the unit will save the speed, time, and other parameters as
set by the user. Once the power returns, the disc rotator will resume operation for the
remaining run time with a cycle time ± ve minutes. The unit saves the run time every
ve minutes of operation.
To select power mode, long press the ‘Time’ button. Until this function is reactivated,
the disc rotator will not resume its operation after power failure.
Example: The user has set an RPM of 45 and the time value of 35 minutes. After
a completion of 23 minutes, the there was a power cut and operation comes to a
standstill. Just prior to the power cut, the remaining time seen on the display was 23
minutes. When the power resumes, the unit will restart its operation from 25 minutes
with the set RPM and other operational values.
Removal of tubes from the disc plate
To remove the tubes from the disc plate, do not rotate the disc plate with your hands.
The procedure to remove the tubes attached to the bottom of the disc plate is as below:
1. Single press the ‘Pulse’ button to rotate the disc plate so that the tubes at the
bottom of the disc plate come to the top.
2. Next, remove the tubes from the clamps of the disc plate one by one.

•
ORDERING WITH
WESTLAB IS EASY
Online
www.westlab.com.au
Order online with our easy
Express Order form for fast,
secure ordering.
Phone
1800 358 101
Speak to one of our friendly,
ecient staff from
8.00am - 5.00pm (Mon/Fri)
Email
24 hours, 7 days a week
convenience.
12
PRODUCT MANUAL
1800 358 101
sales.au@westlab.com
www.westlab.com.au
+64 9 553 3677
sales.nz@westlab.com
www.westlab.co.nz
646 568 5391
sales.us@westlab.com
www.westlab.com
1 877 822 1455
sales.ca@westlab.com
www.westlab.com
Australia New Zealand United StatesCanada
7. Troubleshooting
Please contact our technical support team on 1800 358 101.
8. Product Recycling
In the case that the product is to be disposed of, the relevant legal regulations are to
be observed.
Table of contents
Other Westlab Laboratory Equipment manuals

Westlab
Westlab 665-090 User manual

Westlab
Westlab Shaker 3D Bundle User manual

Westlab
Westlab 664-315 User manual

Westlab
Westlab 663-575 User manual

Westlab
Westlab 665-259 User manual

Westlab
Westlab 4500RPM Max User manual

Westlab
Westlab 665-084 User manual

Westlab
Westlab 663-898 User manual

Westlab
Westlab 665-096 User manual

Westlab
Westlab IROLLJR-1200 User manual