manuals.online logo
Brands
  1. Home
  2. •
  3. Brands
  4. •
  5. Westward
  6. •
  7. Jack
  8. •
  9. Westward 13X041 Instructions for use

Westward 13X041 Instructions for use

Saddle Assembly
Lift Pedal
Release Valve Pedal
Position Handle
Tilt Adjustment Knobs
Caster
Chain
Air Pump Pedal
Oil Filler Screw
Air Motor
Base Half
Saddle Bracket
Support Bar
Hydraulic Unit
Bracket
Air Supply Inlet
Saddle Socket
Westward Air/Manual Telescoping
Transmission Jack
2. Attach casters to the base halves.
Attach either one of the two base
halves to the base of the hydraulic
unit, then secure using bolts
(
1/2"Dx3.5"L)
and washers provided.
Apply the same procedure to the other
base half. Use torque wrench to tighten
to 30 lb.ft. Do not overtighten.
3. Attach the brackets to hydraulic unit,
then attach one end of the support
bar to base half and the other end
to the bracket. Secure with hex bolts
and nuts provided. Repeat for all other
three support bars.
4. Slide the handle to hydraulic unit from
top, then secure with bolts and nuts
provided.
5. Install the saddle brackets to the
saddle. Place the socket of the saddle
assembly onto the ram piston. Tighten
set screw on the socket.
BEFORE USE
1.
Verify that the product and application
are compatible.
2. Before using this product, read the
operator's manual completely and
familiarize yourself thoroughly with the
product, its components and recognize
the hazards associated with its use.
3. Press the release valve pedal, ensure
that saddle is fully lowered.
4. Remove the oil ller screw. Ensure oil
level is just below the rim of oil ller
hole. Reinstall the oil ller screw.
General Safety Information
Read, understand,
and follow all
instructions and safety precautions
provided with and on this product before
use. Do not exceed rated capacity.
Adequately support the vehicle before
starting repairs. If loaded jack must be
moved, make certain that load is secured
by appropriate means, and in the lowest
possible position. Always move the jack
over a smooth, hard level surface and that
the lifting platform is level. Use of this
product is limited to removal, installation,
and transportation of automotive and
light truck transmissions, transfer cases
and transaxles. Use only adapters /
accessories provided by the manufacturer
of this transmission jack. Use only
adapters / accessories whose rated
capacity is greater than the rated capacity
of this jack. Ensure the center of gravity
U.S. Patent No.5,341,723
Please read and save these instructions. Read carefully before attempting to assemble, install, operate or maintain the product described. Protect yourself
and others by observing all safety information. Failure to comply with instructions could result in personal injury and/or property damage! Retain instructions
for future reference.
Operating Instructions & Parts Manual 13X041
®
Description
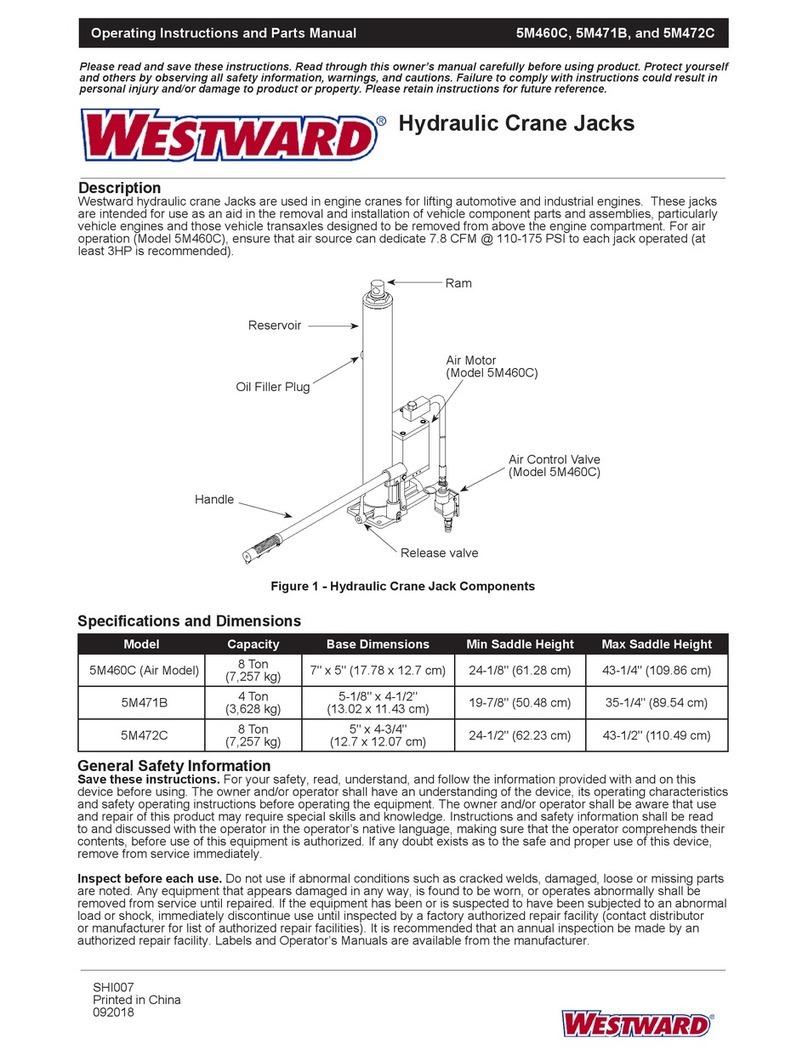
Westward Air/Manual Telescoping Transmission Jack is designed to be used as an aid in the removal and installation of automotive
and light truck transmissions, transfer cases and transaxles. This telescopic style transmission jack is for use under an overhead lift
or in a garage pit. Ensure that your air source can dedicate 7.8 CFM @ 110-175 psi to each jack operated.
Specications
SHI894
Printed in Taiwan
06/11
Figure 1 - Telescoping Transmission Jack
Components
is center loaded on the saddle. Never
use this device as a work/repair station.
Transfer the load immediately to a suitable
work station. No alteration shall be made
to this product. Failure to
follow these
instructions and safety precautions may
result in personal injury and/or property
damage.
Preparation
ASSEMBLY
Tools required: 1/4" allen key, 3/8" hex
socket & torque wrench.
1. Three major parts are included in the
package:
(a) Hydraulic Unit Assembly;
(b) Saddle Assembly;
(c) 2 pieces of Base Half with
hardware. (see part# 1~11, page 3)
Capacity
Model Min. Height Saddle Base Extended Saddle AreaMax. Height
13X041 1 Ton 48-5/8" 77-3/8" 15-1/2" x 12-5/8" 24-1/2" x 18-7/8" 42-1/2" x 39-1/2"
Jack Size
Ensure center of gravity load is centered
on the saddle and load is stable before
moving jack. An off-center transmission
could cause the jack to tip over.
LOWERING
Be sure all tools and personnel are clear
before
lowering load. Slowly engage
release valve pedal. Maintain control of
the rate of speed at which the load lowers
at all times.
Slowly, gently apply downward pressure
to the release valve pedal.
Never use this jack
as a workstation!
2
Westward Operating Instructions and Parts Manual 13X041
Maintenance
IMPORTANT: Use only good grade
hydraulic jack oil. Avoid mixing different
types of uid and NEVER use brake
uid, turbine oil, transmission uid, motor
oil or glycerin. Improper uid can cause
premature failure of the jack and the
potential for sudden and immediate loss
of load. Mobil DTE 13M or equivalent is
recommended.
ADDING OIL
1. With saddle fully lowered, set jack in
its upright, level position. Remove oil
ller screw.
2. Fill until oil is level with the oil ller
screw hole, reinstall oil ller screw.
CHANGING OIL
For best performance and longest life,
replace the complete uid supply at least
once per year.
1. With saddle fully lowered, remove oil
ller screw.
2. Lay the jack on its side and drain the
uid into a suitable container.
Note. Dispose hydraulic uid in
accordance with local regulations.
3. Set jack in its level position.
Fill until
oil is level with the oil ller screw hole,
reinstall oil ller screw.
LUBRICATION
1. A periodic lubrication of pivot points,
axles and hinges will help to prevent
rust and assure that casters and pump
assemblies move freely.
2. When used on a daily basis, air pump
should be internally lubricated before
each use. Use only good quality air tool
lubricant. If no oiler is used, pour a
teaspoon of air tool oil into the inlet of
the air supply inlet. Simply operate the
jack using the air pump in order to fully
distribute the oil.
CLEANING
Periodically check the pump piston and
ram for rust or corrosion. Clean as
needed and wipe with an oily cloth.
Note: Never use sandpaper or abrasive
material on these surfaces!
STORAGE
When not in use, store the jack with
saddle fully lowered.
Troubleshooting Chart
Jack will not lift load 1. Release valve not tightly closed 1. Ensure release valve tightly closed
2. Load is too heavy 2. Consider higher capacity jack
Jack will lift, but not maintain pressure 1. Release valve not tightly closed 1. Ensure release valve tightly closed
2. Hydraulic unit malfunctioning 2. Replace
Jack will not lower after unloading 1. Reservoir overfilled 1. Drain fluid to proper level
2. Linkages binding 2. Clean and lubricate moving parts
Poor lift performance 1. Fluid level low 1. Ensure proper fluid level
2. Hydraulic unit malfunction 2. Replace
Will not lift to full extension Fluid level low Ensure proper fluid level
Symptom Possible Cause(s) Corrective Action
BEFORE USE (Continued)
5. Pour a teaspoon of good quality, air
tool lubricant into the air supply inlet of
the lift control valve. Connect to air
supply and operate for 3-10 seconds to
evenly distribute lubricant.
Note: This unit is equipped with the
popular 1/4” NPT air coupler. When
installing a different air coupler of
your choice, ensure that thread tape
or compound is used when servicing
connections. To ensure dependable,
trouble free operation an inline air dryer
and oiler is recommended.
6. Ensure that jack rolls freely. Raise and
lower the unloaded jack throughout the
lifting range before putting into service
to ensure the pump operates smoothly.
Replace worn or damaged parts
and assemblies with factory authorized
replacement parts only.
Operation
Follow the instructions for removal and
installation of transmission, transfer case
or transaxle according to the vehicle
manufacturer's service manual.
LIFTING
Pump foot pedal or press air pump pedal
until saddle reaches desired position.
Secure load with provided chains.
Note: do not operate by air and by foot
pumping at the same time.
Westward Air/Manual Telescoping
Transmission Jack
®
Westward Operating Instructions and Parts Manual
For Repair Parts, call 1-800-323-0620
24 hours a day - 365 days a year
13X041
Repair Parts List
Figure 2 — Repair Parts Illustration for Model 13X041
3
Ref Ref
Number Part Number Description Quantity Number Part Number Description Quantity
1G37-3-3300-103 Base Half 2
2651-1-0127-100 Hex Socket Head Bolt,
1/2"Dx3-1/2"L 4
3605-3-0127-405 Lock Washer, W1/2"x3.2 4
4G37-4-5200-105
Caster, 4"D
2
5G37-4-5201-107 Caster w/ Brake, 4"D 2
6653-1-0080-025 Hex Bolt, M8x25 18
7661-2-0080-023 Nut 28
8 G37-6-1319-102 Support Bar 4
9 653-1-0080-045 Hex Bolt, M8x45 10
10 G37-3-1320-109 Bracket 2
11 G37-3-1806-105 Handle 1
12 G36-6-7000-102 Chain 2
13 G52-4-4102-101 Shackle 4
14 G37-3-2903-209 Saddle Bracket 4
15 657-1-0095-107 Wing Screw, 3/8x1" 8
16 G37-3-2902-207 Adjustable Bracket 2
17 G37-3-2901-205 Support Seat 1
18 653-1-0159-109 Hex Bolt, 5/8x1-1/4" 4
19 G37-3-4200-104 Saddle Plate 1
20a G36-3-2300-101 Screw Assy 1
20b G36-3-2301-103 Tilt Screw Assy 1
21 G36-6-4204-103 Support Pin 2
22 667-5-0250-004 C-clip 4
23 G36-3-5100-108 Trust Bearing 2
24 G36-6-4205-105 Pin 2
25 661-2-0100-014 Nut 2
26 602-4-0025-017 Retaining Pin 2
27 G37-6-3304-109 Pin 1
28 667-5-0160-003 C-clip 4
29 G37-6-3305-101 Pin 1
30 649-1-0079-105 Hex Socket Head Bolt,
5/16"D x 3/4"L 2
31 324-4-1900-208 Screw Assembly 2
32 566-4-0070-202 Pin 2
33 G36-6-1809-102 Pedal 2
34 513-5-0016-018 Retaining Pin 2
35 677-5-0127-005 C-clip 2
36 G37-6-1603-109 Axle 1
37 661-2-0079-101 Hex Locking Nut, 5/16" 1
38 649-1-0079-114 Hex Cocket Screw, 5/16x3" 1
39 G36-3-1900-100 Lift Pedal 1
40 A20060-0016 Coupler, Male 1/4NPT 1
41 G36-6-2302-103 Hose Connector, Elbow 2
42 G36-6-2300-109 Air Hose 1
43 524-2-0123-108 Spring 1
44 G36-3-2000-109 Air Motor 1
45 G36-3-1500-104 Hyd. Cartridge 1
46 651-7-0063-209 Hose Connector, Straight
- G37-3-9901-109 Repair Kit for Hydraulic Unit -
1
4, 5
2
36
7
8
7
9
6
10
11
7
9
12
14
15
13
16
17
19
18
20a
20b
21
21
22
22
25
26
24
23
23
24
25
26
27
29
30
28
28
31
32 33
37
38
3536
39
3433
32
40
46
42
43
41
44
45
Please provide following information:
-Model number
-Serial number (if any)
-Part description and number as shown in parts list
Westward Operating Instructions and Parts Manual 13X041
LIMITED WARRANTY
WESTWARD ONE-YEAR LIMITED WARRANTY.Air/Manual Telescoping Transmission Jack, Model covered
in this manual, is warranted by Westward to the original user against defects in workmanship or materials under
normal use for one year after date of purchase. Any part which is determined to be defective in
material or workmanship and returned to an authorized service location, as Westward designates, shipping
costs prepaid, will be, as the exclusive remedy, repaired or replaced at Westward's option. For limited warranty
claim procedures, see PROMPT DISPOSITION below. This limited warranty gives purchasers specic legal
rights which vary from jurisdiction to jurisdiction.
LIMITATION OF LIABILITY.To the extent allowable under applicable law, Westward's liability for
consequential and incidental damages is expressly disclaimed. Westward's liability in all events is limited to and
shall not exceed the purchase price paid.
WARRANTY DISCLAIMER.Westward has made a diligent effort to provide product information and illustrate
the products in this literature accurately; however, such information and illustrations are for the sole purpose
of identication, and do not express or imply a warranty that the products are MERCHANTABLE, or FIT FOR
A PARTICULAR PURPOSE, or that the products will necessarily conform to the illustrations or descriptions.
Except as provided below, no warranty or afrmation of fact, expressed or implied, other than as stated in the
"LIMITED WARRANTY" above is made or authorized by Westward.
PRODUCT SUITABILITY. Many jurisdictions have codes and regulations governing sales, construction,
installation, and/or use of products for certain purposes, which may vary from those in neighboring areas. While
Westward attempts to assure that its products comply with such codes, it cannot guarantee compliance, and
cannot be responsible for how the product is installed or used. Before purchase and use of a product, review the
product applications, and all applicable national and local codes and regulations, and be sure that the product,
installation, and use will comply with them.
Certain aspects of disclaimers are not applicable to consumer products; e.g., (a) some jurisdictions do not
allow the exclusion or limitation of incidental or consequential damages, so the above limitation or exclusion
may not apply to you; (b) also, some jurisdictions do not allow a limitation on how long an implied warranty lasts,
consequentially the above limitation may not apply to you; and (c) by law, during the period of this Limited
Warranty, any implied warranties of implied merchantability or tness for a particular purpose applicable to
consumer products purchased by consumers, may not be excluded or otherwise disclaimed.
PROMPT DISPOSITION. Westward will make a good faith effort for prompt correction or other adjustment
with respect to any product which proves to be defective within limited warranty. For any product believed to
be defective within limited warranty, rst write or call dealer from whom the product was purchased. Dealer will
give additional directions. If unable to resolve satisfactorily, write to Westward at address below, giving dealer's
name, address, date, and number of dealer's invoice, and describing the nature of the defect. Title and risk of
loss pass to buyer on delivery to common carrier. If product was damaged in transit to you, le claim with carrier.
Manufactured for Grainger International, 100 Grainger Pkwy., Lake Forest, Illinois 60045 U.S.A.
4
Manufactured for Grainger International, Inc.,
Lake Forest, IL 60045 U.S.A.
Westward Air/Manual Telescoping
Transmission Jack
®
Other Westward Jack manuals

Westward 15F197 Instruction Manual

Westward

Westward 15F197 Instruction Manual

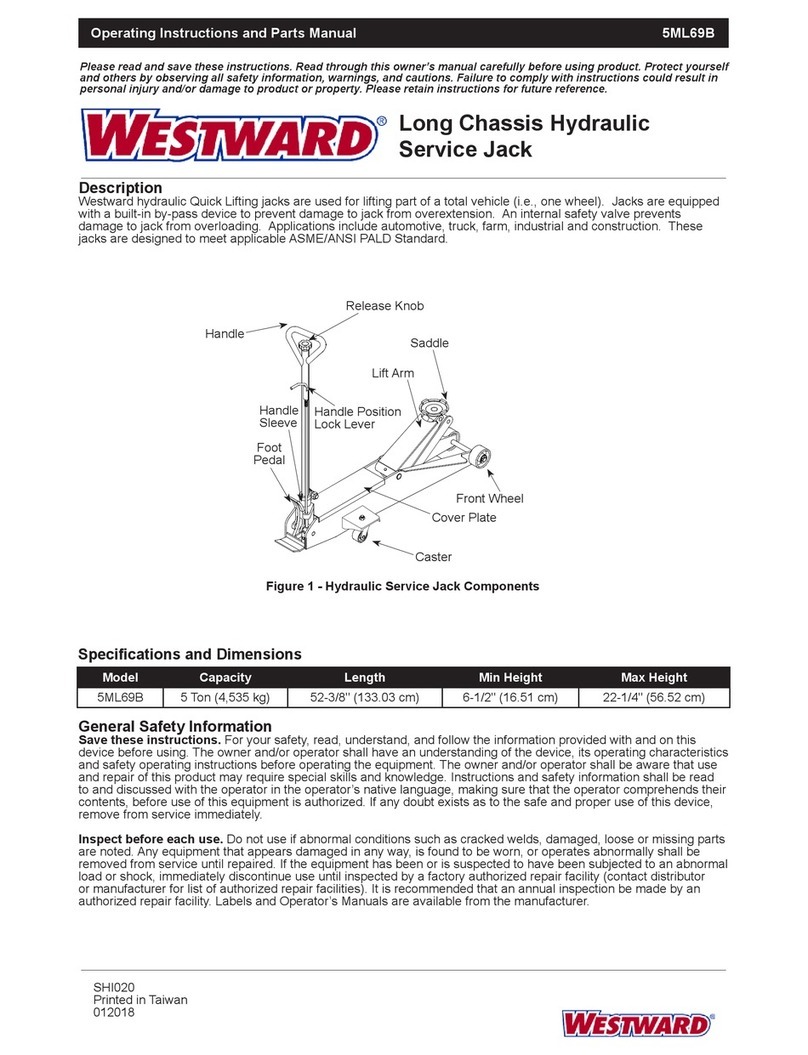
Westward 5ML68A Instructions for use

Westward

Westward 5ML68A Instructions for use

Westward 1VW35 Instructions for use

Westward

Westward 1VW35 Instructions for use

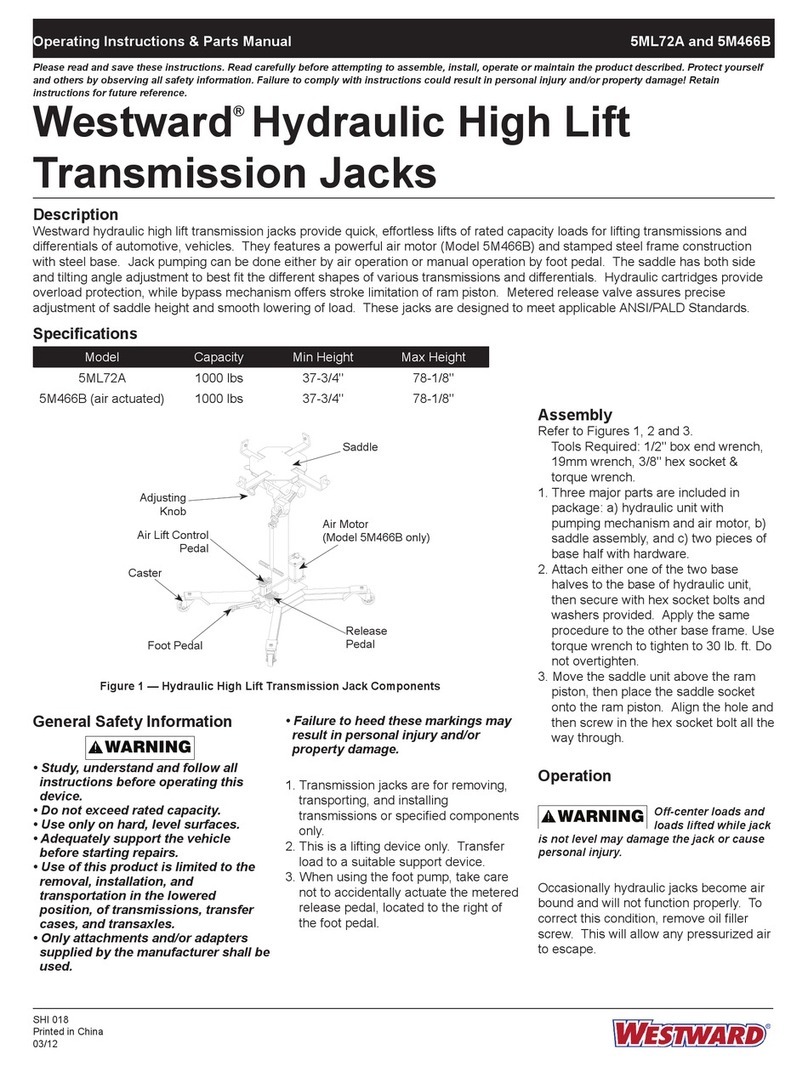
Westward 5ML72A Instructions for use

Westward

Westward 5ML72A Instructions for use

Westward 5M451A Instructions for use

Westward

Westward 5M451A Instructions for use

Westward 5ML69B User manual

Westward

Westward 5ML69B User manual

Westward 3ZC66 Instructions for use

Westward

Westward 3ZC66 Instructions for use

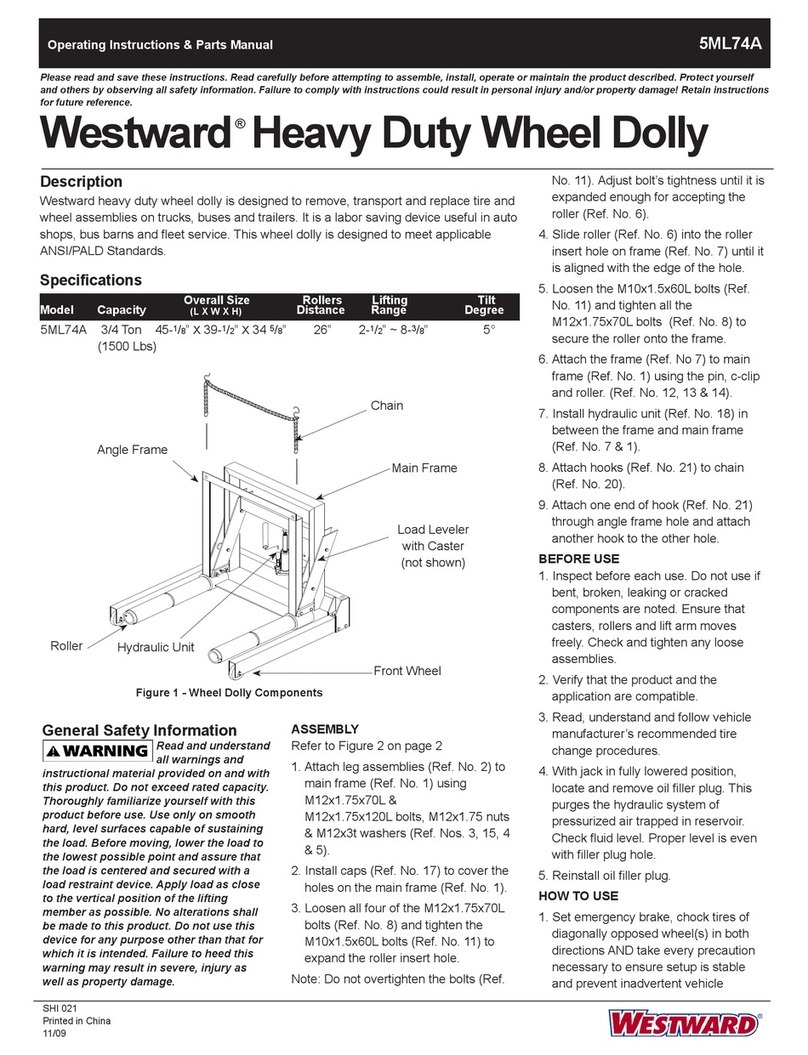
Westward 5ML74A User manual

Westward

Westward 5ML74A User manual

Westward 1VW31 Instructions for use

Westward

Westward 1VW31 Instructions for use

Westward 3CFK6 User manual

Westward

Westward 3CFK6 User manual

Westward 1ZKY1A Service manual

Westward

Westward 1ZKY1A Service manual

Westward 1ZKX5A Service manual

Westward

Westward 1ZKX5A Service manual

Westward 5ML72B Service manual

Westward

Westward 5ML72B Service manual

Westward 5ML69C Service manual

Westward

Westward 5ML69C Service manual

Westward 1ZKX4 Instructions for use

Westward

Westward 1ZKX4 Instructions for use

Westward 3W929C Service manual

Westward

Westward 3W929C Service manual

Westward 1VW32 Instruction Manual

Westward

Westward 1VW32 Instruction Manual

Westward 1MZK9 Instructions for use

Westward

Westward 1MZK9 Instructions for use

Westward 5M460C Service manual

Westward

Westward 5M460C Service manual

Popular Jack manuals by other brands

Best Tugs BRAVO 5 user manual

Best Tugs

Best Tugs BRAVO 5 user manual

TradeQuip 2051T owner's manual

TradeQuip

TradeQuip 2051T owner's manual

NEO TOOLS 11-712 instruction manual

NEO TOOLS

NEO TOOLS 11-712 instruction manual

TOWKING Sway user manual

TOWKING

TOWKING Sway user manual

Sumner Southwire ST-882 Operators safety manual

Sumner

Sumner Southwire ST-882 Operators safety manual

Sealey PAFJ3S instructions

Sealey

Sealey PAFJ3S instructions

Strongway 55832 owner's manual

Strongway

Strongway 55832 owner's manual

Varan NEBJ-01 user manual

Varan

Varan NEBJ-01 user manual

Ronix RH-4904 manual

Ronix

Ronix RH-4904 manual

JBM 50815 manual

JBM

JBM 50815 manual

Sunex Tools 1003AJ manual

Sunex Tools

Sunex Tools 1003AJ manual

Bulldog Security Velocity Series instructions

Bulldog Security

Bulldog Security Velocity Series instructions

RIDGE RYDER 299575 OPERATIONAL ADVICE

RIDGE RYDER

RIDGE RYDER 299575 OPERATIONAL ADVICE

Sealey 1020LE.V3 Series instructions

Sealey

Sealey 1020LE.V3 Series instructions

Arcan A20015 quick start guide

Arcan

Arcan A20015 quick start guide

AC Hydraulic SD26PHL user guide

AC Hydraulic

AC Hydraulic SD26PHL user guide

SATA 97821 user manual

SATA

SATA 97821 user manual

Sealey National Machinery NA3010 instructions

Sealey

Sealey National Machinery NA3010 instructions

manuals.online logo
manuals.online logoBrands
  • About & Mission
  • Contact us
  • Privacy Policy
  • Terms and Conditions

Copyright 2025 Manuals.Online. All Rights Reserved.