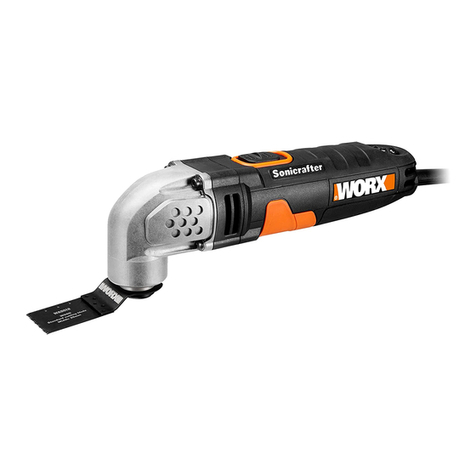
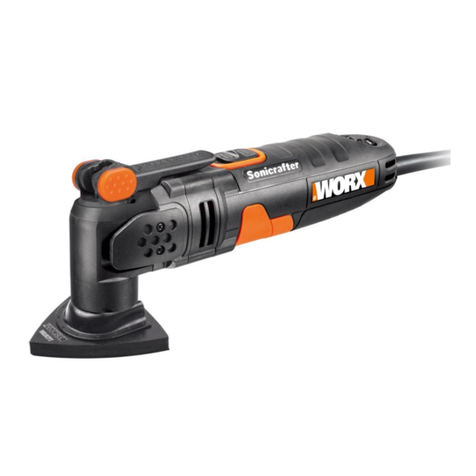
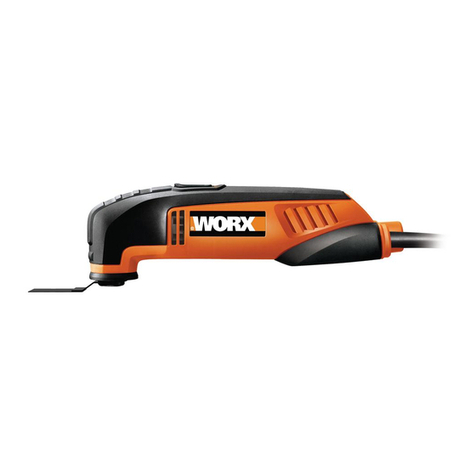
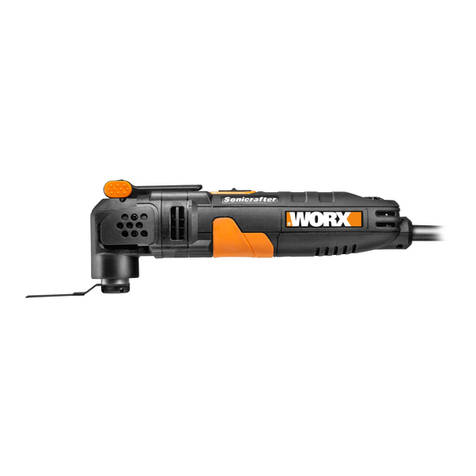
Worx Sonicrafter WX673 User manual

P06
P15
P24
P32
P41
P50
P59
P67
P75
P83
P91
P99
P107
P116
EN
D
F
I
ES
PT
NL
DK
FIN
NOR
SV
TR
GR
RU
High frequency multi-function tool
Hochfrequenz-Multifunktionswerkzeug
Outil multifonction de haute fréquence
Attrezzo multi funzione ad alta frequenza
Herramienta multifunción de alta frecuencia
Ferramenta multifunções de alta-frequência
Multifunctioneeel gereedschap met hoge frequentie
Højfrekvens multifunktionsredskab
Suuritaajuuksinen monitoimityökalu
Høyfrekvent multi-funksjonsverktøy
Multifunktionsverktyg för höga hastigheter
WX673 WX673.1 WX673.3 WX673.9

Original instructions EN
Übersetzung der Originalanleitung D
Traduction des instructions initiales F
Traduzione delle istruzioni originali I
Traducción de las instrucciones originales ES
Tradução das instruções originais PT
Vertaling van de oorspronkelijke instructies NL
Oversættelse af de oprindelige instruktioner DK
Alkuperäisten ohjeiden käännös FIN
Oversettelse av de opprinnelige instruksjonene NOR
Översättning av originalinstruktionerna SV
TR
GR
RU


1
2 3
456
910 11 12 13 14
17 18 19 20 21
2322
7
8
15 16

II
I
AB1
B3
B2
D1
C
E
D2

High frequency multi-function tool EN
6
1. LED LIGHT
2. ON/OFF SWITCH
3. BATTERY PACK LATCH
4. BATTERY PACK *
5. VARIABLE SPEED CONTROL
6. VENTING SLOTS
7. SANDING PAD (UNPERFORATED)
8. FASTENING PIECE
9. UNIVERSAL END CUT BLADE *
10. END CUT BLADE
11. HSS SEMICIRCLE SAW BLADE
12. SANDING SHEET (UNPERFORATED)
13. SANDING PAD (PERFORATED) *
14. SANDING SHEET (PERFORATED) *
15. SANDING FINGER PAD *
16. SANDING FINGER SHEET *
17. TRIANGULAR CARBIDE RASP *
18. CARBIDE GRIT SEGMENT SAW BLADE *
19. RIGID SCRAPING BLADE *
20. FELT POLISHING PAD *
21. ADAPTER (ADAPTER FOR OTHER BRANDS OF ACCESSORIES (Fein®, Bosch®)
22. DUST EXTRACTION DEVICE*
23. ALLEN KEY
* Not all the accessories illustrated or described are included in standard
delivery.

High frequency multi-function tool EN
7
TECHNICAL DATA
Type WX673 WX673.1 WX673.3 WX673.9 (6-designation of machinery,
representative of high frequency oscillation tool)
Voltage 12V
Oscillations speed 5000-20000/min
Oscillations angle 3.2°
Machine weight 1.0kg
NOISE INFORMATION
A weighted sound pressure LpA: 75dB(A)
A weighted sound power LwA: 86dB(A)
KpA&KwA 3.0dB(A)
Wear ear protection when sound pressure is over 80dB(A)
VIBRATION INFORMATION
Vibration total values (triax vector sum) determined according to EN 60745:
Typical weighted vibration Vibration emission value ah=3.14m/s2
Uncertainty K = 1.5m/s²
WARNING: The vibration emission value during actual use of the power tool can differ
from the declared value depending on the ways in which the tool is used dependant on
the following examples and other variations on how the tool is used:
How the tool is used and the materials being drilled.
The tool being in good condition and well maintained.
The use the correct accessory for the tool and ensuring it is sharp and in good condition.
The tightness of the grip on the handles and if any anti vibration accessories are used.
And the tool is being used as intended by its design and these instructions.
This tool may cause hand-arm vibration syndrome if its use is not adequately
managed.
WARNING: To be accurate, an estimation of exposure level in the actual conditions of
use should also take account of all parts of the operating cycle such as the times when
the tool is switched off and when it is running idle but not actually doing the job.This may
significantly reduce the exposure level over the total working period.
Helping to minimize your vibration exposure risk.

High frequency multi-function tool EN
8
ALWAYS use sharp chisels, drills and blades.
Maintain this tool in accordance with these instructions and keep well lubricated (where
appropriate).
If the tool is to be used regularly then invest in anti vibration accessories.
Avoid using tools in temperatures of 10oC or less.
Plan your work schedule to spread any high vibration tool use across a number of days.
ACCESSORIES
WX673 WX673.1 WX673.3 WX673.9
Allen key 1
Battery pack 1 2 1 /
Charger 3hr 30min 30min /
We recommend that you purchase your accessories from the same store that sold you the tool.
Use good quality accessories marked with a well-known brand name. Choose the type according
to the work you intend to undertake. Refer to the accessory packaging for further details. Store
personnel can assist you and offer advice.

High frequency multi-function tool EN
9
SAFETY INSTRUCTIONS
FOR BATTERY PACK
a) Do not dismantle, open or shred
secondary cells or battery pack.
b) Do not expose cells or battery pack to heat
or fire. Avoid storage in direct sunlight.
c) Do not short-circuit a cell or a battery
pack. Do not store cells or battery pack
haphazardly in a box or drawer where
they may short-circuit each other or be
short-circuited by other metal objects.
d) Do not remove a cell or battery from its
original battery pack enclosure required
for use.
e) Do not subject cells or battery pack to
mechanical shock.
f) In the event of a cell leaking, do not allow
the liquid to come in contact with the skin
or eyes. If contact has been made, wash
the affected area with copious amounts of
water and seek medical advice.
g) Do not use any charger other than that
specifically provided for use with the
equipment.
h) Observe the plus (+) and minus (–) marks
on the cell, battery and equipment and
ensure correct use.
i) Do not use any cell or battery pack
which is not designed for use with the
equipment.
j) Do not mix cells of different manufacture,
capacity, size or type within a device.
k) Keep cells and battery pack out of the
reach of children.
l) Seek medical advice immediately if a cell
or a battery pack has been swallowed.
m) Always purchase the correct cell or battery
for the equipment.
n) Keep cells and battery pack clean and dry.
o) Wipe the cell or battery pack terminals
with a clean dry cloth if they become dirty.
p) Secondary cells and battery pack need
to be charged before use. Always use
the correct charger and refer to the
manufacturer’s instructions or equipment
manual for proper charging instructions.
q) Do not leave a battery pack on prolonged
charge when not in use.
r) After extended periods of storage, it may
be necessary to charge and discharge
the cells or battery pack several times to
obtain maximum performance.
s) Secondary cells and battery pack give their
best performance when they are operated
at normal room temperature (20 °C ± 5 °C).
t) Retain the original product literature for
future reference.
u) Use only the cell or battery pack in the
application for which it was intended.
v) When possible, remove the battery pack
from the equipment when not in use.
w) Dispose of properly.
High frequency multi-function tool EN
10
To reduce the risk of injury, user
must read instruction manual.
Warning
Double insulation
Wear eye protection
Wear ear protection
Wear dust mask
Do not dispose of batteries, return
exhausted batteries to your local
collection or recycling point.
SYMBOLS OPERATION INSTRUCTIONS
NOTE: Before using the tool, read the
instruction book carefully.
INTENDED USE
The power tool is intended for sawing
and separating wooden materials, plastic,
plaster, non-ferrous metals and fasteners
(e.g. nails and clamps) as well as for working
on soft wall tiles and for dry grinding of
small surfaces. It is especially suitable for
working close to edges and for flush cutting.
BEFORE PUTTING INTO OPERATION
A) CHARGING THE BATTERY
The battery charger supplied is matched to the
Li-ion battery installed in the machine. Do not
use another battery charger.
The Li-ion battery is protected against deep
discharging. When the battery is empty,
the machine is switched off by means of a
protective circuit: The tool holder no longer
rotates.
In a warm environment or after heavy use, the
battery pack may become too hot to permit
charging. Allow time for the battery to cool
down before recharging.
When the battery pack is charged for the first
time and after prolonged storage, the battery
pack will accept a 100% charge after several
charge and discharge cycles.
B) TO REMOVE OR INSTALL BATTERY
PACK (See Fig. A)
Depress the battery pack release button to
release and slide the battery pack out from
your tool. After recharge, slide it back into
your tool. A simple push and slight pressure
will be sufficient.
OPERATION
WARNING: Do not touch the gear
box after long working time, because it
could be hot.
1. MOUNTING THE TOOL (See Fig. B1,
B2)
CAUTION: For all work or when
changing application tools, always
wear protective gloves. Avoid danger

High frequency multi-function tool EN
11
of injury from the sharp edges of the
application tools. Application tools can
become very hot while working, presenting
danger of burns!
WARNING: To reduce the risk of
injury, do not let the Universal end
cut blades or any segment saw blades
face back toward the user’s hand.
Unscrew the fastening piece (8).
Clean the tool holder, the application tool and
the fastening piece (8).
Place the application tool exactly onto
the hex-shaped tool holder. Note that the
application tool has a flush fit.
Reposition the fastening piece (8) using the
supplied allen key.
2. ADAPTER (21) (See Fig.
B3
)
Accessories of other brands (Fein®, Bosch®)
can be fitted onto the Sonicrafter®brand tool
using the adapter.
NOTE: Fein is a registered trademark of
C. & E. Fein GmbH. Bosch is a registered
trademark of Robert Bosch GmbH.
1) Use the allen key (23) to unscrew the
fastening piece (8) and then remove it
from the tool holder.
2) Clean the tool holder, the adapter the
application tool and the fastening piece.
3) Fit the adapter onto the tool holder,
then place the application tool onto the
adapter. Make sure that the tool holder,
the adaptor, and the application tool share
a flush fit.
4)
Reposition the fastening piece onto the
application tool and tighten with the allen key.
NOTE: Make sure the adapter matches the
application tool. The adapter (I) is matched to
the application tool of Fein®. The adapter (II)
is matched to the application tool of Bosch®.
(See Fig. B3)
3. MOUNTING/CHANGING THE
SANDING SHEET (See Fig. C)
Align the sanding sheet and press it onto the
sanding pad by hand.
Firmly press the power tool with the sanding
sheet against a flat surface and briefly switch
the power tool on. This provides for good
adhesion and prevents premature wear.
If one point has become worn, pull off the
sanding sheet, turn it 120° and place it on
again.
4. OPERATING THE ON/OFF SWITCH
To start the machine, push the On/Off switch
(2) forward so that the “I” is indicated on the
switch.
To switch off the machine, push the On/Off
switch (2) toward the rear so that the “0” is
indicated on the switch.
5. USING THE VARIABLE SPEED
CONTROL
Select oscillation frequency (speed) while
the motor is running.
The variable speed control (5) can be used
to set the optimum oscillating frequency
according to the accessories used and the
respective application.
High oscillation frequency:
Sanding, sawing, rasping and polishing
stone and metal.
Low oscillation frequency:
Polishing varnishes.
6. MOUNTING THE SUCTION DEVICE
(See Fig. D1, D2)
When vacuuming, mount the suction device
as shown in D1-D2.
NOTE: Using the sanding pad perforated.
You can only do the vacuuming after fitting
the dust collector.
7. SANDING
Typical application: Wood, metal; small
areas, especially corners, edges and places
difficult to access.
Select high oscillation frequency.
Sand with a constant movement and light
pressure.
Heavy pressure does not increase the removal
– the sanding sheet merely wears faster.
8. SAWING WITH THE SEGMENT SAW
BLADE
Typical application: Wood, plastics, sheet metal.
Select high oscillation frequency.
The saw blade lasts longer if the wear
is distributed evenly. To ensure an even

High frequency multi-function tool EN
12
distribution, loosen the saw blade, rotate it
and retighten firmly.
9. SAWING WITH THE UNIVERSAL END
CUT SAW BLADE (See Fig. E)
WARNING: The sawing teeth are
very sharp. Do not touch during
mounting and application.
The workpiece must be inserted firmly or
clamped tightly before it is cut.
Typical application: Wood, metal (e. g.
nails),plaster board and soft plastics.
When plunging and sawing use a slight pendulum
motion, to allow sufficient chip removal.
10. SCRAPING
Typical application: Scraping off old varnish
or adhesives, removing glued carpeting, e.
g. on stairs or other small to medium-sized
surfaces.
Select medium/high oscillation frequency
(for variable speed models).
11. LED LIGHT (1)
To turn on the light simply press the on/off
switch. When you release the on/off switch,
the light will be off.
LED lighting increases visibility-great for
dark or enclosed area. LED is also a battery
capacity indicator. It will flash when power
gets low.
12. TEMPERATURE DEPENDENT
OVERLOAD PROTECTION
When using as intended for, the power tool
cannot be subject to overload. When the
load is too high or the allowable battery
temperature of 75°C is exceeded, the
electronic control switches off the power
tool until the temperature is in the optimum
temperature range again.
13. PROTECTION AGAINST DEEP
DISCHARGING
The Li-ion battery is protected against deep
discharging by the “Discharging Protection
System”. When the battery is empty, the
machine is switched off by means of a
protective circuit: The inserted tool no longer
rotates.
14. DISPOSAL OF AN EXHAUSTED
BATTERY PACK
To preserve natural resources, please
recycle or dispose of the battery
pack properly. This battery pack
contains Lithium batteries. Consult your local
waste authority for information regarding
available recycling and/or disposal options.
Discharge your battery pack by operating
your tool, then remove the battery pack
from the tool housing and cover the battery
pack connections with heavy-duty adhesive
tape to prevent short circuit and energy
discharge. Do not attempt to open or remove
any of the components.
WORKING HINTS FOR YOUR
TOOL
If your power tool becomes too hot, especially
when used at low speed, set the speed to
maximum and run it with no load for 2-3
minutes to cool the motor. Avoid prolonged
usage at very low speeds. Always keep the
blade sharp.
Always ensure the workpiece is firmly held or
clamped to prevent movement.
Any movement of the material may affect the
quality of the cutting or sanding finish.
Start your tool before working and turn it off
only after you stop working.
Do not start sanding without having the
sandpaper fitted.
Do not allow the sandpaper to wear away, it
will damage the sanding pad.The guarantee
does not cover sanding pad wear and tear.
Use coarse grit paper to sand rough surfaces,
medium grit for smooth surfaces and fine grit
for finishing surfaces. If necessary, first make
a test run on scrap material.
Excessive force will reduce the working
efficiency and cause motor overload.
Replacing the accessory regularly will
maintain optimum working efficiency.
MAINTENANCE
Your power tool requires no additional
lubrication or maintenance. There are no

High frequency multi-function tool EN
13
user serviceable parts in your power tool.
Never use water or chemical cleaners to clean
your power tool. Wipe clean with a dry cloth.
Always store your power tool in a dry place.
Keep the motor ventilation slots clean. Keep
all working controls free of dust. Occasionally
you may see sparks through the ventilation
slots.This is normal and will not damage your
power tool.
ENVIRONMENTAL
PROTECTION
Waste electrical products should not
be disposed of with household waste.
Please recycle where facilities exist.
Check with your Local Authority or retailer for
recycling advice.
PLUG REPLACEMENT
(UK & IRELAND ONLY)
If you need to replace the fitted plug then
follow the instructions below.
IMPORTANT
The wires in the mains lead are colored in
accordance with the following code:
BLUE =NEUTRAL
Brown = Live
As the colors of the wires in the mains lead of
this appliance may not correspond with the
colored markings identifying the terminals
in your plug, proceed as follows.The wire
which is colored blue must be connected to
the terminal which is marked with N.The wire
which is colored brown must be connected to
the terminal which is marked with L.
WARNING: Never connect live or neutral
wires to the earth terminal of the plug. Only
fit an approved 13A BS1363/A plug and the
correct rated fuse.
NOTE: If a moulded plug is fitted and has to
be removed take great care in disposing of the
plug and severed cable, it must be destroyed
to prevent engaging into a socket.
Connect
Blue to N
(neutral)
Outer sleeve
firmly clamped
Cable grip
Brown L (live)
13 Amp fuse approved
to BS1362

High frequency multi-function tool EN
14
DECLARATION OF
CONFORMITY
We,
POSITEC Germany GmbH
Konrad-Adenauer-Ufer 37
50668 Köln
Declare that the product,
Description
WORX High frequency multi-function tool
Type WX673 WX673.1 WX673.3
WX673.9 (6-designation of machinery,
representative of high frequency
oscillation tool)
Function Sawing, scraping, sanding
Complies with the following directives,
Machinery directive 2006/42/EC
Electromagnetic compatibility directive
2004/108/EC
RoHS directive 2011/65/EU
Standards conform to
EN 55014-1
EN 55014-2
EN 60745-1
EN 60745-2-4
The person authorized to compile the
technical file,
Name: Russell Nicholson
Address: Positec Power Tools (Europe)
Ltd, PO Box 152, Leeds, LS10 9DS, UK
2012/10/22
LeoYue
POSITEC Quality Manager

15
D
Hochfrequenz-Multifunktionswerkzeug
1. ARBEITSLICHT
2. EIN/AUS-SCHALTER
3. AKKUVERRIEGELUNG
4. AKKU *
5. VARIABLER GESCHWINDIGKEIT
6. LÜFTUNGSSCHLITZE
7. SCHLEIFPAD
8. ZUBEHÖR-BEFESTIGUNGSSET
9. UNIVERSALKLINGE *
10. TAUCHSÄGEBLATT
11. HSS SEGMENTSÄGEBLATT
12. SCHLEIFPAPIER
13. SCHLEIFPAPIERFOLIE *
14. PERFORIERTES SCHLEIFPAPIER *
15. SCHLEIFAUSATZ *
16. SCHLEIFBLATT *
17. DREIECKIGE RASPEL *
18. KARBID-SANDSTRAHLKLINGE *
19. FESTER KRATZER *
20. FILZ-POLIERAUFSATZ *
21. DAPTER (ZUBEHÖR DER MARKEN Fein®, Bosch®EIGNEN SICH FÜR
WERKZEUGE DER MARKE Sonicrafter®.)
22. STAUBAUFSATZ*
23. INBUSSCHLÜSSEL
* Abgebildetes oder beschriebenes Zubehör gehört teilweise nicht zum Lieferumfang.

16
D
Hochfrequenz-Multifunktionswerkzeug
TECHNISCHE DATEN
Typ WX673 WX673.1 WX673.3 WX673.9 (6-Bezeichnung der Maschine, Repräsentant
des Hochfrequenz-Multifunktionswerkzeug)
Nennspannung 12V
Schwingfrequenz 5000-20000/min
Schwingwinkel 3.2°
Gewicht 1kg
INFORMATIONEN ÜBER LÄRM
Gewichteter Schalldruck LpA: 75dB(A)
Gewichtete Schallleistung LwA: 86dB(A)
KpA&KwA 3.0dB(A)
Tragen Sie bei einem Schalldruck über einen Gehörschutz 80dB(A)
INFORMATIONEN ÜBER VIBRATIONEN
Vibrationsgesamtmesswertermittlung gemäß EN 60745:
Typischer gewichteter Vibrationswert Vibrationsemissionswert ah=3.14m/s2
Unsicherheit K = 1.5m/s²
WARNUNG: Der Vibrationsemissionswert während des tatsächlichen Gebrauchs
des Elektrowerkzeugs kann vom angegebenen Wert abweichen, je nachdem, wie das
Werkzeug gemäß folgender Beispiele und anderweitiger Verwendungsmöglichkeiten eingesetzt
wird:
Wie das Werkzeug verwendet wird und Materialen geschnitten oder angebohrt werden.
Das Werkzeug ist in gutem Zustand und gut gepflegt.
Verwendung des richtigen Zubehörs für das Werkzeug und Gewährleistung seiner Schärfe und
seines guten Zustands.
Die Festigkeit der Handgriffe und ob Antivibrationszubehör verwendet wird.
Und ob das verwendete Werkzeug dem Design und diesen Anweisungen entsprechend
verwendet wird.
W
ird dieses Werkzeug nicht anemessen gehandhabt, kann es ein Hand-Arm-Vibrationssyndrom
erzeugen.
WARNUNG: Um genau zu sein, sollte ein Abschätzung des Belastungsgrades aller
Arbeitsabschnitte während tatsächlicher Verwendung berücksichtigt werden, z.B. die

17
D
Hochfrequenz-Multifunktionswerkzeug
Zeiten, wenn das Werkzeug ausgeschaltet ist, und wenn es sich im Leerlauf befindet und
eigentlich nicht eingesetzt wird. Auf diese Weise kann der Belastungsgrad während der
gesamten Arbeitszeit wesentlich gemindert werden.
Minimieren Sie Ihr Risiko, dem Sie bei Vibrationen ausgesetzt sind.
Verwenden Sie IMMER scharfe Meissel, Bohrer und Sägeblätter.
Pflegen Sie dieses Werkzeug diesen Anweisungen entsprechend und achten Sie auf eine gute
Einfettung (wo erforderlich).
Bei regelmäßiger Verwendung dieses Werkzeugs sollten Sie in Antivibrationszubehör
investieren.
Vermeiden Sie den Einsatz von Werkzeugen beiTemperaturen von 10ºC oder darunter.
Machen Sie einen Arbeitsplan, um die Verwendung von hochvibrierenden Werkzeugen auf
mehrereTage zu verteilen.
ZUBEHÖRTEILE
WX673 WX673.1 WX673.3 WX673.9
Inbusschlüssel 1
Akku-Pack 1 2 1 /
Ladegerät 3Stunde 30min 30min /
Wir empfehlen Ihnen, sämtliche Zubehörteile beim selben Fachhändler zu beziehen, bei dem
Sie auch Ihr Elektrowerkzeug gekauft haben. Verwenden Sie nur hochwertige Zubehörteile von
namhaften Herstellern. Weitere Informationen finden Sie auf der Verpackung der Zubehörteile.
Auch Ihr Fachhändler berät Sie gerne.

18
D
Hochfrequenz-Multifunktionswerkzeug
SICHERHEITSHINWEISE
FÜR AKKUPACKS
a) Akkus bzw. Akkupacks nicht zerlegen,
öffnen oder zerdrücken.
b) Zellen bzw. Akkupacks nicht Hitze oder
Feuer aussetzen. Lagerung in direktem
Sonnenlicht vermeiden.
c) Zellenbzw. ein Akkupacks
nichtkurzschließen. Zellen bzw. Akkupacks
nicht wahllos in einer Schachtel oder
Schublade aufbewahren, wo sie einander
kurzschließen oder durch andere
Metallgegenstände kurzgeschlossen
werden könnten.
d) Eine Zelle bzw. eine Batterie nicht
aus der zum Einsatz notwendigen
Originalummantelung des
Akkupacksentfernen.
e) Zellen bzw. Akkupacks nicht mechanischen
Stößen aussetzen.
f) Im Fall, dass Flüssigkeit aus einer Zelle
austritt, darf diese nicht in Kontakt mit
der Haut oder den Augen kommen. Sollte
dies dennoch geschehen, den betroffenen
Bereich sofort mit viel Wasser spülen und
einen Arzt aufsuchen.
g) Nur das speziell für das Gerät konzipierte
Ladegerät verwenden.
h) Die Markierungen Plus (+) und Minus
(–) auf Zellen, Batterien und dem Gerät
beachten und für korrekten Einsatz sorgen.
i) Keine Zellen bzw. Akkupacks verwenden,
die nicht ausdrücklich für den Gebrauch
mit dem Gerät vorgesehen sind.
j) Zellen verschiedener Hersteller, Kapazität,
Größe oder Art nicht im selben Gerät
mischen.
k) Zellen und Akkupacks von Kindern
fernhalten.
l) Beim Verschlucken einer Zelle oder
eines Akkupacks muss sofort ein Arzt
herangezogen werden.
m) Immer die richtige Zelle bzw. Batterie für
das Gerät kaufen.
n) Zellen und Akkupacks sauber und trocken
halten.
o) Sollten die Klemmen der Zelle bzw. des
Akkupacks schmutzig werden, diese
mit einem sauberen, trockenenTuch
abwischen.
p) Akkus und Akkupacks müssen vor dem
Gebrauch aufgeladen werden.Immer
das richtige Ladegerät benutzen und vor
Gebrauch für die korrekten Instruktionen
zum Aufladen in den Anweisungen des
Herstellers bzw. im Benutzerhandbuch
nachschlagen.
q) Ein Akkupack bei Nichtverwendung nicht
längere Zeit aufladen lassen.
r) Nach längerer Lagerung des Gerätes ist es
eventuell notwendig, die Zellen oder das
Akkupackmehrere Male aufzuladen und
zu entladen, um eine optimale Leistung zu
erhalten.
s) Akkus und Akkupacks funktionieren bei
normaler Zimmertemperatur (20 °C ± 5 °C)
am besten.
t) Die originalen Produktunterlagen zum
späteren Nachschlagen aufbewahren.
u) Zellen bzw. Akkupack nur im dafür
vorgesehenen Gerät verwenden.
v) DasAkkupack bei Nichtverwendung
womöglich aus dem Gerät nehmen.
w) Ordnungsgemäß entsorgen.

19
D
Hochfrequenz-Multifunktionswerkzeug
Lesen Sie diese
Bedienungsanleitung gut durch,
bevor Sie die Elektrowerkzeug
benutzen.
Achtung – Bedienungsanleitung
lesen!
Schutzisolation
Beim Arbeiten mit der
Elektrowerkzeug, tragen Sie eine
Schutzbrille
Tragen Sie Gehörschutz, Wenn Sie
die Elektrowerkzeug benutzen
Tragen Sie eine Elektrowerkzeug
Akku nicht in den Haushaltsmüll
geben. Bringen Sie den leeren
Akku zu Ihrer lokalen Sammel- oder
Recyclingstelle.
SYMBOLE HINWEISE ZUM BETRIEB
HINWEIS: Lesen Sie das Handbuch
vor Inbetriebnahme des Werkzeuges
sorgfältig durch.
BESTIMMUNGSGEMÄSSER GEBRAUCH
Das Elektrowerkzeug ist bestimmt zum
Sägen und Trennen von Holzwerkstoffen,
Kunststoff, Gips, NichteisenMetallen
und Befestigungselementen (z.B. Nägel,
Klammern) sowie zum Bearbeiten von
weichen Wandfliesen und zum trockenen
Schleifen kleiner Flächen. Es ist besonders zum
randnahen und bündigen Arbeiten geeignet.
VOR DEM EINSATZ
A) LADEN DES AKKUS
Das mitgelieferte Akku-Ladegerät ist dem in
der Maschine eingebauten Lithium-Ionen-
Akku angepasst. Verwenden Sie kein anderes
Akku-Ladegerät.
Der Lithium-Ionen-Akku ist gegen
übermäßiges Entladen geschützt. Wenn
der Akku leer ist, wird die Maschine von
einem Schutzkreis ausgeschaltet: Der
Werkzeughalter dreht sich nicht mehr.
In einer warmen Umgebung oder nach
extremem Gebrauch könnte der Akku zu
heiss geworden sein, um einen Ladevorgang
einzuleiten. Lassen Sie den Akku sich erst gut
abkühlen, bevor Sie ihn aufladen.
Wird der Akku erstmalig oder nach längerer
Zeit aufgeladen. Nach mehrmaligen
Lade - und Entladezyklen akzeptiert der Akku
jedoch ein Aufladen von 100%.
B) ANBRINGEN UND ENTFERNEN DES
AKKUS (Siehe A)
Drücken Sie die Akkuverriegelung hinein,
um den Akku zu entriegeln, und ziehen Sie
ihn aus dem Bohrer heraus. Schieben Sie
ihn nach dem Aufladen wieder in den Bohrer
hinein. Schieben Sie ihn mit leichtem Druck
ganz in die Aufnahme hinein.
HINWEISE ZUM BETRIEB
WARNUNG:
Kommen Sie nach langer
Arbeitszeit nicht mit dem Schaltkasten in
Kontakt, denn er könnte heiss geworden
sein.

20
D
Hochfrequenz-Multifunktionswerkzeug
1. WERKZEUG MONTIEREN
(Siehe B1, B2)
ACHTUNG: Bei allen Arbeiten oder
beim Austausch von Werkzeugen
müssen Sie Schutzhandschuhe tragen.
Vermeiden Sie die Gefahr von Verletzungen
aufgrund von scharfen Kanten an den
Arbeitswerkzeugen. Arbeitswerkzeuge
können sehr heiss werden, während
Sie damit arbeiten, was zu gefährlichen
Verbrennungen führen kann!
WARNUNG: Um das Risiko von
Verletzungen zu mindern, lassen Sie
nicht zu, dass die Universalend-Schneiden
oder andere Abschnitte der Sägeblätter
zur Hand des Benutzers weisen.
Lösen Sie den Bolzen und entfernen Sie den
zubehör-befestigungsset (8).
Reinigen Sie den Werkzeughalter, das
Arbeitswerkzeug sowie den Bolzen und den
zubehör-befestigungsset (8).
Legen Sie das Werkzeug genau auf den
hexagonal geformten Werkzeughalter.
Achten Sie darauf, dass das Werkzeug
bündig eingepasst ist.
Positionieren Sie den zubehör-befestigungsset (8)
2. DAPTER (21)(Siehe F)
Zubehör der Marken Fein®, Bosch®eignen
sich für Werkzeuge der Marke Sonicrafter®.
HINWEIS: Fein ist ein registriertes
Markenzeichen der C. & E. Fein GmbH.
Bosch ist ein registriertes Markenzeichen der
Robert Bosch GmbH.
1) Lösen Sie mit einem Inbus-Schlüssel (23)
die Montageplatte (8) und entfernen Sie
sie vom Werkzeughalter.
2) Reinigen Sie Werkzeughalter, Adapter,
zu verwendendes Werkzeug und
Montageplatte.
3) Befestigen Sie den Adapter am
Werkzeughalter und montieren Sie das
gewünschte Werkzeug auf den Adapter.
Achten Sie darauf, dass Werkzeughalter,
Adapter und zu verwendendes Werkzeug
bündig montiert sind.
4) Befestigen Sie die Montageplatte am
Werkzeug und ziehen Sie sie mit dem
Inbusschlüssel fest.
HINWEIS: Vergewissern Sie sich, dass der
Adapter zum Werkzeug passt. Der Adapter (I)
passt zum Werkzeug von Fein®. Der Adapter
(II) passt zum Werkzeug von Bosch®. (Siehe
B3)
3. SCHLEIFBLATT ANBRINGEN/
WECHSELN (Siehe C)
Richten Sie das Schleifblatt aus und drücken
Sie es mit der Hand auf die Schleifscheibe
auf.
Drücken Sie das Elektrowerkzeug mit dem
Schleifblatt fest gegen eine flache Oberfläche
und schalten Sie das Elektrowerkzeug kurz
ein. Auf diese Weise wird gute Haftung
gewährleistet und eine vorzeitige Abnutzung
verhindert.
Hat sich eine Stelle abgenutzt, ziehen Sie das
Schleifblatt ab, drehen Sie es um 120° und
bringen Sie es wieder an.
4. BEDIENUNG DES EIN-/
AUSSCHALTERS
Zum Einschalten des Elektrowerkzeugs
schieben Sie den Ein-/Ausschalter (2) nach
vorn, sodass am Schalter „I“ erscheint.
Zum Ausschalten des Elektrowerkzeugs
schieben Sie den Ein-/Ausschalter (2) nach
hinten, sodass am Schalter „0“ erscheint.
5. SCHALTER FÜR VARIABLE
DREHZAHLSTEUERUNG
Bestimmen Sie die Schwingungsfrequenz
(Geschwindigkeit) während der Motor läuft.
Mit der variablen Geschwindigkeitskontrolle
(5) kann eine optimale Schwingfrequenz
entsprechend dem verwendeten Zubehör
und der auszuführenden Arbeit eingestellt
werden.
Hohe Schwingfrequenz:
Schleifen, Sägen, Raspeln, Polieren von
Stein und Metall.
Niedrige Schwingfrequenz:
Polieren von Lacken.
6. STAUBABSAUGUNG ANBRINGEN
(Siehe D1, D2)
Für das Absaugen montieren Sie die
Absaugvorrichtung wie in D1-D2 dargestellt
ist.
HINWEIS: Verwenden Sie das perforierte
This manual suits for next models
3
Table of contents
Languages:
Other Worx Power Tools manuals

Worx
Worx Sonicrafter WX676 Installation manual

Worx
Worx WU527 User manual

Worx
Worx WX252 Installation manual

Worx
Worx WX472 User manual

Worx
Worx WX856 User manual

Worx
Worx Sonicrafter WX681 User manual

Worx
Worx WX543L User manual

Worx
Worx WX688L X Series User manual

Worx
Worx WT545 User manual

Worx
Worx Sonicrafter WX678 User manual
Popular Power Tools manuals by other brands

Hakko Electronics
Hakko Electronics FT-8004 instruction manual

Weidmüller
Weidmüller CA 100 operating manual

Rockwell
Rockwell RK5100K Install instructions

Makita
Makita 6704D instruction manual

Parkside
Parkside PKGA 14.4 A1 Translation of the original instructions

Dremel
Dremel 4000 Operating/safety instructions