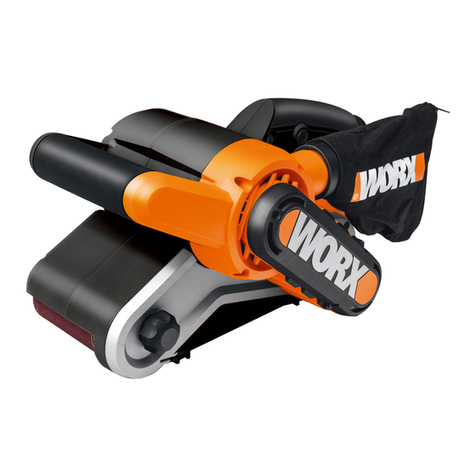
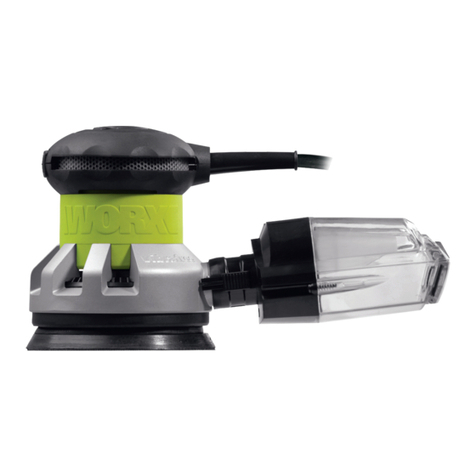
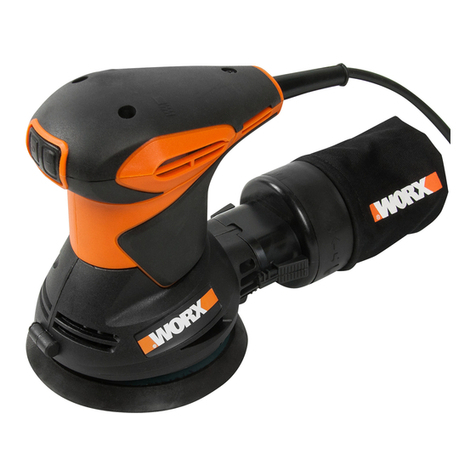
Worx WX654 User manual

P05
P12
P19
P26
P34
P42
P49
P56
P63
P70
P77
EN
D
F
I
ES
NL
PL
HU
RO
CZ
SK
Random orbital sander
Exzenterschleifer
Ponceuse rotative
Levigatrice roto-orbitale
Lijadora rotorbital
Excentrische schuurmachine
Szlierka orbitalna mimośrodowa
Random körkörös mozgású csiszoló
Şlefuitor oribital aleatoriu
Nesouměrná vibrační bruska
Elektrická leštiaca dráhová brúska
WX653 WX654

Original instructions EN
Originalbetriebsanleitung D
Notice originale F
Istruzioni originali I
Manual original ES
Oorspronkelijke gebruiksaanwijzing NL
Tłumaczenie oryginalnych instrukcji PL
Eredeti használati utasítás HU
Traducerea instrucţiunilor iniţiale RO
Překlad původních pokynů CZ
Preklad pôvodných pokynov SK

1
7
6
4
5
2
3
8a
8b

9
A B C
D E F
G

Random orbital sander EN
5
1. SLIDING ON-OFF SWITCH
2. SOFT GRIP HANDLE
3. DUST BOX *
4. DUST EXTRACTION OUTLET
5. BASEPLATE
6. MOTOR HOUSING
7. VARIABLE SPEED CONTROL
8. DUST EXTRACTION ADAPTER (A: 35mm; B: 32mm)
9. SANDING PAPER (See Fig. B) *
* Not all the accessories illustrated or described are included in standard delivery.

Random orbital sander EN
6
TECHNICAL DATA
Type WX653 WX654 (650~659-designation of machinery, representative of Random
orbital sander)
WX653 WX654
Rated voltage 220-240V~50/60Hz 230-240V~50Hz
Rated input power 360W 480W
Rated no load speed 7000-12000opm 4000-11000opm
Belt size 125mm 150mm
Orbital diameter 2.5mm
Protection class /II
Machine weight 2.1kg 2.3kg
NOISE AND VIBRATION DATA
WX653 WX654
A weighted sound pressure LPA: 78.6dB(A)
KPA: 3.0dB(A)
LPA :83.4dB(A)
KPA: 3.0dB(A)
A weighted sound power LWA: 89.6dB(A)
KWA: 3.0dB(A)
LWA: 94.4dB(A)
KWA: 3.0dB(A)
Wear ear protection when sound pressure is over 80dB(A)
Typical weighted vibration ah= 6.47m/s²
K = 1.5m/s²
ah= 9.19m/s2
K = 1.5m/s²
The declared vibration total value may be used for comparing one tool with another, and may
also be used in a preliminary assessment of exposure.
WARNING:The vibration emission value during actual use of the power tool can differ
from the declared value depending on the ways in which the tool is used dependant on the
following examples and other variations on how the tool is used:
The tool being in good condition and well maintained.
The use the correct accessory for the tool and ensuring it is sharp and in good condition.
The tightness of the grip on the handles and if any anti vibration accessories are used.
And the tool is being used as intended by its design and these instructions.
This tool may cause hand-arm vibration syndrome if its use is not adequately
managed.

Random orbital sander EN
7
WARNING: To be accurate, an estimation of exposure level in the actual conditions of use
should also take account of all parts of the operating cycle such as the times when the tool
is switched off and when it is running idle but not actually doing the job.This may significantly
reduce the exposure level over the total working period.
Helping to minimise your vibration exposure risk.
Maintain this tool in accordance with these instructions and keep well lubricated (where
appropriate).
If the tool is to be used regularly then invest in anti vibration accessories.
Avoid using tools in temperatures of 10oC or less.
Plan your work schedule to spread any high vibration tool use across a number of days.
ACCESSORIES
Dust box 1
32mm dust extraction adaptor 1
35mm dust extraction adaptor 1
60 grit velcro sanding paper 3
80 grit velcro sanding paper 3
120 grit velcro sanding paper 3
125mm baseplate 1(only for WX654)
We recommend that you purchase your accessories from the same store that sold you the tool.
Use good quality accessories marked with a well-known brand name. Choose the type according
to the work you intend to undertake. Refer to the accessory packaging for further details. Store
personnel can assist you and offer advice.

Random orbital sander EN
8
To reduce the risk of injury, user
must read instruction manual
Warning
Double insulation
Wear eye protection
Wear ear protection
Wear dust mask
SYMBOLS OPERATING INSTRUCTIONS
NOTE: Before using the tool, read the
instruction book carefully.
INTENDED USE
The machine is intended for dry sanding of
wood, plastic, metal and filler material as well
as painted surfaces. Machines with electronic
control are also suitable for polishing.
ASSEMBLY THE ROTARY
SANDER
1. REPLACING THE SANDING PLATE
(See Fig A)
To replace the sanding plate, pull off the Sand
paper. Loosen and remove the screw.
Replace damaged sanding plates without
delay.
2. REPLACING THE SAND PAPER
Remove the plug from the socket before
carrying out any adjustment, servicing or
maintenance.
A) Selecting the sand paper
Depending on the material to be worked and
the desired material removal, various Sand
paper qualities are to be used:
- Use coarse grits to sand down rough finishes
medium grit to smooth the work and fine grit
to finish off.
-The higher the grade number, the finer the
grit. For rough work, start with a low grade of
grit. (e.g.60grit) and change to a higher, finer
grade (e.g.120grit) for finishing.
B) Replacing the sand paper (See Fig B)
Lift the Sand paper at the side and pull it off
the sanding plate. Clean the sanding plate, if
required. Press the new Sand paper against
the bottom of the sanding plate.To ensure
optimum dust extraction, the holes of the
Sand paper must match with those of the
sanding plate.
OPERATION
1. SWITCHING ON/OFF (See Fig C)
Depress “Ⅰ” on the sliding on-off switch to

Random orbital sander EN
9
start the machine.
Depress “0” on the sliding on-off switch to
stop it.
2. VARIABLE SPEED CONTROL
(See Fig D)
With the variable speed control dial (7), the
required speed can be selected (also while
running).
The required speed is dependent on the
material and is to be determined by a practical
trial.
After longer periods of working at low speed,
allow the machine to cool down by running it
for approx. 3 minutes at maximum speed with
no load.
Sanding
work
Grain Speed
setting(opm)
Coarse
sanding
Precision
sanding
Sanding
down
varnishes
180 400 8700~11000
Stripping
paint 40 120 9800~11000
Touching
up
paintwork
120 120 7600~10000
Sanding
wood 60 240 7600~11000
Machining
veneer 180 400 8700~11000
Sanding
aluminium 80 240 7600~11000
Derusting
metal 40 120 9800~11000
Sanding
metal and
steel
120 240 9800~11000
Sanding
plexiglass 180 400 6500~8700
3. DUST BOX (See Fig E, F)
A) Attach the dust box (See Fig E)
Your sander is equipped with a dust collection
box.To attach, slide the dust box onto the
outlet piece and take care that the dust box
locks in the grooves of the outlet.
CAUTION: To prevent the possibility
of sanding dust or foreign body being
thrown into your face or eyes, never attempt
to use your sander without the dust box
properly installed.
B) Empty dust box (See Fig F)
For more efficient operation, empty dust box
every 5-10mins.This will permit the air to flow
through the box better.To empty the dust box,
pull off the dust box out of the dust extraction
outlet directly and shake out dust.
4. USING THE DUST EXTRACTION
ADAPTER (See Fig G)
Your sander is equipped with two dust
extraction adapters, which are designed for
connecting the hose of a vacuum cleaner.
If the vacuum hose is 35mm, Insert the 35mm
dust adapter (a) directly into the rear dust
outlet of sander. If the vacuum hose is 32 mm,
insert the 32 mm adapter (b) into the back of
35mm adapter (a).
NOTE: Please pull the dust adapter to make
sure tightened securely on the dust outlet.
5. SANDING SURFACES
Place the machine with the complete Sand
paper on the surface to be worked. Ensure
uniform sanding pressure. Less sanding
pressure increases the sanding capacity and
protects the machine and the sanding tool.
The removal capacity and the sanding pattern
are determined mainly by the selection of
the Sand paper (grain size), the speed of the
sanding plate and the application pressure.
ROUGH SANDING
Attach a Sand paper with coarse grain.
Apply only light sanding pressure to achieve
increased material removal.
FINE SANDING
Attach a Sand paper with fine grain. With
moderate pressure, move the machine in a
circular pattern or alternately in lengthwise
and crosswise directions over the work piece.
Do not tilt the machine to avoid sanding
through the work piece (e.g. when sanding
veneer). After finishing the work, switch off the
machine and lift it from the work piece.
Random orbital sander EN
10
WORKING HINTS FOR YOUR
ROTARY SANDER
If your power tool becomes too hot, especially
when used at low speed, set the speed to
maximum and run it with no load for 2-3
minutes to cool the motor. Avoid prolonged
usage at very low speeds. Always use sand
paper that is suitable for the material you want
to sand.
Always ensure the work-piece is firmly held or
clamped to prevent movement.
Any movement of the material may affect the
quality of the sanding finish.
Start your sander before sanding and turn it
off only after you stop sanding. For the best
results, sand wood in the direction of the
grain.
Do not start sanding without having the
sandpaper fitted.
Do not allow the sand paper to wear away
it will damage the base-plate.The guarantee
does not cover base-plate wear and tear.
Use coarse grit paper to sand rough surfaces,
medium grit for smooth surfaces and fine grit
for the final surfaces. If necessary, first make a
test run on scrap material.
Use only good quality sand paper.
The sand paper controls the sanding
efficiency, not the amount of force you apply
to the tool. Excessive force will reduce the
sanding efficiency and cause motor overload.
Replacing the sand paper regularly will
maintain optimum sanding efficiency.
MAINTAINANCE
Remove the plug from the socket before
carrying out any adjustment, servicing or
maintenance.
Your power tool requires no additional
lubrication or maintenance.There are no
user serviceable parts in your power tool.
Never use water or chemical cleaners to
clean your power tool. Wipe clean with a
dry cloth. Always store your power tool in a
dry place. Keep the motor ventilation slots
clean. Keep all working controls free of dust.
Occasionally you may see sparks through the
ventilation slots.This is normal. If the supply
cord is damaged, it must be replaced by the
manufacturer, its service agent or similarly
qualified persons in order to avoid a hazard.
ENVIRONMENTAL
PROTECTION
Waste electrical products must not be
disposed of with household waste.
Please recycle where facilities exist.
Check with your local authorities or retailer for
recycling advice.

Random orbital sander EN
11
PLUG REPLACEMENT
(UK & IRELAND ONLY)
If you need to replace the fitted plug then
follow the instructions below.
IMPORTANT
The wires in the mains lead are colored in
accordance with the following code:
BLUE =NEUTRAL BROWN =LIVE
As the colors of the wires in the mains lead of
this appliance may not correspond with the
colored markings identifying the terminals
in your plug, proceed as follows.The wire
which is colored blue must be connected to
the terminal which is marked with N.The wire
which is colored brown must be connected to
the terminal which is marked with L.
WARNING! Never connect live or
neutral wires to the earth terminal of
the plug. Only fit an approved 13ABS1363/A
plug and the correct rated fuse.
NOTE:If a moulded plug is fitted and has to
be removed take great care in disposing of the
plug and severed cable, it must be destroyed
to prevent engaging into a socket.
DECLARATION OF
CONFORMITY
We,
POSITEC Germany GmbH
Konrad-Adenauer-Ufer 37
50668 Köln
Declare that the product,
Description WORX Random orbital sander
Type WX653 WX654(650~659-
designation of machinery, representative
of Random orbital sander)
Function Removing surface material
using an abrasive medium
Complies with the following directives:
2006/42/EC
2004/108/EC
2011/65/EU
Standards conform to:
EN 55014-1
EN 61000-3-3
EN 55014-2
EN 60745-1
EN 61000-3-2
EN 60745-2-4
The person authorized to compile the
technical file,
Name Russell Nicholson
Address Positec Power Tools (Europe)
Ltd, PO Box 152,Leeds,LS10 9DS,UK
2014/07/19
LeoYue
POSITEC Quality Manager
Connect
Blue to N
(neutral)
Outer sleeve
firmly clamped
Cable grip
Brown L (live)
13 Amp fuse approved
to BS1362

Exzenterschleifer D
12
1. EIN/AUS-SCHIEBESCHALTER
2. SOFTHANDGRIFF
3. STAUBBEHÄLTER *
4. STAUBAUSGANG
5. SCHLEIFTELLER
6. MOTORGEHÄUSE
7. STUFENLOSER DREHZAHLWÄHLER
8. STAUBADAPTER (A: 35mm; B: 32mm)
9. SCHLEIFPAPIER *(Siehe Bild B)
*Abgebildetes oder beschriebenes Zubehör gehört teilweise nicht zum Lieferumfang.

Exzenterschleifer D
13
TECHNISCHE DATEN
Typ WX653 WX654 (650~659-Bezeichnung der Maschine, Repräsentant Exzenter-
schleifer)
WX653 WX654
Spannung 220-240V~50/60Hz 230-240V~50Hz
Nennaufnahmeleistung 360W 480W
Leerlaufdrehzahl 7000-12000opm 4000-11000opm
Schleiffläche 125mm 150mm
Schwingkreisdurchmesser 2.5mm
Schutzisolation /II
Gewicht 2.1kg 2.3kg
LÄRMPEGEL UND VIBRATIONEN
WX653 WX654
Gewichteter Schalldruck LPA: 78.6dB(A)
KPA: 3.0dB(A)
LPA :83.4dB(A)
KPA: 3.0dB(A)
Gewichtete Schallleistung LWA: 89.6dB(A)
KWA: 3.0dB(A)
LWA: 94.4dB(A)
KWA: 3.0dB(A)
Tragen Sie bei einem Schalldruck über 80dB(A) einen Gehörschu
Typischer gewichteter Vibrationswert ah= 6.47m/s²
K = 1.5m/s²
ah= 9.19m/s2
K = 1.5m/s²
Der Schwingungsgesamtwert kann zum Vergleichen einesWerkzeugs mit einem anderen verwen-
det werden, ebenso für eine vorläufige Beurteilung von Belastungen.
WARNUNG: Der Vibrationsemissionswert während des tatsächlichen Gebrauchs des
Elektrowerkzeugs kann vom angegebenen Wert abweichen, je nachdem, wie dasWerkzeug
gemäß folgender Beispiele und anderweitiger Verwendungsmöglichkeiten eingesetzt wird:
Das Werkzeug ist in gutem Zustand und gut gepflegt.
Verwendung des richtigen Zubehörs für das Werkzeug und Gewährleistung seiner Schärfe und
seines guten Zustands.
Die Festigkeit der Handgriffe und ob Antivibrationszubehör verwendet wird.
Und ob das verwendete Werkzeug dem Design und diesen Anweisungen entsprechend
verwendet wird.
Wird dieses Werkzeug nicht anemessen gehandhabt, kann es ein Hand-Arm-
Vibrationssyndrom erzeugen.

Exzenterschleifer D
14
WARNUNG: Um genau zu sein, sollte ein Abschätzung des Belastungsgrades aller
Arbeitsabschnitte während tatsächlicherVerwendung berücksichtigt werden, z.B. die Zeiten,
wenn das Werkzeug ausgeschaltet ist, und wenn es sich im Leerlauf befindet und eigentlich nicht
eingesetzt wird. Auf diese Weise kann der Belastungsgrad während der gesamten Arbeitszeit
wesentlich gemindert werden.
Minimieren Sie Ihr Risiko, dem Sie bei Vibrationen ausgesetzt sind.
Pflegen Sie dieses Werkzeug diesen Anweisungen entsprechend und achten Sie auf eine gute
Einfettung (wo erforderlich).
Bei regelmäßiger Verwendung dieses Werkzeugs sollten Sie in Antivibrationszubehör investieren.
Vermeiden Sie den Einsatz von Werkzeugen beiTemperaturen von 10ºC oder darunter.
Machen Sie einen Arbeitsplan, um dieVerwendung von hochvibrierenden Werkzeugen auf
mehrereTage zu verteilen.
LIEFERUMFANG
Staubbehälter 1
32mm Staubadapter 1
35mm Staubadapter 1
60 Körnung Klettverschluss-Sandpapier 3
80 Körnung Klettverschluss-Sandpapier 3
120 Körnung Klettverschluss-Sandpapier 3
125mm Schleifteller 1(nur WX654)
Wir empfehlen Ihnen, sämtliche Zubehörteile beim selben Fachhändler zu beziehen, bei dem
Sie auch Ihr Elektrowerkzeug gekauft haben. Verwenden Sie nur hochwertige Zubehörteile von
namhaften Herstellern. Weitere Informationen finden Sie auf der Verpackung der Zubehörteile.
Auch Ihr Fachhändler berät Sie gerne.

Exzenterschleifer D
15
Lesen Sie unbedingt die
Anleitung, damit es nicht zu
Verletzungen kommt
Warnung
Schutzisolation
Schutzbrille tragen
Gehörschutz tragen
Schutzmaske tragen
SYMBOLE HINWEISE ZUM BETRIEB
Hinweis: lesen sie das handbuch
vor inbetriebnahme des werkzeuges
sorgfältig durch.
BESTIMMUNGSGEMÄSSER GEBRAUCH
Das Gerät ist bestimmt zum trockenen
Schleifen von Holz, Kunststoff, Metall,
Spachtelmasse sowie lackierten Oberflächen.
Geräte mit elektronischer Regelung sind auch
geeignet zum Polieren.
MONTAGE DER SANDPAPIE
RSCHLEIFMASCHINE
1. SCHLEIFTELLER WECHSELN
(Siehe Bild A)
Um die Schleifplatte auszutauschen, nehmen
Sie das Sandpapier ab und drehen Sie die
Schraube heraus.
Beschädigte Schleifteller sofort
auswechseln.
2. SCHLEIFPAPIER WECHSELN
Ziehen Sie grundsätzlich den Netzstecker,
bevor Sie Einstell-, Reparatur- oder
Wartungstätigkeiten ausführen.
A) WAHL DES SCHLEIFPAPIER
Entsprechend dem zu bearbeitenden
Material und dem gewünschten Abtrag sind
unterschiedliche Schleifpapier qualitäten
einzusetzen:
- Nutzen Sie eine grobe Körnung, um raue
Oberflächen zu bearbeiten, eine mittlere
Körnung, um die Oberfläche zu glätten und
eine feine Körnung für den Abschluss.
- Je höher die Gradnummer, desto feiner die
Körnung. Starten Sie bei rauen Arbeiten mit
einem kleinen Körnungsgrad (z.B. 60) und
wechseln Sie dann zu einem höheren, feineren
Grad (z.B 120) für den Abschluss.
B) SCHLEIFPAPIER WECHSELN
(Siehe Bild B)
Das Schleifpapier seitlich anheben und vom
Schleifteller abziehen. Den Schleifteller ggf.
reinigen. Das neue Schleifpapier auf die
Unterseite des Schleiftellers aufdrücken.
Zur Gewährleistung einer optimalen
Staubabsaugung müssen die Bohrungen des

Exzenterschleifer D
16
Schleifpapier mit denen des Schleiftellers
übereinstimmen.
HINWEISE ZUM BETRIEB
1. EIN-AUS-SCHALTEN (Siehe Bild C)
“I” am Ein/Aus-Schiebeschalter drücken, um
die Maschine zu starten.
“0” am Ein/Aus-Schiebeschalter drücken, um
die Maschine zu stoppen
2. DREHZAHLVORWAHLKNOPF
(Siehe Bild D)
Mit dem Stellrad (7) lässt sich die benötigte
Schwingzahl auch während des Betriebes
vorwählen.
Die erforderliche Schwingzahl ist vom
Werkstoff abhängig und durch praktischen
Versuch zu ermitteln Nach längerem
Arbeiten mit kleiner Drehzahl die Maschine
zur Abkühlung zirka 3 Minuten lang mit
maximaler Drehzahl im Leerlauf drehen
lassen.
Schleifen
Körnung Drehzahlein
stellung
(min-1)
Grobsch
leifen
Feinsch
leifen
Abschlei
fen von
Lacken
180 400 8700~11000
Abschlei
fen von
Farbe
40 120 9800~11000
Ausbes
sern von
Farbe
120 120 7600~10000
Schleifen
von Holz
60 240 7600~11000
Bearbei
ten von
Furnier
180 400 8700~11000
Schleifen
von Alumi
nium
80 240 7600~11000
Rost
entfernen
40 120 9800~11000
Schleifen
von Stahl
oder Eisen
120 240 9800~11000
Schleifen
von
Plexiglas
180 400 6500~8700
3. STAUBBEHÄLTER (Siehe Bild E, F)
A) NUTZUNG DES STAUBBEHÄLTERS
(Siehe Bild E)
Ihre Sandpapierschleifmaschine ist mit einem
Staubsammelbehälter ausgestattet. Zum
Anbringen schieben Sie den Staubbehälter auf
das Auslassstück, und achten Sie darauf, dass
er in den Nuten des Auslasses einrastet.
VORSICHT:Um zu verhindern, dass
Sandstaub oder Fremdkörper in Ihr
Gesicht oder Ihre Augen gelangen, verwenden
Sie Ihre Sandpapierschleifmaschine nie ohne
richtig angebrachten Staubbehälter.
B) LEEREN DES STAUBBEHÄLTERS
(
Siehe Bild
F)
Um ein effizientes Arbeiten zu erleichtern,
leeren Sie alle 5-10 Minuten den
Staubbehälter. Dies sorgt für einen guten
Luftfluss durch den Behälter. Entfernen
Sie zum Leeren den Staubbehälter vom
Schwingschleifer, und öffnen Sie den Behälter.
um den Staub herauszuschütteln.
4. STAUBABSAUGADAPTER (
Siehe Bild
G)
Ihre Sandpapierschleifmaschine ist mit zwei
Staubabsaugadaptern ausgestattet, die für
den Anschluss des Schlauches an einen
Staubsauger vorgesehen sind.
Falls der Staubsaugerschlauch einen
Durchmesser von 35 mm aufweist, führen Sie
den 35-mm-Staubabsaugadapter (a) direkt in
die Staubauslassöffnung auf der Rückseite
der Sandpapierschleifmaschine ein. Falls der
Staubsaugerschlauch einen Durchmesser
von 32 mm aufweist, führen Sie den 32-
mm-Staubabsaugadapter (b) in den 35-mm-
Adapter auf der Rückseite der Maschine ein.
Hinweis: Bitte ziehen Sie leicht am
Staubabsaugadapter, um sicherzustellen, dass
er fest an der Staubauslassöffnung sitzt.

Exzenterschleifer D
17
5. FLÄCHEN SCHLEIFEN
Das Gerät mit der ganzen Schleifpapier
auf den zu bearbeitenden Untergrund
aufsetzen. Auf gleichmäßigen Anpressdruck
achten. Weniger Anpressdruck bringt mehr
Schleifleistung und schont das Gerät und
das Schleifwerkzeug. Die Abtragsleistung
und das Schliffbild werden im Wesentlichen
durch die Wahl des Schleifpapier (Körnung),
die Drehzahl des Schleiftellers und den
Anpressdruck bestimmt.
GROBSCHLIFF
Ein Schleifpapier grober Körnung aufziehen.
Das Gerät nur leicht andrücken, um einen
größeren Materialabtrag zu erreichen.
FEINSCHLIFF
Ein Schleifpapier feinerer Körnung aufziehen.
Das Gerät mit mäßigem Druck flächig kreisend
oder wechselnd in Längs- und Querrichtung
auf dem Werkstück bewegen. Das Gerät nicht
verkanten, damit ein Durchschleifen des zu
bearbeitenden Werkstückes (z.B. Furniere)
verhindert wird. Nach Beendigung des
Arbeitsvorgangs Gerät ausschalten und vom
Werkstück abheben.
ARBEITSHINWEISE
FÜR IHREN
EXCENTERSCHLEIFER
Die Maschine kann bei lang andauernden
Arbeiten mit niedrigen Geschwindigkeiten
heiß werden. Lassen Sie sie in einem
solchen Fall 2 bis 3 Minuten mit maximaler
Drehzahl laufen, damit der Motor abkühlen
kann. Vermeiden Sie Dauerbetrieb bei sehr
niedrigen Drehzahlen.
Verwenden Sie Schleifpapier, das für das zu
schleifende Material geeignet ist.
Ein Schleifblatt mit dem Metall bearbeitet
wurde, sollte nicht für andere Materialien
verwendet werden.
Das Werkstück muss bei allen Arbeiten sicher
befestigt oder festgeklemmt werden, damit es
nicht verrutschen kann.
Schalten Sie den Schwingschleifer ein und
halten Sie ihn mit beiden Händen fest. Legen
Sie die Schleiffläche sanft und flach an das
Werkstück an; beim ersten Kontakt kann
es etwas „ausschlagen“. Bewegen Sie den
Schwingschleifer langsam; am besten in
gleichmäßigen, kreisförmigen Bewegungen.
Üben Sie keinen zu grossen Druck auf den
Schwingschleifer, lassen Sie die Maschine
die Arbeit verrichten. Halten Sie den Motor
auf Drehzahl, so erreichen Sie die beste
Abtragung.
Übermäßig hoher Druck belastet den Motor
unnötig und beeinträchtigt die Lebensdauer
des Schleifpapiers. Überprüfen Sie den
Zustand des Schleifpapiers regelmäßig und
tauschen es bei Bedarf aus.
Verwenden Sie das Gerät niemals ohne
Schleifpapier.
Wechseln Sie das Schleifpapier rechtzeitig,
andernfalls kann die Schleifplatte beschädigt
werden. Der normale Verschleiß der
Schleifplatte wird nicht von der Garantie
abgedeckt.
Verwenden Sie kleine (grobe) Körnungen
für raue Oberflächen, mittlere Körnungen
für bereits geglättete Oberflächen und hohe
(feine) Körnungen für die Endbearbeitung der
Oberfläche.
WARTUNG
Ziehen Sie grundsätzlich den Netzstecker,
bevor Sie Einstell-, Reparatur- oder
Wartungstätigkeiten ausführen.
Ihr Werkzeug benötigt keine zusätzliche
Schmierung oder Wartung. Es enthält keine
Teile, die Sie warten müssen. Reinigen
Sie Ihr Werkzeug niemals mit Wasser oder
chemischen Loesungsmitteln. Wischen
Sie es mit einem trockenenTuch sauber.
Lagern Sie Ihr Werkzeug immer an einem
trockenen Platz. Sorgen Sie dafür, dass bei
staubigen Arbeiten die Lüftungsöffnungen
frei sind. Falls es erforderlich sein sollte, den
Staub zu entfernen, trennen Sie zuerst das
Elektrowerkzeug vom Stromversorgungsnetz.
Verwenden Sie nichtmetallische Objekte zum
Entfernen von Staub und vermeiden Sie das
Beschädigen innererTeile. Gelegentlich sind
durch die Lüftungsschlitze hindurch Funken zu
sehen. Dies ist normal und wird Ihr Werkzeug
nicht beschädigen.
Wenn ein Ersatz von Stecker oder

Exzenterschleifer D
18
Anschlussleitung erforderlich ist, dann ist
dies von unserer Servicestelle oder einer
Elektrofachwerkstatt durchzuführen, um
Sicherheitsgefährdungen zu vermeiden.
Lassen Sie Reparaturen nur durch unsere
Servicestelle oder durch eine Fachwerkstatt
mit Originalersatzteilen durchführen.
UMWELTSCHUTZ
Elektroprodukte dürfen nicht mit dem
normalen Haushaltsmüll entsorgt
werden, sondern sollten nach
Möglichkeit zu einer Recyclingstelle gebracht
werden. Ihre zuständigen Behörden oder
Ihr Fachhändler geben Ihnen hierzu gerne
Auskunft.
KONFORMITÄTSERKLÄRUNG
Wir,
POSITEC Germany GmbH
Konrad-Adenauer-Ufer 37
50668 Köln
Erklären hiermit, dass unser Produkt
Beschreibung WORX Exzenterschleifer
Typ WX653 WX654
(650~659-Bezeichnung der Maschine,
repräsentiert die Exzenterschleifer)
Funktionen Entfernen von
Oberflächenmaterial mithilfe eines
Schleifmittels
Den Bestimmungen der folgenden Richtlinien
entspricht:
2006/42/EC
2004/108/EC
2011/65/EU
Werte nach
EN 55014-1
EN 61000-3-3
EN 55014-2
EN 60745-1
EN 61000-3-2
EN 60745-2-4
Zur Kompilierung der technischen Datei
ermächtigte Person
Name Russell Nicholson
Adresse Positec Power Tools (Europe)
Ltd, PO Box 152,Leeds,LS10 9DS,UK
2014/07/19
LeoYue
POSITEC Qualitätsleiter

Ponceuse rotative F
19
1. INTERRUPTEUR MARCHE ARRÊT À GLISSIÈRE
2. POIGNÉE GRIP SOUPLE
3. BOÎTIER À POUSSIÈRE *
4. BUSE DE SORTIE DES POUSSIÈRES
5. PLATEAU DE PONÇAGE
6. LOGEMENT MOTEUR
7. CADRAN DE COMMANDE DE VITESSE VARIABLE
8. ADAPTATEUR POUR EXTRACTEUR DE POUSSIÈRE (A: 35mm; B: 32mm)
9. PAPIERS DE VERRE *(Voir Figure B)
*Les accessoires reproduits ou décrits ne sont pas tous compris avec le modèle
standard livré.

Ponceuse rotative F
20
CARACTÉRISTIQUES TECHNIQUES
Modèle WX653 WX654 (650~659- désignations des pièces, illustration de la
Ponceuse rotative)
WX653 WX654
Tension nominale 220-240V~50/60Hz 230-240 V~50Hz
Puissance absorbée nominale 360W 480W
Régime à vide 7000-12000opm 4000-11000opm
Taille de la plaque de base 125mm 150mm
Diamètre d’amplitude 2.5mm
Double isolation / Classe /II
Masse 2.1kg 2.3kg
BRUITS ET VIBRATIONS
WX653 WX654
Niveau de pression sonore mesurée LPA: 78.6dB(A)
KPA: 3.0dB(A)
LPA :83.4dB(A)
KPA: 3.0dB(A)
Niveau de puissance sonore mesurée LWA: 89.6dB(A)
KWA: 3.0dB(A)
LWA: 94.4dB(A)
KWA: 3.0dB(A)
Porter un casque anti-bruit si la pression sonore est supérieure à 80dB(A)
Valeur de vibration mesurée ah= 6.47m/s²
K = 1.5m/s²
ah= 9.19m/s2
K = 1.5m/s²
La valeur totale de vibration déclarée peut être utilisée pour comparer un outil à un autre, et peut
également être utilisé dans une évaluation préliminaire de l’exposition.
AVERTISSEMENT: La valeur d’émission de vibrations pendant l’utilisation réelle de l’outil
électrique peut différer de la valeur déclarée selon la façon dont l’outil est utilisé, selon les
exemples suivants et d’autres variations sur la façon dont l’outil est utilisé:
L’outil est en bon état et bien entretenu.
L’utilisation du bon accessoire pour l’outil et l’assurance qu’il est affuté et en bon état.
Le serrage du grip sur les poignées et le cas échéant les accessoires anti-vibrations utilisés.
Et l’outil est utilisé comme prévu dans sa conception et dans les présentes instructions.
Cet outil peut causer un syndrome de vibration du bras et de la main s’il n’est pas
correctement géré.
This manual suits for next models
1
Table of contents
Languages:
Other Worx Sander manuals