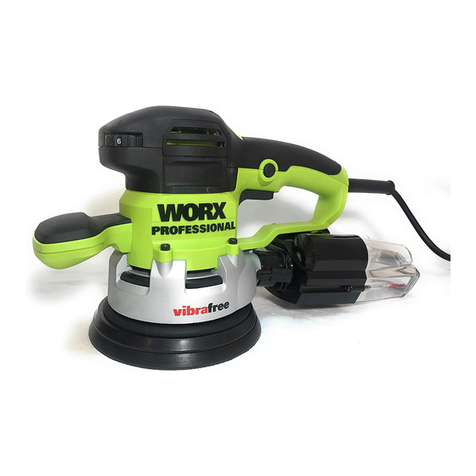
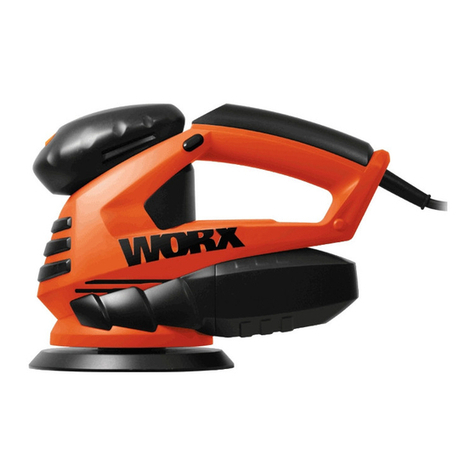
Worx WU651 User manual

WU651 •Random orbit sander - 300W 04
•Exzenterschleifer - 300W 15
•Ponceuse orbitale - 300W 26
•Levigatrice rotorbitale - 300W 37
•Handpalm schuurmachine - 300W 48


3
4
5
6
7
1
2
8
10
9a
9b
CB
E
D.2D.1
F
A

4
1
2
3
4
5
6
7
8
9
10
Component list
On/off witch
Soft grip handle
Cyclonic dust box
Latching lever
Dust extraction outlet
Outer base plate
Inner base plate
Motor housing
a: Inner spot paper*(See Fig A)
b: Outer ring paper*(See Fig A)
Dust extraction adaptor(See Fig E)
* Not all the accessories illustrated or described are included in
standard delivery.
1
2
3
4
5
6
7
8
9
10
11
12
Additional safety instructions for
your sander
Remove the plug from the socket before carrying out any
adjustment, servicing or maintenance.
Fully unwind cable drum extensions to avoid potential overheating.
When an extension cable is required you must ensure it has the
correct ampere rating for your power tool and is in a safe electrical
condition.
Ensure your mains supply voltage is same as indicated on the
rating plate.
Your tool is double insulated for additional protection against a
possible electrical insulation failure within the tool.
Always check walls, floors and ceilings to avoid hidden power
cables and pipes.
After long working periods external metal parts and accessories
could be hot.
Wear eye protection when operating this tool.
If possible, ensure the workpiece is firmly clamped to prevent
movement.
Your sander is a hand held tool, do not clamp your finishing sander.
Before sanding, check the area is free of nails, screws, etc.
Never stop the sander by applying a force to the baseplate.

5
13
14
15
16
17
18
19
20
21
22
23
24
25
Only use paper in good condition. Do not use torn or worn paper.
Do not sand material containing asbestos due to a health risk.
Do not sand lead based paint due to the risk of lead poisoning.
Do not eat or drink in the working area of the sander.
Do not allow people to enter the working area without wearing a
dust mask.
Where possible, seal off the working area to contain the dust for
later removal.
Always wear a dust mask.
Your tool is designed for dry sanding only, not wet sanding.
Your tool is designed for general purpose light polishing of wood
and metals.
Do not sand magnesium material due to the risk of fire.
Always wear safety glasses or eye shields when using the
sander. Everyday eyeglasses have only impact-resistant
lenses; they are NOT safety glasses. Following this rule will
reduce the risk of serious personal injury.
Always wear a face mask or dust mask. Following this rule will
reduce the risk of serious personal injury.
Always wear hearing protection during extended periods
of operation. Following this rule will reduce the risk of serious
personal injury.
Warning: Some dust particles created by power sanding,
sawing, grinding, drill and other construction jobs contain
chemicals known to cause cancer, birth defects or other
reproductive harm. Some examples of these chemicals are:
Lead from lead-based paints.
Crystalline silica from bricks and cement and other masonry
products.
Arsenic and chromium from chemically treated lumber.
Your risk from these exposures varies, depending upon how
often you do this type of work. To reduce your exposure to these
chemicals:
Work in a well-ventilated area.
Work with approved safety equipment, such as those dust masks
that are specially designed to filter microscopic particles.
•
•
•
•
•

6
Symbols
Read the manual
Warning
Wear safety goggles
Wear dust mask
Wear ear protection
Double insulated
Note: The label on your tool may include the following symbols

7
Technical data
Rated voltage 230-240 V~50 Hz
Rated power 300 W
No load speed 12000 /min
Base size 125 mm
Orbital dia 3.0 mm
Protection class /II
Weight 1.6 kg
•
•
•
•
•
•
•

8
Noise information
A weighted sound pressure 81.2 dB (A)
KpA 3 dB (A)
A weighted sound power 92.2 dB (A)
KwA 3 dB (A)
Wear ear protection when sound pressure is over 85 dB (A)
Vibration information
Vibration total values (triax vector sum) determined according to EN
60745:
Typical weighted vibration
Vibration emission value ah= 9.35
m/s2
Uncertainty K = 1.5 m/s²
Warning: The vibration emission value during actual use of the
power tool can differ from the declared value depending on the ways
in which the tool is used dependant on the following examples and
other variations on how the tool is used:
How the tool is used and the materials being cut or drilled.
The tool being in good condition and well maintained.
The use the correct accessory for the tool and ensuring it is sharp
•
•
•
•
•
and in good condition.
The tightness of the grip on the handles and if any anti vibration
accessories are used.
And the tool is being used as intended by its design and these
instructions.
This tool may cause hand-arm vibration syndrome if its use is
not adequately managed.
Warning: To be accurate, an estimation of exposure level in
the actual conditions of use should also take account of all parts of
the operating cycle such as the times when the tool is switched off
and when it is running idle but not actually doing the job.This may
significantly reduce the exposure level over the total working period.
Helping to minimise your vibration exposure risk.
ALWAYS use sharp chisels, drills and blades.
Maintain this tool in accordance with these instructions and keep
well lubricated (where appropriate)
If the tool is to be used regularly then invest in anti vibration
accessories.
Avoid using tools in temperatures of 100C or less.
Plan your work schedule to spread any high vibration tool use across
a number of days.

9
1
Operating instructions
Note: Before using the tool, read the instruction book carefully.
KNOW YOUR RANDOM ORBIT SANDER
Vibrafree ™ Random Orbit Sander are uniquely designed with two
counter balanced sanding pads that always move in opposite directions to
each other.This design platform virtually cancels out the sander’s vibration
in every load condition. This active vibration canceling technology makes
this sander more comfortable and easy to use, taking the vibration out of
the sander, the workpiece, your hands and arms, and putting this energy
to work sanding and removing material.
FITTING THE SANDING PAPER (See Fig A)
Sanding paper is easily attached on the pad of your sander. Fit the
inner spot paper over the plate so that it covers the entire area, push
and slightly twist to make sure the coated sanding paper is even on
the plate. Operate like this when fit the outer ring paper. Make sure
the sanding paper is even with the edges and that the sanding paper
is taut on the pad.
Remove the abrasive paper by pinching an edge and peeling off (See
Fig B)
CYCLONIC DUST BOX (See Fig C)
A) Attach the cyclonic dust box
Your sander is equipped with a cyclonic dust box. To attach, slide
the box onto the outlet piece and take care that the latching lever
engages.
Caution: To prevent the possibility of sanding dust or foreign
body being thrown into your face or eyes, never attempt to use your
sander without the box properly installed.
B) Empty the cyclonic dust box (See Fig D1,D2)
For more efficient operation, empty the cyclonic dust box every
5-10mins. This will permit the air to flow through the box better.
To empty the box, press the latching lever in and pull off the box. Then
press the button at the rear of the box to open it, and shake out dust.
USING THE DUST EXTRACTION ADAPTER (See Fig.E)
Your sander is equipped with a dust adapter, which is designed for
collect dust task. To attach, slide the adapter onto the outlet piece
and take care that the latching lever engages. Then connect the hose
of a vacuum cleaner. First please turn on the vacuum cleaner, and
then turn on the sander. If you stop sanding, first turn off the sander,
then turn off your vacuum cleaner.
OPERATING THE SWITCH (See Fig F)
To start your sander, depress the protective cover over the switch at
2
3
4
10
the position marked“I”. To stop your sander, depress the protective
cover at the position marked “0”.
ORBITAL SANDING
Guide your sander parallel to the working surface and move it in
circles or in a cross pattern. Do not tilt the tool in order to avoid
deep unwanted sanding marks. The amount of material removed is
determined by the speed of the sanding disc and the grit size used.
The speed of the sanding disc diminishes relative to the pressure
applied to the tool. For faster removal, do not increase pressure on
the tool, but use a coarser grit size.
SELECTING THE RIGHT GRADE OF SANDPAPER
•Different grades of sanding paper can be purchased from good DIY
shops. Available grades are Coarse, Medium and Fine.
•Use coarse grits to sand down rough finishes, medium grit to
smooth the work and fine grit to finish off.
•The higher the grade number, the finer the grit. For rough work start
with a low grade of grit. (e.g. 60 grit) and change to a higher, finer
grade (e.g. 120 or 180 grit) for finishing. If you use a fine grade for
rough surfaces it will soon clog and need changing.
•It is best to make a trial run on a scrap piece of material to
determine the optimum grades of sandpaper for a particular job.
5
6
SANDING PLATE BRAKE
An integrated sanding plate brake reduces the speed when running
at no load so that scoring is avoided when placing the machine on the
work piece. A continuously increasing no-load speed over the course
of time indicates that the sanding plate brake is worn and must be
replaced by an authorized customer service location.
7

11
Working hints for your random
orbit sander
If your power tool becomes too hot, especially when used at low
speed, set the speed to maximum and run it with no load for 2-3
minutes to cool the motor. Avoid prolonged usage at very low
speeds. Always use sand paper that is suitable for the material you
want to sand.
Always ensure the work-piece is firmly held or clamped to prevent
movement.
Any movement of the material may affect the quality of the sanding
finish.
Start your sander before sanding and turn it off only after you stop
sanding. For the best results, sand wood in the direction of the grain.
Do not start sanding without having the sandpaper fitted.
Do not allow the sand paper to wear away it will damage the base-
plate. The guarantee does not cover base-plate wear and tear.
Use coarse grit paper to sand rough surfaces, medium grit for
smooth surfaces and fine grit for the final surfaces. If necessary, first
make a test run on scrap material.
Use only good quality sand paper.
The sand paper controls the sanding efficiency, not the amount of
force you apply to the tool. Excessive force will reduce the sanding
efficiency and cause motor overload. Replacing the sand paper
regularly will maintain optimum sanding efficiency.
Accessory
Dust extraction adaptor 1
Cyclonic dust box 1
60 grit velcro sanding paper 5
120 grit velcro sanding paper 5
180 grit velcro sanding paper 5
We recommend that you purchase your accessories from the same
store that sold you the tool. Use good quality accessories marked
with a well-known brand name. Choose the type according to the
work you intend to undertake. Refer to the accessory packaging for
further details. Store personnel can assist you and offer advice.
•
•
•
•
•

12
Maintenance
Remove the plug from the socket before carrying out any
adjustment, servicing or maintenance.
Your power tool requires no additional lubrication or maintenance.
There are no user serviceable parts in your power tool. Never use
water or chemical cleaners to clean your power tool. Wipe clean with
a dry cloth. Always store your power tool in a dry place. Keep the
motor ventilation slots clean. Keep all working controls free of dust.
Occasionally you may see sparks through the ventilation slots. This
is normal. If the supply cord is damaged, it must be replaced by the
manufacturer, its service agent or similarly qualified persons in order
to avoid a hazard.
Environmental protection
Waste electrical products should not be disposed of with
household waste. Please recycle where facilities exist. Check
with your local authorities or retailer for recycling advice.

13
Plug replacement
(UK & Ireland only)
If you need to replace the fitted plug then follow the instructions
below.
IMPORTANT
The wires in the mains lead are colored in accordance with the following
code:
BLUE =NEUTRAL
BROWN = LIVE
As the colors of the wires in the mains lead of this appliance may not
correspond with the colored markings identifying the terminals in
your plug, proceed as follows. The wire which is colored blue must
be connected to the terminal which is marked with N. The wire which
is colored brown must be connected to the terminal which is marked
with L.
Warning! Never connect live or neutral wires to the earth terminal
of the plug. Only fit an approved 13ABS1363/A plug and the correct
rated fuse.
Note: If a moulded plug is fitted and has to be removed take great
care in disposing of the plug and severed cable, it must be destroyed to
prevent engaging into a socket.
Connect
Blue to N
(neutral)
Outer sleeve
firmly clamped
Cable grip
Brown L (live)
13 Amp fuse approved
to BS1362

14
Declaration of conformity
We,
POSITEC Germany GmbH
Neuer Höltigbaum 6
22143 Hamburg
Declare that the product,
Description WORX Random orbit sander
Type WU651
Complies with the following Directives,
EC Machinery Directive 98/37/EC
EC Low Voltage Directive 2006/95/EC
EC Electromagnetic Compatibility Directive 2004/108/EC
Standards conform to
EN 55014-1 EN 61000-3-3 EN 55014-2
EN 60745-1 EN 61000-3-2 EN 60745-2-4
2008/07/02
Jacky Zhou
POSITEC Quality Manager
•
•
•

15
KOMPONENTEN
Ein-Aus-Schalter
Softhandgriff
Zyklonkasten
Arretierhebel
Staubausgang
Äußere Bodenplatte
Innere Bodenplatte
Motorgehäuse
a: Inneres Schleifpapier *(siehe Bild A)
b: Äußeres Schleifpapier *(siehe BildA)
Staubadapter(siehe Bild E)
* Abgebildetes oder beschriebenes Zubehör gehört teilweise nicht
zum Lieferumfang.
1
2
3
4
5
6
7
8
9
10
1
2
3
4
5
6
7
ZUSÄTZLICHE
SICHERHEITSHINWEISE FÜR
IHREN EXCENTERSCHLEIFER
Ziehen Sie den Stecker aus der Steckdose, ehe Sie
Einstellungsänderungen, Reparatur- oder Wartungsarbeiten
durchführen.
Wickeln Sie das Verlängerungskabel von der Trommel, um eine
mögliche Überhitzung zu vermeiden.
Versichern Sie sich bei Verwendung eines Verlängerungskabels,
dass das Kabel der für das Werkzeug vorgeschriebenen
Nennleistung entspricht und sich in einem funktionsfähigen
Zustand befindet.
Kontrollieren Sie, ob die Netzspannung der auf dem Typenschild
angegebenen Spannung entspricht.
Ihr Werkzeug ist schutzisoliert. Bei einem etwaigen internen
Kurzschluss sind Sie sicher vor einem elektrischen Schlag
geschützt.
Prüfen Sie vor dem Arbeiten in Wänden und Decken den genauen
Verlauf von Stromkabeln oder Rohrleitungen. Delete this, is for
drilling tools!
Nach längerem Gebrauch können zugängliche Metall- und
Zubehörteile sehr heiß sein.

16
8
9
10
11
12
13
14
15
16
17
18
19
20
21
Tragen Sie beim Arbeiten mit diesem Werkzeug eine Schutzbrille.
Sorgen Sie nach Möglichkeit dafür, dass das Werkstück sicher
befestigt ist und sich nicht bewegen kann.
Der Schwingschleifer ist ein handgeführtes Werkzeug, das
nirgends festgeklemmt werden darf.
Entfernen Sie vor Beginn der Schleifarbeiten alle Nägel, Schrauben
usw. aus dem Arbeitsbereich.
Versuchen Sie niemals, den Schwingschleifer durch Druck auf die
Schleifplatte zu stoppen.
Verwenden Sie ausschließlich Schleifpapier in einwandfreiem
Zustand. Verwenden Sie kein verschlissenes Papier.
Das Schleifen von asbesthaltigem Material ist aufgrund des
Gesundheitsrisikos nicht zulässig.
Bleihaltige Farbe darf nicht geschliffen werden; andernfalls besteht
die Gefahr einer Bleivergiftung.
Essen und trinken Sie nicht am Arbeitsplatz.
Unbeteiligte, die den Arbeitsplatz betreten, müssen eine
Atemmaske tragen.
Dichten Sie den Arbeitsbereich nach Möglichkeit ab, sodass Sie
den Staub auffangen und nach der Arbeit entfernen können.
Tragen Sie beim Arbeiten stets eine Atemmaske.
Der Schwingschleifer darf nicht für Nassschleifarbeiten verwendet
werden.
Der Schwingschleifer ist für leichte Schleifarbeiten an Holz und
Metall konzipiert.
Magnesiumhaltiges Material darf wegen des erhöhten Brandrisikos
nicht geschliffen werden.
Tragen Sie beim Arbeiten mit der Excenterschleifer immer
einen geeigneten Augenschutz. Normale Brillen haben
lediglich schlagfeste Gläser, KEINE Sicherheitsgläser. Eine
Beachtung dieser Vorschrift vermindert die Unfallgefahr.
Verwenden Sie stets eine Atem- oder Staubmaske. Eine
Beachtung dieser Vorschrift vermindert die Unfallgefahr.
Tragen Sie bei längeren Arbeiten immer einen Gehörschutz.
Eine Beachtung dieser Vorschrift vermindert die Unfallgefahr.
Warnung: Bestimmte Stäube, die bei Schleif-, Säge-,
Schmirgel-, Bohr- und ähnlichen Arbeiten am Bau anfallen,
können Substanzen enthalten, die Krebs verursachen oder das
Erbgut schädigen. Hierzu zählen unter anderem:
Blei aus Farben und Lacken auf Bleibasis.
Kristallines Silikat aus Ziegeln und Zement sowie weiteren
Baustoffen.
Arsen und Chrom aus chemisch behandelten Hölzern.
Die durch solche Aussetzungen bedingten Risiken für die
Gesundheit unterscheiden sich je nach Häufigkeit, mit der solche
Tätigkeiten stattfinden.
Um die Aussetzung zu diesen chemischen Substanzen
herabzusetzen:
22
23
24
25
•
•
•

17
Führen Sie alle Arbeiten in gut belüfteten Bereichen durch.
Tragen Sie zugelassene Schutzausrüstungen wie z. B.
Atemmasken, die speziell für das Herausfiltern kleinster
Staubteilchen ausgelegt sind.
•
•
SYMBOLE
Lesen Sie das Handbuch
Warnung
Augenschutz tragen
Staubschutzmaske tragen
Gehörschutz tragen
Doppelte Isolierung
Hinweis: Das Etikett auf dem Werkzeug kann die folgenden Symbole
enthalten

18
TECHNISCHE DATEN
Spannung 230-240 V~50 Hz
Nennaufnahmeleistung 300 W
Leerlaufdrehzahl 12000 /min
Schleiffläche 125 mm
Schwingkreisdurchmesser 3.0 mm
Schutzisolation /II
Gewicht 1.6 kg
•
•
•
•
•
•
•

19
INFORMATIONEN ÜBER LÄRM
Gewichteter Schalldruck 81.2 dB (A)
KpA 3 dB (A)
Gewichtete Schallleistung 92.2 dB (A)
KwA 3 dB (A)
Tragen Sie bei einem Schalldruck über einen Gehörschutz 85 dB (A)
INFORMATIONEN ÜBER
VIBRATIONEN
Vibrationsgesamtmesswertermittlung gemäß EN 60745:
Typischer gewichteter
Vibrationswert
Vibrationsemissionswert ah= 9.35
m/s2
Unsicherheit K = 1.5 m/s²
WARNUNG: Der Vibrationsemissionswert während
des tatsächlichen Gebrauchs des Elektrowerkzeugs kann
vom angegebenen Wert abweichen, je nachdem, wie das
Werkzeug gemäß folgender Beispiele und anderweitiger
Verwendungsmöglichkeiten eingesetzt wird:
•
•
•
•
•
Wie das Werkzeug verwendet wird und Materialen geschnitten oder
angebohrt werden.
Das Werkzeug ist in gutem Zustand und gut gepflegt
Verwendung des richtigen Zubehörs für das Werkzeug und
Gewährleistung seiner Schärfe und seines guten Zustands.
Die Festigkeit der Handgriffe und ob Antivibrationszubehör
verwendet wird.
Und ob das verwendete Werkzeug dem Design und diesen
Anweisungen entsprechend verwendet wird.
Wird diesesWerkzeug nicht anemessen gehandhabt, kann es
ein Hand-Arm-Vibrationssyndrom erzeugen.
WARNUNG: Um genau zu sein, sollte ein Abschätzung des
Belastungsgrades aller Arbeitsabschnitte während tatsächlicher
Verwendung berücksichtigt werden, z.B. die Zeiten, wenn das
Werkzeug ausgeschaltet ist, und wenn es sich im Leerlauf befindet
und eigentlich nicht eingesetzt wird. Auf diese Weise kann der
Belastungsgrad während der gesamten Arbeitszeit wesentlich
gemindert werden.
Minimieren Sie Ihr Risiko, dem Sie bei Vibrationen ausgesetzt sind.
Verwenden Sie IMMER scharfe Meissel, Bohrer und Sägeblätter.
Pflegen Sie dieses Werkzeug diesen Anweisungen entsprechend

20
Hinweise zum betrieb
Hinweis: Lesen Sie das Handbuch vor Inbetriebnahme des
Werkzeuges sorgfältig durch.
LERNEN SIE IHREN ZUFALLSSCHWINGSCHLEIFER KENNEN
Vibrafree™ Zufallsschwingschleifer besitzen zwei einzigartig
konstruierte, gegengewichtige Schleifschuhe, die sich immer
entgegengesetzt zueinander bewegen.
Diese Designplattform hebt die Vibration des Schleifers praktisch bei
jeder erdenklichen Belastung auf.
Diese aktive Vibrationsaufhebetechnik bewirkt eine bequeme
und mühelose Bedienung des Schleifers, indem Vibrationen
aus dem Schleifer, dem Werkstück, Ihren Händen und Armen
herausgenommen werden und diese Energie in die Arbeit zum
Schleifen und Entfernen von Materialien gesteckt wird.
SCHLEIFPAPIER WECHSELN (Siehe Bild A)
Das Schleifpapier lässt sich mühelos am Pad Ihrer Schleifmaschine
befestigen. Legen Sie das innere Schleifpapier über die Platte, so
dass es den gesamten Bereich abdeckt, vergewissern Sie sich durch
Drücken und leichtes Drehen des Schleifpapiers, dass es die Platte
gleichmäßig bedeckt. Gehen Sie bei der Anbringung des äußeren
Schleifpapiers auf gleich Weise vor. Achten Sie darauf, dass das
1
und achten Sie auf eine gute Einfettung (wo erforderlich).
Bei regelmäßiger Verwendung dieses Werkzeugs sollten Sie in
Antivibrationszubehör investieren.
Vermeiden Sie den Einsatz von Werkzeugen beiTemperaturen von
10ºC oder darunter.
Machen Sie einen Arbeitsplan, um die Verwendung von hochvibrier-
enden Werkzeugen auf mehrereTage zu verteilen.
Table of contents
Languages:
Other Worx Sander manuals

Worx
Worx WX661 User manual

Worx
Worx WX646 Installation manual

Worx
Worx WX822 Installation manual

Worx
Worx WX639 User manual

Worx
Worx WX856.9 Installation manual

Worx
Worx WX661 Installation manual

Worx
Worx WU650 User manual

Worx
Worx WX647 Installation manual

Worx
Worx PROFESSIONAL WU756 User manual

Worx
Worx WX856L Series User manual