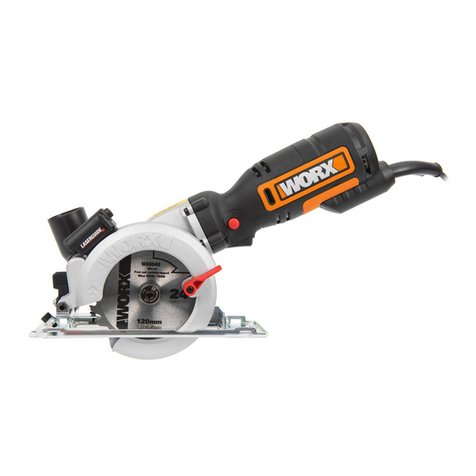
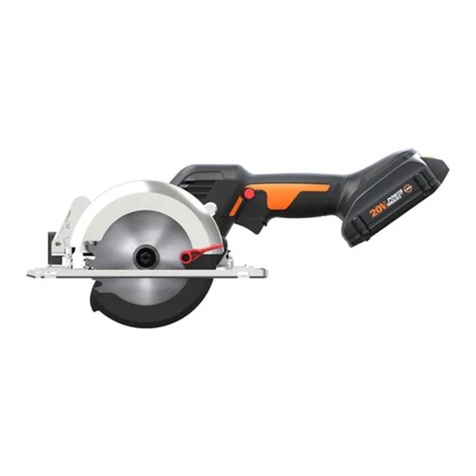
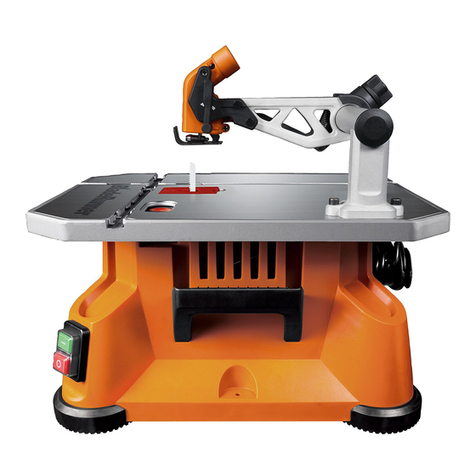
Worx WORXSAWXL WX427L User manual

WX427L
Compact Circular Saw EN
Scie Circulaire Compacte F
Sierra Circular Compacta ES
P03
P17
P29


Compact Circular Saw EN
3
PRODUCT SAFETY
WARNING: Some dust created by power
sanding, sawing, grinding, drilling and other
construction activities contains chemicals
known to the State of California to cause
cancer, birth defects or other reproductive
harm. Some examples of these chemicals are:
• Lead from lead-based paints;
• Crystalline silica from bricks and cement
and other masonry products;
• Arsenic and chromium from chemically-
treated lumber.
Your risk from these exposures varies,
depending on how often you do this type
of work. To reduce your exposure to these
chemicals work in a well ventilated area, and
work with approved safety equipment, such as
those dust masks that are specially designed to
filter out microscopic particles.
WARNING: This product can expose you
to chemicals including lead and Di(2-
ethylhexyl)phthalate (DEHP) which are known to
the State of California to cause cancer and birth
defects or other reproductive harm. For more
information go to www.P65Warnings.ca.gov.
GENERAL POWER TOOL
SAFETY WARNINGS
WARNING: Read all safety warnings,
instructions, illustrations and
specifications provided with this power tool.
Failure to follow all instructions listed below may
result in electric shock, fire and/or serious injury.
Save all warnings and instructions for future
reference.
The term power tool in the warnings refers to your
electric (corded) power tool or battery-operated
(cordless) power tool.
1. WORK AREA SAFETY
a) Keep work area clean and well lit. Cluttered
or dark areas invite accidents.
b) Do not operate power tools in explosive
atmospheres, such as in the presence of
flammable liquids, gases or dust. Power
tools create sparks which may ignite the dust or
fumes.
c) Keep children and bystanders away while
operating a power tool. Distractions can
cause you to lose control.
2. ELECTRICAL SAFETY
a) Power tool plugs must match the outlet.
Never modify the plug in any way. Do
not use any adapter plugs with grounded
power tools. Unmodified plugs and matching
outlets will reduce risk of electric shock.
b) Avoid body contact with grounded
surfaces such as pipes, radiators, ranges
and refrigerators. There is an increased risk of
electric shock if your body is grounded.
c) Do not expose power tools to rain or wet
conditions. Water entering a power tool will
increase the risk of electric shock.
d) Do not abuse the cord. Never use the cord
for carrying, pulling or unplugging the
power tool. Keep cord away from heat,
oil, sharp edges or moving parts.Damaged
or entangled cords increase the risk of electric
shock.
e) When operating a power tool outdoors, use
an extension cord suitable for outdoor use.
Use of a cord suitable for outdoor use reduces
the risk of electric shock.
f) If operating a power tool in a damp
location is unavoidable, use a residual
current device (RCD) protected supply. Use
of an RCD reduces the risk of electric shock.
3. PERSONAL SAFETY
a) Stay alert, watch what you are doing and
use common sense when operating a
power tool. Do not use a power tool while
you are tired or under the influence of
drugs, alcohol or medication. A moment of
inattention while operating power tools may
result in serious personal injury.
b) Use personal protective equipment.
Always wear eye protection. Protective
equipment such as dust mask, non-skid safety
shoes, hard hat, or hearing protection used for
appropriate conditions will reduce personal
injuries.
c) Prevent unintentional starting. Ensure
the switch is in the off-position before
connecting to power source and/or battery
pack, picking up or carrying the tool.
Carrying power tools with your finger on the
switch or energizing power tools that have the
switch on invites accidents.
d) Remove any adjusting key or wrench
before turning the power tool on. A wrench
or a key left attached to a rotating part of the
power tool may result in personal injury.
e) Do not overreach. Keep proper footing
and balance at all times. This enables
better control of the power tool in unexpected
situations.
f) Dress properly. Do not wear loose clothing
or jewelry. Keep your hair and clothing
away from moving parts. Loose clothes,
jewelry or long hair can be caught in moving
parts.
g) If devices are provided for the connection
of dust extraction and collection facilities,
ensure these are connected and properly
used. Use of dust collection can reduce dust-
related hazards.
h) Do not let familiarity gained from frequent
use of tools allow you to become
complacent and ignore tool safety
principles. A careless action can cause severe

Compact Circular Saw EN
4
injury within a fraction of a second.
4. POWER TOOL USE AND CARE
a) Do not force the power tool. Use the
correct power tool for your application.
The correct power tool will do the job better and
safer at the rate for which it was designed.
b) Do not use the power tool if the switch
does not turn it on and off. Any power tool
that cannot be controlled with the switch is
dangerous and must be repaired.
c) Disconnect the plug from the power
source and/or remove the battery pack,
if detachable, from the power tool before
making any adjustments, changing
accessories, or storing power tools. Such
preventive safety measures reduce the risk of
starting the power tool accidentally.
d) Store idle power tools out of the reach
of children and do not allow persons
unfamiliar with the power tool or these
instructions to operate the power tool.
Power tools are dangerous in the hands of
untrained users.
e) Maintain power tools and accessories.
Check for misalignment or binding of
moving parts, breakage of parts and
any other condition that may affect the
power tools operation. If damaged, have
the power tool repaired before use. Many
accidents are caused by poorly maintained
power tools.
f) Keep cutting tools sharp and clean.
Properly maintained cutting tools with sharp
cutting edges are less likely to bind and are
easier to control.
g) Use the power tool, accessories and
tool bits etc., in accordance with these
instructions and in the manner intended for
the particular type of power tool, taking
into account the working conditions and
the work to be performed. Use of the power
tool for operations different from those intended
could result in a hazardous situation.
h) Keep handles and grasping surfaces dry,
clean and free from oil and grease. Slippery
handles and grasping surfaces do not allow
for safe handling and control of the tool in
unexpected situations.
5. SERVICE
a) Have your power tool serviced by a
qualified repair person using only identical
replacement parts. This will ensure that the
safety of the power tool is maintained.
SAFETY INSTRUCTIONS
FOR ALL SAWS
Cutting procedures
a) DANGER: Keep hands away from
cutting area and the blade. If both hands
are holding the saw, they cannot be cut by the
blade.
b) Do not reach underneath the workpiece.The
guard cannot protect you from the blade below
the workpiece.
c) Adjust the cutting depth to the thickness
of the workpiece. Less than a full tooth of the
blade teeth should be visible below the workpiece.
d) Never hold workpiece in your hands or
across your leg while cutting. Secure the
workpiece to a stable platform. It is important
to support the work properly to minimise body
exposure, blade binding, or loss of control.
e) Hold power tool by insulated gripping
surfaces when performing an operation
where the cutting tool may contact hidden
wiring or its own cord. Contact with a “live”
wire will also make exposed metal parts of the
power tool “live” and shock the operator.
f) When ripping always use a rip fence or
straight edge guide.This improves the accuracy
of cut and reduces the chance of blade binding.
g) Always use blades with correct size and
shape (diamond versus round) of arbor
holes. Blades that do not match the mounting
hardware of the saw will run off-centre, causing
loss of control.
h) Never use damaged or incorrect blade
washers or bolt. The blade washers and
bolt were specially designed for your saw, for
optimum performance and safety of operation.
FURTHER SAFETY
INSTRUCTIONS FOR ALL
SAWS
Kickback causes and related warnings
— kickback is a sudden reaction to a pinched,
jammed or misaligned saw blade, causing
an uncontrolled saw to lift up and out of the
workpiece toward the operator;
— when the blade is pinched or jammed tightly by
the kerf closing down, the blade stalls and the
motor reaction drives the unit rapidly back toward
the operator;
— if the blade becomes twisted or misaligned in the
cut, the teeth at the back edge of the blade can dig
into the top surface of the wood causing the blade
to climb out of the kerf and jump back toward the
operator.
Kickback is the result of saw misuse and/or incorrect
operating procedures or conditions and can be
avoided by taking proper precautions as given below.
a) Maintain a firm grip on the saw and position
your arms to resist kickback forces.
Position your body to either side of the
blade, but not in line with the blade. Kickback
could cause the saw to jump backwards, but
kickback forces can be controlled by the operator,
if proper precautions are taken.
b) When blade is binding, or when interrupting
a cut for any reason, release the trigger and
hold the saw motionless in the material until

Compact Circular Saw EN
5
the blade comes to a complete stop. Never
attempt to remove the saw from the work
or pull the saw backward while the blade is
in motion or kickback may occur. Investigate
and take corrective actions to eliminate the cause
of blade binding.
c) When restarting a saw in the workpiece,
centre the saw blade in the kerf so that the
saw teeth are not engaged into the material.
If a saw blade binds, it may walk up or kickback
from the workpiece as the saw is restarted.
d) Support large panels to minimise the risk
of blade pinching and kickback. Large panels
tend to sag under their own weight. Supports
must be placed under the panel on both sides,
near the line of cut and near the edge of the panel.
e) Do not use dull or damaged blades.
Unsharpened or improperly set blades produce
narrow kerf causing excessive friction, blade
binding and kickback.
f) Blade depth and bevel adjusting locking
levers must be tight and secure before
making the cut. If blade adjustment shifts while
cutting, it may cause binding and kickback.
g) Use extra caution when sawing into existing
walls or other blind areas. The protruding
blade may cut objects that can cause kickback.
SAFETY INSTRUCTIONS
FOR SAWS (CIRCULAR SAW
WITH INNER PENDULUM
GUARD)
Lower Guard Function
a) Check lower guard for proper closing
before each use. Do not operate the saw
if lower guard does not move freely and
close instantly. Never clamp or tie the
lower guard into the open position. If saw is
accidentally dropped, lower guard may be bent.
Raise the lower guard with the retracting handle
and make sure it moves freely and does not touch
the blade or any other part, in all angles and
depths of cut.
b) Check the operation of the lower guard
spring. If the guard and the spring are not
operating properly, they must be serviced
before use. Lower guard may operate sluggishly
due to damaged parts, gummy deposits, or a
build-up of debris.
c) Lower guard may be retracted manually
only for special cuts such as “plunge cuts”
and “compound cuts.” Raise lower guard by
retracting handle and as soon as blade enters the
material, the lower guard must be released. For
all other sawing, the lower guard should operate
automatically.
d) Always observe that the lower guard is
covering the blade before placing saw
down on bench or floor. An unprotected,
coasting blade will cause the saw to walk
backwards, cutting whatever is in its path. Be
aware of the time it takes for the blade to stop
after switch is released.
ADDITIONAL SAFETY
RULES FOR YOUR
CIRCULAR SAW
1. Only use saw blades recommended in the
specification.
2. Do not use any abrasive wheels.
3. Use only blade diameter(s) in accordance with the
markings.
4. Identify the correct saw blade to be used for the
material to be cut.
5. Use only saw blades that are marked with a speed
equal or higher than the speed marked on the
tool.
CUT-OFF MACHINE SAFETY
WARNINGS
a) The guard provided with the tool must
be securely attached to the power tool
and positioned for maximum safety, so
the least amount of wheel is exposed
towards the operator. Position yourself
and bystanders away from the plane of
the rotating wheel. The guard helps to protect
operator from broken wheel fragments and
accidental contact with wheel.
b) Use only bonded reinforced or diamond
cut-off wheels for your power tool. Just
because an accessory can be attached to your
power tool, it does not assure safe operation.
c) The rated speed of the accessory must
be at least equal to the maximum speed
marked on the power tool. Accessories
running faster than their rated speed can break
and fly apart.
d) Wheels must be used only for
recommended applications. For example:
do not grind with the side of cut-off
wheel. Abrasive cut-off wheels are intended for
peripheral grinding, side forces applied to these
wheels may cause them to shatter.
e) Always use undamaged wheel flanges that
are of correct diameter for your selected
wheel. Proper wheel flanges support the wheel
thus reducing the possibility of wheel breakage.
f) Do not use worn down reinforced wheels
from larger power tools. Wheels intended for
a larger power tool are not suitable for the higher
speed of a smaller tool and may burst.
g) The outside diameter and the thickness
of your accessory must be within the
capacity rating of your power tool.
Incorrectly sized accessories cannot be adequately
guarded or controlled.
h) The arbour size of wheels and flanges must
properly fit the spindle of the power tool.
Wheels and flanges with arbour holes that do not
match the mounting hardware of the power tool

Compact Circular Saw EN
6
will run out of balance, vibrate excessively and
may cause loss of control.
i) Do not use damaged wheels. Before each
use, inspect the wheels for chips and
cracks. If power tool or wheel is dropped,
inspect for damage or install an undamaged
wheel. After inspecting and installing the
wheel, position yourself and bystanders
away from the plane of the rotating wheel
and run the power tool at maximum no
load speed for one minute. Damaged wheels
will normally break apart during this test time.
j) Wear personal protective equipment.
Depending on application, use face
shield, safety goggles or safety glasses.
As appropriate, wear dust mask, hearing
protectors, gloves and shop apron capable
of stopping small abrasive or workpiece
fragments. The eye protection must be capable
of stopping flying debris generated by various
operations.The dust mask or respirator must be
capable of filtrating particles generated by your
operation. Prolonged exposure to high intensity
noise may cause hearing loss.
k) Keep bystanders a safe distance away from
work area. Anyone entering the work area
must wear personal protective equipment.
Fragments of workpiece or of a broken wheel may
fly away and cause injury beyond immediate area
of operation.
l) Hold the power tool by insulated gripping
surfaces only, when performing an
operation where the cutting accessory
may contact hidden wiring or its own cord.
Cutting accessory contacting a “live” wire may
make exposed metal parts of the power tool “live”
and could give the operator an electric shock.
m) Position the cord clear of the spinning
accessory. If you lose control, the cord may be
cut or snagged and your hand or arm may be
pulled into the spinning wheel.
n) Never lay the power tool down until the
accessory has come to a complete stop.
The spinning wheel may grab the surface and pull
the power tool out of your control.
o) Do not run the power tool while carrying
it at your side. Accidental contact with the
spinning accessory could snag your clothing,
pulling the accessory into your body.
p) Regularly clean the power tool’s air vents.
The motor’s fan will draw the dust inside the
housing and excessive accumulation of powdered
metal may cause electrical hazards.
q) Do not operate the power tool near
flammable materials. Sparks could ignite these
materials.
r) Do not use accessories that require liquid
coolants. Using water or other liquid coolants
may result in electrocution or shock.
FURTHER SAFETY
INSTRUCTIONS FOR
ABRASIVE CUTTING-OFF
OPERATIONS
Kickback and related warnings
Kickback is a sudden reaction to a pinched or
snagged rotating wheel. Pinching or snagging causes
rapid stalling of the rotating wheel which in turn
causes the uncontrolled power tool to be forced in
the direction opposite of the wheel’s rotation at the
point of the binding.
For example, if an abrasive wheel is snagged or
pinched by the workpiece, the edge of the wheel
that is entering into the pinch point can dig into the
surface of the material causing the wheel to climb
out or kick out.The wheel may either jump toward
or away from the operator, depending on direction
of the wheel’s movement at the point of pinching.
Abrasive wheels may also break under these
conditions.
Kickback is the result of power tool misuse and/or
incorrect operating procedures or conditions and can
be avoided by taking proper precautions as given
below.
a) Maintain a firm grip on the power tool
and position your body and arm to allow
you to resist kickback forces. Always use
auxiliary handle, if provided, for maximum
control over kickback or torque reaction
during start-up. The operator can control torque
reactions or kickback forces, if proper precautions
are taken.
b) Never place your hand near the rotating
accessory. Accessory may kickback over your
hand.
c) Do not position your body in line with the
rotating wheel. Kickback will propel the tool in
direction opposite to the wheel’s movement at the
point of snagging.
d) Use special care when working corners,
sharp edges etc. Avoid bouncing and
snagging the accessory. Corners, sharp edges
or bouncing have a tendency to snag the rotating
accessory and cause loss of control or kickback.
e) Do not attach a saw chain, woodcarving
blade, segmented diamond wheel with
a peripheral gap greater than 10 mm or
toothed saw blade. Such blades create frequent
kickback and loss of control.
f) Do not “jam” the wheel or apply excessive
pressure. Do not attempt to make an
excessive depth of cut. Overstressing the
wheel increases the loading and susceptibility to
twisting or binding of the wheel in the cut and the
possibility of kickback or wheel breakage.
g) When wheel is binding or when
interrupting a cut for any reason, switch
off the power tool and hold the power tool
motionless until the wheel comes to a
complete stop. Never attempt to remove


Compact Circular Saw EN
7
the wheel from the cut while the wheel is
in motion otherwise kickback may occur.
Investigate and take corrective action to eliminate
the cause of wheel binding.
h) Do not restart the cutting operation in the
workpiece. Let the wheel reach full speed
and carefully re-enter the cut. The wheel
may bind, walk up or kickback if the power tool is
restarted in the workpiece.
i) Support panels or any oversized workpiece
to minimize the risk of wheel pinching and
kickback. Large workpieces tend to sag under
their own weight. Supports must be placed under
the workpiece near the line of cut and near the
edge of the workpiece on both sides of the wheel.
j) Use extra caution when making a “pocket
cut” into existing walls or other blind
areas. The protruding wheel may cut gas or water
pipes, electrical wiring or objects that can cause
kickback.
ADDITIONAL SAFETY
RULES:
1. Always wear a dust mask.
SAFETY WARNING FOR
YOUR LASER
Warning for class II laser
CAUTION--Laser radiation when open. DO NOT STARE
INTO BEAM
CAUTION--Laser radiation when open and interlock
defeated. DO NOT STARE INTO BEAM
LASER RADIATION--DO NOT STARE INTO BEAM
ADDITIONAL SAFETY
WARNING
Do not stare directly at the laser beam. A hazard may
exist if you deliberately stare into the beam, please
observe all safety rules as follows:
1. The laser shall be used and maintained in
accordance with the manufacturer’s instructions.
2. Never aim the beam at any person or an object
other than the work piece.
3. Always ensure the laser beam is aimed at a
sturdy work piece without reflective surfaces,
e.g. wood or rough-coated surfaces are
acceptable. Bright shiny reflective sheet steel or
similar is not suitable for laser applications as
the reflective surface may direct the laser beam
back at the operator.
4. Do not change the laser device with a different
type.The manufacturer or an authorized agent
must carry out repairs.
5. CAUTION: Use of controls or adjustments
other than those specified herein may result in
hazardous radiation exposure.
6. CAUTION--The use of optical instruments with
this product will increase eye hazard.
SAVE THESE INSTRUCTIONS
SYMBOLS
To reduce the risk of injury, user must
read instruction manual
Double insulation
Warning
Wear ear protection
Wear eye protection
Wear dust mask
Do not stare into beam
Laser radiation
Incorrect

Compact Circular Saw EN
8
8 1 2
20 21 3
7126
4
16
10
9
18
17
23
5
11

Compact Circular Saw EN
9
COMPONENT LIST
1. LOCK OFF BUTTON
2. SOFT GRIP HANDLE
3. HEX KEY
4. ON/OFF SWITCH
5. SPINDLE LOCK BUTTON
6. LOWER BLADE GUARD
7. LOWER GUARD LEVER
8. FIXED UPPER GUARD
9. DUST EXTRACTION OUTLET
10. VACUUM ADAPTER
11. DEPTH ADJUSTMENT LEVER
12. BASE PLATE
13. SAW BLADE (SEE FIG. A)
14. INNER FLANGE (SEE FIG. A)
15. BLADE BOLT (SEE FIG. A)
16. PARALLEL GUIDE
17. PARALLEL GUIDE CLAMPING FIXTURE
18. BEVEL ADJUSTMENT LEVER
19. OUTER FLANGE (SEE FIG. A)
20. LASER GUIDE
21. LASER ON-OFF SWITCH
22. LASER BATTERIES (TWO) (SEE FIG. G2)
23. BLADE ALIGNMENT INDICATOR
Not all the accessories illustrated or described are included in standard delivery.

Compact Circular Saw EN
10
TECHNICAL DATA
Type Designation WX427L (4-designation of machinery, representative of Saw)
Voltage 120 V ~ 60 Hz
Rated current 6A
Rated speed 4000/min
No load speed 3500/min
Blade size
TCT blade 24T 4-1/2˝ (115 mm) X 3/8˝ (9.5 mm) X 24T
4-1/2" 60T HCS Blade 4-1/2”(115mm) X 3/8”(9.5mm) X 60T
4-1/2" Abrasive cutting blade 4-1/2” (115mm) X 3/8”(9.5mm)
Cutting capacity Cutting Depth at 90° 1-11/16˝ (43 mm)
Cutting Depth at 45° 1-1/8˝ (29 mm)
Bevel capacity 0-45°
Arbor Size 3/8˝ (9.5 mm)
Recommended maximum
material thickness Wood 1-11/16˝ (43 mm)
Protection class /ll
Bare tool weight 5 lbs
Laser battery model no. LR44 1.5V
ACCESSORIES
24TTCT blade WA5043 2PC
60T HCS blade WA8302 2PC
60G abrasive blade WA5048 2PC
Parallel Guide 1 PC
Vacuum Adaptor 1 PC
Hex Key 1 PC
We recommend that you purchase your accessories listed in the above list from the same store that sold you
the tool. Refer to the accessory packaging for further details. Store personnel can assist you and offer advice.

Compact Circular Saw EN
11
14 13 19 15
E1
E2
E3
C2
D
22
G2 G3
G1
C1
B
A
F

Compact Circular Saw EN
12
14 13 19 15
E1
E2
E3
C2
D
22
G2 G3
G1
C1
B
A
F

Compact Circular Saw EN
13
14 13 19 15
E1
E2
E3
C2
D
22
G2 G3
G1
C1
B
A
F

Compact Circular Saw EN
14
OPERATING INSTRUCTIONS
NOTE: Before using the tool, read the
instruction book carefully.
INTENDED USE:
The tool is intended for ripping and cross-cutting
wood and other materials in straight cutting lines,
while resting firmly on the work piece.
1. SAFETY ON/OFF
Your switch is locked off to prevent accidental
starting. Depress lock off button (1) then on/off switch
(4) and release lock off button (1).Your switch is now
on.To switch off just release the on/off switch.
Note: Keep the dust adapter connected to dust
collecting device when using the tool.
2.
CHANGING THE SAW BLADE (See Fig. A)
• Before any changes are made to the tool
itself, unplug the saw.
• Wear protective gloves when mounting
the saw blade. Danger of injury exists when
touching the saw blade.
• Only use saw blades that correspond
with the characteristic data given in the
operating instructions.
• Do not under any circumstances use
grinding discs as the cutting tool.
REMOVING THE BLADE
Press the spindle lock button (5) and keep it
depressed.
Manually rotate the blade until the spindle lock
“clicks” into place and keeps the blade from spinning
freely.
Loosen the blade bolt (15) with the Hex Key (3) by
turning it clockwise. Remove the outer flange (19).
Manually retract back the lower blade guard (6) and
hold it firmly with the lower guard lever (7). Remove
the saw blade (13).
MOUNTING THE BLADE
Check to make sure the blade surface and flanges are
clean before reinstalling.
Place the blade onto the inner flange and spindle
making sure the arrow on the blade matches the
arrow direction on the fixed upper guard (8).
Depress the spindle lock button (5).
Insert the outer flange (19) over the spindle and
tighten the bolt (turning counter-clockwise) with 1/4
turn more than finger tight using the hex key (3).
Check that the blade is securely fastened by
continuing to hold down the spindle lock button
(5) and attempting to manually rotate the blade. If
installed correctly, the blade should not spin.
For best cutting results, use a saw blade suited to the
material and cut quality desired.
3. ADJUSTING THE CUTTING DEPTH
- Release the Depth Adjustment Lever (11) by lifting
it up.
- Manually push the base plate (12) up or down to
the desired depth on the scale.
- Push the Depth Adjustment Lever (11) back down
to lock the base plate at the desired depth.
- Always add 1/8” (3 mm) to the depth of cut to
ensure the blade has enough clearance to cut
completely through the material.
4. PARALLEL GUIDE (See Fig. B)
The parallel guide is used for making long, straight
rip cuts.
Slide the parallel guide (16) through the parallel
guide clamping fixture (17) to the desired cutting
distance and tighten the clamping screw to lock into
position. Do not over tighten. It can be used from
either side of the base plate (12).
5. ADJUSTING THE CUTTING ANGLE (See Fig.
C1, C2)
Release the Bevel Adjustment Lever (18) by pushing
it in the counter-clockwise direction.
-Manually tilt the base plate (12) up or down to the
desired depth on the scale.
-Secure the Bevel Adjustment Lever (18) by pushing
it back down (clockwise) to lock the base plate at the
desired depth.
NOTE:The location of the blade cut-line will change
depending on the bevel angle that is being used.The
blade cut-line location when cutting at 90 degrees or
45 degrees is marked with a notch on the front of the
base plate (12).
The base plate (12) must always be held firmly
against the material being cut to reduce saw
vibration, blade jumping, or blade breakage.
6. SAWDUST REMOVAL (See Fig. D)
Your saw includes a vacuum adapter (10) that
attaches to the dust extraction outlet (9) on the
saw.This adapter port can be attached to a vacuum
cleaner (sold separately).The use of the vacuum
is strongly recommended as it keeps the work
area clean, dramatically increases cut visibility and
reduces airborne dust. It also keeps dust out of the
working elements of the guard.
If your power tool becomes too hot, please run your
circular saw no load for 2-3 minutes to cool the
motor. Avoid prolonged usage at very low speeds.
Protect saw blades against impact and shock. Cutting
with extreme force can significantly reduces the
performance capability of the tool and reduces the
service life of the saw blade. Sawing performance
and cutting quality depend essentially on the
condition and the tooth count of the saw blade.
Therefore, use only sharp saw blades that are suited
for the material being cut.
Choice of blades: 24 teeth for general work, approx.
40 teeth for finer cuts, more than 40 teeth for very
fine cuts into delicate surfaces, diamond for tile,
cement board, etc.
1. MAKING CROSS CUTS AND RIP CUTS
WARNING: To avoid sudden kick-back, never
start with the stationary blade in contact with
the work.

Compact Circular Saw EN
15
Always start the saw and allow it to reach full speed
before plunging into work material.
a) ALWAYS use your saw with your hands positioned
correctly.
WARNING: Always maintain proper control
of the saw to make sawing safer and easier.
Loss of control of the saw could cause an accident
resulting in possible serious injury.
b) When making cross or rip cuts, align your line of
cut with the center of the “V” notch located on the
front of the saw’s base.
c) Since the thickness of blades varies, make a trial
cut in scrap material along the guideline to determine
how much, if any, you should offset the blade from
the guideline to allow for the blade thickness to get
an accurate cut.
MAKING RIP CUTS
Always use a guide when making long rip cuts with
your saw.You can use any suitable straight edge
clamped to the work or the parallel guide that is
included with your saw.
2. POCKET CUTTING (SOFT MATERIALS ONLY)
(See Fig. E1, E2, E3)
This operation requires much skill with a saw and
must only be carried out by a qualified person.
WARNING: The blade teeth are exposed during
this operation so proceed with extreme caution.
Clearly mark the area to be cut. Set the depth of cut
on the saw. Position the saw over the marked area
with the front edge of the base plate resting on the
work surface and cutting guide aligned with marked
line on workpiece.
Ensure the blade is not touching but is close to the
work surface.The moving lower guard must be
rotated open by using lever. Switch the saw on and
gently swing the blade down into the material but
maintain a pivoting force on the front edge of the
base.The moving lower guard can now be released
for normal action of the guard.
DO NOT bind the blade in the cut; push the saw
blade forward at a rate where the blade is not
laboring.
When the cut is complete, release the trigger safety
release and switch and let the blade come to a
complete stop. DO NOT REMOVE the saw and
blade from the workpiece while the blade is moving.
This could damage your cut (kerf), cause kickback and
loss of control, resulting in injury.
WARNING: To avoid cutting injury from the
sharp blade, please don’t put your hands around
the base plate.
Using the laser light feature (See Fig. F)
NOTE: Clean the laser generator periodically.
WARNING: Never stare directly into the laser
beam and never point the beam at anybody.The
laser beam energy is extremely harmful to human
eyes.WARNING: When not in use, always turn the
laser off to save the battery capacity.
Replacing laser batteries (See Fig. G1-G3)
To fit new batteries, adjust the position of the cord
and insert two batteries in place. Make sure two
batteries are pressed on the cord.To remove the
batteries, just slowly pull the end of the cord.
NOTE: Pay attention that “+/-” of the batteries are the
same as the illustration on the machine.
MAINTAIN TOOLS WITH
CARE
Remove the plug from the socket before
carrying out any adjustment, servicing or
maintenance.
Keep tools sharp and clean for better and safer
performance. Follow instructions for lubricating and
changing accessories. Inspect tool cords periodically
and if damaged, have repaired by authorized service
facility.Your power tool requires no additional
lubrication or maintenance.There are no user
serviceable parts in your power tool. Never use water
or chemical cleaners to clean your power tool. Wipe
clean with a dry cloth. Always store your power tool
in a dry place. Keep the motor ventilation slots clean.
Keep all working controls free of dust.
If the supply cord is damaged, it must be replaced
by the manufacturer, its service agent or similarly
qualified persons in order to avoid a hazard.
Periodically clear dust and chips from guard and base
to ensure proper performance.

Compact Circular Saw EN
16
TROUBLESHOOTING
Symptom Possible Causes Possible Solution
Tool will not start when operating the
on/off switch.
Power cord not plugged in.
Power cord is broken.
Carbon brush has worn down.
Check to make sure power cord is
connected well into a working outlet.
Unplug the power cord. Replace it using
a qualified maintenance person.
Replace the carbon brush using a
qualified maintenance person.
Cutting depth is less than that is set. Sawdust accumulated at the rear
of the base. Shake out sawdust. Consider connecting
a vacuum for dust collection.
Blade spins or slips Blade is not tightly engaged with
the spindle.
Remove the blade, and reassemble it as
described in INSTALL /CHANGE THE
BLADE section.
Blade will not cut a straight line. Blade is dull.
Blade is not mounted properly.
Saw is not being guided properly.
Mount a new, sharp blade on the saw.
Check that blade is properly mounted.
Use a parallel guide.
Blade kicks back when beginning
a cut. Blade is not spinning fast enough. Allow the saw blade to reach full speed
prior to beginning a cut in the material.

F
17
Scie Circulaire Compacte
SÉCURITÉ DU PRODUIT
AVERTISSEMENT! Certaines des
poussières produites en utilisant des outils
électriques sont considérées par l’État de
Californie comme susceptibles de provoquer le
cancer, des anomalies congénitales et d’autres
problèmes de reproduction. Voici des exemples
de ces produits chimiques :
• plomb issu de peinture à base de plomb;
• silice crystalline issue de briques et du
ciment et autres produits de maçonnerie;
• arsenic et chrome issus de bois traité
chimiquement.
Votre risque de ces expositions varie en
fonction de la fréquence à laquelle vous
effectuez ce travail. Pour réduire votre
exposition à ces produits chimiques : travaillez
dans une zone bien ventilée; portez un
équipement de sécurité approuvé, tel que des
masques antipoussières spécialement conçus
pour éliminer les particules microscopiques par
filtrage.
AVERTISSEMENT: Ce dispositif peut vous
exposer aux produits chimiques notamment
le plomb et le di-phtalate (de 2-éthylhexyle)
(DEHP) qui sont reconnus dans l’État de
Californie comme causant des cancers et des
anomalies congénitales ou d’autres anomalies
de la reproduction. Pour en savoir plus, veuillez
consulter le site www.P65Warnings.ca.gov.
AVERTISSEMENTS
GENERAUX CONCERNANT
LA SECURITE DES OUTILS
ELECTRIQUES
AVERTISSEMENT! Lisez et assimilez
toutes les instructions. Le non-respect des
instructions ci-après peut entraîner un risque de choc
électrique, d’incendie et/ou de blessures graves.
Conservez tous les avertissements et
instructions pour pouvoir les consulter
ultérieurement.
L’expression « outil électrique » dans tous les
avertissements énumérés ci-dessous se réfère
à votre outil électrique fonctionnant sur secteur
(branché) ou à batterie (sans-fil).
1) AIRE DE TRAVAIL
a) Veillez à ce que l’aire de travail soit propre
et bien éclairée. Le désordre et le manque de
lumière favorisent les accidents.
b) N’utilisez pas d’outils électriques dans un
milieu présentant un risque d’explosion,
par exemple en présence de liquides,
de gaz ou de poussières inflammables.
Les outils électriques créent des étincelles qui
pourraient enflammer les poussières ou les
vapeurs.
c) Gardez à distance les curieux, les enfants
et les visiteurs lorsque vous travaillez
avec un outil électrique. Ils pourraient
vous distraire et vous faire faire une fausse
manoeuvre.
2) SÉCURITÉ ÉLECTRIQUE
a) Les fiches des outils électriques doivent
correspondre aux prises murales. Ne
jamais modifier la fiche de quelque façon
que ce soit. Ne pas utiliser de fiches
d’adaptation avec des outils électriques
mis à la terre (mis à la masse). Des
fiches non modifiées et des prises qui leur
correspondent réduiront le risque de choc
électrique.
b) Évitez tout contact corporel avec des
surfaces mises à la terre (tuyauterie,
radiateurs, cuisinières, réfrigérateurs, etc.).
Le risque de choc électrique est plus grand si
votre corps est en contact avec la terre.
c) N’exposez pas les outils électriques à la
pluie ou à l’eau. La présence d’eau dans un
outil électrique augmente le risque de choc
électrique.
d) Ne maltraitez pas le cordon. Ne
transportez jamais l’outil par son cordon
et ne débranchez jamais la fiche en tirant
sur le cordon. N’exposez pas le cordon
à la chaleur, à des huiles, à des arrêtes
vives ou à des pièces en mouvement. Un
cordon endommagé augmente le risque de choc
électrique.
e) Lorsque vous utilisez un outil électrique à
l’extérieur, utilisez un prolongateur adapté
à une utilisation en extérieur. L’utilisation
d’un cordon adapté à une utilisation extérieure
réduit le risque de choc électrique.
f) Si vous devez utiliser un outil électrique
dans un endroit humide, utilisez un
dispositif de courant résiduel (RCD)
d’alimentation protégée. L’utilisation d’un
RCD réduit le risque de choc électrique.
3) SÉCURITÉ DES PERSONNES
a) Restez alerte, concentrez-vous sur
votre travail et faites preuve de bon
sens. N’utilisez pas un outil électrique si
vous êtes fatigué ou sous l’influence de
drogues, d’alcool ou de médicaments. Un
instant d’inattention lors de l’utilisation d’outils
électriques peut entraîner des blessures graves.
b) Utilisez des accessoires de sécurité.
Portez toujours une protection oculaire.
De l’équipement de sécurité tel que le masque
antipoussière, les chaussures de sécurité
antidérapantes, des casques durs ou des
protections antibruit utilisés dans des conditions
appropriées réduiront les blessures corporelles.
c) Évitez les démarrages accidentels. Avant
d’insérer la batterie dans l’outil, assurez-
vous que son interrupteur est en position
« OFF » (Arrêt) ou verrouillée. Le fait

F
18
Scie Circulaire Compacte
de transporter un outil avec le doigt sur la
détente/l’interrupteur ou d’insérer la batterie
dans un outil dont la détente est en position «
ON » (Marche) peut causer un accident.
d) Retirer les clés de réglage avant de mettre
l’outil sous tension. Une clé restée attachée
à une partie mobile de l’outil pourrait entraîner
des blessures corporelles.
e) Ne vous penchez pas trop en avant.
Maintenez un bon appui et restez en
équilibre en tout temps. Une bonne stabilité
vous permet de mieux réagir à une situation
inattendue.
f) Habillez-vous convenablement. Ne portez
ni vêtements flottants ni bijoux. Gardez
les cheveux, les vêtements et les gants
éloignés des pièces en mouvement. Les
vêtements flottants, les bijoux ou les cheveux
longs risquent d’être happés par des pièces en
mouvement.
g) Si un sac de récupération de la poussière
est fourni avec un connecteur pour
aspirateur, assurez vous qu’il est
correctement relié et utilisé de façon
appropriée. L’utilisation de ce système réduit
les dangers physiques et physiologiques liés à la
poussière.
h) Ne laissez pas les habitudes acquises par
une utilisation fréquente d’outils relâcher
notre vigilance et ignorer les principes de
sécurité des outils. Une utilisation négligente
peut causer des blessures graves en une fraction
de seconde.
4) UTILISATION ET ENTRETIEN DE L’OUTIL
a) Ne forcez pas l’outil. Utilisez l’outil
approprié à la tâche. L’outil approprié
fonctionne mieux et de façon plus sécuritaire.
Respectez aussi la vitesse de travail qui lui est
propre.
b) N’utilisez pas un outil si l’interrupteur ne le
met pas en marche ou ne peut l’arrêter. Un
outil qui ne peut être contrôlé par l’interrupteur
est dangereux et doit être réparé.
c) Débranchez la batterie de l’outil ou
mettez son interrupteur en position «
OFF » (Arrêt) ou « LOCKED » (Verrouillé)
avant d’effectuer un réglage, de changer
d’accessoire ou de ranger l’outil. De telles
mesures de sécurité préventive réduisent le
risque de démarrage accidentel de l’outil.
d) Rangez les outils hors de portée
des enfants et d’autres personnes
inexpérimentées. Les outils sont dangereux
dans les mains d’utilisateurs novices.
e) Prenez soin de bien entretenir les outils.
Soyez attentif à tout désalignement ou
coincement des pièces en mouvement,
à tout bris ou à toute autre condition
préjudiciable au bon fonctionnement de
l’outil. Si vous constatez qu’un outil est
endommagé, faites-le réparer avant de
vous en servir. De nombreux accidents sont
causés par des outils en mauvais état.
f) Les outils de coupe doivent être toujours
bien affûtés et propres. Des outils
bien entretenus, dont les arêtes sont bien
tranchantes, sont moins susceptibles de se
coincer et plus faciles à contrôler.
g) Utilisez l’outil électrique, les accessoires
et les forets etc., en conformité avec ces
instructions et de la manière conçue pour
le type particulier d’outil électrique, prend
en compte les conditions de travail et le
travail qui doit être accompli. L’emploi de
l’outil électrique pour des opérations différentes
de celles pour lesquelles il a été conçu pourrait
entraîner une situation dangereuse.
h) Maintenez les poignées et les surfaces de
prise sèches, propres et exemptes d’huile
et de graisse. Des poignées et surfaces
de prise glissantes ne permettent pas une
manipulation et un contrôle sécurisés de l’outil
dans des situations inattendues.
5) ENTRETIEN
a) Ayez votre outil électrique entretenu
par un réparateur agréé n’utilisant que
des pièces de rechange identiques. Cela
assurera que la sécurité de l’outil électrique est
maintenue.
MESURES DE SÉCURITÉ
POUR TOUT TYPE DE SCIE
Procédures de coupe
a) AVERTISSEMENT: Garder vos mains
éloignées de la zone de coupe et de la
lame. Si les deux mains tiennent la scie,
elles ne peuvent pas être coupées par la lame.
b) Ne vous abaisser pas en dessous de la
pièce à travailler. La protection ne vous protège
pas de la lame en dessous de la pièce à travailler.
c) Ajuster la profondeur de coupe à l’épaisseur
de la pièce à travailler. Moins d’une dent de la
lame devrait être visible sous la pièce de bois.
d) Ne jamais tenir une pièce qui est entrain
d’être coupée dans les mains ou sur
les genoux. Il est important de maintenir
correctement la pièce à travailler pour réduire les
risques d’exposition corporelle, de dérapage de la
lame ou de perte de contrôle.
e) Lors de l’exécution d’une opération au
cours de laquelle l’outil de coupe peut
venir en contact avec les fils cachés ou son
propre cordon, tenez l’outil par ses surfaces
isolées de préhension. Le contact avec un
fil sous tension rendra les pièces métalliques
exposées de l’outil sous tension et causera des
chocs à l’opérateur.
f) Toujours utiliser un guide à refendre ou
un guide à bord droit pour refendre. Cela
améliore la précision de la coupe et réduit les
risques de dérapage de la lame.
g) Toujours utiliser des lames à la bonne taille
et à la bonne forme de trou (diamant ou

F
19
Scie Circulaire Compacte
rond) s’adaptant sur l’arbre. Les lames qui ne
conviennent pas à la scie tourneront de manière
incontrôlée.
h) Ne jamais utiliser de boulon ou rondelles
endommagées ou incorrects. Les rondelles
et le boulon ont été spécialement conçus pour la
scie, pour une performance optimale et pour une
utilisation en toute sécurité.
MESURES DE SÉCURITÉ
SUPPLÉMENTAIRES POUR
TOUT TYPE DE SCIE
Causes et prévention des effets de rebond
- L’effet de rebond est une réaction soudaine d’une
lame de scie mal alignée, tordue ou grippée qui
dévie la scie de la pièce de bois vers l’utilisateur.
- Lorsque la lame est pincée ou grippée à
l’extrémité du trait de scie, la lame se bloque et
la réaction du moteur ramène très rapidement
l’unité en direction de l’utilisateur.
- Si la lame se tord ou s’aligne mal dans la coupe,
la dent de l’extrémité arrière de la lame peut
plonger dans la surface supérieure du bois et la
lame peut sortir du trait de scie pour être projetée
vers l’utilisateur.
L’effet de rebond est le résultat d’une mauvaise
utilisation de la scie et/ou de procédures ou de
conditions d’utilisation incorrectes et peut être évité en
suivant les instructions ci-dessous.
a) Maintenir fermement la scie et positionner
les bras pour résister aux forces de
l’effet de rebond. Positionner le corps de
chaque côté de la lame mais non dans le
prolongement de celle-ci. L’effet de rebond
pourrait faire sauter la scie en arrière mais ces
forces peuvent être contrôlées par l’utilisateur si
les mesures nécessaires sont prises.
b) Lorsque la lame se grippe ou lorsque la
coupe est interrompue pour quelques
raisons, relâcher l’interrupteur et maintenir
la scie dans la pièce de bois jusqu’à l’arrêt
complet de l’outil. Ne jamais essayer de
retirer la scie du travail ou de tirer la scie
en arrière lorsque la lame est en marche
ou un effet de rebond pourrait se produire.
Chercher la cause du grippage de la lame et
prendre les mesures correctives.
c) Lors du redémarrage de la scie dans la
pièce de bois, centrer la scie dans la ligne
de coupe et vérifier que les dents de la scie
ne sont pas engagées dans la pièce. Si la
lame de scie est grippée, elle pourrait sauter hors
de la pièce de bois lors du redémarrage de la scie.
d) Supporter les gros panneaux afin de réduire
le risque de pincement ou de retour en
arrière de la lame. Les gros panneaux ont
tendance à fléchir sous leur propre poids. Des
supports doivent être placés sous la planche de
chaque côté, près de la ligne de coupe et près du
bord de la planche.
e) Ne pas utiliser de lames émoussées ou
endommagées. Des lames non aiguisées ou
incorrectes produisent des lignes de coupe
étroites provoquant un frottement excessif, un
grippage de la lame ou un effet de rebond.
f) Les verrous de réglage de la profondeur
de la lame et de l’angle de chanfreinage
doivent être fixés fermement et en toute
sécurité avant d’effectuer la coupe. Si les
leviers de serrage de la lame se desserraient
pendant la coupe, cela pourrait provoquer le
grippage de la lame ou un effet de rebond.
g) Être davantage prudent lors de la sciage sur
des murs existants ou sur d’autres surfaces
opaques. Si la saillie de lame entre en contact
avec d’autres objets en arrière de la surface ceci
pourrait provoquer un rebond de la scie.
INSTRUCTIONS DE
SÉCURITÉ DE TRAVAIL
AVEC VOTRE SCIE
CIRCULAIRE - EN
UTILISANT LE GARDE
INTERNE DE MOUVEMENT
PENDULAIRE
Fonction de garde inférieure
a. Avant chaque utilisation, vérifiez que
le protecteur rétractable soit bien
refermé. Ne pas mettre la scie en
marche si le protecteur inférieur ne
bouge pas librement et ne se ferme
pas instantanément. Ne jamais bloquer
ou attacher le protecteur inférieur en
position ouverte. Si la scie est accidentellement
échappée, le protecteur inférieur peut se tordre.
Faites pivoter le protecteur inférieur par son levier
et assurez-vous qu’il bouge librement et ne touche
pas la lame ni aucune autre partie, dans tous les
angles et profondeurs de coupe.
b. Vérifier le bon fonctionnement du ressort
du protecteur inférieur. Si le protecteur
et le ressort ne fonctionnent pas
correctement, ils doivent être réparés
avant toute utilisation. Le protecteur inférieur
peut fonctionner lentement à cause de parties
endommagées, de dépôts gommeux ou d’un
amoncellement de débris.
c. Le protecteur inférieur doit être soulevé
manuellement uniquement pour des
coupes spéciales telles que « les coupes
en plongée » et les « coupes composées
». Soulevez le protecteur inférieur en
soulevant son levier de pivotement et
dès que la lame pénètre le matériau, le
protecteur inférieur doit être relâché.
Pour toutes les autres opérations de sciage,
le protecteur inférieur devrait être en fonction
automatique.
d. Toujours s’assurer que le protecteur
inférieur recouvre la lame avant de poser
la scie sur l’établi ou sur le sol. Une lame à
nue, non protégée qui n’a pas fini de tourner fera

F
20
Scie Circulaire Compacte
reculer la scie qui tranchera tout ce qui se trouve
sur son passage. Prendre en compte le temps
nécessaire à la lame pour s’arrêter après que
l’interrupteur ait été relâché.
RÉGLES DE SÉCURITÉ
SUPPLÉMENTAIRES - POUR
LES SCIES CIRCULAIRES
1. Utilisez uniquement des lames recommandées dans
les spécifications
2. Ne pas utiliser de meules.
3. Utiliser uniquement des lames dont le diamètre
correspond aux marques.
4. Assurez-vous de sélectionner la lame appropriée à
utiliser pour le type matériau à découper
5. Utilisez uniquement des lames de scie spécifiées
pour une vitesse égale ou supérieure à la vitesse
indiquée sur l’outil.
CONSIGNES DE SÉCURITÉ
RELATIVES À LA
TRONÇONNEUSE
a) La garde fournie avec l’outil doit être
solidement fixée à l’outil électrique et
positionnée de manière à garantir une
sécurité optimale, de façon à exposer
l’utilisateur au minimum de disques
possible. Les observateurs et vous,
devez être à distance du plan de la
meule rotative. La garde permet de protéger
l’utilisateur contre les fragments de la meule et
de tout contact accidentel avec celle-ci.
b) Utilisez uniquement des meules de
tronçonnage renforcées ou en diamant
pour votre outil électrique. Un accessoire
fixé à votre outil électrique ne garantit pas la
manipulation sécurisée de cet outil.
c) La vitesse nominale de l’accessoire doit
être au moins égale à la vitesse maximale
indiquée sur l’outil électrique. Des
accessoires fonctionnant plus rapidement que
leur vitesse nominale risquent de voler en éclats.
d) Il faut utiliser les meules uniquement
aux fins recommandées. Par exemple :
n’utilisez pas le côté de la meule comme
outil de broyage. Les meules de tronçonnage
abrasives sont destinées au meulage
périphérique, de fait, les forces appliquées à ces
meules peuvent les faire voler aux éclats.
e) Utilisez toujours des boudins de disque
en bon état et de diamètre approprié pour
vos meules. Les boudins de disque appropriés
supportent les meules et réduisent ainsi les
risques de cassure.
f) Évitez d’utiliser des meules renforcées
usées qui ont servies sur des outils
électriques plus larges. Les meules destinées
à un outil électrique plus large ne conviennent
pas à la vitesse élevée d’un outil plus petit, et
peuvent en conséquence éclater.
g) Le diamètre externe et l’épaisseur de
votre accessoire doivent correspondre
à la puissance nominale de votre outil
électrique. Des accessoires aux dimensions
inappropriées ne sont pas protégeables ou
contrôlables.
h) Les dimensions de la tonnelle des meules
et des boudins doivent correctement
s’emboîter aux broches de l’outil
électrique. Les accessoires comportant des
orifices de tonnelle qui ne correspondent pas
au matériel de montage de l’outil électrique
seront déséquilibrés et subiront des vibrations
excessives, ce qui peut occasionner une perte de
contrôle.
i) N’utilisez pas des meules endommagées.
Avant chaque utilisation, vérifiez que
la meule est exempte d’écornure ou de
fissure. Si l’outil électrique ou la meule
tombe, vérifiez tout dommage ou installez
une meule en bon état. Après la vérification
ou l’installation d’une nouvelle meule, les
observateurs et vous devez être à distance
du plan de la meule rotative et utilisez
l’outil électrique à la vitesse maximale sans
charge pendant une minute. Des meules
endommagées vont se disloquer pendant l’essai.
j) Portez un équipement de protection
personnelle. En fonction de l’application,
utilisez un écran facial ou des lunettes de
sécurité ou de protection. Si nécessaire,
portez un masque anti-poussières, des
protège-tympans, des gants et un tablier
d’atelier capable d’arrêter les petits
fragments abrasifs ou des morceaux de la
pièce ouvragée. Le masque antipoussières
doit pouvoir filtrer les particules générées
par vos activités. Une exposition prolongée
à un bruit de forte intensité est susceptible
de causer des pertes auditives.
k) Gardez les spectateurs à une distance de
sécurité de la zone de travail. Quiconque
pénètre dans la zone de travail doit porter
un équipement de protection corporelle.
Des fragments des pièces à travailler ou d’un
accessoire cassé peuvent être projetés hors de
la zone de travail immédiate et entraîner des
blessures.
l) Ne tenez l’outil électrique que par ses
surfaces de poigne isolées lorsque vous
effectuez une opération au cours de
laquelle l’accessoire de découpe peut
entrer en contact avec des fils dissimulés
ou avec le cordon de l’outil. Le contact avec
un fil sous tension mettra les parties métalliques
exposées de l’outil sous tension, causant ainsi
un choc électrique chez l’utilisateur.
m) Positionnez le cordon à l’écart de
l’accessoire rotatif. Si vous perdez le
contrôle, le cordon peut être coupé ou
Table of contents
Languages:
Other Worx Saw manuals

Worx
Worx WX429.1 User manual

Worx
Worx WX439 Installation manual

Worx
Worx BladeRunner X2 WX572 User manual

Worx
Worx WX550 User manual

Worx
Worx WX427 Installation manual

Worx
Worx WX445 Operation instructions

Worx
Worx WX426 User manual

Worx
Worx WX80RS User manual

Worx
Worx WX437 Operation instructions

Worx
Worx WX440 Installation manual

Worx
Worx WX429 User manual

Worx
Worx WX550L User manual

Worx
Worx WX531 Installation manual

Worx
Worx WX445 User manual

Worx
Worx EXACTRACK User manual

Worx
Worx WX423.X User manual

Worx
Worx BladeRunner X2 WX572 User manual

Worx
Worx WU427.1 Installation manual

Worx
Worx WX424 HandyCut User manual

Worx
Worx WX423 User manual