Anbauanleitung Fitting Instructions Istruzione
B
Y
W
U
N
D
E
R
L
I
C
H
Bestell Nummer/ Part Number/ Codice: 8600888
R 1200 RT Navihalter / GPS Bracket / Supporto GPS
Vielen Dank für Ihr Vertrauen zu unserem Produkt.
1. Fahren Sie die Verkleidungsscheibe in die höchste Stellung.
Entfernen Sie die beiden Verkleidungsschrauben unter der Ver-
kleidungsscheibe (Bild B)
2. Lösen Sie die Klemmschraube der Spiegelscheibe und ziehen
Sie den Spiegel aus der Halterung (Bild C, D).
3. Entfernen Sie links und rechts die Spiegelgehäuse an den vier
Halteschrauben (Bild E).
4. Drehen Sie die vier Halteschrauben der Amaturenverkleidung
heraus und entfernen Sie die Cockpitverkleidung (Bild F, G, H).
5. Drücken Sie die Amaturenverkleidung vorsichtig nach hinten
weg, Achten Sie darauf, das die Amaturen nicht zerkratzt werden
(Klebeband oder ähnliches). Ziehen Sie von der Verkleidung die
Blechmuttern ab (Bild I, K).
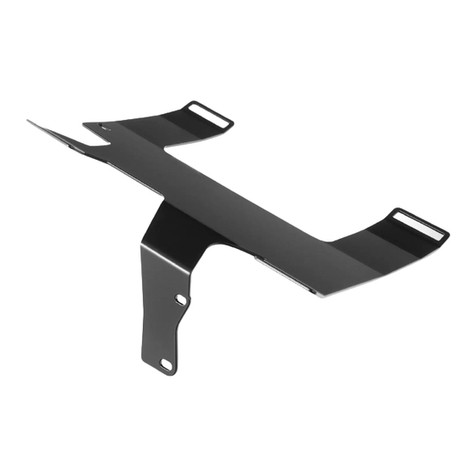
6. Montieren Sie lose die Schrauben M5x16, U-Scheiben und
Gewindeblech an den Zusatzhalter (Bild J). Setzen Sie den
Zusatzhalter mittig auf die Haltezunge (K1) am Armaturenträger,
richten Sie ihn so aus, das die Gewindeeinsätze genau mit den
Verkleidunglöchern fl uchten (K2 + K3), und ziehen Sie dann die
Schrauben fest (K4).
7. Montieren Sie die Amaturenverkleidung und die Spiegel wieder
am Fahrzeug.
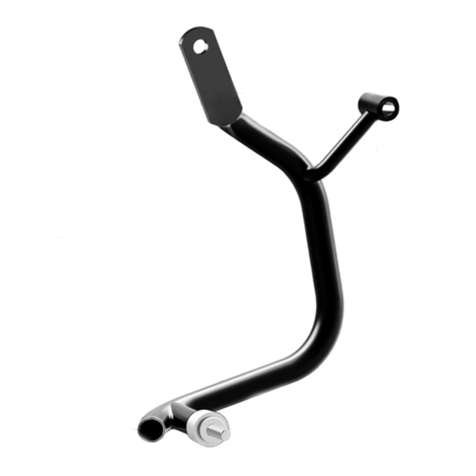
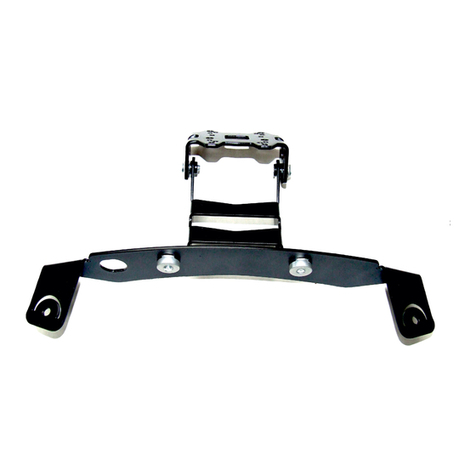
8. Kleben Sie auf den Grundhalter den Moosgummi auf (Bild M).
9. Montieren Sie den Grundhalter mit den Schrauben M5x20 und
Kunststoffscheibe zwischen Halter und Verkleidung am Fahrzeug
(Bild L + O).
10. Befestigen Sie den Halter mit den Schrauben M5x12, U-Scheibe
und Kunststoffscheibe zwischen Grundhalter und Halter (Bild N).
11. Das Lochbild des Halters entspricht den meisten Motorrad Na-
vigationsgeräten. Die Schraubengrößen entnehmen Sie bitte der
Dokumentation des Navigationsgerätes.
12. Fahren Sie die Verkleidungsscheibe in die unterste Stellung
und achten Sie darauf, das genügend Abstand zwischen dem
Gerät und der Verkleidungsscheibe ist, um eine Berührung zu
vermeiden.
13. Richten Sie den Halter aus und drehen Sie alle Schrauben fest
(Bild P, Q + R).
Thank you for purchasing our product.
1. Put the screen into its highest position. Remove both bolts
of the cover behind the screen (Image B).
2. Loosen the set screw of the mirror. Remove the mirror glass
from the support (fi gures C+D).
3. Remove the left and right mirror housing by removing the two
screws each (Image E).
4. Remove the four screws of the instrument cover and take
off the cockpit fairing (Image F, G, H)
5. Pull the instrument cover backwards, be careful not to scratch
the instruments (it might be good practice to protect them with
some sort of sticky tape). Pull out both clip nuts (Image I, K).
6. Loosely screw the M5x16 bolts with washers and special nut
to the support bracket (Image J). Place the support bracket
over the “tongue” (Image K1) of the instrument carrier. Align it
so that the threads of the support brackets align with the holes
in the fairing (K2 + K3), then tighten the support bolts (K4).
7. Reattach the instrument cover and mirrors previously re-
moved.
8. Attach suitable cut lengths of the supplied soft foam to the
main bracket (Image M).
9. Attach the main bracket to the motorcycle using the supplied
M5x16 bolt, and a plastic washer between the bracket and
the “dashboard” (Image L + O).
10. Attach the device bracket to the main bracket using the
M5x12 bolt and steel washer, and a plastic washer between
both brackets (Image N).
11. The holes in the device bracket will allow fi tting most com-
mon motorcycle navigation systems, use the instructions
supplied with the navigation device to determine the suitable
bolt diameter.
12. Slowly and carefully lower the screen to its lowest position -
make sure the screen does not touch the device or brackets.
13. Adjust the position of the device and tighten all bolts (Image
P, Q, R).
Grazie di aver acquistato un prodotto Wunderlich
1. Portare il parabrezza in posizione alta. Rimuovere le due viti
sotto il parabrezza (fi gura B).
2. Svitare la vite d’arresto dello spechietto, quindi rimuoverlo
dal suo supporto (fi gure C+D).
3. Rimuovere ad entrambi i lati ilcorpo specchio svitando le 4
viti (fi gura E).
4. Allentare le 4 viti del cruscotto, quindi rimuovere il cruscotto
(fi gure F,G,H).
5. Tirare la copertura del cruscotto e fare attenzione di non
graffi are il cruscotto (potrebbe essere utile di proteggerlo
utilizzando del nastro). Rimuovere entrambi I dadi (fi gura I, K).
6. Montare i bulloni M5x16, rondelle e dado speciale alla staffa
(fi gura J). Non stringere completamente. Posizionare la staffa
sopra la “linguetta” del supporto del cruscotto (K1). Allinearlo
in modo che I fi letti della staffa sono in concomitanza con i
fori della carena (fi gure K2 + K3) , quindi stringere i bulloni
del supporto (K4).
7. Rimontare il cruscotto e gli specchietti al veicolo.
8. Applicare del nastro di schiuma in dotazione sul supporto
(fi gura M).
9. Installare il supporto fra parabrezza e carena utilizzando le
due viti M5x16 e rondelle di plastica che vengono installati
fra il supporto e carena (fi gura L + O).
10. Installare la staffa per il apparecchio utilizzando le viti M5x12,
rondelle di acciaio e rondelle di plastica fra supporto e staffa
(fi gura N).
11. I fori nella staffa Vi permetteranno di installare la maggior
parte dei navigatori. Vi preghiamo di verifi care il manuale del
navigatore per le dimensioni dei viti.
12. Portare il parabrezza in posizione bassa e assicurare che ci
sia un spazio suffi ciente fra navigatore e parabrezza.
13. Allineare tutto l’assemblaggio e fi ssare le viti (fi gura P, Q, R).
General note: Our fi tting instructions are
written to the best of our knowledge but
specifi cations or details may change. If you have diffi culties or have doubts with
fi tting this part please seek advice from your BMW dealer or workshop of your choice.
Please note that in some cases due to vehicle related tolerances beyond our control
some products might need adjusting to fi t. We cannot warranty parts fi tting in those
circumstances.
Note generali: Le nostre istruzioni di montaggio
sono scritte al meglio delle nostre possibilità
ma dettagli o specifi che possono venire variate. Se avete diffi coltà o dubbi sul montaggio
di questo accessorio vi invitiamo a rivolgervi al vostro concessionario BMW o alla vostra
offi cina di fi ducia.Prendete nota che in qualche caso per tolleranze relative al veicolo
al di fuori del nostro controllo alcuni accessori possono necessitare di aggiustamenti
appropriati. In questo caso non possiamo garantire un perfetto montaggio.
Genereller Hinweis: Unsere Anleitungen
sind nach bestem Wissen erstellt worden,
erfolgen jedoch ohne Gewähr. Sollten Sie mit dem Anbau nicht zurecht kommen
oder Zweifel haben, so wenden Sie sich bitte an Ihren BMW-Händler oder die
Werkstatt Ihres Vertrauens. Bitte beachten Sie , dass wir keine Gewährleistungen für
fahrzeugspezifi sche Toleranzen übernehmen können! Es kann im Einzelfall notwendig
sein, dass Produkte diesen angepasst werden müssen.
News, Shop, Downloads und Informationen: www.wunderlich.de
Alles um das Thema Navigation: www.navigation.wunderlich.de
Copyright by Wunderlich® Copyright by Wunderlich®Copyright by Wunderlich®
1
Nuovi sezioni del catalogo ed ultime Novità:
Istruzioni di montaggio download (colore)
www.wunderlich.de/update
www.wunderlich.de/manuals
The latest catalogue sections and news:
Fitting instructions download (full colour):
www.wunderlich.de/update
www.wunderlich.de/manuals
Sie können diese Anleitung auch in Farbe herunterladen:
www.wunderlich.de/manuals
You can download these instructions in colour:
www.wunderlich.de/manuals
Potere scaricare queste istruzioni in colore su:
www.wunderlich.de/manuals
