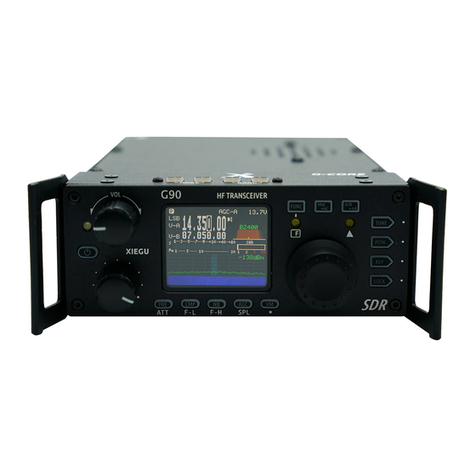
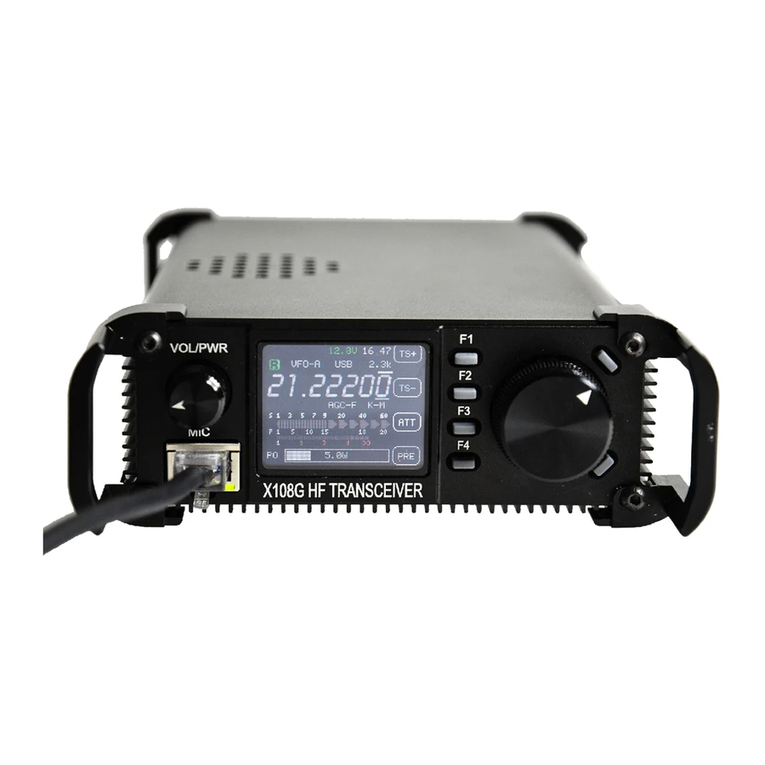
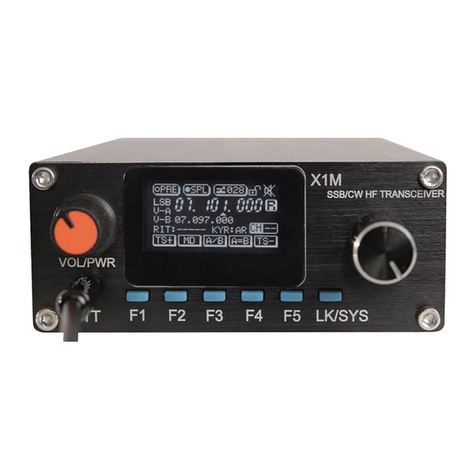
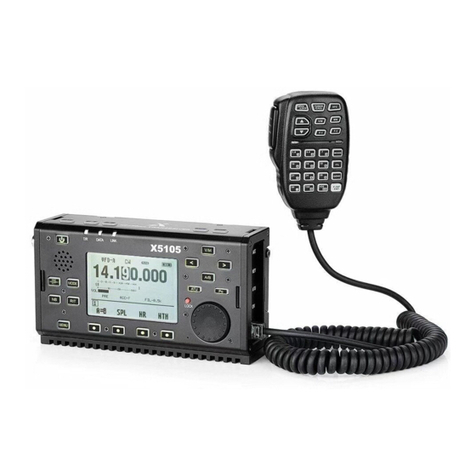
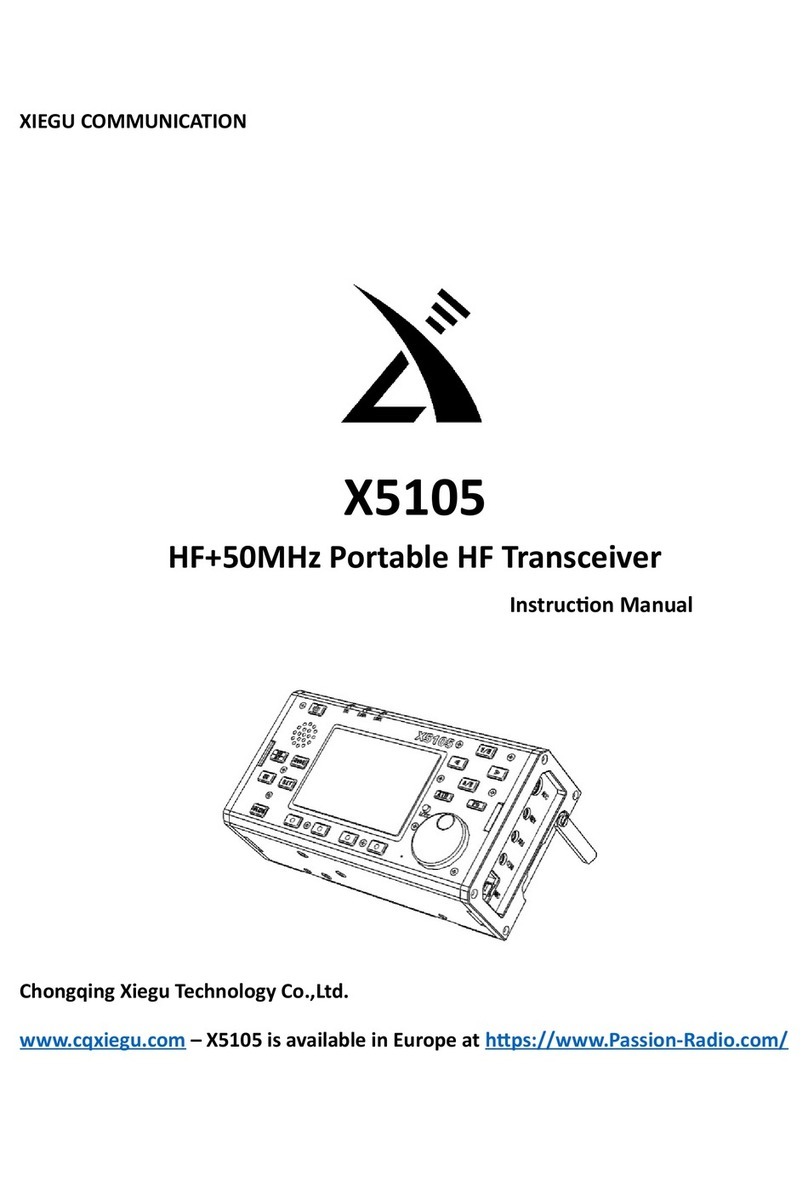
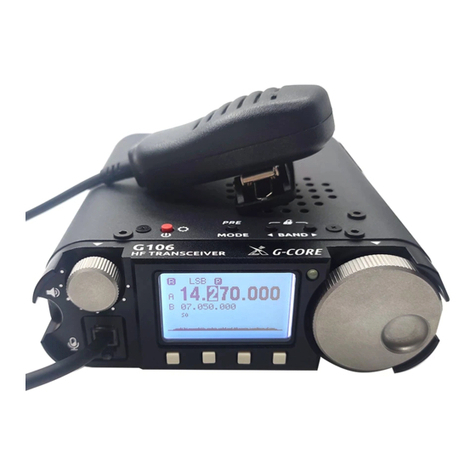
XIEGU X5105 User manual

XIEGU
HF/50MHZ Portable Short-wave Transceiver
X5105
Operation Manual
For Firmware V3.0 Edited by KE4RG
December 17, 2020
Based upon original manual by
Chongqing Xiegu Technology Co., Ltd
Why This Manual?
I was frustrated with errors and omissions of the existing manuals.
TAP means press and release.
HOLD means press for 2-seconds and release.

Xiegu X5105 Operating Manual 2
Table of Contents
X5105 Features .................................................4
Front Panel Functions .......................................5
1 [Power].................................................5
2 [MODE].................................................5
3 [PRE/ATT] .............................................5
4 [RIT]......................................................5
5 [NB] ......................................................6
6 [MENU].................................................6
7-10 Multi-Function Menu Softkeys.......6
11 [LOCK].................................................6
12 [KNOB]................................................6
13 [ATU] ..................................................6
14 [Po].....................................................6
15 [A/B]...................................................6
16 [<] .......................................................6
17 [>] .......................................................6
18 [V/M]..................................................6
Top Panel Functions..........................................7
19 [UP] ....................................................7
20 [DN]....................................................7
21 [VOL -] ................................................7
22 [VOL +]................................................7
23 [PTT] ...................................................7
Front Panel LEDs ...............................................8
A [T/R] LED ..............................................8
B [DATA] LED...........................................8
C [LINK] LED.............................................8
Left Panel Functions..........................................8
24 Antenna..............................................8
25 IF Out..................................................8
26 Left Tilt Bracket..................................8
27 Earphone............................................8
28 EXT DC................................................8
Right Panel Functions........................................9
29 ACC.....................................................9
30 KEY......................................................9
31 ATU.....................................................9
32 COM ...................................................9
33 Right Tilt Bracket................................9
34 MIC.....................................................9
Handheld Microphone Function.....................10
[1 LOCK].................................................10
[2 PTT] ...................................................10
[3 Up/Down] .........................................10
VFO Mode ............................................ 10
Memory Mode ..................................... 10
[4 LED]...................................................10
GREEN................................................... 10
[5 Numeric Pad] ....................................10
0 to 9 .................................................... 10
F-IN/ENT............................................... 10
[6 FIL].....................................................10
[7 MODE]...............................................10
[8 LED]...................................................10
[9 F-1/F-2] .............................................10
[10 MW] ................................................10
[11 V/M]................................................10
[12 XFC].................................................10
[13 TUNER/CALL]...................................10
External Interfaces ..........................................11
Microphone (RJ-45)...............................11
CIV Interface (3.5mm TRS jack).............11
Earphone (3.5mm TRS jack)..................11
Accessory (8-pin MINI-DIN) ..................11
Telegraph Key (1/8-inch TRS)................11
Maintenance of Internal Battery ....................12
Charging: ...............................................12
External Power Supplies: ......................12
Multi-Function Menu Description...................13
Multi-Function Menu Map....................13
Multi-Function Menu Operation.....................14
Menu1 Rx/Tx Audio Configuration .......14
AGC....................................................... 14
RF-GAIN................................................ 14
SQL........................................................ 14
COMP ................................................... 14
COMP ....................................................14
LEVEL .....................................................14
TAP ....................................................... 14
Menu2 DSP............................................14
DSP-FLT................................................. 14
DSP-FLT..................................................14
L_CUT ....................................................14
H_CUT....................................................14
NR......................................................... 14
NR..........................................................14
LEVEL .....................................................14
NOTCH.................................................. 14
NOTCH...................................................14
CNT........................................................14
BW.........................................................14

Xiegu X5105 Operating Manual 3
EQ......................................................... 15
BASS.......................................................15
MEDI ......................................................15
TREB.......................................................15
EQ ..........................................................15
Menu3 Memories .................................15
MEMO .................................................. 15
SEL..........................................................15
INS..........................................................15
BACK ......................................................15
SAVE.......................................................15
MSG...................................................... 15
QUIT.......................................................15
EDIT........................................................15
SPACE................................................15
INS ....................................................15
BACK.................................................15
DEL.........................................................15
CALLSIGN.............................................. 15
SPACE.....................................................15
INS..........................................................15
BACK ......................................................15
SAVE.......................................................15
Menu4 Keyer and CW Parameters .......16
Key........................................................ 16
MAN.......................................................16
AUTO-L...................................................16
AUTO-R ..................................................16
TONE..................................................... 16
QSKTIME............................................... 16
QSK ....................................................... 16
Menu5 MODEM and Scanning..............16
DIGI....................................................... 16
RTTY.......................................................16
AFC....................................................16
CAR ...................................................16
MSG..................................................16
PSK31.....................................................16
AFC....................................................16
CAR ...................................................16
MSG..................................................16
PSK63.....................................................16
AFC....................................................16
CAR ...................................................16
MSG..................................................16
PSK125...................................................16
AFC....................................................16
CAR ...................................................16
MSG..................................................16
CWDEM..................................................17
THRE .................................................17
TONE.................................................17
MSG..................................................17
SRM ...................................................... 17
BW.........................................................17
STOP ......................................................17
QUIT ......................................................17
SWR ...................................................... 17
QUIT ......................................................17
BW.........................................................17
MODE ....................................................17
SPEED ....................................................17
Menu6 Interface Options......................17
MIC/VOX............................................... 17
S/P ........................................................ 17
LIN/OUT................................................ 17
LIN .........................................................17
G-LIN......................................................17
LOUT......................................................17
G-LOUT..................................................17
PTT........................................................ 17
NORMAL................................................17
TOGGLE .................................................17
System Settings Menu.....................................18
LCD Backlight.........................................18
LCD Contrast .........................................18
BEEP Volume.........................................18
Side Tone Volume .................................18
Key BEEP................................................18
AM Mod Level.......................................18
Band Stack Mode ..................................18
MIC Bias ................................................18
Charger..................................................18
IF Output ...............................................18
RSSI Scale ..............................................18
User Key F1 ...........................................18
User Key F2 ...........................................18
Band Voltage Data...........................................18
60M OPERATION.............................................19
Multi-Function Menu Initial Settings ..............19
Common Tasks ................................................20
Initial Setup ...........................................20
Switch battery display...........................20
Calibrate S-meter..................................20
Toggle split............................................20
Enable CPO............................................20
Store Message.......................................21
Transmit Message.................................21
Reset .....................................................21
Enter Frequency....................................21
Store Callsign.........................................21
Store VFO ..............................................21
Recall VFO .............................................21
SPECIFICATIONS ..............................................22

Xiegu X5105 Operating Manual 4
X5105 Features
The X5105 is an ultra-portable short-wave full-mode transceiver that integrates all functions required for
amateur radio operations.
•HF+50 MHz, all-mode
•Variable power output of .1W to 5W
•General Coverage Receiver
•Available Modes are A1A(CW), A3E(AM), J3E(USB/LSB), F3E(FM)
•Two VFOs, independently configurable frequency, mode, filter, preamp/attenuator, ATU
•Small size 6-5/8” wide x 3-5/8” high x 1-7/8” deep (about 168mm*93mm*47mm)
•Weighs 2.1 pounds with battery
•Built-in microphone and PTT switch for handy-talkie operation
•High-Visibility 3.6-Inch back-lit LCD Screen
•Speech Compressor
•Built-in 3800-mAh high-capacity lithium battery for 6 to 8 hours of operation
•Memory Keyer with Code Practice Oscillator (CPO)
•Split operation and Receive Incremental Tuning (RIT)
•Built-in Pre-Amp, Attenuator, and Noise Blanker
•Adjustable AGC-Rate
•Built-in SWR Bridge and Antenna Matching Unit
•1st-IF Output (70.455 MHz) supports external Spectrum Display
•Built-in digital baseband processing, enabling:
oDigital noise reduction, digital NOTCH filter
oDigital receive audio equalizer
oVariable bandwidth digital filter
oDirect-decoding amateur radio common data modes
oComputer Aided Transmission (CAT), audio, and line level interfaces
oCW, PSK, RTTY automatic decoding/preset message transmitting
•Built-in high-stability TCXO
•Multi-function electret Keypad Microphone
•Built in high output speaker (0.6W (8Ω, ≤10% THD))
•Built-in Desktop Stand
•Upgradable via Firmware Download
•Straight key or paddle input to electronic keyer
•Wide operating voltage range (9.0 to 15.0 VDC)
•FCC Registered and CE Marked

Xiegu X5105 Operating Manual 5
Front Panel Functions
1 [Power]
HOLD to turn the radio ON or OFF.
When radio is OFF, TAP to display charging voltage and battery voltage.
To force a reset of the MCU, press and hold [Power] for 10 seconds.
NOTE: Always use [Power] to turn the X5105 on or off. This will ensure that the transceiver configuration
is saved. NEVER switch off by removing an external power supply.
2 [MODE]
TAP to select next operating mode in sequence:
HOLD [MODE] to toggle between Split ON and Split OFF. In Split operation VFOA is used for receiving, VFOB
is used for transmitting. When in Split operation, the split icon is visible beside the VFOB frequency.
3 [PRE/ATT]
TAP to engage the RF preamplifier, attenuator, or neither in sequence: PREAMP-ATTENUATOR-OFF
4 [RIT]
TAP to toggle RIT function ON or OFF.
When ON, set Rx offset (±1.5 kHz) by rotating [KNOB]
HOLD RIT to zero the RIT setting.

Xiegu X5105 Operating Manual 6
5 [NB]
TAP to toggle the Noise Blanker ON or OFF.
HOLD to toggle between the battery level icon and voltage display.
6 [MENU]
TAP to select the next Multi-Function Menu [1 to 6]. See below.
7-10 Multi-Function Menu Softkeys
TAP one of the Softkeys to select a function displayed in menu area of LCD.
11 [LOCK]
TAP to select next backlight brightness level.
HOLD to toggle the user interface LOCK. When enabled, the LOCK icon will be displayed and the user interface
is disabled.
12 [KNOB]
While in VFO Mode, rotate to increase/decrease frequency.
While in Memory Mode, rotate to increase/decrease memory channel.
While in a sub-menu, rotate to select certain parameters.
13 [ATU]
TAP [ATU] to enable/disable Antenna Matching Unit.
HOLD [ATU] to start the matching operation
14 [Po]
TAP [Po] to display and adjust transmitting power from 0.1W to 5W using the [KNOB].
HOLD [Po] to display and adjust SWR protection threshold from 1:2 to 1:3 using the [KNOB].
TAP [Po] to return to normal operation.
15 [A/B]
In addition to frequency, each VFO retains its own MODE, ATTENUATOR/RF-AMPLIFIER, ATU, FILTER, and
RF-POWER settings! The VFO in use is the one displayed at the top of the display.
TAP [A/B] to swap the positions of VFOA and VFOB.
HOLD [A/B] to copy the VFO in use (top) to the other (below).
16 [<]
In VFO Mode, TAP [<] to move the cursor left to the next higher digit, increasing the tuning rate.
In Memory Mode, TAP [<] to tune to next lower memory channel.
17 [>]
In VFO Mode, TAP [>] to move the cursor right to the next lower digit, decreasing the tuning rate.
In Memory Mode, TAP [>] to tune to next higher memory channel.
18 [V/M]
TAP [V/M] to switch between VFO Mode and Memory Mode.
In Memory Mode, rotate [KNOB] to select the channel by tag or number.
In Memory Mode, HOLD [V/M] to transfer displayed configuration into the rig and switch to VFO Mode.

Xiegu X5105 Operating Manual 7
Top Panel Functions
19 [UP]
TAP [UP] to tune to the next higher band.
20 [DN]
TAP [DN] to tune to the next lower band.
21 [VOL -]
TAP [VOL -] to reduce the volume. HOLD to reduce volume rapidly.
22 [VOL +]
TAP [VOL +] to increase the volume. HOLD to increase volume rapidly.
23 [PTT]
In PTT Normal Mode, depress [PTT] to transmit, release to receive.
In PTT Triggering Mode, TAP [PTT] to toggle between receiving and transmitting.
If Digital MODEM is ON, TAP [PTT] to transmit current message (MSG01 to MSG10) in current mode.

Xiegu X5105 Operating Manual 8
Front Panel LEDs
A [T/R] LED
[T/R] LED is green when receiving.
[T/R] LED is red when transmitting.
[T/R] LED is red when transceiver is OFF and charging.
[T/R] LED is green when OFF and charging is complete.
B [DATA] LED
[DATA] LED will blink during data communications.
C [LINK] LED
[LINK] LED will illuminate when transceiver is connected to peripherals.
Left Panel Functions
24 Antenna
BNC-Female antenna port with impedance of 50 ohms.
25 IF Out
MCX-Female 1st-IF Output (70.455 MHz).
26 Left Tilt Bracket
Fold it outward to use
27 Earphone
This 3.5mm TRS jack is used to connect earphone.
28 EXT DC
This 5.5mm X 2.1mm coaxial power jack, (+) center, is used to
connect external DC power. To fully charge the internal
battery, must be capable of supplying of 13.8VDC at 3A. See
Maintenance of Internal Battery for precautions.

Xiegu X5105 Operating Manual 9
Right Panel Functions
29 ACC
Accessory interface. This 8-pin mini-DIN connector can be used for external PTT input, current band
identification, and line level input/output audio for data communications.
30 KEY
This 3.5mm TRS jack is used to connect a manual or paddle
telegraph key. For a manual key, dit and dah (tip and ring)
must be connected.
31 ATU
This 3.5mm TRS jack provides voltage levels to control an
external band switch. Band Voltage Data Table below
32 COM
This 3.5mm stereo jack implements the computer aided
(CAT) interface and supports firmware updates. NOTE: The
CAT interface is a partial implementation of the IC7000 CIV
protocol (19200 baud, no parity, 8-bits, 1 stop bit, ID 70
hex).
33 Right Tilt Bracket
Fold it outward to use.
34 MIC
The RJ-45 external multi-function microphone connector.

Xiegu X5105 Operating Manual 10
Handheld Microphone Function
[1 LOCK]
HOLD to disable buttons on panel and keypad.
[2 PTT]
Push-to-Talk key - Depress to transmit, release to receive.
This PTT switch does NOT initiate trigger mode or digital messages.
[3 Up/Down]
VFO Mode - TAP to increase/decrease frequency. HOLD
to increase/decrease frequency rapidly.
Memory Mode - TAP to increase/decrease memory
channel
[4 LED]
GREEN when PTT released.
RED when PTT depressed.
[5 Numeric Pad]
0 to 9 - TAP to switch to labeled band. After F-IN/ENT,
TAP to enter frequency in MHz.
F-IN/ENT - TAP followed by 0 to 9 and F-IN/ENT again to
enter frequency in MHz.
[6 FIL]
Filter - No function
[7 MODE]
TAP to select next operating mode in sequence: [LSB-USB-CW-CWR-NFM-AM]
[8 LED]
Flashes when a button is depressed.
[9 F-1/F-2]
TAP to perform function selected by the user in System Settings Menu, 12 and 13.
[10 MW]
No Function.
[11 V/M]
VFO/Memory - TAP to toggle between VFO Mode and Memory Mode.
[12 XFC]
When the digital MODEM is enabled (Menu5), TAP to transmit current message in the current digital mode.
[13 TUNER/CALL]
TAP to enable/disable Antenna Matching Unit. HOLD to start the matching operation

Xiegu X5105 Operating Manual 11
External Interfaces
Microphone (RJ-45)
MSVSW should probably be 'M8V SW'.
MICE is probably MIC Earth (Ground).
CIV Interface (3.5mm TRS jack)
Earphone (3.5mm TRS jack)
Accessory (8-pin MINI-DIN)
Telegraph Key (1/8-inch TRS)
For a manual key, dit and dah (tip and ring) must be connected
NOTE: The TRS jacks require a matching plug with a narrow shaft to allow complete insertion.

Xiegu X5105 Operating Manual 12
Maintenance of Internal Battery
The X5105 has a built-in 3800mAh lithium polymer battery pack. When there is no external power connected,
the battery pack will power the radio.
Charge the battery fully before long-term storage.
When operating from battery, when the voltage drops near 10VDC, the battery icon at top right of display will
indicate that external power should be connected.
Charging:
1. Navigate to System Menu #9 Charger.
2. Rotate [KNOB] to select ON, enabling the charging function. (Select OFF to disable charging function.)
3. HOLD [Power] to turn OFF the X5105.
4. Set voltage of external power supply between 13.8VDC and 15.0VDC
5. Insert the barrel plug into the power supply jack on the Left Panel.
6. With the X5105 power OFF, the T/R LED will be red when charging. The T/R indicator light will be
green when charging is finished.
7. You may operate the transceiver in RECEIVE mode while charging.
8. To avoid damage DO NOT TRANSMIT WHILE CHARGING!
9. Do not insert or remove the external power cable while the transceiver is ON!
10. The charging time may vary from 2 hours to a maximum of 10 to 12 hours. Charging will automatically
stop when battery is fully charged. The screen will display Vext and Vbat. Voltage of a fully charged
battery is between 12.1VDC and 12.5VDC.
11. It is normal for transceiver to become warm when charging.
If a high temperature is observed on the back of the X5105, disconnect power and move the
transceiver to a safe, well ventilated area!
External Power Supplies:
The external DC power supply must be fused and provide minimum 3A at 13.8VDC. A choke can be placed on
the power cord to prevent RF noise from entering or radiating from the radio. External power exceeding
15.0VDC may cause irreversible damage. Polarity of power lines must be carefully observed to avoid reverse
polarity and damage! Limited warranty does not include damages caused by incorrect connection of external
power supply or abnormal voltage.

Xiegu X5105 Operating Manual 13
Multi-Function Menu Description
The X5105 uses a multi-function menu to enable, disable or configure various options. Menus are arranged in
six pages, and each menu page has up to four options that can be selected using the SoftKeys. TAP [MENU]
repeatedly to scroll through the six available pages (Menu1 to Menu6).
Most parameters of the multi-function menu are changed using the [KNOB].
•TAP [MENU] repeatedly to select the menu of interest.
•If necessary, HOLD the multi-function key of the secondary menu item.
•Adjust the parameter by rotating [KNOB].
•TAP [MENU] to exit the secondary menu.
Multi-Function Menu Map
Menu
Functions
1
AGC
RF-GAIN
SQL
COMP
AGC speed
RF Gain Adjust
Squelch
compression
2
DSP-FLT
NR
NOTCH
EQ
DSP options
Noise Reduction
NOTCH
options
Equalizer
3
MEMO
MSG
CALLSIGN
/
VFO
Memories
Digital Messages
CALLSIGN
/
4
KEY
TONE
QSKTIME
QSK
Telegraph
Key
Sidetone settings
QSK
timeout
QSK on/off
5
(BELOW)
DIGI
SRM
SWR
-
Digital MODEM
Rx Scan
SWR Scan
RTTY
AFC
CAR
MSG
PSK31
AFC
CAR
MSG
PSK63
AFC
CAR
MSG
PSK125
AFC
CAR
MSG
CWDEM
THRE
TONE
MSG
6
MIC/VOX
S/P
LIN/OUT
PTT
Microphone
speaker/earphone
Line
IN/OUT
PTT Latch
NOTE: In Menu5 the first Softkey is blank when the RF MODEM is OFF. TAP DIGI
to turn the RF MODEM ON. When the RF MODEM is ON, the first Softkey will
display the current digital mode (RTTY, PSK31, PSK63, PSK125, or CWDEM). TAP
the first Softkey to advance to the next mode in the list. TAP [MENU] to toggle
the RF MODEM OFF. See below for more information.

Xiegu X5105 Operating Manual 14
Multi-Function Menu Operation
Menu1 Rx/Tx Audio Configuration
AGC - TAP repeatedly to scroll through values OFF, SLOW, FAST, and AUTO.
RF-GAIN - TAP to edit using [KNOB] (10 to 100).
TAP RF-GAIN again to exit editing.
HOLD RF-GAIN to restore default value (80).
SQL - TAP to edit using [KNOB], (OFF to S9).
TAP SQL again to exit editing.
COMP - TAP to toggle Compression ON or OFF.
HOLD COMP to display Compression Parameters.
COMP - TAP to toggle Compression ON or OFF
HOLD COMP to return to Menu1.
LEVEL –TAP to edit Compression Level using [KNOB].
TAP LEVEL again to exit editing.
HOLD LEVEL to restore default value (1:2).
Menu2 DSP
DSP-FLT - TAP to toggle DSP Filter ON or OFF.
HOLD to display L-CUT and H-CUT menus.
DSP-FLT - TAP to toggle DSP Filter ON or OFF.
HOLD DSP-FLT to return to Menu2
L_CUT –TAP to edit Low Cutoff using [KNOB].
TAP L_CUT to exit editing.
HOLD L_CUT to restore default (300 SSB, 550 CW, 100 AM/FM).
H_CUT –TAP to edit High Cutoff using [KNOB].
TAP H_CUT to exit editing.
HOLD H_CUT to restore default (2700 SSB, 1050 CW, 3000 AM/FM).
NR - TAP to toggle Noise Reduction ON or OFF.
HOLD to display NR LEVEL menu.
NR - TAP to toggle DSP Filter ON or OFF.
HOLD NR to exit to Menu2
LEVEL - Tap to edit Noise Reduction Level using [KNOB].
Tap LEVEL again to exit editing.
HOLD LEVEL to restore default value (10).
NOTCH TAP to toggle Notch Filter ON or OFF.
HOLD to display Notch Filter Parameter menu.
NOTCH - TAP to toggle Notch Filter ON or OFF.
HOLD NOTCH to return to Menu2
CNT - TAP to edit Center Frequency using [KNOB] (250 Hz to 3000 Hz).
Tap CNT again to exit editing.
HOLD CNT to restore default value (1000).
BW –TAP to edit Notch Width using [KNOB] (50 Hz to 250 Hz).
Tap BW again to exit editing.
HOLD BW to restore default value (100).

Xiegu X5105 Operating Manual 15
EQ TAP to toggle Audio Equalizer ON or OFF.
HOLD EQ to display Equalizer Settings.
BASS - TAP to edit Bass Level using [KNOB].(-12dB to 12dB)
Tap Bass again to exit editing.
HOLD BASS to restore default value (0dB).
MEDI - TAP to edit Medium Level using [KNOB].(-12dB to 12dB)
Tap MEDI again to exit editing.
HOLD MEDI to restore default value (0dB).
TREB - TAP to edit Treble Level using [KNOB].(-12dB to 12dB)
Tap TREB again to exit editing.
HOLD TREB to restore default value (0dB).
EQ - TAP to toggle Audio Equalizer ON or OFF.
Tap EQ again to exit editing.
HOLD EQ to return to Menu2
Menu3 Memories
MEMO - TAP to enter VFO Channel Editor sub-menu.
TAP MENU at any time to discard changes and return to Menu3.
Rotate [KNOB] to select channel (CH01 to CH99).
SEL - TAP to toggle between Edit CHxx (channel info) and Edit TAG.
INS –When Channel CHxx is selected, no action.
When Edit TAG is selected TAP to erase last character.
BACK - When Channel CHxx is selected, TAP to delete this channel information.
When Edit TAG is selected TAP to erase last character.
SAVE - TAP to save settings and return to Menu3.
MSG –TAP to enter Digital Message Editor.
Rotate [KNOB] to select message MSG01 to MSG10.
TAP [MENU] at any time to discard changes and return to Menu3.
QUIT - TAP (or TAP [MENU]) to return to Menu3.
EDIT - TAP to edit selected MSGxx.
SPACE - TAP to insert a space character.
Rotate [KNOB] to select next character.
INS - TAP to insert selected character.
BACK - TAP to erase last character.
SAVE - TAP to save edits and return to Digital Message Editor.
TAP MENU to discard changes and return to Message List.
DEL - TAP to delete selected MSGxx.
CALLSIGN - TAP to enter Callsign Editor.
TAP [MENU] at any time to discard changes and return to Menu3.
SPACE - TAP to insert a space character.
Rotate [KNOB] to select next character.
INS - TAP to insert selected character.
BACK - TAP to erase last character.
SAVE - TAP to save edits and return to Menu3.

Xiegu X5105 Operating Manual 16
Menu4 Keyer and CW Parameters
Key - TAP to scroll through:
MAN - Select to disable keyer and select manual or straight key.
AUTO-L - Select to enable keyer and select paddle for left hand.
AUTO-R - Select to enable keyer and select paddle for right hand.
TONE –TAP to set sidetone (transmit offset) using [KNOB] (425Hz to 1200Hz).
TAP TONE to save and exit.
QSKTIME –TAP to set CW break in delay time using [KNOB] (0nSec to 1000nSec).
TAP QSKTIME to save and exit.
HOLD QSKTIME to restore default value (100nS).
NOTE: The X5105 uses a relay to switch Tx/Rx. Full break-in is not possible. Set this value
high enough to prevent switching during your normal inter-character time.
QSK - TAP to toggle CW Transmit Enable ON or OFF
NOTE: Set QSK OFF to disable the transmitter and enable Code Practice Oscillator (CPO).
Menu5 MODEM and Scanning
DIGI - TAP to turn on the digital MODEM and display current digital mode in Softkey1.
TAP [MENU] at any time to turn the MODEM off and return to Menu5
TAP [PTT] or XFC to send the current digital message in the current digital mode.
TAP Softkey1 repeatedly to scroll and select the desired digital mode:
RTTY MODEM
AFC -.has no function.
CAR -.has no function.
MSG - TAP repeatedly to select message MSG01 to MSG10.
TAP PTT or XFC to send.
PSK31 MODEM
AFC - TAP to view AFC State.
While AFC State is displayed, TAP AFC to toggle between ON and OFF.
Display of AFC State will close after 5-seconds.
CAR - TAP and rotate [KNOB] to select carrier from 300Hz and up.
(Carrier or phase frequency correction is an alternative to AFC).
MSG - TAP repeatedly to scroll to message MSG01 to MSG10.
TAP PTT or XFC to send.
PSK63 MODEM
AFC - TAP to view AFC State.
While AFC State is displayed, TAP AFC to toggle between ON and OFF.
Display of AFC State will close after 5-seconds.
CAR - TAP and rotate [KNOB] to select carrier from 300Hz and up.
(Carrier or phase frequency correction is an alternative to AFC)
MSG - TAP repeatedly to scroll to message MSG01 to MSG10.
TAP PTT or XFC to send.
PSK125 MODEM
AFC - TAP to view AFC State
TAP AFC to toggle between ON and OFF.
Display of AFC State will close after 5-seconds.
CAR - TAP and rotate [KNOB] to select carrier from 300Hz and up.
(Carrier or phase frequency correction is an alternative to AFC).
MSG - TAP to select message MSG01 to MSG10.
TAP PTT or XFC to send.

Xiegu X5105 Operating Manual 17
CWDEM CW MODEM
THRE - TAP and rotate [KNOB] to select threshold from 1 to 100.
TAP THRE to save and exit editor.
TONE - TAP and rotate [KNOB] to set sidetone 425Hz to 1200Hz.
TAP TONE to save and exit editor.
MSG - TAP repeatedly to scroll to message MSG01 to MSG10.
TAP PTT or XFC to send.
SRM Scanning Receiver
TAP SRM to begin continuous scan centered on the current frequency.
BW - TAP to select value from table below.
STOP - TAP to toggle stop or resume the scan.
QUIT - TAP to return to Menu5.
In v3 firmware, BW is NOT bandwidth! This table shows scanning span for each value of BW:
Setting
of
BW
+-kHz
around
center
Span
in
kHz
0.5k
50
100
1k
100
200
2k
200
400
5k
500
1000
10k
1000
2000
SWR Scanner
TAP SWR to display the SWR graph and begin scanning.
QUIT - TAP to return to Menu5.
BW - TAP to select bandwidth and step.
MODE - TAP to select SINGLE or CONTINUOUS scan.
SPEED - TAP to toggle between SLOW (25ms per step) and FAST (12ms per step) scan rate.
Menu6 Interface Options
TAP [MENU] at any time to return to Menu6
MIC/VOX - TAP to select INT (internal), EXT (external), or AUTO (automatic) microphone.
NOTE: VOX delay is set at 100ms.
S/P - TAP to select SPEAKER or PHONE.
LIN/OUT - TAP to configure line level audio on ACC, the 8-pin mini-DIN connector.
LIN TAP to toggle line-in ON or OFF.
When LINE-IN is enabled, internal AND external microphones are disabled.
G-LIN TAP and rotate [KNOB] to set line-in gain.
TAP G-LIN to save and exit editor.
HOLD G-LIN to restore default value.
LOUT TAP to toggle line-out ON or OFF
G-LOUT TAP and rotate [KNOB] to set line-out gain.
TAP G-LOUT to save and exit editor.
HOLD G-LOUT to restore default value.
NOTE: In early releases, LINE-OUT switch and LINE-OUT gain have no effect. The LINE OUT pin of ACC
connector is always on with output level relative to receiving volume.
PTT - TAP to change PTT Mode between NORMAL and TOGGLE.
NORMAL mode - the transmitter is keyed while PTT is depressed.
TOGGLE mode - PTT functions as a latching transmit-receive switch. TAP PTT to toggle between transmit
and receive states.

Xiegu X5105 Operating Manual 18
System Settings Menu
System parameters may be changed to suit your operating preferences.
1. HOLD [MENU] to enter System Settings Menu.
2. TAP [<] or [>] Softkey to display the menu items you want to adjust.
3. Rotate [[KNOB]] to set parameter value.
4. TAP [SAVE] to save current settings and exit menu mode.
5. TAP [QUIT] at any time to exit menu mode without saving.
Descriptions of System Menu
Items
Number
Description
Range
Default
LCD Backlight
#1
Displayer backlight brightness
OFF to LEVEL5
LEVEL5
LCD Contrast
#2
Displayer contrast ratio
0 to 30
30
BEEP Volume
#3
System prompt volume
0 to 100
50
Side Tone Volume
#4
Side Tone Volume Level
0 to 100
50
Key BEEP
#5
Key BEEP OFF/ON
OFF/ON
ON
AM Mod Level
#6
AM Modulation Level
0 to 63
60
Band Stack Mode
#7
Band Up/Dn step mode
Ham/Full
Ham
MIC Bias
#8
MIC Bias OFF/ON
OFF/ON
ON
Charger
#9
Charger OFF/ON
OFF/ON
ON
IF Output
#10
IF Output OFF/ON
OFF/ON
OFF
RSSI Scale
#11
S Meter Calibration
-100 to +100
0
User Key F1
#12
Hand Microphone F1 key
LEFT
LEFT
User Key F2
#13
Hand Microphone F2 key
RIGHT
RIGHT
Band Voltage Data
The ACC accessory interface (8-pin DIN) of the X5105 provides a voltage unique to each band. The pin is
labeled BAND and the voltage can be used to control peripheral equipment.
Band
Volts
1.8MHz
230mV
7MHz
920mV
18MHz
1610mV
28MHz
2300mV
3.5MHz
460mV
10MHz
1150mV
21MHz
1840mV
50MHz
2530mV
5.0MHz
690mV
14MHz
1380mV
24MHz
2070mV

Xiegu X5105 Operating Manual 19
60M OPERATION
Operation on the 60 Meter band is channelized. The operator is responsible for tuning to one of five
frequencies. The channels can be programmed into memory.
USB
CW/DATA
5330.5
5332.0
5346.5
5348.0
5357.0
5358.5
5371.5
5373.0
5403.5
5405.0
Multi-Function Menu Initial Settings
Menu
Functions
1
AGC
RF-GAIN
SQL
COMP
OFF
80
OFF
OFF
2
DSP-FLT
NR
NOTCH
EQ
ON
OFF
OFF
OFF
3
MEMO
MSG
CALLSIGN
<your call>
4
KEY
TONE
QSKTIME
QSK
Telegraph Key
800
500ms
ON
5
DIGI
SRM
SWR
6
MIC/VOX
S/P
LIN/OUT
PTT
AUTO
SPEAKER
OFF/OFF
NORMAL

Xiegu X5105 Operating Manual 20
Common Tasks
Task
Instructions
Initial Setup
1. If battery is not charged, follow Charging to bring battery
voltage above 11.0 volts. Alternatively, connect external
power (2.5 Amps at 9 to 15 VDC). Ensure that battery charger
is turned OFF (Systems Setting Menu #9). DO NOT
TRANSMIT WHILE BATTERY CHARGER IS OPERATING!
2. Connect an antenna appropriate for the band.
3. For CW, connect a straight key (1/8-inch TRS plug, tip and
ring shorted) or paddle (1/8-inch TRS plug, sleeve common).
4. For SSB, AM, or FM connect the multi-function microphone.
5. HOLD [Power] to turn transceiver ON.
6. Follow the manual instructions to save your callsign.
7. Tune to the band using [KNOB] or multi-function
microphone. Alternately, TAP [V/M] to switch to Memory
Mode and recall target channel. See Recall VFO Channel for
more info.
8. Refer to the Band Plan, tune to a free frequency.
9. TAP [MODE] repeatedly to set mode of operation.
10. Ensure the RIT is OFF using [RIT].
11. Follow manual instructions to set [PRE/ATT], [NB], [VOL +] /
[VOL -] to comfortable levels.
12. Refer to Multi-Function Menu Initial Settings and verify the
settings of Menu1 to Menu6. IF NO AUDIO IS HEARD ensure
that RF-Gain, SQL, and S/P are set correctly.
13. TAP [Po] and set POWER LEVEL .
14. HOLD [Po] and set SWR THR protection level (1:2, 1:2.5, 1:3).
Power output will reduce to minimum if SWR exceeds this
level.
15. If your antenna is NOT resonant, TAP [ATU] to engage the
antenna matching unit (ATU). HOLD [ATU] to initiate
operation of the antenna matching unit.
16. Enjoy!
Switch battery display
between icon and VDC
HOLD [NB] Noise Blanker
Calibrate S-meter
1. Power on the rig.
2. Disconnect the antenna.
3. HOLD [MENU] to open System Level Menu.
4. TAP <or >Softkey repeatedly until #11:RSSI Scale is displayed.
5. Rotate [KNOB] until indicated level bounces SLIGHTLY.
6. TAP Softkey SAVE to save and exit.
7. TAP Softkey QUIT to exit without saving and exit.
Toggle split and normal
operation
1. HOLD [MODE] button
Enable CPO (Code Practice
Oscillator)
1. TAP [MENU] repeatedly until Multi-Function Menu4 is displayed.
2. TAP Softkey QSK to toggle ON (transmitter enabled, CPO OFF) and
OFF (transmitter disabled, CPO ON)
Other manuals for X5105
7
Table of contents
Other XIEGU Transceiver manuals
Popular Transceiver manuals by other brands

Rockwell Automation
Rockwell Automation Allen-Bradley 58UHF-TR-100-SR15US installation instructions

GENLED
GENLED Acolyte DiGidot CTRLPIXELTRKITSP manual

RELM
RELM RH250 Service manual

DINUY
DINUY CO K5X 002 Operation and installation manual

IMC Networks
IMC Networks Copper SFPs features and benefits

Harxon
Harxon HX-DU1601D user manual