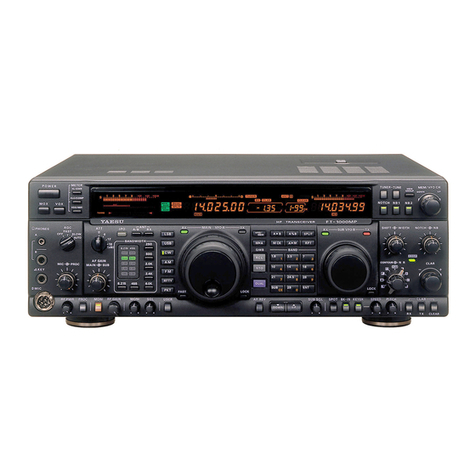
Yaesu FTdx5000 Series Manual

Introduction
This manual provides technical information necessary for
servicing the FTDX5000 Series HF/50 MHz Transceiver.
Servicing this equipment requires expertise in handling
surface-mount chip components. Attempts by non-qual-
ified persons to service this equipment may result in
permanent damage not covered by the warranty, and
may be illegal in some countries.
Two PCB layout diagrams are provided for each dou-
ble-sided circuit board in the Transceiver. Each side of
is referred to by the type of the majority of components
installed on that side (“leaded” or “chip-only”). In most
cases one side has only chip components, and the oth-
er has either a mixture of both chip and leaded compo-
nents (trimmers, coils, electrolytic capacitors, ICs, etc.),
or leaded components only.
While we believe the technical information in this manu-
al to be correct, VERTEX STANDARD assumes no lia-
bility for damage that may occur as a result of typograph-
ical or other errors that may be present. Your coopera-
tion in pointing out any inconsistencies in the technical
information would be appreciated.
©2011 VERTEX STANDARD CO., LTD. EH036H90C
TechnicalSupplement
HF/50 MHz TRANSCEIVER
FTDX5000S
ERIES
Contents
Specifications
Exploded View & Miscellaneous Parts
Block Diagram
Connection Diagram
Alignment
Board Unit (Schematics, Layouts & Parts)
TRX Unit
VRF Unit
BPF Unit
SCP Unit
DVS Unit
RX-1 Unit
LOCAL Unit
CNTL Unit
PA-B Unit
TUNER Unit
TUNER-C Unit
ANT Unit
VRF-A Unit
DSP Unit
VR-A Unit
VR-B Unit
ENC Unit
BACK-LIGHT Unit
SW-A Unit
SW-B Unit
SW-C Unit
SW-D Unit
JACK Unit
MIC Unit
UEL Unit
LINK Unit
Important Note
1) This transceiver was assembled using Pb (lead) free solder,
based on the RoHS specification.
Only lead-free solder (Alloy Composition: Sn-3.0Ag-0.5Cu)
should be used for repairs performed on this apparatus. The
solder stated above utilizes the alloy composition required for
compliance with the lead-free specification, and any solder
with the above alloy composition may be used.
2) Risk of explosion if battery is replaced by an incorrect type.
Dispose of used batteries according to the instructions.
VERTEX STANDARD CO., LTD.
4-8-8 Nakameguro, Meguro-Ku, Tokyo 153-8644, Japan
VERTEX STANDARD
US Headquarters
10900 Walker Street, Cypress, CA 90630, U.S.A.
YAESU UK LTD.
Unit 12, Sun Valley Business Park, Winnall Close
Winchester, Hampshire, SO23 0LB, U.K.
VERTEX STANDARD HK LTD.
Unit 1306-1308, 13F., Millennium City 2, 378 Kwun Tong Road,
Kwun Tong, Kowloon, Hong Kong
VERTEX STANDARD (AUSTRALIA)PTY., LTD.
Tally Ho Business Park, 10 Wesley Court, East Burwood, VIC, 3151

Specifications
General
Rx Frequency Range: 30 kHz - 60 MHz (operating)
1.8 - 29.7 MHz, 50 - 54 MHz (specified performance, Amateur bands only)
Tx Frequency Ranges: 1.8 - 29.7 MHz, 50 - 54 MHz (Amateur bands only)
5.16750MHz, 5.33200MHz, 5.34800MHz,
5.36800MHz, 5.37300MHz, 5.40500MHz (USA version only)
Frequency Stability: ±0.05 ppm (MP version, after 1 minute @+14 °F ~ +140 °F [–10 °C ~ +60 °C])
±0.5 ppm (after 1 minute @+14 °F ~ +140 °F [–10 °C ~ +60 °C])
Operating Temperature Range:
+14 °F ~ +140 °F (–10 °C ~ +60 °C)
Emission Modes: A1A (CW), A3E (AM), J3E (LSB, USB), F3E (FM),
F1B (RTTY), F1D (PACKET), F2D (PACKET)
Frequency Steps: 1/5/10 Hz (SSB,CW, & AM), 100 Hz (FM)
Antenna Impedance: 50 Ohms, unbalanced
16.7 - 150 Ohms, unbalanced (Tuner ON, 1.8 - 29.7 MHz Amateur bands)
25 - 100 Ohms, unbalanced (Tuner ON, 50 MHz Amateur band)
Power Consumption: Rx (no signal) 70 VA
(@117 VAC) Rx (signal present) 80 VA
Tx (200 W) 720 VA
Supply Voltage: AC 90 V - AC 264 V
Dimensions (WxHxD): 18.2” x 5.3” x 15.3” (462 x 135 x 389 mm) w/o knob and connector
Weight (approx.): 46.3 lbs (21 kg)
Transmitter
Power Output: 10 - 200 watts (CW, LSB, USB, FM, RTTY, PKT)
5 - 50 watts (AM carrier)
10 - 75 watts (Class A: LSB, USB)
Modulation Types: J3E (SSB): Balanced,
A3E (AM): Low-Level (Early Stage)
F3E (FM): Variable Reactance
Maximum FM Deviation: ±5.0 kHz/±2.5 kHz
Harmonic Radiation: Better than –60 dB (1.8 - 50 MHz Amateur bands)
SSB Carrier Suppression: At least 60 dB below peak output
Undesired Sideband Suppression: At least 60 dB below peak output
Audio Response (SSB): Not more than –6 dB from 300 to 2700 Hz
3rd-order IMD: –31 dB @14 MHz, 100 watts PEP
–40 dB @14 MHz, Class A: 75 watts PEP
Bandwidth: 500 Hz (CW)
3.0 kHz (LSB, USB)
6.0 kHz (AM)
16 kHz (FM)
Microphone Impedance: 600 Ohms (200 to 10 k Ohms)
SPECIFICATIONS-1 FTDX5000 Series Technical Supplement

Receiver
Circuit Type: VFO-A; Double-conversion superheterodyne
VFO-B; Triple-conversion superheterodyne
Intermediate Frequencies: VFO-A; 9 MHz /30 kHz (24 kHz for AM/FM)
VFO-B; 40.455 MHz/455 kHz /30 kHz (24 kHz for AM/FM)
Sensitivity: SSB (2.4 kHz, 10 dB S+N/N)
2 µV (0.5 - 1.8 MHz, IPO1)
0.2 µV (1.8 - 30 MHz, AMP2)
0.125 µV (50 - 54 MHz, AMP2)
AM (6 kHz, 10 dB S+N/N, 30 % modulation @400 Hz)
6 µV (0.5 - 1.8 MHz, IPO1)
2 µV (1.8 - 30 MHz, AMP2)
1 µV (50 - 54 MHz, AMP2)
FM (BW: 15 kHz, 12 dB SINAD)
0.5 µV (28 - 30 MHz, AMP2)
0.35 µV (50 - 54 MHz, AMP2)
There is no specification in frequency ranges not listed.
Squelch Sensitivity (AMP2): SSB/CW/AM
2 µV (0.1 - 30 MHz)
2 µV (50 - 54 MHz)
FM
1 µV (28 - 30 MHz)
1 µV (50 - 54 MHz)
There is no specification in frequency ranges not listed.
Selectivity (–6/–60 dB): Mode –6 dB –60 dB
CW 0.5 kHz or better 750 Hz or less
LSB, USB 2.4 kHz or better 3.6 kHz or less
AM 6 kHz or better 15 kHz or less
FM 12 kHz or better 30 kHz or less
Image Rejection: 70 dB or better (1.8 - 29.7 MHz Amateur bands, VRF: ON)
60 dB or better (50 MHz Amateur band)
Maximum Audio Output: 2.5 W into 4 Ohms with 10% THD
Audio Output Impedance: 4 to 8 Ohms (4 Ohms: nominal)
Conducted Radiation: Less than 4000 µµW
: Except the 9 MHz.
Specifications are subject to change, in the interest of technical improvement, without notice or obligation,
and are guaranteed only within the amateur bands.
Specifications
SPECIFICATIONS-2
FTDX5000 Series Technical Supplement

Specifications
Note
SPECIFICATIONS-3 FTDX5000 Series Technical Supplement

Exploded View-1
Exploded View
Case ASSY
CP9633001
TOP CASE ASSY
RA1058600
SHIELD CASE COVER
CP9634001
BOTTOM CASE ASSY
(W/ LEG ASSY)
RA0719500 (X2 pcs)
LEG
RA072470A (X2 pcs)
LEG
RA072460A (X2 pcs)
LEG
Non-designated parts are available only as part of a designated
assembly.
RA1170900
SHIELD CASE COVER
RA1058500
SHIELD CASE COVER
RA1208800 (X2pcs)
GASKET
RA1208700
SPONGE RUBBER
RA1207600 (X2pcs)
GASKET
R7133800B (X2 pcs)
WASHER
R7133800B (X2 pcs)
WASHER
RA0733900
PORON SHEET
REF. VXSTD P/N Description Qty.
U31406007 OVAL HEAD SCREW M4X6B 10
U31306007 OVAL HEAD SCREW M3X6B 23
U24306001 BIND HEAD TAPTITE-B M3X6 15
U34308001 FLAT HEAD TAPTITE-B M3X8 10
U03306002 SEMS SCREW ASM3X6NI 1
U20304002 BINDING HEAD SCREW M3X4NI 3
U9900254 SPECIAL SCREW M4X20B 2
U24410007 BIND HEAD TAPTITE-B M4X10B 2
RA1233300
SHEEET
RA1208800 (X2pcs)
GASKET
RA1235600 (X3pcs)
SHEEET
RA1080800 (X7pcs)
PORON SHEET

Exploded View-2
Exploded View
Panel ASSY (1/2)
RA1227100 (X2 pcs)
INSULATOR (ENC)
RA117780B
KNOB MAIN ASSY
RA1176900 (X2pcs)
VOLUME KNOB
(IN18ASSY)
RA1208100
RUBBER RING (MAIN)
Non-designated parts are available only as part of a designated
assembly.
REF. VXSTD P/N Description Qty.
U24208001 BIND HEAD TAPTITE-B M2.6X8 5
U03306002 SEMS SCREW ASM3X6NI 4
RA1178400
RUBBER RING (SUB)
RA1178300 (X2pcs)
RUBBER RING (SEL)
RA0744600
SLEEVE
U9900192
WAVE WASHER
RA0729400
WASHER
R0134990A
COIL SPRING
R3135000A
WASHER
U9900192
WAVE WASHER
RA0729400
WASHER
RA0729400
WASHER
RA0729400
WASHER
RA117740A
SUB KNOB ASSY
RA1177100 (X2pcs)
KNOB ASSY (SEL)
RA1176800 (X2pcs)
VOLUME KNOB
(OUT21ASSY)
RA1176700 (X6pcs)
VOLUME KNOB
(IN13ASSY)
RA1176600 (X6pcs)
VOLUME KNOB
(OUT17ASSY)
RA1177000
KNOB ASSY(METER)
LINK Unit
VR-A Unit
VR-B Unit
ENC Unit
This nut are attached to ROTARY SWITCH.
This washer are attached to ROTARY SWITCH.
This nut are
attached to VR (X8pcs).
This washer are
attached to VR (X8pcs).

Exploded View-3
Exploded View
Panel ASSY (2/2)
RA117870A
NAME PLATE
RA1175800
LIGHT GUIDE (CAT)
RA1173700
WINDOW
RA1175200
PUSH KNOB (PWR)
RA1175900
PUSH KNOB
(MRTX)
RA1175300
PUSH KNOB
(10KEY)
RA1173900 (X3pcs)
WINDOW (EL)
RA1175400
PUSH KNOB
(MODE)
RA1174700 (X2pcs)
KNOB ASSY (VFO)
SW-C Unit
RA1175500
PUSH KNOB (NB)
Non-designated parts are available only as part of a designated
assembly.
REF. VXSTD P/N Description Qty.
U24105001 BIND HEAD TAPTITE-B M2X5 55
R7155600 (X8 pcs)
HIMERON TAPE
RA1174900 (X2pcs)
KNOB ASSY (DNR)
RA1176200
PUSH KNOB (STO)
RA1185000
PUSH KNOB (RX)
RA1176100
PUSH KNOB (AB)
RA1175600
PUSH KNOB
(MAINL)
RA1175700
PUSH KNOB
(MAINR)
RA1174100
KNOB ASSY (MOX)
RA1174400
KNOB ASSY (CLAR)
RA1176000
PUSH KNOB (SRTX)
RA1185100
REFLECTOR SHEET
RA119700B
FRONT PANEL ASSY
Q7000629 (X3pcs)
MODULE (UEL362)
UEL Unit
RA1178500 (X3pcs)
DOUBLE FACE (EL)
SW-B Unit
SW-D Unit
SW-A Unit
RA1154100
SHIELD CASE COVER
(VOL)
RA1176400 (X5pcs)
LEVER KNOB
RA1236800
SPONGE RUBBER
RA1236800
SPONGE RUBBER
RA1234000
SPONGE RUBBER
(MAINR)
RA1234100
SPONGE RUBBER
(MAINL)
RA1176300
PUSH KNOB
(CLASSA)
RA1178600
HOLDER (EL)

Exploded View-4
Exploded View
Panel Frame ASSY
RA1176500
REFLECTOR
RA1173300 (X2pcs)
GROUND PLATE
RA1153800
PANEL FRAME
Q7000633
VFD MODULE
M0290077
M0290078 (CE Type)
METER
MIC Unit
JACK Unit
BACK-LIGHT Unit
Q9000833
ROTARY ENCODER
Q9000833
ROTARY ENCODER
Non-designated parts are available only as part of a designated
assembly.
REF. VXSTD P/N Description Qty.
U24208001 BIND HEAD TAPTITE-B M2.6X8 9
This washer are attached to ROTARY ENCODER.
This nut are attached to ROTARY ENCODER.
This metal fittings are attached to CONNECTOR.
This washer are attached
to CONNECTOR.
This nut are attached to CONNECTOR.
RA1185200 (X2pcs)
SPONGE RUBBER (REF)
RA1173200
GROUND PLATE
RA1223200
SHEET
RA1223300
SHEET
This washer are attached to ROTARY ENCODER.
This nut are attached to ROTARY ENCODER.

Exploded View-5
Exploded View
CHASSIS ASSY (1/4)
RA104750A
CHASSIS
PA-B Unit
Q7000634
POWER SUPPLY
FAN ASSY
SP ASSY
S5000292
FINGER GUARD
Non-designated parts are available only as part of a designated
assembly.
REF. VXSTD P/N Description Qty.
U24306001 BIND HEAD TAPTITE-B M3X6 32
U03306002 SEMS SCREWASM3X6NI 12
U03310002 SEMS SCREWASM3X10NI 7
U03314001 SEMS SCREW ASM3X14 4
U04308002 SEMS SCREWHSM3X8NI 4
U65500102 WING NUT N5NI 1
U72005002 TOOTHED LOCK WASHER OW5NI 2
U70005002 PLAIN WASHER FW5NI 2
U66500002 FLANGE NUT N5NI 1
U51525020 HEXA SOCKET BOLT M5X25SUS 1
RA1172600 (X2 pcs)
SHEET
RA1232300
SHIELD CASE COVER
RX-1 Unit
RA1219100 (X3pcs)
INSULATOR
RA1151700
SHIELD CASE COVER
BPF Unit
ANT UNIT ASSY
TUNER UNIT ASSY
TUNER-C Unit
RA1172400
DISPLAY PANEL
S5000010
LEAD CLAMP
(L=55)
S5000321
SPACER
S5000290 (X4pcs)
SPACER
RA1208800
GASKET
R7153661
BLIND SHEET
RA1231800
INSULATOR SHEET
RA1233200 (X2pcs)
PORON SHEET
RA117260A (X2 pcs)
ThermalConductivePad

Exploded View-6
Exploded View
CHASSIS ASSY (2/4)
Non-designated parts are available only as part of a designated
assembly.
SP ASSY PA-B UNIT ASSY
RA0910100
HOLDER
RA1059300
HOLDER
RA090120A
HEATSINK
RA0910400
HEATSINK PLATE
RA0916100
INSULATOR SHEET
PA-B UNIT
RA1154400
SHIELD CASE COVER
REF. VXSTD P/N Description Qty.
U24306001 BIND HEAD TAPTITE-B M3X6 6
U03306002 SEMS SCREW ASM3X6NI 15
U02312002 SEMS SCREW SM3X12NI 6
U34308001 FLAT HEAD TAPTITE-B M3X8 14
U03308002 SEMS SCREW ASM3X8NI 2
S5000223 SPACER 12
S5000321 SPACER 1
Non-designated parts are available only as part of a designated
assembly.
REF. VXSTD P/N Description Qty.
U9900021 PAN HEAD TAPTITE-B HM3X6 4
RA1172700
HOLDER (SP)
RA1237100
SPONGE RUBBER (SP2)
M4090125
SPEAKER
RA1080800
PORON SHEET
RA1237700 (X4pcs)
PORON SHEET
RA1172800
SPONGE RUBBER (SP)
RA00152B0 (X6pcs)
GROUND PLATE
RA1237800
PORON SHEET
RA123790A
SHEEET
RA1235800 (X2pcs)
SPONGE RUBBER

Exploded View-7
Exploded View
CHASSIS ASSY (3/4)
FAN ASSY
TUNER Unit
ANT UNIT ASSY
RA1059200
SHIELD CASE COVER (ANT)
Non-designated parts are available only as part of a designated
assembly.
REF. VXSTD P/N Description Qty.
U03306002 SEMS SCREWASM3X6NI 4
TUNER UNIT ASSY
Non-designated parts are available only as part of a designated
assembly.
RA1172500 (X2 pcs)
SPONGE RUBBER (FAN)
M2090050
FAN
Non-designated parts are available only as part of a designated
assembly.
REF. VXSTD P/N Description Qty.
U03306002 SEMS SCREWASM3X6NI 4
U44308002 PAN HEAD TAPTITE-B M3X8NI 10
P1090984 (X5pcs)
CONNECTOR (MDR-2)
P1091117B
CONNECTOR
(BNC/BR M11)
ANT Unit
RA1059100
HOLDER (ANT)
RA1234900
PORON SHEET
RA123330A
SHEEET
S5000323
TERMINAL
RA123350A
ThermalConductivePad
RA1318200
ThermalConductivePad
RA1318100
ThermalConductivePad

Exploded View-8
Exploded View
CHASSIS ASSY (4/4)
RA104750A
CHASSIS
DSP Unit
VRF Unit
SCP Unit
DVS Unit
LOCAL Unit
CNTL Unit
VRF-A Unit
TRX Unit
RA1170300
SHIELD CASE COVER
Non-designated parts are available only as part of a designated
assembly.
REF. VXSTD P/N Description Qty.
U24306001 BIND HEAD TAPTITE-B M3X6 40
U03306002 SEMS SCREW ASM3X6NI 16
U24308001 BIND HEAD TAPTITE-B M3X8 3
U44308002 PAN HEAD TAPTITE-B M3X8NI 2
RA1058700
SHIELD CASE (DSP)
RA1059000
SHIELD CASE COVER (DSP)
RA083090A
SHIELD CASE COVER
RA1151900
SHIELD CASE COVER
RA0423200
LOCK PLATE

BLOCK & CONNECTION DIAGRAM-1FTDX5000 Series Technical Supplement
BLOCK DIAGRAM (Lot. 1)

BLOCK & CONNECTION -2 FTDX5000 Series Technical Supplement
BLOCK DIAGRAM (Lot. 2~)

BLOCK & CONNECTION DIAGRAM-3FTDX5000 Series Technical Supplement
CONNECTION DIAGRAM (Lot. 1)

BLOCK & CONNECTION -4 FTDX5000 Series Technical Supplement
CONNECTION DIAGRAM (Lot. 2~)

ALIGNMENT-1
Alignment
FTDX5000 Series Technical Supplement
Introduction and Precautions
The following procedures cover adjustments that are
not normally required once the transceiver has left
the factory. However, If a problem occurs during
normal operation due to component failure; realign-
ment may be required after the faulty components
have been replaced.
We recommend that authorized Vertex Standard
Technicians, who are experienced with the circuitry
and fully equipped to repair and align our products,
perform repairs. If a fault is suspected, contact the
selling dealer for instructions regarding repair. Au-
thorized Vertex Standard Technicians have the lat-
est information to align all circuits and make com-
plete performance checks to ensure compliance with
factory specifications after repairs.
Those who do undertake any of the following align-
ments are cautioned and proceed at their own risk.
Problems caused by unauthorized attempts at re-
alignment are not covered by the warranty policy.
Vertex Standard must reserve the right to change
circuits and alignment procedures in the interest of
improved performance, without notifying owners.
Under no circumstances should any alignment be
attempted unless the normal functions and opera-
tion of the transceiver are clearly understood, the
cause of the malfunction has been clearly identified
and all faulty components replaced. The need for
realignment should be determined to be absolutely
necessary.
The following test equipment (and a thorough fa-
miliarity with its correct use) is necessary for correct
realignment. Most steps do not require all of the
equipment listed. The interactions of some adjust-
ments may require that more complex adjustments
be performed in a sequence. Do not attempt to per-
form only a single step unless it is clearly isolated
electrically from all other steps. Have all test equip-
ment ready before beginning, and follow all of the
steps in a section in the order they are presented.
Required Test Equipment
RF Signal Generator
AF Signal Generator
Spectrum Analyzer good to at least 1 GHz.
Frequency Counter
SINAD Meter
RF Millivoltmeter
Digital DC Voltmeter (high-Z, 1 M-Ohm/V)
DC Voltmeter
DC Ammeter (30 A)
Ohmmeter
DMU-2000 Data Management Unit
50-Ohm Dummy Load (200 watts)
100-Ohm Dummy Load (200 watts)
150-Ohm Dummy Load (200 watts)
In-Line Wattmeter (200 watts, 50-Ohm)
Linear Detector
RF Coupler
4-Ohm AF Dummy Load (3 watts)
Alignment Preparation & Precautions
A 50-ohm RF Dummy load and in-line wattmeter
must be connected to the “ANT 1” jack in all proce-
dures that call for transmission, except where speci-
fied otherwise. Correct alignment is not possible with
an antenna.
After completing one step, read the following step
to determine whether the same test equipment will
be required. If not, remove the unneeded test equip-
ment before proceeding. (except the dummy load
and wattmeter).
Correct alignment requires that the ambient temper-
ature be maintained constant between 68 °F ~ 86 °F
(20 °C ~ 30 °C). When the transceiver is brought into
the shop from a hot or cold environment, it should
be allowed time to come to room temperature be-
fore alignment. Also, the test equipment must be
thoroughly warmed up before beginning.
Whenever possible, alignments should be made with
oscillator shields and circuit boards firmly affixed in
place. Also, the test equipment must be thoroughly
warmed up before beginning.
Note: Signal levels in dB referred to in this proce-
dure are based on 0 dBµ = 0.5 µV (closed cir-
cuit).

ALIGNMENT-2
Alignment
FTDX5000 Series Technical Supplement
Analog Meter Adjustment
Meter Full Adjustment
Press and hold in the [1(1.8)], [2(3.5)], and [3(7)]
keys, while turning the radio on, to enter the
alignment mode.
Rotate the (VFO-A)[SELECT] Knob to select the
alignment parameter “01-01 MTR FULL.”
Rotate the (VFO-B)[SELECT] knob so that the
Main S-meter deflects to full scale.
Press and hold in the [MENU] button for 2 sec-
onds to save the new setting and exit from the
alignment mode.
VDD Meter Adjustment
Connect the DC voltmeter to TP5518 on the PA-
B Unit.
Switch the external display to “SWR Monitor”
page.
Press and hold in the [1(1.8)], [2(3.5)], and [3(7)]
keys, while turning the radio on, to enter the
alignment mode.
Rotate the (VFO-A)[SELECT] knob to select the
alignment parameter “01-02 VDD MTR.”
Press the [ENT] key, then rotate the (VFO-
B)[SELECT] knob so that the VDD meter read-
ing is the same as that on the DC voltmeter.
Rotate the (VFO-A)[SELECT] knob to select the
alignment parameter “01-03 VDD TFT.”
Rotate the (VFO-B)[SELECT] knob so that the
VDD meter (on the external display) reading is
the same as that on the DC voltmeter.
Press and hold in the [MENU] button for 2 sec-
onds to save the new setting and exit from the
alignment mode.
PA-A UNIT POINTS
Connect the DC voltmeter
(TP5518)
Connect the DC voltmeter
(pin1 of J5520)
MTR FULL
[1(1.8)], [2(3.5)], and [3(7)] keys
(VFO-B)[SELECT] knob
(VFO-A)[SELECT] knob
SUB DISPLAY-II
SUB DISPLAY-I SUB DISPLAY-III

ALIGNMENT-3
Alignment
FTDX5000 Series Technical Supplement
TEMP
TEMP Meter Adjustment
Connect the DMU-2000 to the FTDX5000, and set
the external display screen to the SWR page to
view the temperature indication.
Press and hold in the [1(1.8)], [2(3.5)], and [3(7)]
keys, while turning the radio on, to enter the
alignment mode.
Rotate the (VFO-A)[SELECT] knob to select the
alignment parameter “01-04 TEMP.”
Rotate the (VFO-B)[SELECT] knob so that the
SUB DISPLAY-III is reads "70."
Confirm that the temperature-meter reads 80 °C
± 5 °C.
Rotate the (VFO-B)[SELECT] knob so that the
SUB DISPLAY-III is reads "125."
Confirm that the temperature-meter reads 20 °C
± 5 °C.
Press and hold in the [MENU] button for 2 sec-
onds to save the new setting and exit from the
alignment mode.
Cooling fan Adjustment
Connect the DC voltmeter to pin 1 of J5520 on
the PA-B Unit.
Press and hold in the [1(1.8)], [2(3.5)], and [3(7)]
keys, while turning the radio on, to enter the
alignment mode.
Rotate the (VFO-A)[SELECT] knob to select the
alignment parameter “01-05 FAN.”
Rotate the (VFO-B)[SELECT] knob so that the
SUB display-III reads "110" or less.
Confirm the fan is stopped.
Rotate the (VFO-B)[SELECT] knob so that the
SUB display-III display is reads "127."
Confirm that the voltmeter reads 7.2 V ± 0.3 V.
Rotate the (VFO-B)[SELECT] knob so that the
SUB display-III display is reads "146."
Confirm that the voltmeter reads 6.3 V ± 0.3 V.
Rotate the (VFO-B)[SELECT] knob so that the
SUB display-III display is reads "165."
Confirm that the voltmeter reads 4.3 V ± 0.3 V.
Rotate the (VFO-B)[SELECT] knob so that the
SUB display-III display is reads "187."
Confirm that the voltmeter reads less than 0.5 V.
Press and hold in the [MENU] button for 2 sec-
onds to save the new setting and exit from the
alignment mode.
[1(1.8)], [2(3.5)], and [3(7)] keys
(VFO-B)[SELECT] knob
(VFO-A)[SELECT] knob
SUB DISPLAY-II
SUB DISPLAY-I SUB DISPLAY-III

ALIGNMENT-4
Alignment
FTDX5000 Series Technical Supplement
PLL (Main) Adjustment
Connect the Digital DC voltmeter (high-Z) to
TP4004 on the LOCAL Unit.
Confirm that the voltmeter reads 3.0 V ± 1.5 V.
2nd Local (Sub, SCP) Adjustment
Disconnect the coaxial cable from J4001 on the
LOCAL Unit, then connect the RF millivoltmeter
to J4001.
Confirm that the RF millivoltmeter reads –3 dBm
± 3dBm.
Disconnect the RF millivoltmeter from J4001, then
re-connect the coaxial cable to J4001.
Disconnect the coaxial cable from J4002 on the
LOCAL Unit, then connect the RF millivoltmeter
to J4002.
Confirm that the RF millivoltmeter reads –3 dBm
± 3dBm.
Disconnect the RF millivoltmeter from J4002, then
re-connect the coaxial cable to J4002.
Main 2nd Local Adjustment
Connect the RF millivoltmeter to TP4003.
Adjust T4002 on the LOCAL Unit for maximum
deflection on the RF millivoltmeter (more than
0.42 dBm).
Disconnect the RF millivoltmeter from TP4003.
Sub 3nd Local Adjustment
Connect the RF millivoltmeter to TP4001.
Confirm that the RF millivoltmeter reads –0.42
Vrms ± 0.13 Vrms.
Disconnect the RF millivoltmeter from TP4001.
1st Local (Main, Sub, SCP) Adjustment
Set the Main Band (VFO-A) frequency to 14.000
MHz in the SSB mode.
Connect the RF millivoltmeter to TP4012.
Confirm that the RF millivoltmeter reads –0.28
Vrms ± 0.08 Vrms.
Disconnect the RF millivoltmeter from TP4012.
Connect the RF millivoltmeter to TP4013.
Confirm that the RF millivoltmeter reads –0.28
Vrms ± 0.08 Vrms.
Disconnect the RF millivoltmeter from TP4013.
Connect the RF millivoltmeter to TP4014.
Confirm that the RF millivoltmeter reads –0.28
Vrms ± 0.08 Vrms.
Disconnect the RF millivoltmeter from TP4014.
Local Adjustment
2nd Local Oscillator Adjustment
Disconnect the coaxial cable from J4002 on the
LOCAL Unit, then connect the Frequency counter
to J4002.
Press and hold in the [1(1.8)], [2(3.5)], and [3(7)]
keys, while turning the radio on, to enter the
alignment mode.
Rotate the (VFO-A)[SELECT] knob to select the
alignment parameter “01-06 FREQ.”
Rotate the (VFO-B)[SELECT] knob so that the Fre-
quency counter reading is “40.000 MHz (± 2Hz).”
Press and hold in the [MENU] button for 2 sec-
onds to save the new setting and exit from the
alignment mode.
OCXO Only
Disconnect the Frequency counter from J4002,
then connect the RF millivoltmeter to J4002.
Connect the RF millivoltmeter to TP4010.
Adjust T4003, T4004 and T4006 on the LOCAL
Unit for maximum deflection on the RF
millivoltmeter (more than –10 dBm).
Disconnect the RF millivoltmeter from TP4010.
Other manuals for FTdx5000 Series
3
Table of contents
Other Yaesu Transceiver manuals

Yaesu
Yaesu FTA-750 Spirit User manual

Yaesu
Yaesu FT2DR User manual

Yaesu
Yaesu FT+850 User manual

Yaesu
Yaesu FTDX-9000D User manual

Yaesu
Yaesu FT-411 MKII Manual

Yaesu
Yaesu FTM-3200DE User manual

Yaesu
Yaesu SK-2699R User manual

Yaesu
Yaesu FT-7B User manual

Yaesu
Yaesu FTM-10R Manual

Yaesu
Yaesu MARK-V FT-100MP User manual

Yaesu
Yaesu FT-101E User manual

Yaesu
Yaesu FT-840 User manual

Yaesu
Yaesu FTM-100DR User manual

Yaesu
Yaesu FT-1500M User manual

Yaesu
Yaesu FTM-10R User manual

Yaesu
Yaesu FTM-6000R User manual

Yaesu
Yaesu FT-891 User manual

Yaesu
Yaesu VX-1R User manual

Yaesu
Yaesu FT-4XE User manual

Yaesu
Yaesu GX1280S User manual