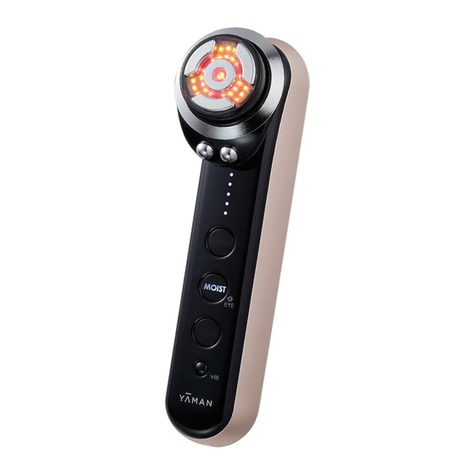
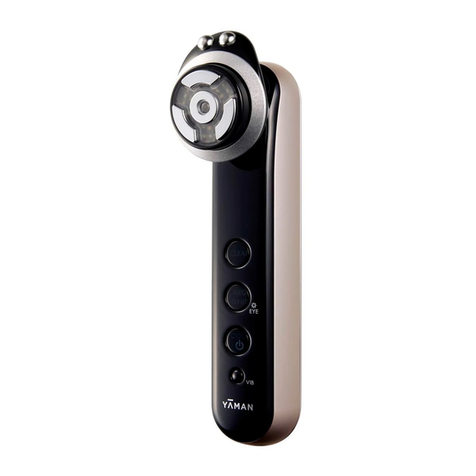
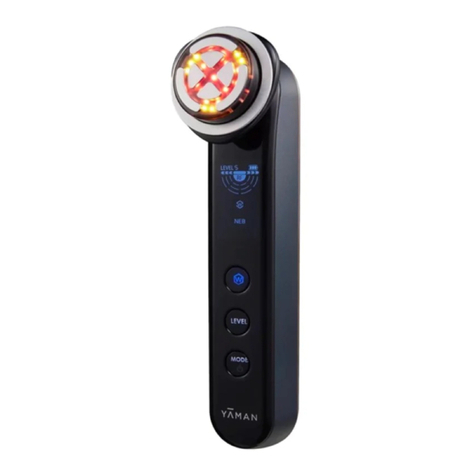
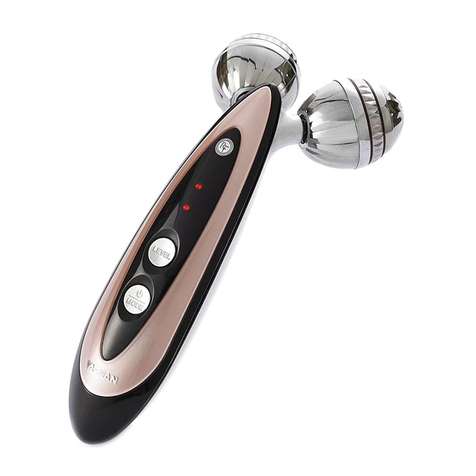
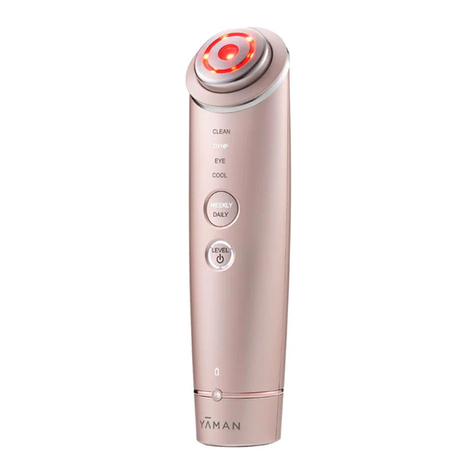
YAMAN MIYABI YJFG0 User manual

27
YJFG0
Table of Contents
Safety Precautions • • • • • • • • • • • • • • • • • • • • • • • • • • • • • • • • • • • • • • • • • • • • • • • • • • • • • • • • • • 1
Use in Foreign Countries • • • • • • • • • • • • • • • • • • • • • • • • • • • • • • • • • • • • • • • • • • • • • • • • • • • • • 7
Names of Components • • • • • • • • • • • • • • • • • • • • • • • • • • • • • • • • • • • • • • • • • • • • • • • • • • • • • • 8
Before Use• • • • • • • • • • • • • • • • • • • • • • • • • • • • • • • • • • • • • • • • • • • • • • • • • • • • • • • • • • • • • • • • • 9
How to Use • • • • • • • • • • • • • • • • • • • • • • • • • • • • • • • • • • • • • • • • • • • • • • • • • • • • • • • • • • • • • • • 15
After Treatment • • • • • • • • • • • • • • • • • • • • • • • • • • • • • • • • • • • • • • • • • • • • • • • • • • • • • • • • • • • 20
Troubleshooting • • • • • • • • • • • • • • • • • • • • • • • • • • • • • • • • • • • • • • • • • • • • • • • • • • • • • • • • • • • 21
After-sales Service • • • • • • • • • • • • • • • • • • • • • • • • • • • • • • • • • • • • • • • • • • • • • • • • • • • • • • • • • 24
Product Specifications• • • • • • • • • • • • • • • • • • • • • • • • • • • • • • • • • • • • • • • • • • • • • • • • • • • • 26
User’s Manual
Home Use Beauty Device
YA-MAN THE MIYABI
YJFG0-1-001E
Before using this product, please read these instructions carefully.
Please read this User’s Manual carefully for information on how to use the device properly and safely.
After reading the contents hereof, be sure to keep this User’s Manual in an accessible location.
Be sure to include this User’s Manual if you are transferring ownership of the device to another person.
English User’s Manual come with this product.
Please download the other language’s User’s Manual version
from this link (https://www.ya-man.co.jp/en/support/documents/)
or scan with QR code with your camera phone.
Please carefully read User’s Manual to ensure safe and proper
use of the device. TO ACCESS SCAN WITH
YOUR CAMERA PHONE

Safety Precautions
WARNING
The following individuals should not use the device:
Prohibition
・
Read these Safety Precautions carefully before using the device in order to use it correctly.
・
Use the device sensibly in accordance with the prescribed steps.
・
Immediately discontinue use and arrange to have the device repaired if any abnormality occurs.
・
Do not use the device while it is in a defective state, as doing so could cause physical harm to the user.
・
The precautions listed in the User’s Manual are very important. For your safety, please follow them
carefully.
・
Precautions are classified as DANGER, WARNING, or ATTENTION in order to clearly specify the level of
danger and possible injury or damage that may occur if the device is misused.
Classifications of Precautions
Symbols
* “Property damage” refers to expanded damage affecting a dwelling, household belongings,
or domestic animals and pets.
WARNING Improper use of this device may pose a risk of death or serious injury.
DANGER Improper use of this device poses a severe and likely risk of death or
serious injury.
ATTENTION
Improper use of this device may cause an injury or property
damage*.
This symbol shows you what you must not do.
This symbol shows you what you must do.
This symbol shows you what you must be careful with.
DANGER
The following individuals should not use the device:
Use of the device could cause electronic medical devices to malfunction.
◆Do not use the device in conjunction with any medical electronic equipment, including:
・
pacemakers or other implanted electronic medical devices
・
artificial heart-lung machines or other electronic life-support medical devices
・
electrocardiographs or other worn electronic medical devices
Prohibition
21
Safety Precautions
Safety Precautions
Failure to comply may cause skin
problems or physical ailments.
Do not use the device for a long
time over areas where the skin is
thin or areas above bones.
Prohibition Failure to comply may cause
physical injuries.
Do not overuse the device. For
usage time and frequency, follow
the instructions in the User’s
Manual.
Prohibition
Failure to comply may cause injuries
or skin problems.
Before use, check to make sure
the electrode and treatment head
are not cracked, deformed or
broken. Do not use the device if it
is damaged or malfunctioning.
Prohibition
Failure to comply may cause accidents or other problems.
• If you have existing or suspected epilepsy, heart disease, or related disorders
• If the user is a small child or a person who is unable to express their intentions on their own
• If you are unable to sense temperature or stimulation
• If you have an autoimmune disease
Do not allow physically challenged persons to use the device unattended.
Consult a physician prior to use under the following conditions:
• If you have an acute disease • If you have an infectious disease
• If you have a malignant tumor • If you have a febrile disease
• If you have high blood pressure or a blood disease • If you have a fever
• If you have sensory impairment due to severe peripheral circulatory dysfunction (e.g. diabetes)
• If you have a nerve damage • If you have a skin disease or atopic dermatitis
• If you are a hospital outpatient and are taking medication
• If you have a pre-existing skin condition, such as an allergic constitution or contact dermatitis,
or if you have a concern about your skin when using this device
Do not use in the following cases or on the following areas.
Failure to comply may cause accidents or other problems.
• If your skin is damaged, experiencing a rash, inflammation, or other abnormalities
• If you are under the influence of alcohol
• Anywhere inside the mouth, around the pubic region, or any mucous membrane • Eyeballs
•
Upper eyelids (exposure to LED light is possible)
•
Lower eyelids and the outer corners of the eyes (EYE CARE Mode and exposure to LED light are possible)
• Throat • Head • Bulging moles • Viral warts • Sites where you have broken a bone
• Areas of internal bleeding, swelling or scabbing after cosmetic medical procedures
* Avoid using the device for 2 weeks after cosmetic medical procedures. After this period, consult with
a physician and only use the device if the physician confirms there is no problem. (e.g. Hyaluronic
acid injections, silicone injections, Botox, thread lifts, double eyelid surgery, HIFU, etc.)
• Areas where metal was implanted by surgery (reconstructive surgery, plastic surgery, cosmetic
surgery, etc.)

43
Safety Precautions
Safety Precautions
WARNING WARNING
• In bathrooms or near bathtubs, showers, washbasins or other containers filled with water
• A dusty location
• Outdoors or a location where there is exposure to direct sunlight
• A slope or a location where there are vibrations or shocks
• A location where there are strong radio waves or magnetism
• Near a flammable substance (such as alcohol, thinner, benzene, nail polish remover or spray).
• A location where there is exposure to oil smoke or steam
• A location that may become hot, such as near a heating device (e.g. a heater)
• A location with drastic temperature changes (e.g. near an air conditioner or heater)
Failure to comply may cause a fire, electric shocks, accidents, malfunction of the device, falls or injuries.
Do not use, store or charge the device in the following locations:
Prohibition
Failure to comply may cause the
electrodes to stick to and damage
the skin.
Do not use at a temperature
below the specified ambient
temperature.
Prohibition
Inquiry the Global After Service
(https://www.ya-man.co.jp/en/support/
repair/) or your local distributor and
use the dedicated AC Adapter. Do not
connect anything other than the rated
power supply (DC9V 2.0A).
Do not use the device if the AC
adapter is damaged.
Prohibition
Failure to comply may cause a fire or
other accidents.
Do not leave the device
unattended while it is turned on.
Prohibition
Failure to comply may cause an electric
shock or a fire due to a short circuit.
Be sure to turn off the power before
pulling out the plug.
Do not pull out the plug from a
power outlet or pull out the plug
from the device during use.
Prohibition
Failure to comply may cause
accidents or injuries.
Keep the device and AC adapter
away from children and do not
allow them to use it alone.
Children shall not play with the
appliance.
User
restrictions
Non-intended
uses are
prohibited
Failure to comply may cause a
malfunction of the device or an injury.
Do not use the device for any
purpose or in areas other than
those stated in the User’s Manual.
The device features a built-in
rechargeable battery.
Failure to comply may lead to the
generation of heat, a fire or
explosion.
Do not dispose of the device in a
fire or place it near fire or flames.
Do not use, charge or store in a
high-temperature or
high-pressure area.
Combustion
warning Failure to comply may cause an
electric shock, short circuit, fire, or
malfunction of the device.
Contact your local distributor for
advice on repairing the device.
Do not use if the AC adapter is
damaged or if the wall socket is
too loose.
Use of a
damaged cable
or plug is
prohibited
Failure to comply may cause a fire
or electric shock.
If the device is dropped or
damaged, turn off the power
immediately, pull out the plug,
and request a repair/inspection.
Must Comply
Failure to comply may cause a fire,
an electric shock or other injuries.
Contact your local distributor for
advice on repairing the device.
Do not disassemble, attempt to
repair or modify this device in
any way.
Disassembly
is prohibited
Failure to comply may cause an
electric shock, short circuit, fire, or
malfunction of the device.
When disconnecting the plug
from a power outlet, be sure to
pull it out by grasping its head
instead of the cord (do not touch
the metal parts). Do not insert or
disconnect the plug with wet or
damp hands.
Removing
the plug
Failure to comply may cause a fire
or electric shock.
If you feel an earthquake, see
lightning or hear thunder, turn
off the power and unplug the
device.
Removing
the plug
Make sure to disconnect the AC
adapter from a power outlet after
charging is completed. Failure to
comply may cause a fire or other
accidents.
After using the device, when the
device is not in use and when
cleaning it, be sure to turn off the
power and remove the plug from
a power outlet.
Removing
the plug
Failure to comply may cause an
electric shock, a short circuit or a
fire.
Always use the dedicated AC
adapter.
Prohibition
Failure to comply may cause an
electric shock, short circuit, fire, or
malfunction of the device.
Do not exceed the rated capacity
of a power outlet or wiring
accessory (do not connect too
many plugs to one outlet).
Overloading of
an electric circuit
is prohibited
Failure to comply may cause the
cable to break, resulting in a fire or
an electric shock.
Straighten out any twists in the cord
before storing.
Do not damage, modify, bundle,
twist or otherwise apply undue
force to the AC adapter.
Careless or
reckless use
is prohibited
Failure to comply may cause a fire,
electric shock or other accidents.
* The free-repair warranty is only
valid in Japan.
Be sure to use AC 100 to 240V.
Make sure the AC adapter is fully
inserted into a power outlet.
Must Comply
Failure to comply may cause
accidents or injuries.
Children shall not play with the device.
Children should obtain the consent of
their guardians before using thedevice
and should only use it under the supervision
of a guardian or a specialist.
Cleaning and user maintenance shall
not be made by children without supervision
or mental capabilities, or lack of
experience and knowledge, unless they
have been given supervision or instruction
concerning use of the appliance by a
personresponsible for their safety.
User
restrictions
56
Safety Precautions
Safety Precautions
ATTENTION
Pressing the device stronger than
necessary or using it intensively on a
single area may damage the skin.
Do not press the device strongly
or use it intensively on a single
area.
Prohibition
Failure to comply may lead to
accidents due to malfunctions of
the device.
Do not allow the device to come
into contact with another
beauty device or electronic
appliance while the power is on.
Do not use with other electronic
products (electric blankets/bed
sheets, heated tables, etc.) at
the same time.
Prohibition
Failure to comply may cause
accidents or injuries.
Do not use while driving.
Prohibition
If the mode is used for continuous
treatments, the head will not
become fully cool.
Have an interval of at least
30 minutes between treatments.
Do not use COOL Mode
continuously.
Prohibition
The main unit is rated JIS-compliant
and a water resistance rating of IPX5,
which means that it is resistant to
low-pressure splashes.
Do not intentionally splash
water on the device as it is not
designed to withstand strong water
pressure from showers or faucets,
nor to be submerged in water.
Failure to comply may cause a
malfunction of the device.
Do not expose the device to
strong water pressure from
showers or faucets nor submerge
it in water.
Prohibition
Stop using the device immediately if
the treatment does not agree with
your skin. If symptoms persist the
following day and beyond, consult
a physician.
Check carefully that your skin is
not showing any abnormalities
during the treatment. Stop using
the device immediately if you
start to feel pain, fatigue or if
you see any skin reaction during
use.
Must Comply
Make only gradual adjustments to
the intensity level. Failure to comply
may cause accidents or injuries.
Use only Level 1 upon the first use
and until you are accustomed to
use.
Even if you do not feel any
stimulation, make only small
adjustments to the intensity
level.
Use the device at an intensity
level that suits you.
Must Comply
ATTENTION
When using on the same area
again, be sure to leave an interval of
24 or more hours between
treatments. Excessive use may
damage the skin. The above
recommendations are guidelines
only; please observe your skin
condition and use the device
accordingly.
Avoid using the device on the
same area for longer than 15
minutes.
Must Comply
You may feel strong irritation or
discomfort due to EMS on your
cheeks or chin.
If you feel strong discomfort,
consult a physician.
If you are currently undergoing
dental treatment or have teeth
fillings, choose a lower intensity
level and apply the device to a
different area.
Must Comply
Failure to comply may cause an
accident.
If a power failure occurs, turn off
the power immediately and
unplug the device from the power
outlet.
Removing
the plug
Failure to comply may cause
damage to your eyes or skin.
Do not look directly into the LED
light. When using the LED light
to treat the upper eyelids, lower
eyelids and outer corners of the
eye, be sure to close your eyes
and keep the electrode head at
least 5 cm away from the skin.
Prohibition

Use in Foreign Countries
87
Names of Components
Use in Foreign Countries
Main Unit
Indicator Panel
N+Button
LEVEL Button
POWER/MODE Button
Adapter Plug Insertion Port
Electrode Head
LED Lamps
Cotton Stopper
(Silver Ring)
AC Adapter
* The design and specifications of the device and accessories are subject to change for improvements
without prior notice.
* The cotton stopper is attached to the electrode head when
purchased.
* Use this stopper to fix a cotton pad to the electrode head.
[Accessories]
Names of Components
WARNING
Failure to comply may cause a fire, electric shock or malfunction of the device.
Use the device at AC100 to 240V only.
Must Comply
Failure to comply may lead to the generation of heat, fire or malfunction of the device.
Be sure to check the plug configuration and the voltage of the power outlet before
use.
Combustion
warning
The plug configuration and voltage may vary depending on the region and the type of accommodation.
Always be sure to check for compatibility before using the device.
For information about plug adapters, consult with a travel agency or a consumer electronics retailer.

109
Before Use
Before Use
Before Use
• Press and hold the POWER/MODE button to
turn on the device.
• Treatment mode can be changed by pressing the
POWER/MODE button during operation.
• Each Mode has 5 intensity levels that can be
adjusted only with the LEVEL button.
• Press and hold the POWER/MODE button to
turn the power off.
How to Read the Indicator Panel
Indicator and Buttons
Charging Indicator
N+ Button
LEVEL Button
POWER/
MODE Button
Level Indicator
5 levels
Mode
Indicator
This product is rechargeable and can be used either without an electric cord or by connecting it to an AC
adapter.
Always use the device after charging when you use device without an electrical cord.
• Before using for the first time, or if you have not used the device for an extended period, fully charge the
battery and make sure that the Charging indicator has turned from flashing to solid, indicating a full
charge.
• Make sure that there is no water on the adapter plug insertion port.
Failure to comply may cause an electric shock, short circuit, fire, or malfunction of the device.
Charging the Battery
1Insert the AC adapter plug into the adapter socket of the main unit.
3After charging is completed, disconnect the AC adapter plug from the
wall outlet, then disconnect the adapter plug from the device.
2Plug the AC adapter into the power outlet.
• Use only the supplied exclusive AC adapter with this device.
• Plug the AC adapter directly into the wall socket. Do not overload an electric circuit.
• When charging begins, the Charge indicator will flash. When charging has completed, the
charging indicator will turn solid.
Estimated Charging Time
Charging time Operating Time
Approx. 3 hours Approx. 30 minutes
* Charging at room temperature of approx. 25°C.
* Operating time when fully charged.
* Operating time may vary depending on the
operating mode, operating level and/or operating
environment.
* Actual charging time will differ depending upon the
remaining battery and the charging environment.

1211
Before Use
Before Use
The charging indicator lights up/flashes from 1 to 3 depending on
the level of charge.
• Temperature sensor
If the temperature of your skin or of the electrode head becomes high, the output will be lowered for safety.
Also, if the temperature rises excessively, the power will be turned off for safety (a buzzer will sound 10 times
to notify you). If this happens, leave the device turned off for approximately 30 minutes.
• Current sensor
Measure the current value that is output and control it so that the current does not exceed the desired value.
• Motion sensor
The motion sensor will detect the movement of the device, and if the electrode head continues to be applied to
the same position, the output will be stopped for safety.
If you move the device slowly, the motion sensor may cause the warmth of the device to be reduced.
• Touch sensor
The touch sensor detects when your skin is in contact with the device and when it is not, and it adjusts the
output accordingly.
When using without an electric cord: light is on
When using while charging: light is off
Charging: Flashing
When charging has completed, the charging indicator will turn solid.
* When using the device without an electric cord, if the battery
level is insufficient, the device will beep 3 times, the charging
indicator will flash 3 times and the power will be turned off.
Charging Indicator
When half of the operating time has passed, you will be notified by a short beep sound.
Refer to page 14 for the operating time of each mode.
Timer Function
The device will sound three short beeps when the mode is complete, and the light indicator for the next mode
will start flashing (standby status means that a function has stopped).
Refer to page 14 for the operating time of each mode.
If you briefly press the MODE button again, the mode of the indicator that is flashing will start.
When treatment in COOL Mode is finished, the device will sound two short beeps and the power will be turned
off automatically instead of the device going into standby status. This operation only applies to COOL Mode.
Standby status (available only when the DWHP or the NEB course is selected)
Safety Functions
(Flashing)
<Charging> <Fully charged>
(Solid lighting)
Use only Level 1 upon the first use and until you are accustomed to use.
5 levels are available; choose the level you feel more comfortable with.
Each time the LEVEL button is pressed, the level will change.
Level Indicator
When you press and hold the POWER/MODE button to turn ON the device, the treatment mode will be selected
in the following order: CLEAN →DWHP →EMS UP →EYE CARE →COOL →CLEAN (repeat)
CLEAN →NEB →EMS UP →EYE CARE →COOL →CLEAN (repeat)
Mode Indicator
CLEAN EYE
CARE
EMS
UP COOL
DWHP
CLEAN
DAILY CARE
EYE
CARE
EMS
UP COOL
NEB
ModeMode IndicatorModeMode Indicator
ModeMode Indicator
・DWHP course
The mode can be switched by briefly pressing the N+ button during the DWHP course, the treatment mode will be
selected in the following order:
・NEB course
Turn on the power and press and hold the N+ Button
while the DWHP or NEB course is running, to switch to
DAILY CARE Mode.
You cannot switch to DAILY CARE Mode when the
device is in standby status of DWHP or NEB course.
・DAILY CARE

1413
Before Use
Before Use
About Treatment Modes
Pre-testing on Skin
* When using the device or a cosmetic product for the first time, always test for compatibility.
1Clean your skin.
• Wash the inner side of your arm with soap and water, then wipe dry with a towel.
• Remove all metal accessories (watches, necklaces, rings, earrings, etc.) when using the device.
Failure to comply may cause accidents or injuries.
2Apply water or skincare product (gel or lotion) on the inner side of your
arm and apply DWHP Mode of DWHP course treatment for 3 minutes.
• Do not wet or rub the pre-testing area.
If you experience any skin abnormality (redness or burning sensation) at the pre-testing
area within 24 hours, stop using the device.
ATTENTION
• Be sure to perform a pre-test in order to prevent skin problems from occurring.
• If a rash, reddening, itchiness, stinging sensation or other abnormalities occur at
the pre-testing area, immediately stop the pre-test and wash the area.
• Do not use the device if any skin abnormalities are perceived.
The device remembers the level being used when the last treatment modeended, and returns to the same
level settings the next time it is switched on.
Personal Memory Function
If the device is not operated within approx. 5 minutes of going into standby status, it will be turned off
automatically after 2 short beeps. When treatment in COOL Mode is finished, the device will sound two short
beeps for both the DWHP and the NEB courses, and then the power will turn off automatically.
When using DAILY CARE, the device will sound two short beeps and the power will turn off automatically when
the mode ends.
Auto-off (Automatic Power-off)
This product has a water resistance rating of IPX5 (JIS-compliant).
* It is therefore not completely water-resistant. Do not submerge the device in water or hold it under running water.
Water-resistance
This function detects the ease of electric conductivity of your skin and controls the treatment accordingly to
provide the appropriate output.
Resistance Factor Control
* The AC adapter is not waterproof.
• Be sure to move the device on your skin during use (except in EYE CARE Mode and COOL Mode).
• If the COOL Mode is used for continuous treatments, the head will not become fully cool. Have an interval
of at least 30 minutes between treatments.
* Use the device after washing your face and performing your skin care routine using a skin lotion or a similar product.
※Cell Energy Regeneration Technology.
DWHP 5 levels
With or
without cotton
With or
without cotton
With or
without cotton
With or
without cotton
With or
without cotton
With or
without cotton
With or
without cotton
5 levels
EMS UP
5 levels
EYE CARE
5 times
a week
5 levels
DAILY
Everyday
COOL Without cotton
2 to 3 times
a week
5 times
a week
2 to 3 times
a week
• CERTEC • RF 5 levels
CLEAN With cotton
NEB 5 levels
5 levels
EMS UP
5 levels
EYE CARE
COOL Without cotton
Approx.
3 minutes
Approx.
3 minutes
Approx.
3 minutes
Approx.
3 minutes
Approx.
3 minutes
Approx.
3 minutes
Approx.
3 minutes
Approx.
6 minutes
Approx.
3 minutes
Approx.
3 minutes
Approx.
3 minutes
5 levels
CLEAN With cotton
Everyday
use is
possible
Everyday
use is
possible
• Ion derivation
• CERTEC • DYHP
• DWHP • LED
(Red / Orange)
• CERTEC • DYHP
• LED (Red / Orange)
• LED (Red )
• CERTEC • RF
• Ion derivation • LED (Red )
• CERTEC • RF
• EMS • LED (Red )
• CERTEC • EMS
• RF • Ion derivation
• LED (Red )
• CERTEC • RF
• EMS • LED (Red )
• LED (Red )
• EMS for the eye area
• CERTEC
• RF
• LED (Red )
• EMS for the eye area
• CERTEC
• RF
Mode Functions Cotton Operating
time FrequencyLevel
• Micro-currents
• COOL
• LED (Blue)
• Micro-currents
• COOL
• LED (Blue)
DWHP course
NEB course
DAILY CARE
N/A
N/A
※
※
※
※
※
※
※
※
※

15 16
How to Use
How to Use
How to attach a cotton pad to the electrode head
1Remove the cotton stopper
from the electrode head.
2Place a cotton pad on top of the electrode
head and press the cotton stopper down over
the cotton pad.
* If the cotton stopper does not fit properly on the electrode head, please use a larger and thinner
cotton pad. Because thick cotton pads are difficult to fix in place, split them in half before use.
* If the cotton pad is too thick, the thermal action of the CERTEC and RF treatment may be adversely
affected and you will feel less heat.
3Apply your regular skin lotion or gel onto the cotton pad.
* Make sure the skin lotion or gel coats the entire surface of the electrode head.
* If using a watery (low-viscosity) skin lotion, the feeling of warmth may decrease.
Recommended skin lotions: high-viscosity skin lotions
* Be sure to thoroughly wipe off any lotion or gel left on the device with a dry cloth after each use.
How to Use
1Remove makeup and gently cleanse your face.
* Make sure to remove makeup before using the device on your face. If you use the device over
makeup, the foundation may cause dark staining of the skin.
• Remove oil and dirt from your skin so that it is in a clean condition prior to treatment.
• If using your regular skin lotion, be sure that it is water soluble. Do not use oil-based or scrub-
type skin lotions, as these may cause to malfunction of the device or skin problems.
3Press and hold the POWER/MODE button to turn on the power.
When using the DWHP course for treatment, select the mode and
level and do not attempt to modify them.
When using the NEB course for treatment, press the N+ button briefly,
and then select the mode and level.
When using DAILY CARE for treatment, press and hold the N+ button,
and then select the mode and level.
You cannot switch between the DWHP course and the NEB course when
the device is in standby status.
2Attach a cotton pad if necessary and apply skin lotion onto it.
Treatment Method
After treatment, condition your skin as necessary.
• After finishing the treatment, apply lotion and other products throughly into the skin, and complete
with your regular basic skin-care items.
* After each use, refer to ‘After Treatment’ (page 20) and remove the remaining sebum, serum and
other particles stuck to the device.
Failing to remove them may cause a malfunction of the device or skin problems.
6
4Gently apply the electrode head to your skin and move the head over
the area being treated. Refer to pages 17-19 for more details.
• At the end of each mode, standby status is activated (for about 5 minutes), and when the
POWER/MODE button is pressed the next mode starts.
* During use, make sure the electrode head is firmly touching the skin.
5Press and hold the POWER/MODE buttonto turn off the power.
* When treatment in COOL Mode has finished, the power will turn off automatically.
* Be sure to replace the cotton pad used in CLEAN Mode.
How to Use (General Instructions)
Precautions
Be sure to move the device on your skin during use. Do not stop on one spot as this may cause burns.
The perceived warmth of the CERTEC and RF changes depending on the type of skin-care
product used and the skin’s condition at the time of treatment.
Do not use any of the modes on your upper eyelid (exposure to LED light is possible).
Use only EYE CARE Mode or COOL Mode on your lower eyelids or on the outer corners of
your eyes (exposure to LED light is possible).
*
The LED light can be used over the upper eyelids, lower eyelids and outer corners of the eye. Close
Make sure that the cosmetics you use are water-soluble.
Do not use oil-based or scrub-based products.
Doing so may cause the product to malfunction or lead to skin problems.
your eyes and hold the device at least 5 cm away from the eyes. Do not look directly into the LED light.
Do not look directly into the LED light.
The recommended ambient temperature is 15° C to 30°C.
Remove all metal accessories (watches, necklaces, rings, earrings, etc.) when using the device.
Failure to comply may cause accidents or injuries.
Please carefully clean the parts of the device that come into contact with the skin every time
you use it and keep the device clean at all times.
Failure to comply may cause skin problems.
※Cell Energy Regeneration Technology.
※
※

17 18
How to Use
How to Use
How to use the device on your skin
<CLEAN, DWHP and NEB Mode>
Common to both the DWHP and NEB courses
Areas you should not treat
Move the electrode head over the skin in the direction of the arrows shown below.
Areas that can only be treated with LED light
(Refer to page 19 for how to use)
* Close your eyes and hold the device
at least 5 cm away from the skin.
Recommended speed for moving the device: 2 cm/second
Left side
One beep
Standby
Approx.
3 minutes
Three short beeps
Approx.
90 seconds Approx.
90 seconds
Right side
Areas you should not treat: Upper eyelids
Areas you should not treat
<EYE CARE Mode>
Press the electrode head repeatedly on your face from the inner to the outer corners of the eyes as if stamping
on the skin (Press →Release →Move the electrode head in the direction of arrows shown below).
* Be sure not to press down continuously on the skin for longer than 3 seconds.
* Do not move the device while pressing.
If you are concerned about dryness around your eyes,
we recommend applying EYE CARE Mode for approx.
2 minutes for each side (4 minutes in total).
* Lower eyelid and the outer corners of the eyes
can be treated.
Estimated pressing time: approx. 3 seconds for each point
Press and move the device in a circular,
massaging motion as indicated by the arrows.
<EMS UP Mode>
Areas that can only be treated with LED light
(Refer to page 19 for how to use)
* Close your eyes and hold the device
at least 5 cm away from the skin.
If you feel an unpleasant tingling on your skin, reduce the intensity level or move to another area.
You could also moisten the skin with water, lotion or gel before using the device.
Failure to comply may cause skin damage.
• Do not let the electrode head to come in contact with your upper eyelids, lower eyelids, or the outer corners of your eyes.
• Please reapply skin-care products or water during treatment to ensure there is always some liquid between
the electrode head and the skin. If there is an insufficient amount of skin-care products or water, the
stimulation will weaken, causing skin problems.
• If the temperature feels too hot, move the head more quickly. You can also use a cotton pad to lower the
temperature.
• Use the device in a position in which the entire surface of the electrode head comes in contact with your skin.
• Be sure to move the device over the skin as you use it.
Placing the device continuously on the same area may cause burns or low-temperature injuries.
• Do not put the electrode head on the upper eyelids, lower eyelids or the outer corners of the eyes.
Left side
One beep
Standby
Approx.
3 minutes
Three short beeps
Approx.
90 seconds Approx.
90 seconds
Right side
Left side
One beep
Standby
Approx.
3 minutes
Three short beeps
Approx.
90 seconds Approx.
90 seconds
Right side

19 20
After Treatment
After Treatment
1Ensure the power is off and unplug the AC adapter from the main unit.
2To clean the treatment head and cotton stopper, wipe with a damp and
well-wrung cloth to remove any dirt. Wash the cotton stopper with
water.
• Remove the cotton stopper from the main unit and wash it with water before wiping it dry.
• Do not wipe the device with solvents such as alcohol, thinner, benzene, nail polish remover,
kerosene, chemicals or polishing powder.
Failure to comply may cause damage to the surface of the device.
• After using the device, thoroughly wipe off any remaining lotion and gel, ensuring none is left on the
device. Failure to comply may cause a malfunction of the device.
3Wipe off any dirt from areas other than the electrode head and cotton
stopper with a dry cloth.
How to clean and store the product
Storage
When the device is not in use for a long period of time, turn off the power and disconnect the AC adapter
from the main unit and wall socket before storing.
Avoid storing the device near a heater or in a bathroom or other high-temperature/high-humidity
locations. Also, avoid unstable locations or places where there is exposure to direct sunlight.
Keep the device out of the reach of children.
Cleaning and user maintenance shall not be made by children without supervision.
Maintenance and Inspections
When you have not used the device for a long period of time, check to see that it is functioning normally
before re-starting use. Failure to comply may lead to an accident or malfunction of the device.
If the device is malfunctioning, go to ‘Checklist for Possible Problems’ (pages 21-22) and attempt to identify
the problem before arranging to have the device repaired. If the problem persists, inquire the Global After
Service (https://www.ya-man.co.jp/en/support/repair/) or your local distributor.
If the device malfunctions, appears damaged or needs service, please contact your local distributor.
* Please carefully clean the parts of the device that come into contact with the skin every time you use it and
keep the device clean at all times.
Failure to comply may cause skin problems.
<COOL Mode>
<DAILY CARE>
How to treat the upper eyelids,
lower eyelids and outer corners
of the eye using the LED.
Remove the cotton pad, close your eyes and
hold the device at least 5 cm away
from the skin to use the LED light.
Power-off
Left side
One beep
Beeping sound
Approx.
90 seconds Approx.
90 seconds
Right side
Press the electrode head repeatedly on your face
as if stamping on the skin (Press →Release →
Move the electrode head).
Approx.
3 minutes
Power-off
Left side
One beep
Beeping sound
Approx. Approx.
3 minutes3 minutes
Right side
Approx.
6 minutes
Areas you should not treat
Press and move the device in a circular,
massaging motion as indicated by the arrows.
Areas that can only be treated with LED light
(See above for usage)
* Close your eyes and hold the device
at least 5 cm away from the skin.
Common to both the DWHP and NEB courses
• Do not let the electrode head to come in contact
with your upper eyelids, lower eyelids, or the outer
corners of your eyes.

2221
Troubleshooting
Troubleshooting
Problems Possible Causes and Solutions
EMS causes uncomfortable
tingling or pain.
→Lower the intensity with the Level button.
→The entire surface of the electrode head is not touching skin. Use a
mirror to check that the entire surface of the electrode head is
touching the skin.
The EMS feels weak or I
cannot feel it at all.
→Increase the intensity with the Level button.
→The skin lacks moisture or is dry. Moisturize your skin with lotion or gel.
→
→
The skin lacks moisture or is dry. Moisturize your skin with lotion or gel.
→
You are not applying the device along muscles. Verify that you are
applying the device along muscles with the help of a mirror (page 18).
→There is an insufficient charge. Charge the battery (page 9).
Alternatively, use the device by connecting it to an AC adapter.
The treatment temperature
is too high (except in COOL
Mode).
→You have been using the electrode head on your skin for a long
time. Be sure to move the electrode head over your skin when using
the device, except in COOL Mode.
The electrode head moves to slow. Move the device a little quicker.
→It may feel very hot depending on the skin-care product used or the
presence/absence of a cotton pad. If it feels hot, try the following:
• Use a cotton pad, or if you are already using a cotton pad,
use the device without the cotton pad.
• Change the skin-care product used.
You cannot feel CERTEC
and RF warmth.
→The device is in standby or auto-off status (page 12 - 13). Turn the
power off and then on again, or activate the modes by pressing
the POWER/MODE button.
→The electrode head moves fast. Please move the device a little
slower.
I can’t select the level. →There is no intensity level selection available in COOL Mode.
The device cannot be
operated. →Press the LEVEL button and the POWER/MODE button at the
same time (reset)
COOL Mode is not very
cool.
→Cool Mode is being used continuously. Turn off the device and
wait at least 30 minutes before using it again.
→
The device is being used in an environment where the temperature
exceeds the recommended range. Use the device within a
temperature range of 15 to 30°C.
Troubleshooting
Checklist for Possible Problems
The device does not turn on.
→Press and hold the POWER/MODE button to turn the device on
(page 16).
→There is an insufficient charge. Charge the battery (page 9) or
use the device with an electrical cord.
The device shuts off.
→
If you hear 3 long beeps before it shuts off, the battery is
insufficiently charged.
Charge the battery (page 9). Alternatively, use the device by
connecting it to an AC adapter.
→
If the device is left at low temperature for a long time, it may turn
itself off. Leave it at the recommended ambient temperature of 15° C
to 30° C for a while, check the charging status and try again.
Device does not start
charging (charge indicator
does not flash).
→The adapter is not plugged into the device. Plug adapter into the
device (page 9).
→Plug the AC adapter into the wall socket and press the LEVEL
button and POWER/MODE buttons at the same time while the
power is off (reset).
The device is too warm. →The device is being used continuously. Turn off the device and wait
at least 30 minutes before using it again.
The device only operates for
a few minutes even after
charging.
→There is an insufficient charge. Charge the battery (page 9).
Alternatively, use the device by connecting it to an AC adapter.
→You may have pressed the wrong button. Press and hold the
POWER/MODE button to turn the device on again (page 16).
→The device is in standby or auto-off status (page 12 - 13).
Press the POWER / MODE button.
→If the device is used at low temperature, the power may switch off
immediately. Use the device while charging it.
→
The expected life of the rechargeable battery (approximate number
of charging times: 300 times) has expired. Inquire the Global After
Service (https://www.ya-man.co.jp/en/support/repair/) or your
local distributor.
* Do not try to replace the battery by yourself as this may cause a
malfunction of the device.
Problems Possible Causes and Solutions
※Cell Energy Regeneration Technology.
※

23 24
Rechargeable Battery
• The rechargeable battery is a consumable item (It is not covered by warranty).
• If the operation time after charging has become extremely short, it could be the end of the battery’s life.
The battery can be charged approx. 300 times.
• Consult the Global After Service (https://www.ya-man.co.jp/en/support/repair/) or your local distributor
for a battery replacement.
Disposing of the device
Follow your local government rules for proper disposal of this product.
This product uses a lithium-ion storage battery. For information on the disposal of
batteries, see Disposing of the Battery and Removing the Battery below.
The lithium-ion battery used in this product is a valuable recyclable resource.
• The battery must be removed from the appliance before it is disposed.
• Be sure to turn off the power and disconnect the AC adapter before removing the batteries.
• Use a screwdriver to remove the battery. Be careful not to injure yourself.
• When removing the battery, be careful not to damage it on a hard object.
* Failure to comply may cause the generation of heat or a fire.
• Follow your local government rules for proper disposal or recycling of this product.
<Disposing of the Battery>
After-sales Service
After-sales Service
Frequently Asked Questions
Q A
How much lotion or gel
should I use each time?
This device is designed to achieve better results with sufficient use
of lotions and/or gel.
As a general guide, when using cotton pads, be sure the entire
electrode head is moistened with face lotion.
Use about two pearl-sized drops of gel.
We recommend adding more lotion or gel if you feel there is not
enough.
Can I use this product in
the bath?
Also, can I wash the main
unit with water?
The device cannot be used in the bath (bathroom, tub).
The main unit is rated JIS-compliant IPX5, which means that it is
resistant to splashes but cannot withstand strong jets from
showers and faucets, nor can it be submerged in water. The main
unit cannot be washed with water as this may cause a malfunction
of the device. Only the cotton stopper can be washed with water.
Why do I not feel the
warmth of CERTEC and RF
when using CLEAN, NEB or
EYE CARE Modes?
Move the electrode head more slowly or press harder against the
skin surface.
It is also possible that there is insufficient moisture on the cotton
pad. Add more lotion or gel.
Why can’t I see any dirt on
the cotton pad?
Dirt is removed even though it may not be visible on the cotton.
The amount of visible dirt on the cotton can vary among
individuals.
Can I use it over a facial
mask?
It can be used over a facial mask too (except in CLEAN Mode).
We recommend using a facial mask in DWHP Mode, NEB Mode
and DAILY CARE Mode.
Troubleshooting
Correct Disposal of this product
This marking indicates that this product should not be disposed with other household wastes
throughout the UK and EU. To prevent possible harm to the environment or human health
from uncontrolled waste disposal, recycle it responsibly to promote the sustainable reuse of
material resources. To return your used device, please use the return and collection systems or
contact the retailer where the product was purchased. They can take this product for
environmental safe recycling.
※Cell Energy Regeneration Technology.
※

25 26
Rated Power Supply
Power Consumption
Battery
Charging time
Outer Dimensions
Weight
Materials
Country of origin
Accessories
Recommended Environmental
Temperature
Water resistance class:
DC9V 2.0A
Approx. 18 W
Lithium-ion battery
Approx. 3 hours (may vary depending on the charging environment)
Main unit (with cotton stopper): approx. W52 x D62 x H203 (mm)
Main unit (with cotton stopper): approx. 312 g
Main unit: ABS resin Indicator panel: Polycarbonate and acrylic resin
Electrode head: PET resin and stainless steel
Main unit’s metallic parts: ABS resin (indium vapor deposition)
Japan
Cotton stopper, AC adapter
15° C to 30° C
JIS-compliant IPX5 class protection
Product Specifications
<Removing the Battery>
Screw
Connector
Cable
Rubber plug
①Remove the outer cover using a flat-tipped
object.
* It is fixed with strongly adhesive tape
②Remove the 6 rubber stoppers and screws on
the inner cover.
③Remove the inner cover and disconnect the
battery cable from the connector.
④Remove the battery using a flat object like a
ruler.
* It is fixed with strongly adhesive tape
Refer to figures ①to ④below to remove the battery.
Pay attention not to damage the battery
Inner cover
Outer cover
Do not cut the cable.
Battery
Operation Steps
This figure is intended to be used for disposing of the product, not repairing it.
CAUTION: Disassembling the device by yourself may cause a failure.
Warranty
If you have purchased from www.global.ya-man.com,
Warranty: Please register your device at https://global.ya-man.com/apps/warranty/registrants/new
If you have purchased from local distributor,
Warranty: Please contact your local distributor
User’s manual (WEB)
User's manual is also available at following address:
https://www.ya-man.co.jp/en/support/documents/
Table of contents
Other YAMAN Personal Care Product manuals

YAMAN
YAMAN M22 User manual

YAMAN
YAMAN Waterpik WF-03 User manual

YAMAN
YAMAN S12 User manual

YAMAN
YAMAN HRF-15 User manual

YAMAN
YAMAN Photo PLUS Shiny User manual

YAMAN
YAMAN GR-16 User manual

YAMAN
YAMAN Medi Lift PLUS User manual

YAMAN
YAMAN Bloom EYE User manual

YAMAN
YAMAN Medi Lift Eye User manual

YAMAN
YAMAN Bloom 6 User manual