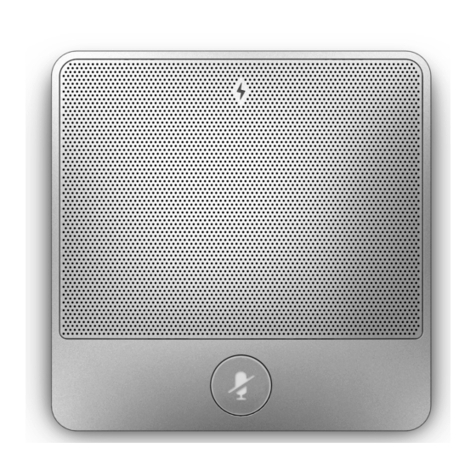
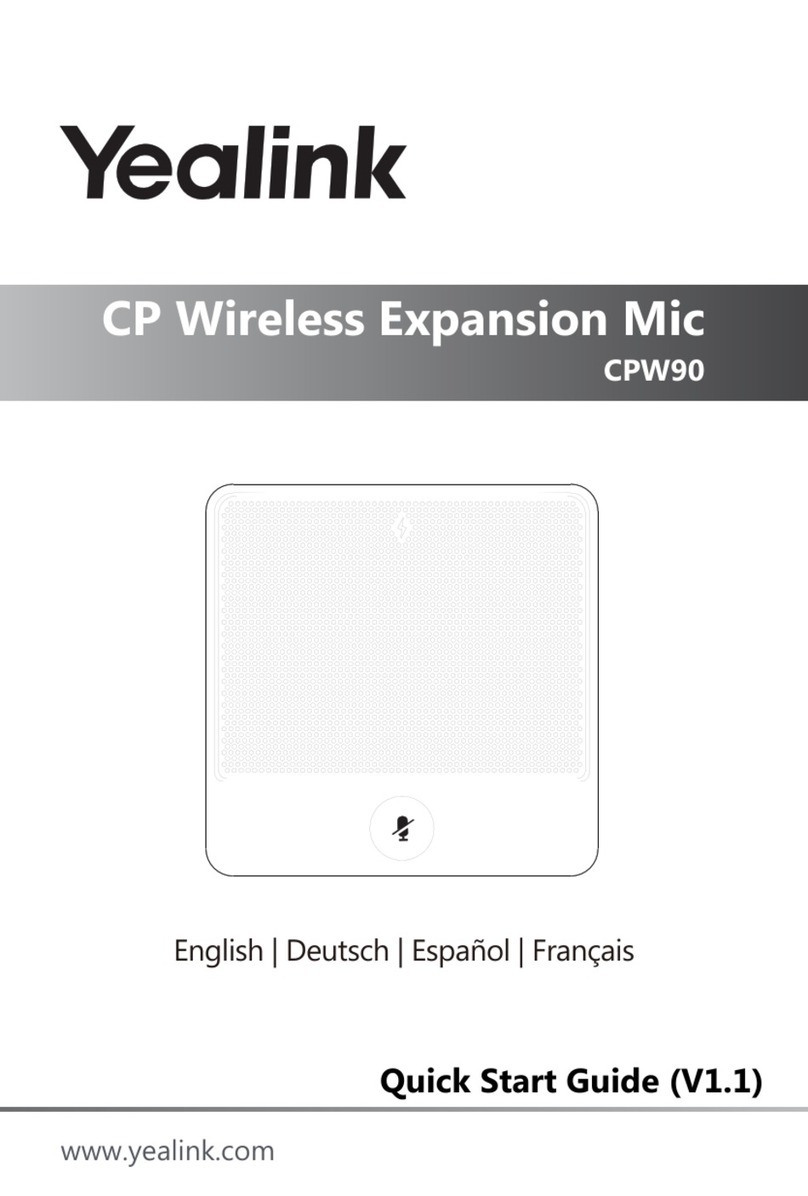
Yealink CPW65-DECT User manual

www.yealink.com
Quick Start Guide (V1.0)
CP Wireless Expansion Mic
CPW65-DECT

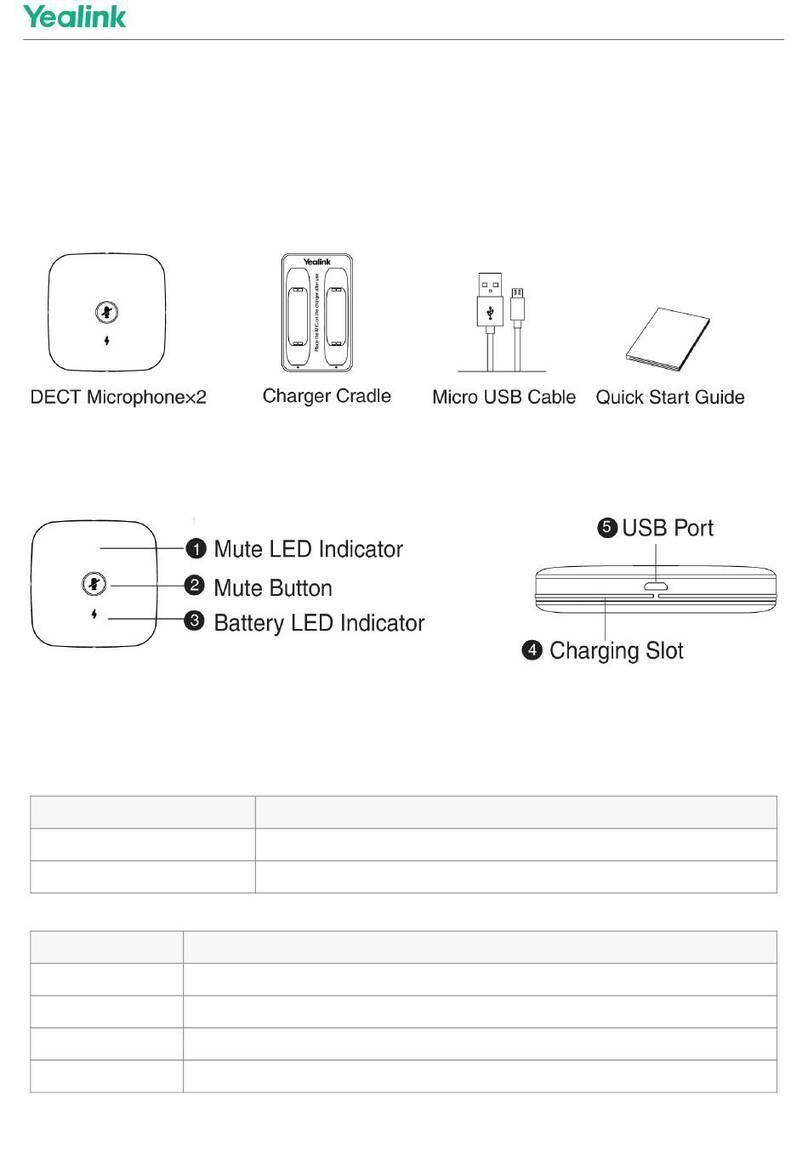
Mute LED Indicator
Packaging Contents
Hardware Overview
The following items are included in your package.
Charging the CPW65
Battery LED Indicator
Mute Button
1
1
2
3
Charging Slot
Charger Cradle 1.8m
Micro USB Cable
Quick Start Guide
DECT
Microphone ×2
Put the CPW65 on the charger cradle. And connect to the power source.
4
USB Port
5
Micro USB Cable
2
Method 1:
Method 2:
L
I
S
WDD60
1
Power Adapter
Plug the provided USB cable into the
USB port on the CPW65, and connect to
the power source.
Micro USB Cable
Type-A to Type-A
Adapter
E
N
G
L
I
S
H
*When connecting WDD60 to UVC84, please use the
Type-A to Type-A Adapter
to
prevent overheating.

Bind/Unbind the CPW65
There are three indicators on the CPW65. The indicators display the CPW65
work status.
LED Instruction
When charging, the battery LED indicator on the CPW65 glows red. When
it is fully charged, the battery LED indicator on the CPW65 will glow green.
The CPW65 starts up automatically when charging. Or you can long tap the
Mute button on the CPW65 for 3 seconds to turn it on.
LED indicator on the
Charger Cradle
:
The CPW65 is not being charged.
Off
Solid white The CPW65 is being charged.
LED Status Description
Note: If it is the first time you use the CPW65, you need to fully charge
it for normal use.
If the
CPW65
is not in use, we still recommend
charging it even when the battery is full.
L
I
S
H
E
N
G
L
I
S
H
2
CPW65 supports binding with UVC86/UVC84/AVHub. The method is as follows:
1. Insert WDD60 into the USB port of UVC86/UVC84/AVHub.
2. Open theYealink RoomConnect software, click the UVC86/UVC84/AVHub
card, and in Device Status > Wireless expansion microphone, click Bind.
3. Put the CPW65 on the charger cradle and long press the Mute Button for 5
seconds to enter the binding mode, and the Mute LED indicator flashes yellow.
After the binding is successful, the Yealink RoomConnect software will display
that CPW65 wireless is connected.
- After the binding is successful, click Check > Device Settings > Unbind to
unbind the wireless microphone.
- Click Check > Device Settings > Add Wireless Microphone to add another
wireless microphone again.
- Click Check > Device Settings > find, and you can see the
Mute LED
indicator on corresponding CPW65
flashes red and green alternately.
Currently, UVC86/UVC84/AVHub supports adding up to 2 (1 pair) CPW65
wireless microphones.

Off
Fast flashing yellow
Slowly flashing yellow
The CPW65 is in the binding mode.
The CPW65 has registered with the host,
but the CPW65 is out of range.
The CPW65 has registered with the host,
but the CP965 is turned off.
The CPW65 is idle.
Mute LED indicator on the CPW65:
The host is searching for the CPW65
which has registered with it.
Flashing red and green
alternately
LED Status
Solid red
Solid green
Fast flashing red The system is receiving an incoming call.
Description
The CPW65 is muted.
The CPW65 is unmuted in meeting.
Battery LED indicator on the CPW65:
The CPW65 is turned on.
Solid green for one second
and then off
Solid green
Fast flashing red 3 times
and then off
Solid red The CPW65 is being charged.
The CPW65 is fully charged.
The battery capacity is too low to turn on
the CPW65.
Solid green for 3 seconds
and then off
LED Status Description
The CPW65 is idle.
E
N
G
L
I
S
H
3

During the meeting, you can tap
the Mute button on the CPW65
to mute or
unmute the CPW65.
Muting or Unmuting the CPW65
4
Placing the CPW65
If you tap the mute button and the battery
LED indicator on the CPW65 is still off, it
means the CPW65 is turned off.
Off
Slowly flashing red The battery capacity is less than 10%.
LED Status Description
r=3m
CPW65
The CPW65 supports 360-degree audio pickup at a radius of up to 3 meters.
You can place the CPW65 on a conference table.
Do the following to ensure optimal voice quality:
The CPW65 should be less than 20 meters from the binded host, and
there are no obstacles between them.
Place the CPW65 on a stable surface and keep it away from obstacles,
so that they can achieve the best performance.
L
I
S
H
E
N
G
L
I
S
H

静音LED指示灯
包装清单
硬件介绍
产品包中包含以下配件。
充电
电源LED指示灯
静音键
1
1
2
3
充电触点
充电底座 1.8m USB线
快速入门指南
DECT麦克风 ×2
将CPW65放置充电底座上,然后通过USB线连接电源。
4
USB 接口
5
USB线
方法1:
方法2:
L
I
S
WDD60
5
电源适配器
直接用USB线连接CPW65的USB
口然后连接电源进行充电。
USB线
Type-A转Type-A
转换头
*WDD60与UVC84连接时请使用Type-A转Type-A转换头,防止过热。
简
体
中
文

绑定/解绑无线麦
CPW65支持与UVC86/UVC84/AVHub配对使用,方法如下:
1.将WDD60插入UVC86/UVC84/AVHub的USB接口。
2.打开Yealink RoomConnect 软件,点击UVC86/UVC84/AVHub卡片,在 设备信息 >
无线拓展麦,点击 绑定。
3.将CPW65放在充电底座上,长按静音键5秒进入配对模式,此时静音指示灯黄色闪
烁。
配对成功后,Yealink RoomConnect 软件将显示CPW65无线已连接。
- 绑定成功后,点击 查看 > 设备设置 > 解绑,可以解绑无线麦。
- 点击 查看 > 设备设置 > 添加无线麦克风,可以再次添加其他无线麦。
目前UVC86/UVC84/AVHub最多支持添加2个(1对)CPW65无线麦。
充电过程中CPW65的电源LED指示灯显示红色,当电充满时,电源LED指示灯
变为绿色。充电时CPW65将自动开机。 你也可以长按CPW65上的静音键3秒进
行开机。
说明:如果你是初次使用CPW65,你需要先将电量充满再正常使用。如果你暂时
不使用CPW65,我们建议将其放在充电座上充电。
CPW65上共有3个指示灯,显示CPW65的工作状态。
充电底座上的LED指示灯:
CPW65没有充电。
熄灭
白灯常亮 CPW65充电中。
指示灯状态 说明
LED指示灯介绍
6
简
体
中
文

熄灭
黄灯快闪
黄灯慢闪
CPW65进入绑定状态。
CPW65已注册到主机,但 CPW65 超出范围。
CPW65已注册到主机,但是主机已经关闭。
CPW65在待机状态。
CPW65上的静音LED指示灯:
已配对主机正在寻找CPW65.
红灯和绿灯交替闪烁
指示灯状态
红灯常亮
绿灯常亮
红灯快闪 来电。
说明
CPW65静音中。
CPW65在会议中静音。
CPW65上的电源LED指示灯:
CPW65开启。
绿灯亮1秒然后熄灭。
绿灯常亮
红灯快闪三次然后熄灭。
红灯常亮 CPW65充电中。
CPW65已充满电。
CPW65电量太低无法开机。
绿灯亮3秒然后熄灭。
指示灯状态 说明
CPW65待机中。
红灯慢闪
熄灭
CPW65电量低于10%。
如果轻按静音按键,CPW65上的电源LED
指示灯仍然是熄灭的,表示CPW65已关机。
7
简
体
中
文

会议期间,你可以按 CPW65 上的静音键进行静音或取消 CPW65 的静音。
CPW65静音和取消静音
放置CPW65
r=3m
CPW65
CPW65支持360度拾音,半径可达3米。 你可以将 CPW65 放在会议桌上。
执行以下操作以确保最佳语音质量:
CPW65与绑定主机的距离应小于20米,并且他们之间没有障碍物。
将 CPW65 放在稳定的表面上并远离障碍物,使他们能够达到最佳性能。
L
I
S
H
E
N
G
L
8
简
体
中
文

Verpackungsinhalt
Hardwareübersicht
In Ihrem Paket sind die folgenden Teile enthalten. Sollte etwas fehlen,wenden Sie sich
bitte an Ihren Systemadministrator.Bitte verwenden Sie
Typ A - Typ A-Adapter
, wenn Sie
WDD60 und UVC84 anschließen, um eine Überhitzung zu vermeiden
Laden des CPW65
Akku-LED-Anzeige
Stummschalttaste
Stummschalt-LED-Anzeige
1
1
2
3
Ladestation 1.8m
Micro-USB-Kabel
Kurzanleitung
DECT-Mikrofon×2
Ladesteckplatz
4
USB-Anschluss
5
D
E
U
T
S
C
H
WDD60
Power Adapter Typ A - Typ A-Adapter
Legen Sie das CPW65 auf die Ladestation. Schließen Sie es an die Stromversorgung an.
2
Method 1:
Method 2:
Stecken Sie das mitgelieferte
USB-Kabel in den USB-Anschluss des
CPW65 und schließen Sie es an die
Stromversorgung an.
1.8m
Micro-USB-Kabel
1.8m
Micro-USB-Kabel
9

Das CPW65 verknüpfen/trennen
Wenn das CPW65 nicht in Gebrauch ist, empfehlen wir Ihnen
trotzdem, es zu laden, auch wenn der Akku vollständig aufgeladen ist.
Auf dem CPW65 gibt es drei Anzeigen. Die Anzeigen zeigen den
Arbeitsstatus des CPW65 an.
LED-Anzeige
LED-Anzeige an der Ladestation:
Das CPW65 wird nicht aufgeladen.
Aus
Dauerhaft weiß Das CPW65 wird gerade aufgeladen.
LED-Status Beschreibung
Notiz: Wenn Sie das CPW65 zum ersten Mal verwenden, müssen Sie es
für eine normale Nutzung vollständig aufladen.
D
E
U
T
S
C
H
Das CPW65 unterstützt die Verknüpfung mit der UVC86/UVC84/dem AVHub. Gehen Sie
folgendermaßen vor:
1. Stecken Sie das WDD60 in den USB-Anschluss der UVC86/UVC84/des AVHub.
2. Öffnen Sie die Yealink RoomConnect-Software, klicken Sie auf die
UVC86/UVC84/AVHub-Karte und klicken Sie unter „Device Status > Wireless expansion
microphone“ (Gerätestatus > Kabelloses Erweiterungsmikrofon) auf „Bind“ (Verknüpfen).
3. Legen Sie das CPW65 auf die Ladestation und drücken Sie die Stummschalttaste 5
Sekunden lang, um in den Verknüpfungsmodus zu gelangen; die Stummschalt-LED-An-
zeige blinkt gelb.
Nachdem die Verknüpfung erfolgreich hergestellt wurde, zeigt die Yealink RoomConnect
Software an, dass das CPW65 kabellos verbunden ist.
- Klicken Sie nach erfolgreicher Verknüpfung auf „Check > Device Settings > Unbind“
(Prüfen > Geräteeinstellungen > Trennen), um die Verknüpfung des kabelllosen Mikrofons
aufzuheben.
- Klicken Sie auf „Check > Device Settings > Add Wireless Microphone“ (Prüfen >
Geräteeinstellungen > Kabelloses Mikrofon hinzufügen), um ein anderes kabelloses
Mikrofon hinzuzufügen.
- Klicken Sie auf „Check > Device Settings > Find“ (Prüfen > Geräteeinstellungen >
Suchen). Sie können sehen, dass die Stummschalt-LED-Anzeige am entsprechenden
CPW65 abwechselnd rot und grün blinkt.
Derzeit unterstützen UVC86/UVC84/AVHub das Hinzufügen von bis zu 2 (1 Paar)
kabellosen CPW65-Mikrofonen.
Während des Ladevorgangs leuchtet die Akku-LED-Anzeige am CPW65 rot. Ist das Gerät
vollständig geladen, leuchtet die Akku-LED-Anzeige am CPW65 grün.
Das CPW65 schaltet sich beim Laden automatisch ein. Sie können auch 3 Sekunden lang
auf die Stumm-Taste am kabellosen CPW65-Mikrofon drücken, um es einzuschalten.
10

Aus
Blinkt schnell gelb
Blinkt langsam gelb
Das CPW65 befindet sich im Registriermodus.
Das CPW65 hat sich am Telefon registriert,
befindet sich aber außerhalb der Reichweite.
Das CPW65 hat sich am Telefon registriert,
aber das CP965 ist ausgeschaltet.
Das CPW65 ist im Standby.
Stummschalt-LED-Anzeige am CPW65:
Das Telefon sucht nach dem CPW65, das
sich an ihm registriert hat.
Abwechselnd rot und
grün blinkend
LED-Status
Dauerhaft rot
Dauerhaft grün
Blinkt schnell rot Das Telefon empfängt einen eingehenden
Anruf.
Beschreibung
Das Telefon ist stummgeschaltet.
Das Telefon gelangt zum Vorwahlbildschirm.
Das Telefon befindet sich in einem Anruf
und ist nicht stumm geschaltet.
Akku-LED-Anzeige am CPW65:
Das CPW65 ist eingeschaltet.
Leuchtet eine Sekunde lang
grün und ist dann aus
Dauerhaft grün
Blinkt 3 Mal schnell rot und
dann aus
Dauerhaft rot Das CPW65 wird gerade aufgeladen.
Das CPW65 ist vollständig aufgeladen.
Die Akkukapazität ist zu gering, um das
CPW65 einzuschalten.
Leuchtet 3 Sekunden lang
grün und ist dann aus
LED-Status Beschreibung
Das CPW65 ist im Standby.
11
D
E
U
T
S
C
H

Wenn das CPW65 als Audio-Eingabegerät für das CP965 Konferenztelefon
fungiert und sich das CP965 Konferenztelefon in einem Anruf befindet, können
Sie auf die Stummschalttaste am CPW65 tippen, um es stumm- oder
lautzuschalten.
Stumm- und Lautschalten des CPW65
Platzieren des CPW65
r=3m
CPW65
Das CPW65 ist ein kabelloses Erweiterungsmikrofon, das als Audio-
Eingabegerät für das CP965 Konferenztelefon dienen kann. Es unterstützt
360°-Audioaufnahme bei einem Radius von bis zu 3 Metern. Sie können das
CPW65 auf einen Tisch im Konferenzraum stellen.
So stellen Sie eine optimale Sprachqualität sicher:
Das CPW65 sollte sich weniger als 20 Meter vom CP965 Konferenztelefon
entfernt befinden, ohne Hindernisse zwischen den beiden Geräten.
Stellen Sie das CPW65 auf einen stabilen Untergrund ohne Hindernisse,
damit die beste Leistung erreicht werden kann.
Wenn Sie auf die Stumm-Taste tippen und die
Akku-LED-Anzeige am CPW65 immer noch aus
ist, bedeutet das, dass das CPW65 ausgeschaltet
ist.
Aus
Blinkt langsam rot Die Akkukapazität beträgt weniger als 10%.
LED-Status Beschreibung
D
E
U
T
S
C
HT
12

Emplacement de chargement
13
Contenu de la boîte
Aperçu du matériel
Les éléments suivants sont inclus dans la boîte. Si vous constatez l’absence
d'un élément, contactez votre administrateur système.Veuillez utiliser
ype-A vers Type-A
Adaptateur
lors de la connexion WDD60 et UVC84 pour éviter la surchauffe.
Chargement du CPW65
Indicateur LED de la batterie
Bouton de sourdine
Indicateur LED de coupure du son
1
1
2
3
Socle du chargeur
1.8m
Câble micro USB
Guide de démarrage
rapide
Microphone sans fil
DECT ×2
Méthode 1 :
Méthode 2:
I
4
Port USB
5
A
N
Ç
A
I
S
F
WDD60
Adaptateur secteur Type-A vers Type-A
Adaptateur
Placez le CPW65 sur le socle du chargeur, et branchez-le à une prise.
2
Méthode 1:
Méthode 2:
Branchez le câble USB fourni dans le
port USB du CPW65 et branchez-le à
une prise.
1.8m
Câble micro USB
1.8m
Câble micro USB

Lier/Annuler la liaison du CPW65
14
Le CPW65 comporte trois indicateurs. Les indicateurs affichent l’état de
fonctionnement du CPW65.
Instructions des LED
Pendant le chargement, l’indicateur LED de la batterie du CPW65 s’allume
en rouge. Lorsque le chargement est terminé, l’indicateur LED de la batterie
du CPW65 s’allume en vert.
Le CPW65 démarre automatiquement lorsqu’il est en charge.Vous pouvez
également appuyer longuement sur le bouton de coupure du son du CPW65
pendant 3 secondes pour l’activer.
Indicateur LED sur le socle du chargeur :
Le CPW65 n’est pas en cours de chargement.
Désactivé
Blanc fixe Le CPW65 est en cours de chargement.
État de la LED Description
Noter: Pour la première utilisation du CPW65, vous devez le charger
complètement pour une utilisation normale.
Lorsque vous n’utilisez pas le CPW65 sans fil, nous vous recom-
mandons toutefois de le charger même si la batterie est pleine.
A
N
Ç
A
I
S
F
Il est possible de lier le CPW65 avec un UVC86/UVC84/AVHub. La procédure est la suivante :
1. Insérez le WDD60 dans le port USB de l’UVC86/UVC84/AVHub.
2. Ouvrez le logicielYealink RoomConnect, cliquez sur la carte UVC86/UVC84/AVHub et, dans
Device Status (État de l’appareil) > Wireless expansion microphone (Microphone d’extension
sans fil), cliquez sur Bind (Lier).
3. Placez le CPW65 sur le socle du chargeur et appuyez sur le bouton de désactivation du son et
maintenez-le enfoncé pendant 5 secondes pour accéder au mode d'association et l’indicateur à
DEL de désactivation du son clignote en jaune.
Une fois la liaison effectuée, le logiciel Yealink RoomConnect signale que le CPW65 sans fil est
connecté.
- Une fois la liaison effectuée, cliquez sur Check (Vérifier) > Device Settings (Paramètres de
l’appareil) > Unbind (Annuler) la liaison pour Annuler la liaison du microphone sans fil.
- Cliquez sur Check (Vérifier) > Device Settings (Paramètres de l’appareil) > Add Wireless
Microphone (Ajouter un microphone sans fil pour) ajouter un autre microphone sans fil.
- Cliquez sur Check (Vérifier) > Device Settings (Paramètres de l’appareil) > Find (Rechercher),
et vous pouvez voir l'indicateur à DEL de désactivation du son du CPW65 correspondant qui
clignote alternativement en jaune et vert.
Actuellement, il est possible d'ajouter jusqu'à 2 (1 paire de) microphones sans fil CPW65 sur
l’UVC86/UVC84/AVHub.

15
Désactivé
Clignotant jaune rapidement
Clignotant jaune lentement
Le CPW65 est en mode d’enregistrement.
Le CPW65 est enregistré sur le téléphone,
mais il est hors de portée.
Le CPW65 est enregistré sur le téléphone,
mais le CP965 est éteint.
Le CPW65 est inactif.
Indicateur LED de coupure du son du CPW65 :
Le téléphone recherche le CPW65 qui a
été enregistré dessus.
Clignotant alternativement
rouge et vert
État de la LED
Rouge fixe
Vert fixe
Rouge clignotant rapidement Le téléphone reçoit un appel entrant.
Description
Le son du téléphone est coupé.
Le téléphone passe à l’écran de
prénumérotation. Le téléphone traite un appel
et le son n’est pas coupé.
Indicateur LED de batterie du CPW65 :
Le CPW65 est allumé.
Vert fixe pendant une
seconde, puis éteint.
Vert fixe
Clignotant rouge rapidement
3 fois, puis éteint
Rouge fixe Le CPW65 est en cours de chargement.
Le CPW65 est chargé complètement.
La capacité de la batterie est trop faible
pour allumer le CPW65.
Vert fixe pendant 3
secondes, puis éteint.
État de la LED Description
Le CPW65 est inactif.
A
N
Ç
A
I
S
F

Lorsque le CPW65 fonctionne comme dispositif d’entrée audio pour le téléphone
de conférence CP965 et que le téléphone de conférence CP965 est en cours
d’appel, vous pouvez appuyer sur le bouton de coupure du son du CPW65 pour
couper ou rétablir le son du CPW65.
Couper ou rétablir le son du CPW65
16
Positionnement du CPW65
Si vous appuyez sur le bouton de coupure
du son et si l’indicateur LED de la batterie
du CPW65 est toujours éteint, cela signifie
que le CPW65 est éteint.
Désactivé
Clignotant rouge lentement La capacité de la batterie est inférieure à 10 %.
État de la LED Description
r=3m
CPW65
Le CPW65 est un microphone d’extension sans fil qui fonctionne comme
dispositif d’entrée audio pour le téléphone de conférence CP965.
Il prend en charge la prise de son à 360 degrés dans un rayon de 3 mètres.
Vous pouvez placer le CPW65 sur une table de salle de conférence.
Pour assurer une qualité du son optimale, effectuez les actions suivantes ;
Le CPW65 doit se situer à moins de 20 mètres du téléphone de conférence
CP965 et aucun obstacle ne doit être placé entre eux.
Placez le CPW65 sur une surface stable et sans obstacle afin de bénéficier
des meilleures performances possibles.
A
N
Ç
A
I
S
F

Indicador LED de silencio
Contenido del embalaje
Generalidades del hardware
En el paquete se incluyen los siguientes elementos. Si le falta algo,
póngase en contacto con el administrador del sistema. Utilice
Adaptador
tipo A a tipo A
cuando conecte WDD60 y UVC84 para evitar el sobrecalentamiento.
Cargando el CPW65
Indicador LED de
batería
Botón de silencio
1
1
2
3
Ranura de carga
L
a base de recarga
1.8m
Cable Micro USB
Guía de inicio rápido
Micrófono DECT
×2
4
Puerto USB
5
Método 1:
Método 2:
E
S
P
A
Ñ
O
L
WDD60
Adaptador de corriente Adaptador
tipo A a tipo A
Coloque el CPW65 en la base de carga y conéctelo a la fuente de alimentación.
2
Inserte el cable USB proporcionado en
el puerto USB del CPW65 y conéctelo a
la fuente de alimentación.
1.8m
Cable Micro USB
1.8m
Cable Micro USB
17

Durante la carga, el indicador LED de batería del CPW65 destella en rojo.
Cuando está completamente cargado, el indicador LED de batería del CPW65
destella en verde.El CPW65 se inicia automáticamente al cargar.
O puede hacer una pulsación larga en el CPW65 de 3 segundos para encenderlo.
Vincular/desvincular el CPW65
El CPW65 posee tres indicadores.
Muestran el estado de trabajo del CPW65.
Instrucción del LED
Indicador LED de la base de recarga:
No está cargándose el CPW65.
Apagado
Blanco sólido Está cargándose el CPW65.
Estado de LED Descripción
Nota: Si es la primera vez que utiliza el CPW65, debe cargarlo por
completo para una utilización normal.
Si no se utiliza el CPW65, le recomendamos cargarlo aunque la
batería esté llena.
E
S
P
A
Ñ
O
L
El CPW65 se puede vincular con los dispositivos UVC86/UVC84/AVHub. Para ello,
debe realizar los siguientes pasos:
1. Inserte el WDD60 en el puerto USB de UVC86/UVC84/AVHub.
2. Abra el software Yealink RoomConnect, haga clic en la tarjeta de
UVC86/UVC84/AVHub y, en Device Status (Estado del dispositivo) > Wireless
expansion microphone (Micrófono de expansión inalámbrico), haga clic en Bind
(Vincular).
3. Coloque el CPW65 en la base de carga y mantenga pulsado el botón Mute
(Silenciar) durante 5 segundos para activar el modo de vinculación. A continuación, el
indicador LED de silencio parpadeará en amarillo.
Una vez realizada la vinculación correctamente, el softwareYealink RoomConnect
indicará que el CPW65 inalámbrico está conectado.
- Tras vincular el dispositivo, haga clic en Check (Comprobar) > Device Settings
(Configuración del dispositivo) > Unbind (Desvincular) para desvincular el micrófono
inalámbrico.
- Haga clic en Check (Comprobar) > Device Settings (Configuración del dispositivo) >
Add Wireless Microphone (Añadir micrófono inalámbrico) para volver a añadir otro
micrófono inalámbrico.
- Haga clic en Check (Comprobar) > Device Settings (Configuración del dispositivo) >
Find (Buscar) y el indicador LED de silencio del CPW65 correspondiente comenzará a
parpadear en rojo y verde alternativamente.
Actualmente, los dispositivos UVC86/UVC84/AVHub permiten añadir un máximo de 2
(1 par) de micrófonos CPW65 inalámbricos.
18

Apagado
Amarillo con destello rápido
Amarillo con destello lento
El CPW65 está en modo de registro.
El CPW65 se registró con el teléfono, pero el
CPW65 está fuera de rango.
El CPW65 se registró con el teléfono, pero el
CP965 está Apagado.
El CPW65 se encuentra inactivo.
Indicador LED de silencio del CPW65:
El teléfono está buscando el CPW65, con
el que se registró.
Destella en rojo y verde en
forma alternativa
Estado de LED
Rojo sólido
Verde sólido
Rojo con destello rápido El teléfono recibe una llamada entrante.
Descripción
El teléfono está silenciado.
El teléfono entra en la pantalla de prediscado.
El teléfono se encuentra en una llamada y no
silenciado.
Indicador LED de Batería del CPW65:
El CPW65 está encendido.
Verde sólido durante un
segundo y luego se apaga
Verde sólido
Destella rápido en rojo 3 v
eces y luego se apaga
Rojo sólido Está cargándose el CPW65.
El CPW65 está totalmente cargado.
La capacidad de la batería es muy baja
para encender el CPW65.
Verde sólido durante tres
segundos y luego se apaga
Estado de LED Descripción
El CPW65 se encuentra inactivo.
E
P
O
E
S
P
A
Ñ
O
L
19
Table of contents
Languages:
Other Yealink Microphone manuals

Yealink
Yealink CPW90 User manual

Yealink
Yealink VCM35 User manual

Yealink
Yealink CPW90-BT User manual

Yealink
Yealink CPW65 User manual

Yealink
Yealink CPW90 User manual

Yealink
Yealink VCM34 User manual

Yealink
Yealink CP Series User manual

Yealink
Yealink CPE80 User manual

Yealink
Yealink CPW90 User manual

Yealink
Yealink CPW90 User manual