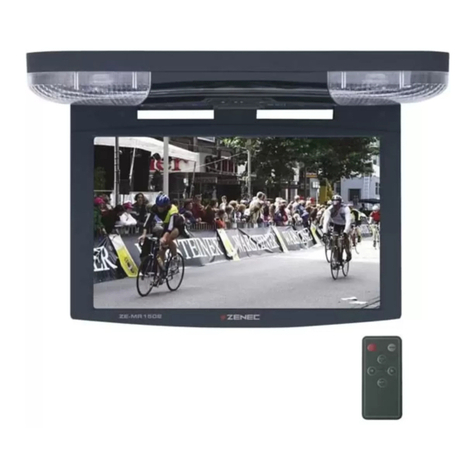
ZENEC ZE-MR1502 - V1.01 User manual

MODEL N0:
USER MANUAL
ENGLISH/GERMAN
39.5cm/15.6“ ROOF MOUNT 16:9
LCD MONITOR
USER MANUAL
ENGLISH/GERMAN

2
ZE-MR1502
Thank you for your purchase of this ZENEC product!
With the ZE-MR1502 monitor, you have chosen a technically mature high quality product
that will give you a long service life and very high reliability, since this product has been
assembled using only high quality parts.
Even though this unit has been designed for intuitive and easy operation, it is recommended
that you read this manual learning how to operate this device in detail, so you are able to
use all implemented features and functions. Please retain this operating manual in a safe
place after reading it, for future reference. Read the warranty conditions at the end of this
manual, to make sure you benefit from full warranty coverage.
If you have further questions about this product, please consult the dealer where it was
purchased, or the ZENEC distributor in your country.
TECHNICAL FEATURES
■ 39.5cm/15.6“/16:9 aspect ratio TFT-LCD display panel of high brightness
■ 1366 x 768 pixels panel resolution with anti-glare coating
■ High contrast LCD screen with 344 x 193 mm active display area
■ Large viewing angle left/right > 40° / top > 10° / down > 30°
■ Compact and shallow housing design for best integration and mountability
■ Rubber coated monitor housing for extra wear resistance and durability
■ Adjustable tilt angle < 180°
■ Multi-norm video system with NTSC & PAL auto switching
■ Setup and picture adjustment by on-screen display menu
■ AV-extension cord with multiconnector for power supply and AV-inputs
■ 2 x A/V RCA-input
■ 1 x A/V RCA-output
■ Integrated IR-transmitter to operate wireless IR-headphones
■ Integrated automatically switched white LED twin dome lights
■ IR-remote control
SPECIAL FEATURES
39.5cm/15.6“, 16:9 A-Grade Display:
The ZE-MR1502 is an overhead (flip down) TFT-LCD active matrix 16:9 video monitor,
featuring a 39.5cm/15.6“ high quality color LCD screen. It deploys a color TFT-LCD panel
with a high resolution, to give you excellent picture detail.
Compatibility:
This monitor is compatible with PAL and NTSC video streams – the internal video signal
processing electronics automatically synchronize with PAL or NTSC video signals.
Applications:
The ZE-MR1502 will work in combination with any common video source unit, featuring an
RCA composite video output, such as DVD-players, VCR’s or TV-tuners.
3
ZE-MR1502
BOX CONTENTS
CONTENT
SAFETY INFORMATION .............................................................................................. 4
REMOTE CONTROL .................................................................................................... 5
REMOTE CONTROL FUNCTIONS ...............................................................................5
USING THE REMOTE CONTROL ................................................................................ 5
BATTERY ......................................................................................................................6
NOTES ON BATTERIES ............................................................................................... 6
THE ROOF MOUNT MONITOR .................................................................................... 7
BASIC OPERATIONS .................................................................................................... 7
LCD PANEL ADJUSTMENT .......................................................................................... 8
MENU ............................................................................................................................9
ELECTRICAL CONNECTIONS ................................................................................... 10
INSTALLATION ....................................................................................................... 12/13
TROUBLESHOOTING ................................................................................................ 14
SPECIFICATIONS ...................................................................................................... 15
WARRANTY ........................................................................................................... 30/31
Part Quantity
LCD Monitor 1
IR Remote Control w/Battery 1
A/V-Interface 1
Metal Mounting Plate 1
ST4.2×16 Screw 8
Adhesive foam 4
CM4x8 Screw 8
User’s Manual 1
Fuse 1
Rubber Spacer 1

4
SAFETY INFORMATION
1. The unit is designed for using with a DC +12V, negative ground battery power supply, it
may not be connected and/or used differently.
2. Do not operate the unit in any way other than described in this manual. Failure to follow
the instructions will invalidate your warranty.
3. Do not disassemble or alter the unit in any way. Any such attempts my result in damage
to the unit and void your warranty.
4. Use only the supplied accessories to install the unit. The use of any accessories except
for those provided might result in damage to the unit.
5. If the fuse blows, first make sure that the cables have not caused a short circuit, then
replace the old fuse with a new one with the same rating.
6. According to the law in different European countries, driving with monitors in use in the
viewing range of the driver is not allowed. Please respect the traffic regulations of your
country, or you might face penalties in case of an accident.
7. Be careful not to run down the car battery while using the unit! Using this unit stationary
without the engine running may drain the battery, and prevent you from being able to
start the engine later on.
8. To clean this monitor, use a glass cleaning agent with a soft towel or tissue. Do not
use any detergents or organic solvents, as these fluids may damage the surface of the
housing.
9. Avoid installing and operating the unit in direct sunlight or near hot air vents. Please note
that the normal working temperature of the unit is between 0°C to 45°C. If the internal
temperature of the vehicle is extremely high, a short cooling down period is necessary
before operating the unit.
10. If the inside of the car is very cold and the monitor is used soon after switching on the
heater, moisture may form on the panel of the unit. Turn off the unit immediately!
Failure to do so may cause the internal components to short-circuit. Allow the unit to
rest for about one hour to allow the condensation to evaporate before operation.
11. In extremely cold environments, the movement of objects in the picture may be slow and
dark. The unit will resume working normally once it reaches its operating temperature.
12. The appearance of small black, shiny dots inside the liquid crystal panel is normal.

5
ZE-MR1502
13. Do not drop or hit the LCD panel with hard objects, as it may cause permanent damage
to the unit. If you come into contact with any spilled LCD fluid, wash and clean affected
areas with plenty of water and soap and seek medical attention immediately.
14. Refer to authorized dealers or the distributor in your country, if you have any queries
about the product.
REMOTE CONTROL
USING THE REMOTE CONTROL
■ Aim the remote control directly at the unit.
■ Maximum IR distance is 3 meters from the IR-sensor.
■ Direct sunlight or very bright light reduces sensitivity to the IR-remote.
■ Obstruction between the IR-sensor and remote control may disrupt IR-signal
reception.
REMOTE CONTROL FUNCTIONS
1. POWER
■ Press the POWER button to switch on/off the unit.
2. MODE
■ Select input signal A/V 1 or A/V 2 with MODE button.
3. MENU +/–
■ The button can be used for selecting menu option
(up/down choice).
4. ADJUST +/–
■ Under “MENU”, it is for changing the system value.
➁➀
➂
➃
➂

6
BATTERY
■ Please remove the insulation plastic sheet insert from the battery holder before use.
■ If the remote control does not function correctly or the operating range is reduced,
replace the battery with a new battery (CR2025).
1. Apply pressure on the recess of the battery tray on the
back of remote control with a small tool. At the same
time, pull out the battery holder.
2. Insert the new battery, with the (+) side up.
3. Push to close the battery holder. You will hear a click
as the holder locks.
NOTES ON BATTERIES
■ Remove batteries if they are empty or if the remote control will not be used for a
long time.
■ Battery and small parts can be a choking hazard. Keep the remote control away from
young children.
Pull
Push 1
2

7
ZE-MR1502
1. POWER
■ Press the POWER button to switch on / off the unit.
2. MODE
■ Select input signal AV 1 or AV 2 with MODE button.
3. MENU +/–
■ The button can be used for selecting menu option (up/down choice).
4. Dome Light SW
■ When the button is in ON/OFF position, press it to turn ON/OFF the dome light.
■ When the button is in DOOR position, it will be activated by the door to switch dome
lights on.
5. OPEN
■ Press the OPEN button to release the monitor panel.
6.
■ Under “MENU”, it is for changing the respective values.
7. IR TRANSMITTER AND REMOTE SENSOR
THE ROOF MOUNT MONITOR
BASIC OPERATIONS
6 6 3 5 4 3 2 17

8
LCD PANEL ADJUSTMENT
1. OPEN THE LCD PANEL
Press Open Button to disengage the LCD panel. Pull the LCD panel outward till you
reach the desired viewing angle.
NOTE
■ The LCD display opens to a maximum angle of 180° degrees. Opening it further than
that may cause damages.
2. CLOSE THE LCD PANEL
Close manually until you hear the lock mechanism click.
NOTE
■ Make sure that cords and other items do not get caught in the panel when you close it.
■ For your safety, be sure to close the LCD panel when not in use.

9
ZE-MR1502
MENU
■ To adjust the picture, use the menu button to select the menu features you would like to
adjust.
■ Values of a selected feature can be adjusted by choosing the right menu entry with the
“+” and “–” buttons. Use the “ ” and “ ” buttons to change value.
CONTRAST: Contrast adjustment
BRIGHTNESS: Brightness setting
COLOR: Color adjustment
TINT: Adjustment to color satu
ration (only NTSC)
Widescreen: Select Wide (16:9) /
Normal (4:3) mode
RESET: Reset menu to
default value

10
ELECTRICAL CONNECTIONS
A/V-1 A/V-2
A/V
OUTPUT
Extra power for
dome lights.
Red: Door Switch
Yellow: Car Battery
Black: Common
OPEN
MODE
MENU+-

11
ZE-MR1502
NOTE
For installation and connection we explicitely recommend to consult your ZENEC dealer.
If you turn over your unit you will see a small square hole, in the tin cover near the front, with a switch
inside. That switch is for adjusting the logical state of the door switch. If the built-in dome lights are on,
when the doors of your car are closed, just use the switch.
NOTE

12
Step 2:
■ Connect the 6 pin power source cable, signal cable with the video adapter.
Step 3:
■ Connect the 6 pin power source cable to a 12V source, ACC and GND power source in
your car.
Step 4:
■ Pull out the original dome light power wire and signal cable through the opening of
original dome light.
Step 5:
■ Connect the signal cable to the female connector on the unit side.
■ Connect the power wire of dome light on the back unit with original dome light power
wire.
Step 6:
■ After the panel is open, fix the unit to the mounting plate with four screws and rip off the
scraps which may be adhering to adhesive foam. Then, use adhesive foam to cover the
four screws.
INSTALLATION
Step 1:
■ Select the screw from ST4.2X16 by length that applies to your vehicle, contained in the
package contents. Screw the metal mounting plate to the car roof. Please remember not
to cover the opening of original dome light.
Car roof girders
Metal Plate
Screw
ST4.2x16

13
ZE-MR1502
Step 7:
■ Please double check and make sure the unit is installed properly before operation.
Car roof girders
Metal
Plate
CM 4x8
Screw
Rubber Spacer
Monitor
Adhesive foam

14
TROUBLESHOOTING
Problem: Cause:Solution:
No picture when the
display is turned on.
1. Power wire is
connected improperly
or fuse blown.
2. System cable is not
connected properly.
1. Check the power wire
and replace the fuse.
2. Check system cable or
replace with a new one.
Blurred picture on the
screen.
1. Interfered by short-
distanced strong RF
emissions.
(E.g. high voltage wire,
transformation station
or aircraft etc...)
1. The reception of the signal
will get better when
moving away from source
of interference.
No function on the
remote control (or
operating distance is
shortened).
1. The battery of remote
control has exhausted.
2. Remote control is
defective.
1. Replace with a new
battery of same rating.
2. Contact with dealer
and replace with a new
remote control.
The picture on the
screen is dark.
1. The monitor is used
at a low temperature
area.
2. BRIGHTNESS is set too
dark.
1. This is the characteristics
of an LCD display at low
temperature, it will restore
to normal brightness after
display is in use for few
minutes.
2. Check BRIGHTNESS
adjustment.

15
ZE-MR1502
SPECIFICATIONS
Operating Voltage Range: Car Battery (DC +10V ~ +16V)
Mechanism: Manual Open / Close
Display Angle: Vertical Adjustable: Up/Down < 180°
Operating Current: < 2A (Dome Light Off)
Dome Light: 0.5W x 2
Operating Temperature: 0° C to +50° C
Storage Temperature: -20° C to +60 ° C
Dimensions (mm): 384 x 340 x 47 (H x W x D)
Weight (g): 2375
If at any time in the future you should need to dispose this product
please note that waste electrical products should not be disposed of
with household waste. Please recycle where facilities exist. Check with
your Local Authority or retailer for recycling advice. (Waste Electrical and
Electronic Equipment Directive)
■ Note: Specification and design of this model is necessarily subject to changes
without notice.

16
ZE-MR1502
Vielen Dank für den Kauf dieses ZENEC-Produktes!
Mit dem Kauf des ZE-MR1502 haben Sie sich für ein technisch ausgereiftes Produkt
entschieden, das Ihnen durch die Verwendung von hochwertigen Materialien und Bauteilen
eine lange Lebensdauer garantiert.
Bei dem ZE-MR1502 von ZENEC handelt es sich um einen 39.5cm/15.6“, 16:9 TFT-LCD
Aktiv-Matrix Deckenmonitor mit Entspiegelung. Aufgrund der kompakten Bauweise und
der vielfältigen Anschlussmöglichkeiten lässt sich der ZE-MR1502 problemlos in jede A/V-
Anlage integrieren.
Größten Wert wurde bei der Entwicklung auf die Bedienungsfreundlichkeit gelegt. Dennoch
muss der ein oder andere Bedienungsschritt mit Hilfe dieser Bedienungsanleitung näher
erläutert werden. Zusätzlich soll sie dazu beitragen, dass Sie das ganze Potential dieses
Produktes nutzen können. Lesen Sie sich vor allem die Garantiebestimmungen genau
durch, um im Falle eines Defektes den optimalen Service und Kundendienst nutzen zu
können. Sollten Sie dennoch weitere Fragen haben, wenden Sie sich bitte an Ihren ZENEC-
Händler oder den jeweiligen Landesvertrieb.
GERÄTE–FEATURES
■ 39.5cm/15.6“, 16:9 TFT-LCD Aktiv-Matrix Deckenmonitor mit hoher Leuchtintensität
■ TFT-LCD-Panel mit 344 x 193 mm Bildgröße und 1366 x 768 Pixel Auflösung
■ Großer Betrachtungswinkel, links/rechts > 40° / oben > 10° / unten > 30°
■ Anti-Glare Beschichtung zur Vermeidung von Monitorreflektionen
■ Kompaktes und flaches Gehäuse, welches eine unauffällige Installation ermöglicht
■ Kunststoffgehäuse mit abriebfester Gummioberfläche gegen Kratzer
■ Einstellbarer Kippwinkel < 180°
■ Multi-Norm Videosystem mit automatischer PAL/NTSC-Umschaltung
■ On-Screen Menüführung direkt am Gerät oder per IR-Fernbedienung
■ A/V-Interface für Stromversorgung und A/V-Eingänge
■ 2 x A/V-Eingänge
■ 1 x A/V-Ausgang
■ Integriertes IR-Sendemodul zur Ansteuerung von drahtlosen Kopfhörern
■ Automatische Innenraumbeleuchtung mit weißen Twin Dome-Lights (LED)
■ IR-Fernbedienung
BESONDERHEITEN
39.5cm/15.6“, 16:9 A-Grade Display:
Der ZE-MR1502 verfügt über ein 39.5cm/15.6“ Aktiv-Matrix TFT-LCD Farbdisplay im 16:9
Format. Das hochauflösende Display verfügt über eine Anti-Glare Beschichtung.
Kompatibilität:
Dieser Monitor ist mit den Videoformaten PAL und NTSC kompatibel und verfügt über eine
interne Videoelektronik mit automatischer Formatumschaltung.
Verwendung:
Der ZE-MR1502 kann mit allen Videoquellen kombiniert werden, welche über einen
Composite-Videoausgang (Cinch) verfügen. Dazu zählen alle handelsüblichen DVD-
Abspielgeräte, VCR-Geräte und TV-Tuner.

17
ZE-MR1502
LIEFERUMFANG
INHALTSVERZEICHNIS
SICHERHEITSHINWEISE ........................................................................................... 18
DIE FERNBEDIENUNG ............................................................................................. 19
DIE EINZELNEN TASTEN ........................................................................................... 19
BENUTZEN DER FERNBEDIENUNG ....................................................................... 19
DIE BATTERIE ............................................................................................................20
BITTE BEACHTEN ..................................................................................................... 20
DER DECKENMONITOR ........................................................................................... 21
DIE EINZELNEN TASTEN .......................................................................................... 21
ÖFFNEN UND SCHLIESSEN DES DECKENMONITORS ...........................................22
MENÜEINSTELLUNGEN ............................................................................................23
INSTALLATION DES GERÄTES ................................................................................24
MONTAGE DES GERÄTES....................................................................................26/27
FEHLERSUCHE .......................................................................................................... 28
SPEZIFIKATIONEN .................................................................................................... 29
GARANTIE ............................................................................................................. 30/31
Deckenmonitor 1
IR-Fernbedienung inkl. Batterie 1
A/V-Interface 1
Montageplatte 1
ST4.2×16 Schrauben 8
Abdeckungen 4
CM4x8 Schrauben 8
Bedienungsanleitung 1
Feinsicherung 1
Distanzgummi 1
Element Menge

18
SICHERHEITSHINWEISE
1. Dieses Gerät ist für den Betrieb an einem Bordnetz mit +12V (DC) und Minus gegen
Masse geeignet und darf auch nur so betrieben werden.
2. Bedienen Sie das Gerät nur so, wie es in dieser Bedienungsanleitung beschrieben wird.
Alles andere kann zum Erlöschen Ihres Garantieanspruches führen.
3. Zerlegen oder modifizieren Sie das Gerät nicht. Dies kann zu einer Beschädigung des
Gerätes führen und Ihr Garantieanspruch erlischt dadurch.
4. Benutzen Sie nur das Originalzubehör um das Gerät zu installieren und zu betreiben, da
ansonsten eine Beschädigung des Gerätes riskiert wird.
5. Bevor Sie eine defekte Sicherung austauschen, sollten Sie erst einmal überprüfen was
der Grund für den Kurzschluss war. Achten Sie dabei besonders auf die Kabel der
Stromversorgung! Wenn der Kurzschluss nicht durch einen Fehler in der Stromversorgung
resultiert, müssen Sie die defekte Sicherung gegen ein neues Exemplar mit identischen
Werten austauschen. Sollte der Kurzschluss immer noch vorhanden sein, wenden Sie
sich bitte an Ihren ZENEC-Händler.
6. Achten Sie bei der Installation des Monitors darauf, dass er den Fahrer des Fahrzeuges
nicht vom Verkehrsgeschehen ablenkt oder ihm in irgendeiner Weise die Sicht versperrt.
Informieren Sie sich deshalb vor der Installation des Gerätes über die in Ihrem Land
geltenden Gesetze und Verkehrsvorschriften, die den Gebrauch eines solchen Gerätes
betreffen.
7. Achten Sie darauf dass bei ausgeschaltetem Motor die Batterie des Fahrzeuges nicht
entladen wird. Da es sich bei dem Gerät um einen Verbraucher handelt und die Batterie
nur bei laufendem Motor aufgeladen wird, kann es passieren dass die Batterie entladen
wird und das Fahrzeug sich nicht mehr starten lässt.
8. Reinigen Sie das Display nicht mit ätzenden Chemikalien oder Lösungsmitteln. Dies
kann zu einer dauerhaften Beschädigung des Displays führen.
9. Achten Sie bei der Installation des Gerätes darauf, dass es nicht dem direktem
Sonnenlicht ausgesetzt ist und auch nicht in der Nähe von Wärmequellen wie z.B den
Öffnungen der Heizung montiert wird. Die Umgebungstemperatur sollte daher zwischen
0°C und 45°C liegen. Sollte die Temperatur im Inneren des Fahrzeuges extrem hoch
sein, ist es empfehlenswert den Innenraum vor der Inbetriebnahme des Gerätes erst
einmal etwas abkühlen zu lassen.
10. Bei extrem kalten Temperaturen kann das Bild etwas dunkel und die Bewegungen
etwas langsam sein. Sobald der Monitor seine Betriebstemperatur erreicht hat, arbeitet
das Gerät bzw. das Display wieder normal.
11. Kleine, schwarze und leuchtende Punkte innerhalb des Displays sind normal für diese
Art von Produkt.
12. Das Display darf keinen harten Stößen oder Erschütterungen ausgesetzt werden, da
dies zu einer dauerhaften Beschädigung führen kann. Falls Sie mit der auslaufenden
Flüssigkeit in Kontakt kommen, sollten Sie gegebenenfalls einen Arzt aufsuchen. Alle
Gegenstände die ebenfalls mit der LCD-Flüssigkeit in Kontakt gekommen sind, sollten
sorgfältig mit Wasser gereinigt werden.

19
ZE-MR1502
13. Wenn Sie Fragen oder Probleme bei der Installation haben, wenden Sie sich bitte an
einen ZENEC-Händler oder an den jeweiligen Landesvertrieb.
DIE FERNBEDIENUNG
DIE EINZELNEN TASTEN
1. [POWER]-Taste
■ Drücken Sie die [POWER]-Taste um das Gerät ein- bzw.
auszuschalten.
2. [MODE]-Taste
■
Drücken Sie die [MODE]-Taste um zwischen den beiden A/V-
Eingängen A/V-1 und A/V-2 zu wählen.
3. [MENU +/–]-Tasten
■ Drücken Sie eine der [MENU ] [+/–]-Tasten um das Menü
aufzurufen und einen entsprechenden Menüpunkt auszu-
wählen.
4. [ADJUST +/–]-Tasten
■ Wenn Sie sich im Menü befinden und einen Menüpunkt
ausgewählt haben, können Sie durch Drücken einer der
Tasten den eingestellten Wert entsprechend verändern.
BENUTZEN DER FERNBEDIENUNG
■ Richten Sie die Fernbedienung direkt auf den IR-Sensor des
Gerätes.
■ Achten Sie darauf dass der Abstand zwischen der Fernbedienung und dem IR-Sensor
nicht größer als 3 Meter ist.
■ Direktes Sonnenlicht oder sehr helles Licht verringern die Empfindlichkeit des IR-
Signals.
■ Vermeiden Sie, dass sich zwischen der Fernbedienung und dem IR-Sensor ein Hindernis
befindet, da ansonsten der Empfang des IR-Sensors gestört wird.
➁➀
➂
➃
➂

20
DIE BATTERIE
■ Wenn die Fernbedienung nicht oder sehr langsam reagiert, müssen Sie wahrscheinlich
die Batterie wechseln:
1. Öffnen Sie den Batteriefachdeckel, indem Sie die
Halterung 1. nach rechts drücken und den Batterie-
fachdeckel anschließend nach vorne ziehen (siehe
Skizze).
2. Nehmen Sie die neue Batterie und legen sie so in das
Batteriefach, dass der + Pol nach oben zeigt (siehe
Skizze).
3. Schieben Sie den Batteriefachdeckel wieder zurück
in das Gehäuse der Fernbedienung (siehe Skizze).
BITTE BEACHTEN
■ Entfernen Sie die Batterie, wenn sie leer ist oder die Fernbedienung längere Zeit nicht
gebraucht wird.
■ Sollte es trotzdem einmal passieren dass die Batterie ausläuft, müssen Sie mit einem
Tuch die Flüssigkeit im Batteriefach entfernen und anschließend eine neue Batterie
einlegen.
■ Bewahren Sie die Batterie außer Reichweite von kleinen Kindern auf. Sollte die Batterie
von einer Person verschluckt werden, bitte sofort einen Arzt aufsuchen.
ziehen
drücken 1
2
This manual suits for next models
1
Table of contents
Languages:
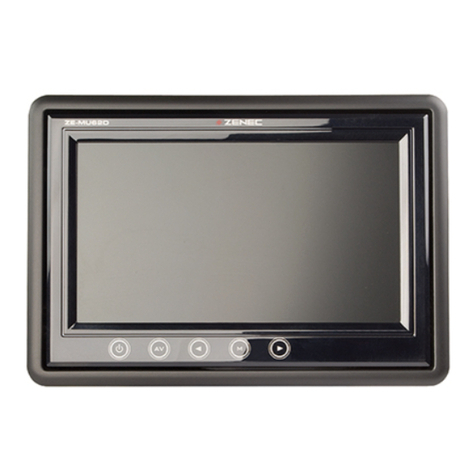
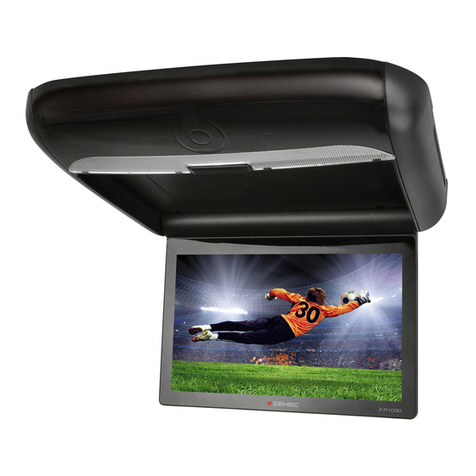
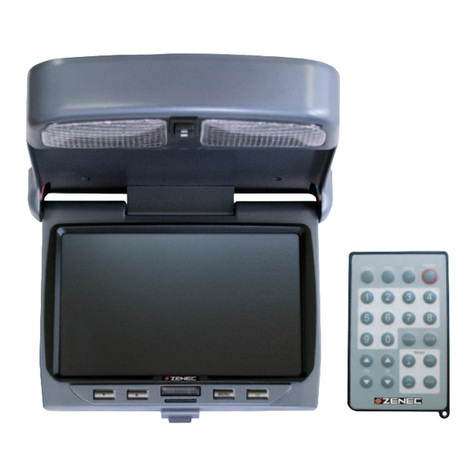
Other ZENEC Monitor manuals

ZENEC
ZENEC ZE-MU620IR User manual

ZENEC
ZENEC ZEM-W652U User manual

ZENEC
ZENEC ZEM-W703MRM User manual

ZENEC
ZENEC Z-R1030 User manual

ZENEC
ZENEC ZEM-W702U User manual

ZENEC
ZENEC ZEM-W700DMM User manual

ZENEC
ZENEC ZEM-W801RM User manual

ZENEC
ZENEC ZEM-560U User manual

ZENEC
ZENEC ZEM-W701RM User manual

ZENEC
ZENEC ZE-MU62D User manual

ZENEC
ZENEC ZE-MR1502 User manual

ZENEC
ZENEC ZE-MC172 User manual

ZENEC
ZENEC ZE-MC292 User manual

ZENEC
ZENEC ZEM-W702RM User manual

ZENEC
ZENEC ZEM-W700U User manual

ZENEC
ZENEC ZEM-W1501RM User manual

ZENEC
ZENEC ZEM-561USM User manual

ZENEC
ZENEC ZEM-W700RM User manual

ZENEC
ZENEC ZEM-W702UIR User manual

ZENEC
ZENEC ZEM-W701USM User manual