Zennio ZN1VI-TPZAS User manual

ZAS
KNXRoomController
ZN1VI-TPZAS
Edition2
Version 1.0
PRODUCT MANUAL

ZENNiOAVANCEYTECNOLOGÍA www.zennio.com
2
Table of Contents
1. Introduction..............................................................................................................3
2. Installation ...............................................................................................................5
2.1. ZAS Installation................................................................................................5
3. Display Management...............................................................................................6
4. IR Control ................................................................................................................8
5. Configuration.........................................................................................................10
5.1. General...........................................................................................................10
5.2. Inputs..............................................................................................................15
5.3. Buttons...........................................................................................................15
6. Parameterization ...................................................................................................17
6.1. Default Configuration......................................................................................17
6.2. General...........................................................................................................19
6.3. Menu options..................................................................................................24
6.4. Inputs..............................................................................................................30
6.5. Buttons...........................................................................................................32

ZENNiOAVANCEYTECNOLOGÍA www.zennio.com
3
1. INTRODUCTION
ZAS is a simple and analog room controller that includes thermostat, IR receiver
and analog/binary inputs. ZAS is a great solution for demanding applications in hotel
rooms and apartments since it is able to manage climate, shutters, lights… and all
through an intuitive and modern touch panel.
Figure 1 Room Controller ZAS
Device Characteristics:
1.8’’ black-lighted display: 128 × 64 pixels
Temperature sensor with thermostat function.
It has 12 tactile buttons
Screensaver showing the time and temperature measured by ZAS, with the
suitable letter size for its reading from several meters away.
The menu in the display offers several submenus:
9Climate control
9Scenes control
9Presence simulation
9Security
9General configuration

ZENNiOAVANCEYTECNOLOGÍA www.zennio.com
4
Different types of status indicators: binary, 1-byte, floating, etc, and,
moreover, all the text labels can be pre-defined by parameter.
Each button of the device counts on a LED that lights during 2 seconds for
showing that the key-press has been correctly done and it can also be a status
indicator for some controls. Moreover, ZAS will beep every time one button is
pressed or the display is touched.
It includes two opto-coupled A/D inputs. The digital input operates as
switch/sensor (detection of rising and falling edges) and the analog input allows
the connection of one temperature probe.
CE compliant.

ZENNiOAVANCEYTECNOLOGÍA www.zennio.com
5
2. INSTALLATION
2.1. ZAS INSTALLATION
ZAS is connected to the KNX installation as any other KNX device, through the
KNX connector placed at the back.
For installing ZAS, first it is necessary to fix the metallic piece into the
squared/rounded standard box where it is going to be installed, with the corresponding
screws.
Next, the KNX bus and the inputs terminal must be connected using the
corresponding connectors; both terminals are placed in the rear part of the device.
Once inputs and bus KNX are connected, the device is fitted in the metal platform
thanks to the included magnets.
Finally, it is necessary to check, from both sides, that nothing unless the ZAS
outline can be seen (the metal platform should be completely hidden by ZAS).
This device does not need any additional external power supply since it is powered
through the KNX bus.
For further information about the installation and technical characteristics, look up
the ZAS Datasheet, available at www.zennio.com and in the packaging of the product.
ElementsDescription
Figure 2 Elements description
Nº Description
1 EIB Connector
2 Temperature sensor
3 Programming button
4 Programming LED
5 Inputs
6 Magnet
7 Tactile area
8 Display
9 IR Receiver

3.
Z
T
the
m
diffe
r
the
b
W
butt
o
Like
w
goin
g
T
E
the
p
U
be c
cou
p
DISPL
A
Z
AS counts
T
he first ro
w
m
enu, two
r
ent option
s
b
utton OK
t
W
ithin any
s
o
n Menu or
w
ise, as w
e
g
out of the
T
he menu
o
C
S
P
S
G
E
ach subm
e
p
rogram E
T
U
nder this
f
onfigured
b
p
le, implem
A
Y MA
N
on 12 tact
i
w
of buttons
arrow-sha
s
of the m
e
t
hat allows
s
ubmenu, f
o
the “arrow
”
e
ll as the b
menu dire
c
o
f the displa
C
limate con
S
cenes con
t
P
resence si
S
ecurity
G
eneral co
n
e
nu allows
T
S.
f
irst row of
b
b
y means
o
enting
j
oin
t
N
AGEM
E
i
le buttons
consists o
f
ped butto
n
e
nu and it i
s
selecting t
h
o
r returnin
g
”
icon that
w
utton Men
u
c
tly.
y offers se
v
trol
t
rol
mulation
n
figuration
to access
b
uttons, th
e
o
f the ETS
t
functions
Fig
u
E
NT
for controll
f
the butto
n
n
sthat all
o
s
also confi
h
e desired
o
g
to the pre
v
w
ill appear
u
, a “cross”
v
eral subm
e
the functi
o
e
re are 8 b
in order to
(binary c
o
u
re 3 ZAS
ing all its f
u
n
Menu tha
t
o
ws to scro
l
gurable as
o
ption.
v
ious one,
in the upp
e
icon in th
e
e
nus:
o
nalities co
n
uttons, ar
r
operate e
i
o
ntrol, tem
p
Front vie
w
u
nctionalitie
t
allows th
e
l
l up and d
o
a tempera
t
it is neces
s
e
r left corn
e
e
upper rig
h
n
figured b
y
r
anged in 4
i
ther indep
e
p
erature co
w
s.
e
direct acc
e
o
wn throu
g
t
ure contro
l
s
ary to pre
s
e
r of the di
s
h
t corne
r
,
a
y
paramete
r
rows. The
y
e
ndently or
ntrol, light,
e
ss to
g
h the
l
, and
s
s the
s
play.
a
llows
r
with
y
can
as a
etc).

ZENNiOAVANCEYTECNOLOGÍA www.zennio.com
7
Moreover, when these buttons are pressed the text message, previously
configured in the ETS for every action, will appear in the display. Once the message is
shown in the display, ZAS will automatically return to the submenu shown in the display
before carrying out the action or the screensaver if it was active.
Each button counts on a LED that lights during 2 seconds for showing that the key-
press has been correctly done. The LED shows the status of the switch or light
controls, in case it is enabled in ETS parameterization.
Moreover the device will beep every time one button is pressed or the display is
touched.

ZENNiOAVANCEYTECNOLOGÍA www.zennio.com
8
4. IR CONTROL
ZAS has a remote control (optional) that allows the control of the functions in the
same way that short or long press of the touch buttons.
Moreover, it counts on a series of buttons that directly activates some special
functions such as scenes, special thermostat modes, 1-bit object sending, etc.
TheFigure 4 Remote control shows the front view of the remote control.
The first row of buttons of the IR remote controller matches with the first row of
buttons of the own ZAS, both, in position and functionality. It has the keys Menu, two
keys Arrows and the key OK.
Figure 4 Remote control
Functions associated to the buttons in the most external lateral columns match up
with the rows of buttons of the device.
Besides the described buttons that have their equivalent button in the touch panel,
the remote control counts on the following keys which directly activate special
functions:
Buttons S1-S6: they activate the configured scenes for the submenu
“scenes” (scenes 1-6). Unlike ZAS, the remote control only allows executing
scenes but not saving them.
Buttons F1-F2: they allow sending 1-bit object configurable from ETS for
sending a “0”, a “1” or switching between “0” and “1”.
Buttons Comfort/Night/Standby: they allow directly establishing the
special thermostat modes Comfort/Night/Standby. It is necessary that these
modes had been previously enabled in ETS (thermostat).
Button Switch off: it switches off the luminosity of the device. One press on
the display or pressing a key of the remote control will activate the default
luminosity of the device.

ZENNiOAVANCEYTECNOLOGÍA www.zennio.com
9
When pressing a key of the remote control, besides executing the associated
function, ZAS will show the corresponding text message of that function. Once the
message of the action has been shown, the display automatically returns to the
submenu shown before pressing the button or the screensaver if it was active.

ZENNiOAVANCEYTECNOLOGÍA www.zennio.com
1
0
5. CONFIGURATION
The configuration of ZAS is carried out with the program ETS and it is organized in
the following sections, where the configuration of each option will be detailed:
General
Inputs
Buttons
5.1. GENERAL
The general configuration allows enabling the different general functions of ZAS as
well as defining the texts to appear on the display when executing them:
Functions
The section Functions allows enabling the following general functionalities:
Luminosity
This functionality allows establishing different luminosity levels for ZAS when
being in normal operation and screensaver.
Moreover, it offers the possibility of configuring two additional special levels of
luminosity that can be activated using 1-bit objects or scenes. These special levels
are configured by parameter.
Touch blocking
The buttons can be blocked using 1-bit objects, scenes or automatically
establishing the interval of time that must pass since the last key-press until the
automatic blocking takes place (time to block).
In the same way, the buttons can be configured for being unblocked using a
scene, sending 1-bit object or simply pressing the display that will also allows
sending a welcome object.
It is also possible configuring the blocking of the remote control at the same
time with the ZAS blocking.
Example: For cleaning the ZAS without activating the functions of the touch
buttons, it can be blocked/unblocked with 1-bit objects. The F1 and F2 special
funcions of the IR remote controller can be used for this aim, in case it is not
blocked at the same time.

ZENNiOAVANCEYTECNOLOGÍA www.zennio.com
1
1
Initial updating
This functionality allows re-establishing the value of the general indicators as
well as the values of the 1-bit objects associated to the buttons, after a power
failure. Moreover, this functionality allows establishing a delay for sending the initial
values since the power is recovered.
Remote control
ZAS counts on a remote control that can be enabled/disabled by parameter.
Each button of the room controller has its equivalent button in the remote
control (See 4.IR Control). Besides them, the remote control has several buttons
that allow the execution of special functions.
Internal temperature sensor
ZAS has an internal temperature probe with an associated communication
object. This communication object can be configured for being periodically sent to
the bus or after a temperature change.
Contrast level
The initial contrast level can be set, although it could be changed by users in
the Configuration menu, according to their needs.
Screens
In the section Screens, the Screensaver can be enabled for showing the time, the
temperature or both of them, alternating the data every 4 seconds.
The Information Screen can be also enabled in this menu. It shows an image of
the touch buttons with their corresponding label in the display, when the central area of
the controller (among the touch buttons) is pressed, during 10 seconds or until next
press.
Figure 5 Information Screen
On the other hand, the Menu and the General Indicators of the device can be
enabled for their configuration in additional section of menu:

ZENNiOAVANCEYTECNOLOGÍA www.zennio.com
1
2
General indicators
ZAS allows the configuration of up to 6 indicators that will be shown in the
display every time the display is pressed or after the execution of an action
associated to a key-press.
Each indicator has associated one communication object and it will show the
pre-configured text message and the value received by the communication object
from another device through the bus.
There are 5 types of indicators:
9Binary (1 bit): it shows different texts according to the received value.
9Counter (1 byte): it shows the received value (0-255).
9Percentage (1 byte): it shows the received value (0-100%).
9Enumeration (1 byte): it allows the introduction of up to 6 numerical
values with their corresponding labels (configurable texts by parameter).
9Float (2 bytes): it shows the received value specifying the units
(configurable text by parameter).
Menu
In the section Menu, the different options of ZAS can be enabled. When each of
these options is enabled, it could be configured selecting the corresponding section
in the lateral menu of the parameters edition.
The default password for restricted access to menu options, buttons and the
own Menu screen can be enabled/disabled in this section.
Each option allows introducing the name that will be shown in the display when
the menu is accessed:
Thermostat
ZAS offers the option of activating the thermostat for the following:
9Heating: this option includes Freezing protection
9Cooling: this option includes Overheating protection.
9Heating and cooling
In case the mode Heating and Cooling is enabled, the automatic switching
between heating and cooling can be activated.
Moreover, ZAS allows selecting one or two temperature sources as
reference temperature. In case of using two temperature sources, the values
provided by these sources will be mixed in a proportion configurable by
parameter.

ZENNiOAVANCEYTECNOLOGÍA www.zennio.com
1
3
Note: The internal temperature sensor can be used as reference
temperature linking the corresponding communication objects with the same
group addresses.
In this section, the special modes, Comfort, Night and Standby, can be
enabled, and the initial configuration for the thermostat when the power is
recovered. In the same way, customized text message can be introduced for
each label. These messages will be shown in the display when the different
thermostat functionalities are activated.
Escenas
The scenes or “lifestyles” are used to activate several devices in the domotic
installation, in a synchronized way, so that different predefined atmospheres are
generated.
ZAS allows the configuration of up to 6 scenes that can be activated by
means of one communication object, used for running (short press of the key
OK) or learning scenes (long press of the key OK).
It can be also input a text chain for each scene in order to be shown in the
display when the corresponding scene is activated.
Presence Simulation
This function is designed to simulate presence in a house.
It allows establishing the initial and the final time of the simulation and the
maximum and minimum duration of the switching on/off of the devices linked to
the simulation.
Security
By means of this functionality, the different menus and buttons can be
protected against un-authorized access establishing a password that consists of
a particular combination of key-presses.
For accessing the protected options of the menu or buttons, it will be
necessary to press the established combination of buttons before pressing the
protected button or selecting the desired option. Once the password has been
introduced, the user has 60 seconds to access or activate the protected
functionalities. After this period of time, the user will have to introduce the
password again to activate the protected functions.
Moreover, this menu allows introducing text messages for guiding the user
in the process of password change, error messages, etc.

ZENNiOAVANCEYTECNOLOGÍA www.zennio.com
1
4
Configuration
The menu Configuration allows enabling the following controls: contrast,
time, programming LED, touch calibration and reset to the values of the last
configuration (long press of key OK), and assigning the name to be shown in
the display to each control.
Generallabels
The section General labels allows introducing labels for options used in multiple
menus: “On”, “Off”, “Scene”, “Saved scene”, and the messages that will guide the
calibration process.
Note: The touch calibration is carried out pressing the buttons 1, 2, 7 y 8, in this
order. The display will indicate the buttons to press, showing the corresponding
instructions.

ZENNiOAVANCEYTECNOLOGÍA www.zennio.com
1
5
5.2. INPUTS
ZAS has two A/D inputs that can be configured as:
Switch/Sensor
A Switch/Sensor connected to an input, consists of an electrical mechanism
which may have its contacts open or closed under normal conditions. These
mechanisms do not recover their normal position automatically as with the push
button.
A transition of a digital signal from low to high or high to low is called "Edge".
9Falling Edge: closed contact to open contact.
9Rising Edge: open contact to closed contact.
When selecting an input as Switch/Sensor, the 1-bit object “[Switch/Sensor]
Sensor Edge” will be sent to the bus every time a falling or rising edge takes place
(with the corresponding configured value by parameter).
This type of input allows configuring a delay for sending the communication
object as well as a cyclical sending and an automatic status sending after a
power failure.
Temperature Sensor
A temperature sensor provides the real temperature measure of a room or
place.
The ZAS application program allows configuring both inputs as temperature
sensors and, in the menu Thermostat, the measure provided by these temperature
sensors can be mixed and set as temperature reference for the thermostat.
When configuring an input as temperature sensor, the temperature calibration,
the temperature sending period, the minimum temperature change for sending
the temperature value to the bus can be established.
Moreover freezing and overheating protection can be enabled.
5.3. BUTTONS
ZAS has 8 tactile buttons for general use, two arrow-shaped buttons
(temperature control and scrolling) and two buttons for accessing the Menu and
validating the selected options (OK).
The 8 buttons for general use, located in 4 rows, can be configured in the following
way:

ZENNiOAVANCEYTECNOLOGÍA www.zennio.com
1
6
Buttons for individual use
These buttons can be configured for sending:
91-bit value (fix or toggle)
9scene
91-bit that sends different values when pressing and releasing the key
91 byte fixed value (0 to 255 range)
92 bytes unsigned integer fixed value (0 to 65535)
92 bytes floating point fixed value (0 to 120.0)
Buttons for operating in couple
Buttons that are located in the same row can be configured to jointly operate
implementing the following functions:
9Light Control
9Shutter Control
9Scaling Control
9Counter Control
9Enumeration Control
9Temperature Control (0 to 100ºC)
Each button of the device counts on a LED that is lighting during two seconds for
indicating that the key-press has been correctly carried out (Regular LED lighting). In
case there is a toggle, switch or light control, the LED can be configured to show the
status associated to the button (State-dependent LED lighting). ZAS will also emit a
“beep” every time a button is pressed.
The arrow-shaped buttons can be configured as a temperature control.
Note: A short key-press of the right button will increase 0.5ºC the temperature while
la the long key-press will increase 1 ºC the temperature. In the same way, the left
button will decrease the temperature.

ZENNiOAVANCEYTECNOLOGÍA www.zennio.com
1
7
6. PARAMETERIZATION
For carrying out the parameterization of the room controller ZAS, it is necessary,
once the ETS is open, importing the product data base ZAS 1.0.vd2.
Next, ZAS must be added to the project where the device is required and, clicking
the right button of the mouse on the device, the Edition of Parameters must be selected
for beginning the configuration.
In the following sections there is a detailed description about the parameterization
of the different functionalities of the device in ETS.
6.1. DEFAULT CONFIGURATION
This section shows the default configuration of the device.
When opening “Edit parameters” the first time, the default General configuration
will appear.
The following figure shows the appearance of the window General:
Figure 6 Default General Configuration
If the Inputs and Buttons are selected, it will be seen that ZAS has two inputs and
8 buttons, disabled by default.

ZENNiOAVANCEYTECNOLOGÍA www.zennio.com
1
8
Figure 7 Default inputs configuration
Figure 8 Default buttons configuration
Next figure shows the available communication objects by default: Time and the
communication objects for sending and receiving Scenes.

ZENNiOAVANCEYTECNOLOGÍA www.zennio.com
1
9
Figure 9 Available communication objects by default
6.2. GENERAL
The parameterization window General allows configuring the basic functionalities,
menus and screens of the room controller ZAS.
Figure 10 General configuration
The basic functions that can be configured in the section General are the following:

ZENNiOAVANCEYTECNOLOGÍA www.zennio.com
2
0
Luminosity
Touch Blocking
Initial Updating
Remote Control
Internal Temperature Sensor
Contrast level
When the desired function is enabled in the scroll down menu located at the right of
the name, the corresponding communication objects will be enabled and the access to
the configuration window of the function will appear in the lateral menu.
Luminosity
This functionality allows carrying out a customized configuration of the
luminosity when it is in normal operation and in screensaver mode:
¾Level while normal operation: value between 5 (minimum luminosity)
and 10 (maximum luminosity).
¾Level while screensaver: value between 3 (minimum luminosity) and
10 (maximum luminosity).
Moreover, it is also possible to configure two special levels of luminosity that
can be activated using 1-bit communication objects or scenes. For these special
levels it can be configured the following parameters:
¾Luminosity level: value between 1 (minimum luminosity) and 10
(maximum luminosity).
¾Enabling: using 1-bit communication object or scene.
¾Value: luminosity value for the special level. This value can be “0” or “1”,
in case of using 1-bit object or the number of the scene.
Table of contents
Other Zennio Controllers manuals

Zennio
Zennio ZN1CL-IRSC User manual

Zennio
Zennio IRSC Plus User manual

Zennio
Zennio FANinBOX 110V 1CH Guide

Zennio
Zennio MAXinBOX SHUTTER 8CH v3 Guide

Zennio
Zennio AudioInRoom ZMU-AUIR User manual

Zennio
Zennio ZCL-MCC User manual

Zennio
Zennio Tecla 55 X Sign User manual

Zennio
Zennio LUMENTO X3 Guide

Zennio
Zennio MINiBOX 20 User manual

Zennio
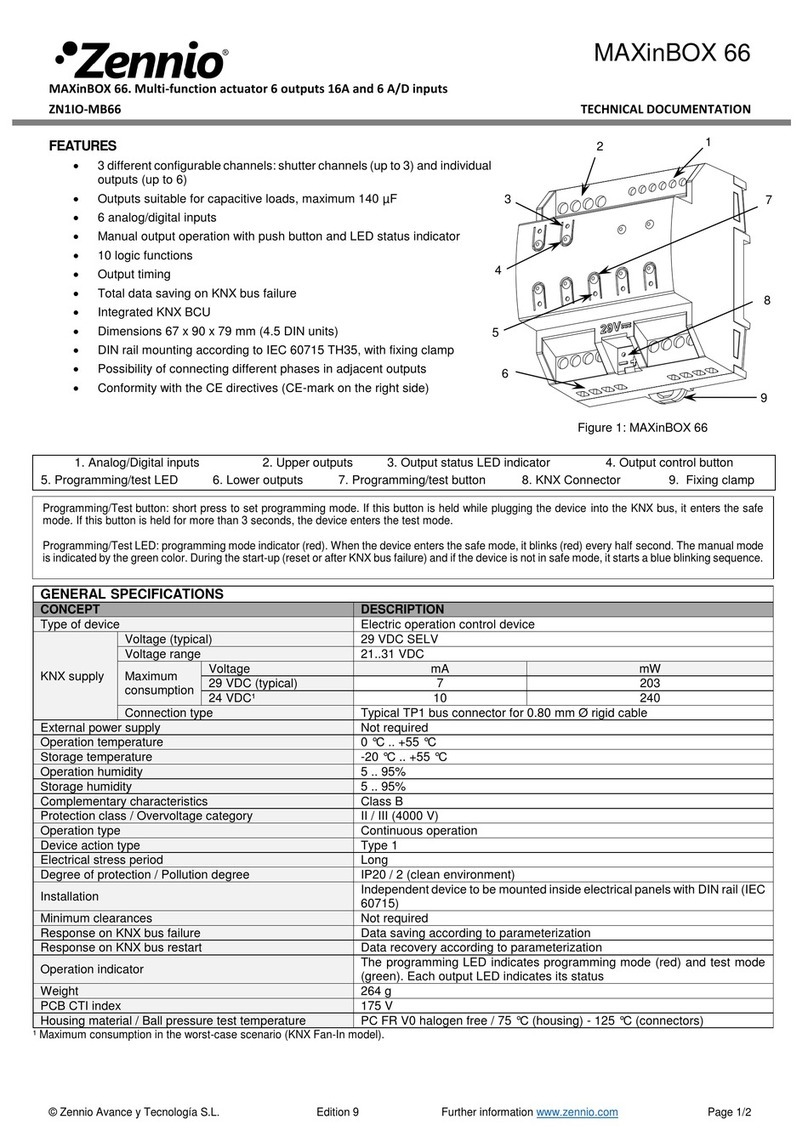
Zennio MAXinBOX 66 User manual
Zennio
Zennio LUMENTO X4 Guide

Zennio
Zennio ZCL-FC010F Guide

Zennio
Zennio FANinBOX 230V 1CH Guide

Zennio
Zennio MAXinBOX 8 Plus Guide

Zennio
Zennio MAXinBOX 24 Guide

Zennio
Zennio ZoningBOX 6 Guide

Zennio
Zennio MAXinBOX 66 Guide

Zennio
Zennio IRSC Zone User manual

Zennio
Zennio MAXinBOX 16 Plus Guide

Zennio
Zennio MINiBOX 45 v3 Guide