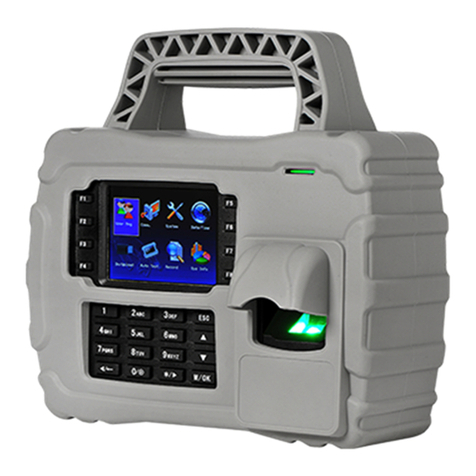
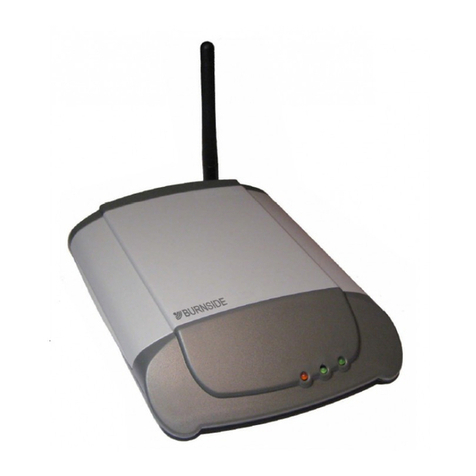
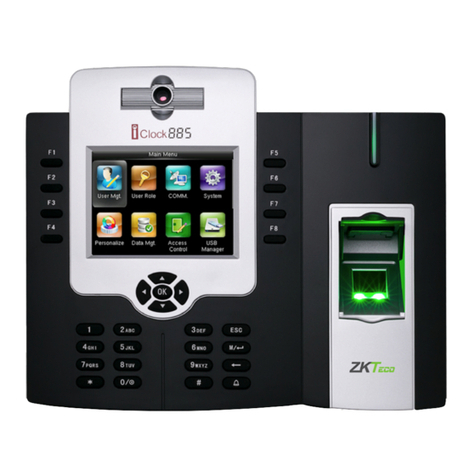
ZKTeco S922 Series User manual

User Guide
S922 Series |Time & Attendance Terminal
This guide provides User instructions only. For information regarding actual installation, refer to the S922 Installation Guide

S922 USER GUIDE | 2016
2
User Guide Disclaimer
All functions described in this document are current as of January 2009. Every eort has been made to ensure the information in this document is complete and
consistent with the US922 you have purchased. Since the US922 is constantly being improved, it is remotely possible that this document may not precisely coincide
with the US922 you have purchased. ZK Software will not assume liability for any direct or indirect nancial loss resulting from any inaccuracies or omissions found
in this document.

US922 USER GUIDE | 2016 3
Step 1: Install the US922 and power it up.
Step 2: Enroll users by registering his/her ngerprints or passwords.
If the US922 is operating in stand-alone mode, (where no 3rd party access con-
trol panel exists) assign users’security privileges directly on the US922.
Note: If using the US922 with a 3rd party Wiegand access control panel, users’
security privileges will be maintained by the access control panel and NOT the
US922.
Step 3: After enrolling user(s), verify that his/her enrolled ngerprint or password
is recognized by the US922.
Step 4: Congure the US922 communication settings and then download the
users’newly enrolled ngerprints from the US922 onto a computer. Data can be
transmitted via TCP/IP or by using a USB ash drive.
Step 5: Verify that US922 displays the correct day and time
Note: Always back up the ngerprint templates on a computer or removable
media source. Having a“template backup”can potentially save you a lot of time.
If the US922 fails or is vandalized, having a“backup”eliminates the need of hav-
ing to re-enroll all your users.
Operating |Brief Overview

US922 USER GUIDE | 2016 4
Prior to operating the US922, it is essential to understand how ngerprint recognition
technology works.
Adding and verifying ngerprints are the core functions of the US922. Once you ac-
quire a thorough understanding of ngerprint recognition technology, you will nd
your experience with the US922 to be very productive and rewarding
How Fingerprint Recognition Technology Works
All ngerprints contain a number of unique physical characteristics called minutiae.
Minutia includes certain visible aspects of ngerprints such as ridges, ridge endings,
and bifurcation (forking) of ridges. Most of the minutiae are found in the core points
of ngerprints, which are found near the center of the ngerprint on the eshy pad
of the nger.
Figure below shows the positions of core points within ngerprints. The core points
are represented by the green dots in the gure below
Fingerprint Recognition Technology
Island Dot Bifurcation Ending Ridges
A core point is dened as the topmost point on the innermost upward recurring
ridge line.
A user is considered“enrolled”in the US922 after his/her ngerprint(s) or password
has been successfully registered in the US922.
When the user places his/her nger(s) on the US922 ngerprint sensor during the
enrollment process, the US922 takes a picture of that user’s nger’s key minutiae
points. Then the US922 uses its proprietary mathematical algorithm and converts
that picture into a unique mathematical template which is comparable to a 60-digit
password. This unique template is then encrypted and stored in the US922 database
IMPORTANT NOTE
Privacy issues should never be a concern when using the US922 because NO REAL
IMAGE OF A USER’S FINGERPRINT IS STORED. ONLY the minutiae-based tem-
plates are stored.
Each time a user’s ngerprint is scanned, the US922 searches its database for a
matching ngerprint. If the US922 nds the user’s ngerprint, then his/her“atten-
dance/door access”is recorded in the US922“audit log” and will be noted in subse-
quent reports.

US922 USER GUIDE | 2016 5
Getting Good Fingerprint Images
The quality of ngerprint images is relative to the number of minutiae points cap-
tured by the US922’s sensor. Fingerprint images not possessing an adequate number
of minutiae points may be unreadable. It is advised to issue a secret password for
those users whose ngerprint images lack sucient minutia points and cannot be
read by the sensor. Also, you may consider purchasing an US922 with an integrated
card reader if you do not intend to assign passwords
Figure A-2 shows poor-quality ngerprints, characterized by smudged, faded or dis-
torted areas on the ngerprint. These conditions can be caused by excessive dryness,
wetness, insucient pressure or scarring of the skin at the ngertip..
Dry Wet Scarred
The US922 ngerprint matching algorithm is capable of extracting the correct minu-
tiae without the benet of a perfect print. However, the positioning of the nger and
the moisture and pressure of the ngerprint are signicant factors to consider when
it is placed on the sensor. This will help achieve a good consistent ngerprint match.
Correcting Wet or Dry Fingerprint Images
When the temperature is rigid or when hands have just been washed, ngerprints
often become very dry. In this case, the user should moisturize his/her ngerprint
simply by breathing on the eshy pad of his/her ngertip prior to placing his/her n-
ger on the sensor. The moisture from his/her breath should improve the recognition
of his/her ngerprint.
Conversely, if the ngerprint is too wet, the ridges and valleys are rendered indistin-
guishable. The lack of recognizable minutiae causes wet ngerprints to be rejected
by the US922. This can be remedied simply by swiping the nger on a clean dry
towel or cloth.
How much pressure is required for a good-quality
ngerprint?
If too much pressure is applied when pressing down on the sensor, the nger’s
ridges become pressed together and create an unrecognizable image. Applying too
much pressure (similar to ngerprints that are too wet) will create a“blurred”image
which the US922 sensor might not recognize.
If too little pressure is applied, the resulting image will be similar to the dry ngerprint
and unidentiable. Issues related to moisture and pressure can easily be addressed
with practice and users getting a feel of the sensor.
Be sure to maintain contact with the ngerprint sensor for 2 full seconds, until
the US922 responds.
The US922 has both audio and visual indicators which respond when the US922
senses a nger.
Fingerprint Recognition Technology

US922 USER GUIDE | 2016
6
Proper Finger Placement
The user’s nger should completely cover the sensor. The nger should be placed at
and in the center of the sensor. The nger should cover at least 80% of the sensor as
shown below
Identity Verication
The US922 will NOT record an employee’s attendance OR allow door access UNTIL
the individual’s identity is veried.
The US922 uses various methods to verify a user’s identity:
•Fingerprint Matching
•Password Matching
•Card Matching (optional)
Fingerprint Matching
The US922 supports two methods of ngerprint matching, 1:N and 1:1.
1: N Fingerprint Matching
When using 1:N Fingerprint Matching, the US922 will place the ngerprint (“1”) in its
temporary memory and then compare it to ALL (“N”) ngerprint templates stored in
the US922 database (up to 2800 templates).
By using 1:N matching, the user enjoys the convenience of not entering his/her User
ID number prior to placing his/her nger on the sensor. 1:N is principally a 1-touch
matching. It is the FASTEST and EASIEST method of ngerprint matching.
The nger should NOT be placed in the following positions:
Upright
Sideways
Skewed
Partial
Fingerprint Recognition Technology

US922 USER GUIDE | 2016 7
Start from the Check/Clock-
In Screen:
If the US922 responds
“Please try again,” the pro-
cess must be repeated.
1: 1 Fingerprint Matching (ID. NO +ngerprint)
When too many users’ngerprints are not easily recognized by the US922, it can be
set to perform 1:1 ngerprint matching.
1:1 matching requires an added step of entering the user’s ID. number rst. However,
1:1 matching is more consistent than 1:N matching.
How to Use 1:1 Fingerprint Matching
PRIOR to placing his/her nger on the US922 ngerprint sensor, the user must FIRST
enter his/her ID number and press . If the ngerprint template registered with
his/her user ID number (“1”) matches his/her nger (“1”), the user’s identity has
successfully been veried using 1:1 ngerprint matching.
From the Check/Clock-In
screen, properly place nger
on sensor.
When the US922 responds,
“Thank you,” the user has
successfully veried his/
her identity by using 1:N
matching.
How to Use 1:N Fingerprint Matching

US922 USER GUIDE | 2016 8
If ngerprint matching
becomes too problematic
for too many users, they can
register with passwords
instead of ngerprints.
How to Use Pass-
word Matching
Start at the Check/Clock-In
Screen:
At the Check/Clock-In
screen, enter the employ-
ee’s User ID. number and
press
After a users ID number
is entered and the user is
NOT prompted to enter his/
her password (“PWD”), this
means that NO password
has been registered to that
ID number.
If the US922 prompts “Error Enroll NO(number)”,this means the user has mistak-
enly entered an incorrect ID number. If this is the case, the user should reattempt
entering his/her correct user ID number.
After entering the user ID.
number, the user will enter
his/her password (“PWD”).
If the US922 responds with
“Thank You”, then the user
has successfully veried his/
her identity using Password
verication.
Password Matching

US922 USER GUIDE | 2016 9
If the US922 prompts the
user with “Error Pwd”, then
the user should re-attempt
entering his/her correct
password.
If the US922 veries the us-
er’s identity BUT determines
the user is NOT permitted
door access AT THAT PAR-
TICULAR TIME, the door will
NOT release and the US922
displays the following:
Door-Access Con-
siderations
The US922 is designed to
work as an Access Control
terminal and a Time &
Attendance recorder.
Door Access Control deci-
sions are based upon“Who”
the user is and“When”the
user is permitted door
access.
The US922 will verify“who”the user is. When the user is granted door access, it can be
decided EITHER by the US922 OR a 3rd party Access Control panel.
If the US922 validates the identity of the user AND determines the user is permitted
door access AT THAT PARTICULAR TIME, the door will release and the US922 displays
the following:
Password Matching

US922 USER GUIDE | 2016 10
User
Add New User
Start at the Check/Clock-
In screen. Press the Menu
key to open the Main
Menu, as shown in the
gure below:
From the Main Menu,
highlight and select User to
add/change/delete users’
ngerprint(s), password or
authority (Admin or user).
From the User Menu, scroll
with the keys until
New User is highlighted:
Press to accept.
The User Menu allows you to:
•Add/Edit/Delete users
•Access the users’attendance records
•Set users’door-access privileges
•Register smart cards (only available in some US922 models)
•Create personalized“Check/Clock-In/Short messages”
•Create Work Codes

US922 USER GUIDE | 2016 11
The following “New User”
settings are available:
Add New User ID.
NO
From within the New User
Menu, scroll with the keys
until the cursor is in the ID.
NO eld
Note: The US922 automat-
ically assigns the next avail-
able ID number by default.
Press to accept the
default ID NO. If a dierent
ID NO is preferred, use the
backspace key and/or scroll keys and type a dierent ID number.
Add New User
Name
The US922 allows up to 24
“letters”(or “symbols”) to be
entered describing a user.
From within the New
User Menu, scroll with the
keys until the cursor
is in the Name eld:
ID. NO (Account Number)
Unique identication number associated with each user.
Name
Up to 24 characters can be entered.
FP (Fingerprint)
A user can enroll up to 10 ngerprints.
PWD (Password)
A user can enroll a password using 1 to 8 characters.
AUTH (Security/Authority)
Identies a user as a normal user or an Administrator.
Note: Administrators have unrestricted access to the entire US922 menu system and
can freely modify user information. Administrator(s) can also enroll other“Administra-
tors.”NON-Administrators (i.e. normal users) cannot access the US922 menu system.
Non-Admins cannot modify user information or make any system changes to the
US922.

US922 USER GUIDE | 2016 12
Each time you press the
asterisk key on the
keypad, you have the
choice to enter either“let-
ters”or “symbols.”When in
“letter mode”[ EN ] (English)
will appear at the bottom of
the screen.
Press the asterisk
again and [symbol] will re-
place [ EN ] (English) at the
bottom of the screen. When
in“symbol mode,”press the right scroll key to access more symbols.
How to create a
User’s Name
The following example
illustrates how to create the
username Joe.
Step 1
From within the New User
menu, press the aster-
isk key until [ EN ]
(English) appears at the
bottom of the screen. You
are now ready to begin entering“letters.”
Step 2
Press the
5JKL
key once.
Notice there are 6 choices:
0j 1k 2l 3J 4K 5L
To enter the username Joe, press the 3 key to create an uppercase letter “J .”
After entering the desired“letter,”the display will return to the [English] prompt.
Step 3
Press the
6MNO
key once to continue entering the username Joe.
Again there are 6 choices:
0m 1n 2o 3M 4N 5O
To continue entering the username Joe, press the 2 key to create a lowercase “o .”
After entering the desired“letter,”the display will return to the [English] prompt.
Step 4
Now press the
3DEF
key once to continue entering the username Joe
Again, notice there are 6 choices:
0d 1e 2f 3D 4E 5F
Finish entering the username Joe by pressing the 1 key once to create a lowercase
“e .”
You’ve now completed entering the user’s name and are ready to enter “Joe’s” n-
gerprint(s) and/or password and authority setting.

US922 USER GUIDE | 2016 13
Enroll New User
Fingerprint (FP)
From within the New
User Menu, scroll with the
keys until the cursor
is in the FP eld.
Notice “Enroll FP” will
become highlighted. Press
to accept selection.
Notice the following screen
appears:
Place the nger you wish to enroll on the sensor, ensuring the nger is placed at
and centered.
Hold the nger still for at
least two full seconds until
the US922 prompts with a
beep to remove it. You will
then be prompted to repeat
the process 2 more times,
each time using the very
SAME nger.
Notice that every time the
US922 successfully records
the user’s ngerprint, each
of the 3 green bars will
become highlighted until all 3 bars are eventually highlighted.
As noted, the US922 will beep with each successful ngerprint template recording.
When all 3 ngerprint
template recordings are
successful, a check mark will
appear beside the 3-colored
green bars:
After 3 successful nger-
print “recordings”, the user’s
ngerprint template is now
successfully registered in the
US922 database.
Press if you would like
to continue recording additional ngerprint/templates.
NOTE: It is highly recommended that users register at least one nger from
each hand.
Since the ngerprint sensor may have diculty reading ngers with cuts or scratches,
having a“backup”nger(s) registered ensures that the user will always be recognized
by the US922. If one nger is temporarily rendered“unreadable”by recent cuts or
scratches, the user can use their backup nger.
After ngerprint registration is completed, press the
ESC
key to return to the New
User menu.

US922 USER GUIDE | 2016 14
Enroll New User
Password (PWD)
NOTE: A password is NOT
required. However, a pass-
word can be used if a user is
having diculty having his/
her ngerprint recorded or
recognized by the US922.
From within the New
User Menu, scroll with the
keys until the cursor
is in the PWD eld.
Notice Enroll Pwd will become highlighted:
Press to accept selection.
Notice the following screen
appears:
In the “Input Pwd”eld,
enter a password of 1 to 8
characters.
Then scroll down to the
“Pwd Arm” eld and re-en-
ter the same password.
After completed, scroll with
the keys until
(M/<-) is highlighted. Then
press the OK key to accept.
After saving the password, the screen will return to the New User menu and the icon
will display alongside Enroll Pwd. This indicates a password has been saved and
registered to that user.
Set New User Au-
thority (AUTH)
The US922 recognizes two
(2) types of users:
1. User
NO administrative rights;
Only Check/Clock-in/out
and/or need door access.
2. Admin
UNRESTICTED US922 sys-
tem rights;
Can add, modify and delete user and door access.
Note: Until an administrator is actually registered on the US922, ALL users have unre-
stricted access to the US922 menu settings (i.e. Add/Edit/Delete users).
For this reason, we advise enrolling an“administrator” after initial installation to help
ensure safeguarding both the US922(s) and the customer door entrance(s).
From within the New User Menu, scroll with the keys until the cursor is in the
AUTH eld.
“AUTH” is the abbreviation for “authority.”
Scroll with the keys to choose either User or Admin.

US922 USER GUIDE | 2016 15
Save/Exit New User
registration
After New User information
is entered, scroll with the
keys until OK (M/<-)
is highlighted. Press
to accept.
You will then be prompted
“Changed Saved! Continue?”
Press to save.
To cancel and return to the
previous menu, scroll and choose Cancel, or press
ESC
Manage User(s)
The Manage Users menu allows the System Administrator(s) to view all users’ infor-
mation stored in the US922.
This includes the users’ ID.
NOs (numbers), names,
how many ngerprints
they have registered and if
they have registered pass-
words.
Search for user(s)
Administrators can search
for any registered user.
Start at the User Menu.
From within the User Menu, scroll with the keys until Manage is highlighted.
Press to select.
Notice the following screen
appears:
Note: In the above gure,
the icon indicates that
particular user is a System
Administrator.
The icon indicates
that a password has been
registered to the respective
user(s).
Press the menu
(OK M/ )
key and the following drop-down menu appears:
Note: The “Attlog” option may appear as “Record,” instead.
The option“User Access”will appear only if the US922 Access
Control feature has been activated.
Use the scroll keys and highlight “search user.”
Then press OK to select.
The following screen appears:
Enter the ID Number and/or
name of the user you wish
to search for. Press to
initiate the search.
After searching successfully,
the user’s record will be
highlighted in blue.
If the user is not registered
on the US922, the message
“No Enroll!” will appear.

US922 USER GUIDE | 2016 16
User(s) Attendance
records
Administrators can retrieve
any registered user’s recent
attendance record.
Start at the User Menu:
From within the User Menu,
scroll with the keys
until Manage is highlight-
ed.
Press to select. Notice
the following screen ap-
pears
Select the user whose at-
tendance records you need
to view by scrolling with the
keys to highlight
his/her record.
Then press the Menu
key so the drop-down
menu appears:
Use the scroll keys
and highlight “record
(Attlog).” Then press to select.
The selected user’s attendance records will be displayed.
Press
ESC
to cancel and return to the previous menu.
Edit User(s)
Administrators can edit
any registered user’s prole
information.
Start at the User Menu:
Scroll with the keys
and highlight Manage. Then
press to open the User
Manage screen:
Select the user whose
prole you need to edit by
scrolling with the
keys.
Then press the Menu
key so the drop-down
menu appears:
Use the scroll keys
and highlight Edit. Then
press to select. The fol-
lowing Edit Menu appears:

US922 USER GUIDE | 2016 17
All the available“edit”op-
tions are the same as in the
“Add user”menu.
Administrators can add
more ngerprints, register a
name if the user previously
did not enter one, add a
password, or change his/
her user authority status to
“User”or “Admin.”
After making all necessary
changes, use the scroll keys and highlight OK(M/<-). Press to save chang-
es and return to the previous menu.
Delete User(s)
Administrators can delete all or partial registered user information on the US922.
Deleting may be necessary when:
•A user’s ngerprint is no longer recognized (possibly caused by injury) or his/her
password has been forgotten.
•The user is no longer employed and his/her ngerprint(s)/password and user
information need to be
deleted from the US922
for security purposes.
Start at the User Menu:
Scroll with the keys
and highlight Manage. Then
press OK to open the User
Manage screen:
Select the user to be de-
leted by scrolling with the
keys.
Then press the Menu
key so the drop-down
menu appears:
Use the scroll keys
and highlight Del User. Then press to select. The following Delete User screen
appears:
You can delete the user,
ngerprint or password.
Scroll with the keys
to highlight your selection.
Press OK to delete your
selection.
The US922 will prompt you
“OKDel”?
Press OK again to conrm
deletion.

US922 USER GUIDE | 2016 18
Add User(s)
Administrators can add
users from the User Manage
Menu also.
Scroll with the keys
and highlight Manage.
Then press to open
the User Manage screen:
Press the Menu key
so the drop-down menu
appears:
Use the scroll keys
and highlight New User.
Then press the key to
select.
The“add”options are the
same as in the“New User
Menu.”
Administrators can add a
new user and register his/her
ngerprints, name, password
and authority status.
After New User information is completely entered, scroll with the keys until
OK (M/<-) is highlighted.
Press to accept.
You will then be prompted “Changed Saved! Continue?”
Press to save.
To cancel and return to the previous menu, scroll and choose Cancel or press
ESC

US922 USER GUIDE | 2016 19
User Access Control
In addition to acting as an attendance recorder, the US922 is also an access control
terminal.
Using the US922 with 3rd Party Door Control Panels:
WHEN THE US922 IS USED WITH A 3RD PARTY ACCESS CONTROL PANEL, THE
US922’S SOLE FUNCTION IS VERIFYING THE IDENTITY OF THE USERS.
AFTER IDENTITY IS VERIFIED, THE US922 SENDS A 26-BIT WIEGAND SIGNAL TO
THE 3RD PARTY CONTROL PANEL PROVIDING ONLY USER-ID MATCH CONFIR-
MATION.
IT IS THE 3RD PARTY PANEL AND NOT THE US922 WHICH CONTROLS DOOR
ACCESS IN THIS CONFIGURATION.
THEREFORE, WHEN USING THE US922 WITH A 3RD PARTY DOOR CONTROL
PANEL, REFER ALL ACCESS-RELATED QUESTIONS TO THE 3RD PARTY CONTROL
PANEL MANUFACTURER AND NOT ZK SOFTWARE.
US922 as a STAND-
ALONE Door Con-
troller:
Scroll with the keys
and highlight Manage.
Press to open the User
Manage screen:
Select the user whose door
access needs to be mod-
ied by using the
keys.
Then press the Menu
key so the drop-down
menu appears:
Use the scroll keys and highlight “User Access.”
Then press to select.
Note: The option for User Access will not be in the drop-
down menu unless the US922 Door Access Control has
been“activated.”

US922 USER GUIDE | 2016 20
The User’s ID NO (number)
will be noted at the top of
the User Access Menu
At this time, enter a Gp
(“Group Number”) to further
dene the User’s access
rights.
If you enter a Group Num-
ber that does not currently
exist, the system will allow
you to add that Group
Number and dene it.
New Group
Creating“groups”allows you to dene“unique door access/ security rules”for multiple
users. After these“rules” are created, you can then assign users to these“groups”
which have been created.”
Creating a few groups is much faster than conguring each user’s individual door
access rights/security one at a time
Creating a Group
From within the User Access
menu, use the scroll
keys and place the cursor in
the Gp (Group) eld:
Then enter a Group Num-
ber and press .
The US922 will prompt:“GP#
NO exist, add it?”
(The “#”refers to the Group
Number you entered)
Press again to accept
the new Group Number.
The New group Menu will
appear:
No. represents the Group
Number you just created.
Ver Type represents the ways this group’s members can veriy his/her identities:
Use the scroll keys to select which verication method (or combination) this group’s
members will use (FP and/or PW and/or PIN and or RF)
FP = Fingerprint
PW = Password
PIN = Personal Identication Number
RF = Radio Frequency ID (proximity card)
This manual suits for next models
1
Table of contents
Other ZKTeco Touch Terminal manuals

ZKTeco
ZKTeco G5 User manual

ZKTeco
ZKTeco ProBio(QR) User manual

ZKTeco
ZKTeco U1000F User manual

ZKTeco
ZKTeco ZK75 Series User manual

ZKTeco
ZKTeco RevFace15 User manual

ZKTeco
ZKTeco LPRS2000 User manual

ZKTeco
ZKTeco ZKAIO1000W User manual

ZKTeco
ZKTeco LFace10 User manual

ZKTeco
ZKTeco ZKBio930 User manual

ZKTeco
ZKTeco ZKBio810 Series User manual

ZKTeco
ZKTeco uFace Plus Series User manual

ZKTeco
ZKTeco ProFace X User manual

ZKTeco
ZKTeco FA2000 User manual

ZKTeco
ZKTeco ZK3530 User manual

ZKTeco
ZKTeco EFace10 User manual

ZKTeco
ZKTeco ZPAD+ User manual

ZKTeco
ZKTeco IN710 User manual

ZKTeco
ZKTeco G2 User manual

ZKTeco
ZKTeco ZKAIO4000W User manual

ZKTeco
ZKTeco PA22 User manual