Zoom X5V Use and care manual

X5v and V3
TECHNICAL REFERENCE

NOTICE
NOTICENOTICE
NOTICE
This document contains proprietary information protected by copyright, and
this Manual and all the accompanying hardware, software, and
documentation are copyrighted. No part of this document may be
photocopied or reproduced by mechanical, electronic, or other means in
any form.
The manufacturer does not warrant that the hardware will work properly in
all environments and applications, and makes no warranty or representation,
either expressed or implied, with respect to the quality, performance,
merchantability, or fitness for a particular purpose of the software or
documentation. The manufacturer reserves the right to make changes to the
hardware, software, and documentation without obligation to notify any
person or organization of the revision or change.
All brand and product names are the trademarks of their respective owners.
© Copyright 2005
All rights reserved.

3
Contents
1. ADVANCED VOIP SETTINGS ........................................ 4
1.1 HOW TO ACCESS THE ADVANCED VOIP OPTIONS ..................... 4
1.2 CHANGING YOUR SERVICE PROVIDER SETTINGS........................ 6
1.3 MODIFYING THE DIAL PLAN................................................14
2. ADVANCED SETUP OPTIONS...................................... 20
2.1 HOW TO USE THE ADVANCED OPTIONS.................................20
2.2 WAN CONFIGURATION .....................................................21
2.3 LAN CONFIGURATION.......................................................29
2.4 DNS ............................................................................31
2.5 ADSL CONFIGURATION (X5V ONLY).....................................33
2.6 ROUTE TABLE .................................................................34
2.7 MISCELLANEOUS..............................................................36
2.8 BRIDGE FILTERING...........................................................39
2.9 RIP CONFIGURATION........................................................40
3. MONITORING STATUS............................................... 42
3.1 WAN STATUS.................................................................42
3.2 ATM STATUS (X5V ONLY) .................................................43
3.5 PPP STATUS ..................................................................44
3.6 MAC TABLE ...................................................................45
4. ADMINISTRATION..................................................... 46
4.1 CHANGING THE ADMINISTRATOR PASSWORD...........................46
4.2 DIAGNOSTICS .................................................................47
4.3 DISPLAYING THE SYSTEM LOG.............................................49
4.4 UPDATING THE UNIT’S FIRMWARE........................................49
4.5 REBOOTING THE SYSTEM ...................................................51
APPENDIX: VOICE OVER IP PHONE INSTALLATION
OPTIONS........................................................................ 52

4
1
Advanced VoIP Settings
1.1 How to Access the Advanced VoIP
Options
To access the advanced VoIP options, click the Voice over
IP icon at the top of the X5v or V3’s main page.
If you have exited from the X5v or V3 and have forgotten
how to establish communication with it, follow these steps:
1
11
1If you have Windows, double-click the Zoom
icon on your desktop that looks like this. This
action opens up the Zoom Configuration
Manager.
If you do not have an icon, open your Web
browser, type http://10.0.0.2 and press
Enter.
2
22
2Log in by typing the following information in
lower-case letters.
User Name: admin
Password: zoomvoip
3
33
3Click the Voice Over IP icon at the top of
the page. The Voice Over IP page displays.

5
4
44
4Scroll down to the bottom of the page to see the Advanced
Options buttons, which let you configure additional VoIP
capabilities. The Supplementary Services button lets you
enable call waiting and call forwarding, for example, and the
Advanced VoIP Setup button lets you set up your X5v or V3
to work with a particular VoIP service provider.

6
1.2 Changing Your Service Provider
Settings
At the bottom of the Voice over IP page, click the Advanced
VoIP Setup button to change your VoIP settings to match any
service provider.
Entry Explanation
Enable VoIP (View-only check box) VoIP cannot be disabled.
Enable SIP (Session
Initiated Protocol)
Registration
The default is Enable. Clear this check box if
you want to set up calls directly to another VoIP
device without registering with a VoIP service.
For example, if you know all the IP addresses of
those you wish to call, you may want to disable
SIP Registration.
Auto Account Configure Enabled by default. Clear the check box to
prevent information that you have entered in this
page from being automatically overwritten.
Note: If you want to configure your account
manually, you will need information specific to
your service provider to complete the fields in
this page.

7
Entry Explanation
User ID ID assigned to you by your VoIP service
provider.
Authorization ID ID to authorize your account, assigned by your
VoIP service provider. (Not all service providers
support this feature.)
Password Password assigned by your VoIP service
provider.
Display Name The name or ID you want to be displayed when
you place a call, if the callee has Caller ID. (Not
all service providers support this feature.)
Domain/Realm IP address of your VoIP service provider’s SIP
registrar. You can enter this either as a numeric
IP address or as a URL.
SIP Port IP port of your VoIP service provider’s SIP
registrar. The default is 5060.
SIP Proxy Address IP address of your VoIP service provider’s SIP
proxy server. You can enter this either as a
numeric IP address or as a URL.
SIP Proxy Port IP port of your VoIP service provider’s SIP proxy
server. The default is 5060.
Outbound Proxy
Address IP address of your VoIP service provider’s
outbound proxy server. You can enter this either
as a numeric IP address or as a URL.
Outbound Proxy Port IP port of your VoIP service provider’s outbound
proxy server. The default is 5060.
SIP Registration Interval Time (measured in seconds) between
registration requests to the VoIP service. The
default is 30.
Authentication Method Security authentication method that your VoIP
service provider uses. The default is MD5
(Message Digest 5).
Local SIP Port The port assigned to handle local SIP traffic –
that is, instructions for making and receiving
calls, such as Hang Up. The default is 5060.
RTP Media Port IP port that the X5v or V3 uses for RTP (Real-
Time Transport Protocol, an Internet protocol for
transmitting data such as audio and video in
real time). The default is 5000.
Caller ID (CID)
Modulation Select either CID_BELL202 or CID_V23. Your
choice depends on where you bought your
telephone equipment. If one selection doesn’t
work, try the other.

8
Select Ring & Tone by
Country/Region Click the arrow to select your country/region
from the list. The appropriate ring and tone
information will be entered automatically. If your
country/region is not shown, select Add/Edit
Country to display the Ring and Tone
Configuration page (see below).
Codec (Coder/Decoder)
Preferences You can prioritize the codecs from 1 to 3. First
priority default is G.711u (best voice quality for
North America). Other choices are G711a
(outside of North America) and G729 (uses less
bandwidth).
If you want to force the use of one codec, list
that codec only, and leave the second and third
boxes blank.
Ring and Tone Configuration
When you select your country or region from the Select Ring and
Tone by Country/Region list on the Voice over IP page, the
appropriate tone and ring configuration information is entered
automatically.
If, however, you select Add/Edit Country from the Select Ring
and Tone by Country/Region list, the Ring and Tone
Configuration page appears. The settings initially displayed reflect
the ring and tone values of the country or region you have
previously chosen—or the default if you haven’t changed it.
You must enter a name in the New Country field and then fill in
the remaining fields. These fields control the ring sound you hear
when your VoIP phone rings, and the tones you hear on the line
when you make a call. Consider customizing these fields only if you
are very familiar with the technical definitions of the ring tones.
To save your edits, on the Action list select
ADD_NEW_COUNTRY, click Save Changes and then Write
Settings to Flash and Reboot.

9
Entry Explanation
Working Country Select a country or region that has a Ring and
Tone configuration close to what you want.
New Country Enter the name of the new Ring and Tone
configuration. This can be the name of a
country, but it doesn’t have to be.
Ring Parameters These parameters control the ring you hear
when someone calls you via VoIP. The
parameter format is F1, Tn, Tf, Tn, Tf, where:
F = frequency in ms
Tn = Time On
Tf = Time Off.
For example, in the page shown above, the
ringback (the tone you hear after dialing, while
you wait for someone to answer) has a tone at
440 ms, a tone at 480 ms, will play for 2000 ms
(2 seconds), will wait for 4000 ms (4 seconds),
and repeat.
Note: by default, Zoom VoIP has a ring that is
similar to but distinct from the PSTN standard in
the country or region you have selected. This is
so that you can tell by the ring whether you are
receiving a PSTN or a VoIP call.
Dialtone These parameters control the dial tone you hear
when you pick up the phone to make a VoIP
call. The parameter format is F1, F2, Tn, Tf, Tn,
Tf.
Busy These parameters control the busy tone you
hear when you make a call to a busy number
over VoIP. The parameter format is F1, F2, Tn,
Tf, Tn, Tf.

10
Ringback These parameters control the ringback tone you
will hear when you make a call over VoIP. The
parameter format is F1, F2, Tn, Tf, Tn, Tf.
Call Waiting These parameters control the call waiting tone
you will hear when someone tries to call you
while you are already on a call over VoIP. The
parameter format is F1, F2, Tn, Tf, Tn, Tf.
Alert These parameters control the alert tone that will
prompt you to enter a number while you are
configuring a supplementary feature such as
call forwarding. The parameter format is F1, F2,
Tn, Tf, Tn, Tf.
Congestion These parameters control the tone you will hear
if a VoIP call fails for a reason other than a busy
number. The parameter format is F1, F2, Tn, Tf,
Tn, Tf.
Recall Not applicable.
Stutter Dialtone These parameters control the tone you hear
when unconditional call forwarding is enabled.
The parameter format is F1, F2, Td, Tn, Tf.
Action DISPLAY_CURR(ent)_COUNTRY_DETAILS is
the default.
To save changes to a new country, select
ADD_NEW_COUNTRY, click Save Changes
and then Write Settings to Flash and Reboot.
After reboot, the new country will appear on the
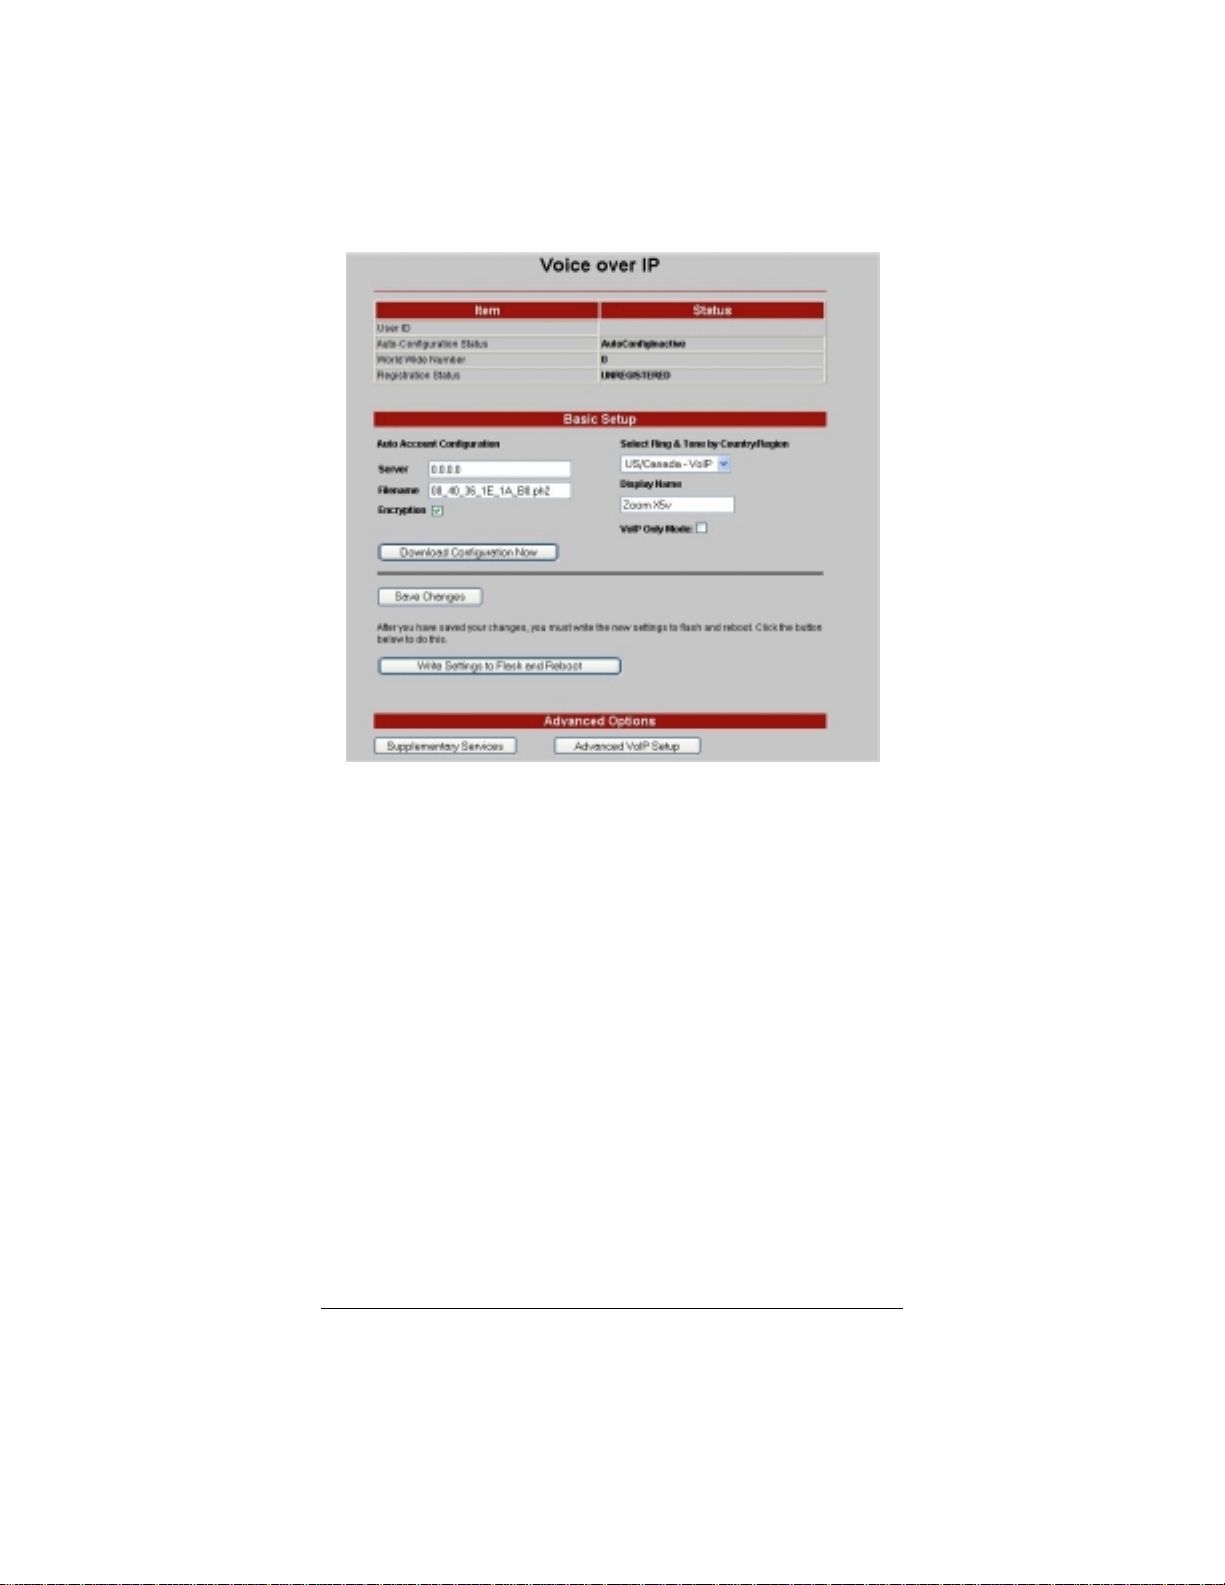
Working Country list and on the Select Ring &
Tone by Country/Region list on the Voice
over IP page.
To save changes to a country already on the
Working Country list, select EDIT_SEL(ected)_
COUNTRY, click Save Changes and then
Write Settings to Flash and Reboot.
To delete a country from the Working Country
list, select the country from the list, select
DELETE_SEL(ected)_COUNTRY, click Save
Changes and then Write Settings to Flash
and Reboot.
Note: If you know that the values you want are a close match to
those of another country, you can save time by doing the following:
•From the Voice over IP page, select that country and then
reboot your X5v or V3.
•Click New Country. Now you have to change only those
values that don’t match yours.
Be aware that it is not a requirement that the ring and tone settings
match those of any one particular country. You can set up any
tones that you like. The main reason to match certain tones to your

11
location is to make them as familiar as possible—so that anyone
using your VoIP service can immediately recognize their meanings.
If you do not know the ring and tone parameters for your area, you
can consult the ITU (International Telecommunications Union)
specifications. The web site is www.itu.int.
Advanced Voice Configuration Options
To further customize your individual VoIP setup, click the
Advanced Voice Configuration button at the bottom of the
Advanced VoIP Setup page.
The Advanced Voice Configuration page displays information
about very detailed telephony functions. Should you decide that
you wish to modify certain settings, we advise that you first check
with your service provider.

12
The Advanced Voice Configuration page is divided into three
sections:
•VAD Configuration
•Miscellaneous Configuration
•Timer Configuration
VAD Configuration
VAD (Voice Activity Detection) is a telephony function that
transmits audio signals only when you are speaking. This reduces
bandwidth usage during calls. When the device notices that you are
not speaking, it can send an indication to the far end to generate a
little background noise. Without this, the person you are talking
with will hear dead silence, and may think the connection has been
broken. “Comfort noise” and SID are methods of providing
background noise.
Entry Explanation
Enable VAD with
Comfort Noise Click to use VAD and add a familiar degree of
background noise during silence on the line.
Enable VAD with
Standard SID Click to use VAD and to insert SIDs (Silence
Insertion Descriptors) during silence on the line.
Enable VAD and
Suppress Noise Click to use VAD without inserting SIDs during
silence on the line.
Disable VAD This option is selected by default.
Miscellaneous Configuration
Entry Explanation
Enable/Disable) Echo
Cancellation Enabled by default. Echo cancellation ensures
that the people you call do not hear their own
voices echoing back to them over the line.
Enable Echo
Cancellation with NLP Enables echo cancellation with NonLinear
Processor.
Enable Echo
Cancellation with
CNG_NLP
Enables echo cancellation with Comfort Noise
Generation using NonLinear Processor.
DTMF (Dual Tone Multi-
Frequency) In-Audio Select this option to send the DTMF tones
generated by your telephone’s keypad as pure
audio.
DTMF (Dual Tone Multi-
Frequency) per RFC
2833
This option sends the DTMF tones generated by
your telephone’s keypad as out-of-bound signals.
This is the default .

13
Hook Flash Max Time The default is 1000 milliseconds (one second). If
a hook flash (pressing the button on the phone’s
receiver or cradle) is longer than the unit of time
entered here, the X5v or V3 will interpret it as an
on hook event (not in use). This function is tied to
Call Waiting.
Debounce ON OFF
Time Minimum time to detect that phone is off hook (in
use)
Debounce OFF ON
Time Minimum time to detect a hook flash (pressing the
hook button on the phone’s receiver or cradle).
Timer Configuration
In the following fields the unit of time is seconds.
Entry Explanation
Predial Timer The interval of time the unit waits for someone to
start dialing after the phone has been taken off
hook (in use). After this interval, the unit sends
ROH (Receiver Off Hook) notification. The default
is 16.
Call Progress Timer The interval between the time a caller places a
call and the time the connection is terminated if
no one answers the call. The default is 60.
Alert Timer The interval between the time a call rings at the
X5v or V3 user’s location and the time the
connection is terminated if the user does not
answer the call. The default is 60.
Call Waiting Timer The period of time during which the call waiting
tone will be played at intervals to alert the user
that a call is waiting. The default is 40 seconds.
Disconnect Timer The interval of time between when a callee
terminates a call and when the X5v or V3 user
hears a fast-busy tone. The default is 10.
CallFwdNoAnsTimer The interval of time that will elapse before a call is
forwarded if “call forwarding on no answer” is
enabled. Note: Each ring takes about 5-6
seconds, so if, for example, you wanted calls to
be forwarded after four rings, you would enter 20-
24 seconds. The default is 30.
Ringback Timer The interval of time that will elapse between when
the X5v or V3 places a call and when the
connection is terminated if no one answers the
call. The default is 60.

14
1.3 Modifying the Dial Plan
The X5v or V3’s dial plan is defined by the dial plan string, which
encodes a complete set of dial plan rules.
Each rule defines behavior for a particular dialing pattern. A dialing
rule, or pattern, can define something like international dialing,
local dialing, or dialing that invokes a service, like call forwarding.
The number of rules is limited only by the string maximum of 512
characters, and the rules can appear in any order. Rules are
separated by a vertical bar ( |). In the table below the letter yis
used to indicate any possible DTMF character. Each rule is created
from elements in the following table:
Dial Plan Rule Elements
Service code
(optional) servicecode:yyy; Rules that apply to a service (see the
Service Definitions list below) start
with a service code and associate a
code string (yyy) with the service
code. A colon (:) separates the
servicecode from the code string.
DTMF
characters 0123456789
ABCD*# Valid DTMF characters in a call
pattern are the digits 0 through 9, the
letters A through D, and the * and #
characters.
Ranges [y-y]Any of a group of characters within
square brackets ([ ])matches the
pattern. A dash (–) indicates a range
of digits. A range can be part of a
A dial plan
string with
vertical bars
separating
the rules

15
group: e.g., [135–7] matches 1, 3, 5,
6 or 7.
Any numeric
digit XX
or xsignifies any of the digits [0–9].
Any digit but 0
or 1 NN
or nsignifies any of the digits [2–
9].
Timeout tyThe character following tspecifies
the timeout interval in seconds
following the preceding event. The
letters athrough zare used to
represent 10 through 35.
Repeat Digit .yTo match a character or range
repeatedly, follow the character or
range with .and a character that
specifies the number of repetitions,
from 1 to 16 (the letters athrough f
are used to represent 10 through 16).
Exclude Digit !digit/range An exclamation point followed by a
digit or a range specifies digits that
are disallowed at this position in the
pattern. Disallowed digits result in no
match with the pattern.
Suffix digit >yThe DTMF digit following the >
character is the suffix character
associated with this pattern. The
characters appearing before the >
represent the minimum number of
characters to qualify as a match for
this pattern.
If the dial plan string is left empty, a default dial pattern to accept
all dialed digits will be incorporated
Service Definitions
The following table lists supplementary and other services, and the
default dial-pad code strings that invoke them:
servicecode Service Default
1Enable Unconditional Call Forwarding *72
2Disable Unconditional Call Forwarding *73
3Enable Call Forwarding on Busy *74
4Enable Call Forwarding on No Answer *75
11 Temporarily disable Call Waiting *70
12 Call Return *69
16 Blind Transfer *90
18 IP or Peer-To-Peer Dialing *47

16
23 Disable Call Forwarding on Busy *76
24 Disable Call Forwarding on No Answer *77
Example
Suppose the dial plan string is the following:
1393x.5t9>#xt2|0>#t411t8x.etfxt2|1Nx.2Nx.5tfxt2
>#|[78]x.6t4>#|N11|
[1-9]x.4t4>#xt2|1:*72;>#x.etfxt2|2:*73;>#t4|
3:*74;>#x.etfxt2|4:*75;>#x.etfxt2|
11:*70;>#t4|12:*69;>#t4|16:*90;>#x.etfxt2|18:*4
7;t4xt2>#|
20:#;x.3tf>#x.atfxt2|22:*83;x.7>#x.7tfxt2|23:*7
6;>#t4|24:*77;>#t4
Here is the breakdown of the various rules, which are separated by
the ( |) character:
1393x.5t9>#xt2
This rule specifies the following:
•It is a rule for a normal call (not associated with a service).
•The dial pattern must begin with the digits 1393.
•1393 is followed by 5 digits each in the range [0-9].
•The IDT allowed between the digits 1393 and the 5 digits
following it is 9 seconds.
•The suffix character is #.
•The minimum number of digits needed to validate the rule is 9
(the four digits 1393 + 5 X’s).
•Before the 9 digits are entered, if the user presses the suffix
character ‘#’ or if a timeout occurs, then it is considered
invalid.
•The last digit is in the range [0-9] and has an IDT of 2.
0>#t411t8x.etfxt2
This is a typical rule for international long distance dialing from
within the North American Number Plan (NANP). The local

17
operator rule 0 is also combined with this rule to reduce the
number of separate rules. However, this is done at the cost of
allowing the minimum number of digits to be just 1, following
which incomplete numbers will be sent to the service provider if
the user presses ‘#’, or after an IDT timeout. Note the very long
(15 seconds) IDT used to guard against this latter possibility.
1Nx.2Nx.5tfxt2>#
This is a typical rule for domestic long distance dialing within the
NANP:
•The dial pattern must begin with a 1.
•The second digit must be in the range [2-9] This is the first
digit of the area code.
•This is followed by two digits in the range [0–9].
•The next digit must be in the range [2–9]. This is the first digit
of the exchange.
•The next 5 digits must be in the range [0–9].
•Each of the first 10 digits has an IDT of 15 seconds.
•A final digit must be in the range [0–9].
•The IDT for the final digit is 2 seconds.
•The suffix character is #.
•The minimum number of digits needed is 11, failing which the
dialed digits do not match this pattern.
The rule can be modified to accommodate other requirements.
[78]x.6t4>#
Rule for specific service provider, for example, Acme:
•The first digit can be only 7 or 8.
•Minimum number of digits is 7.

18
[1-9]x.4t4>#xt2
Pulver number rule:
•Pulver numbers begin with the digit range [1–9].
•A minimum of 4 more digits within the range [0–9] must be
dialed to match this pattern.
•An optional 6th digit is allowed.
1:*72;>#x.etfxt2
Unconditional Call forwarding rule. The service code that specifies
the unconditional Call forwarding rule is 1. This rule specifies that:
•*72 is the dial pad code to enable unconditional call
forwarding. The ( ;) character is the delimiter specifying where
the dial pad code ends.
•The minimum number of digits is 3. *72 followed by the suffix
would do. (Dialing without the suffix would be impractical,
since the IDT is specified as f, or 15 seconds.) If just the three
characters *72 are entered, the number to forward to will be
taken from the entry in the relevant page of the X5v or V3
web page.
•As an option, a forwarding number can be specified. Up to 15
digits are allowed.
Note: the above rule says the number specified can have digits in
the range [0-9] and can be a max size of 15 digits. This is flexible,
and we could have a call forward rule specified as
1:*72;>#[78]x.6t4. Here the forwarding is done only to an
Acme number.
11:*70;>#t4
12:*69;>#t4
16:*90;x.7tf>#x.7tfxt2
The above are rules to temporarily disable call waiting, call return
and blind transfer respectively. As noted, disable call waiting and
call return do not need a number to follow, whereas blind transfer
requires a number to be dialed that specifies where the call should
be transferred. The transfer number must in this case be a
minimum of 7 digits.

19
18:*47;t4xt2>#
This is the rule for Peer-to-Peer dialing, which is dialing without
the use of a SIP server or service. The user must have previously
created an address book that associates single-digit speed-dial
numbers with the SIP addresses of endpoints the user wishes to
dial. The user enters the *47 dial code followed by the speed-dial
number of the desired endpoint.
23:*76;>#t4
This is the rule to disable Call Forwarding on busy.
24:*77;>#t4
This is the rule to disable Call Forwarding on no answer.

20
2
Advanced Setup Options
2.1 How to Use the Advanced Options
To access the Advanced Setup page, click its icon at the top
of the X5v or V3 main page. All the Advanced Configuration
settings are accessible from this page. (If you have exited from the
X5v or V3 and have forgotten how to establish communication
with it, refer to page 4.)
REMEMBER:
Every time you make changes to a page, you must click the
Save Changes button and then the Write Settings to Flash
and Reboot button before you navigate to another page.
Otherwise, your changes will be lost.
Other manuals for X5V
1
This manual suits for next models
1
Table of contents
Other Zoom Modem manuals