FV612 Rev. A 10/11/2022
Page 11
FV612 Rev. A 10/11/2022
Page 10
Maintenance Instructions:
• Do not use any abrasive or chemical cleaners to clean the sink, faucet and other components.
• If abrasives or chemicals are used it can lead to dulling of luster, attacking of chrome plating or decorative nishes.
• ONLY use mildly warm soapy water, and then wipe dry with a clean/soft towel or cloth.
• When cleaning other areas of the restroom be sure the sensor lenses are protected from other cleaning chemicals/
solvents to prevent potential damages to the sensor and/or electronics.
• For surface shine, rubbing a polishing agent will polish the surface of all components.
• Frequent proper cleaning of solid surface sink will maintain the gloss level over time. Also, darker colors require more
frequent cleaning and care. Dirt and residue can easily be removed from the basin surface by using water, mild soap
solution, household ammonia-based cleaners, and/or solid surface cleaners available in market.
• In order to remove hard water and dicult stains on basin surface, use a sponge with diluted cleaner to rub in a circular
motion. To disinfect basin surfaces, wipe the area with diluted bleach and then wash the surfaces and rinse with water.
• Avoid exposing solid surface basin with strong chemicals, such as acetone-based cleaners and solutions. If surfaces
are exposed to these chemicals, quickly rinse the surface with water.
Repair Instructions:
• Zurn recommends that damages should be repaired by certied solid surface fabricator or repair agents.
• Blemishes to the basin surface (such as scratches, burnmarks, and minor chipping) can be repaired by sanding with
super-ne(800 or 1000 grit) sand paper and/or maroon Scotch-Brite™ pads and then followed with a low-speed (1500-
2000 rpm) polisher with a wool pad and a solid surface cleaner or polish to bu the aected area.
• For more serious damage to the basin (size of a dime or larger), repair kits and instructions are available to purchase.
Contact customer service for further information on ordering.
Trouble Shooting Guide:
Service Parts:
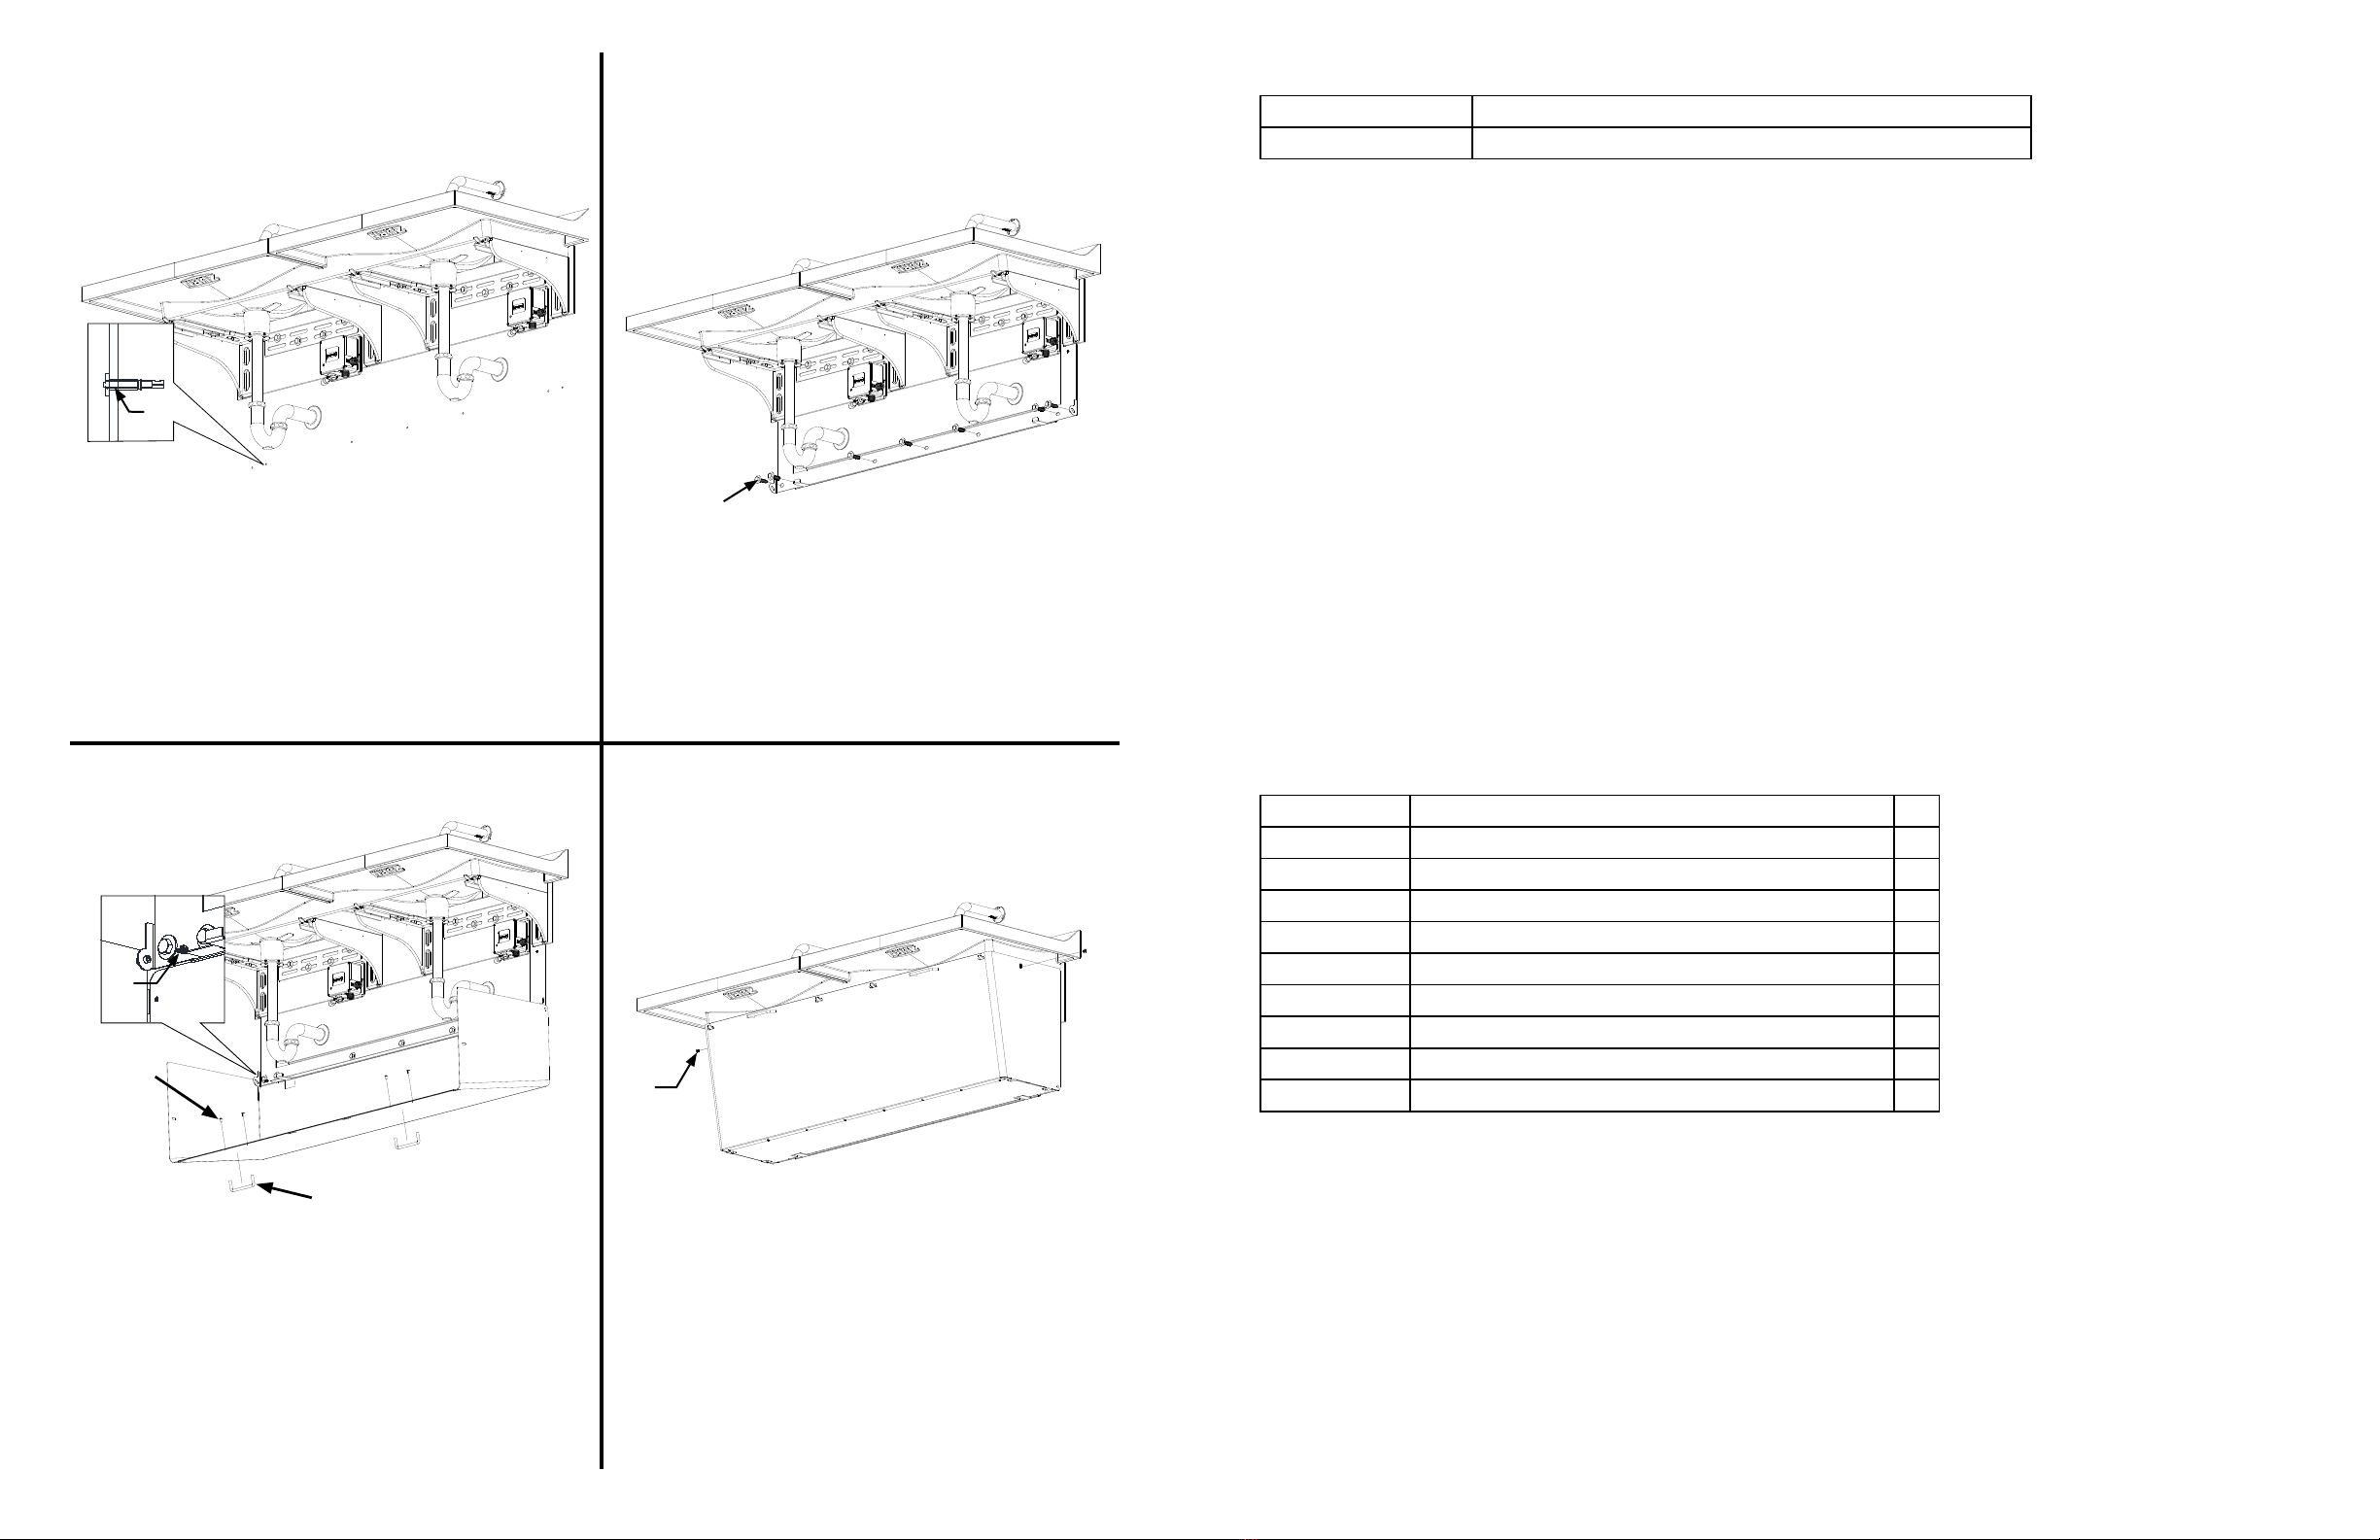
Shroud Installation:
Step 2 Step 3
Step 4 Step 5
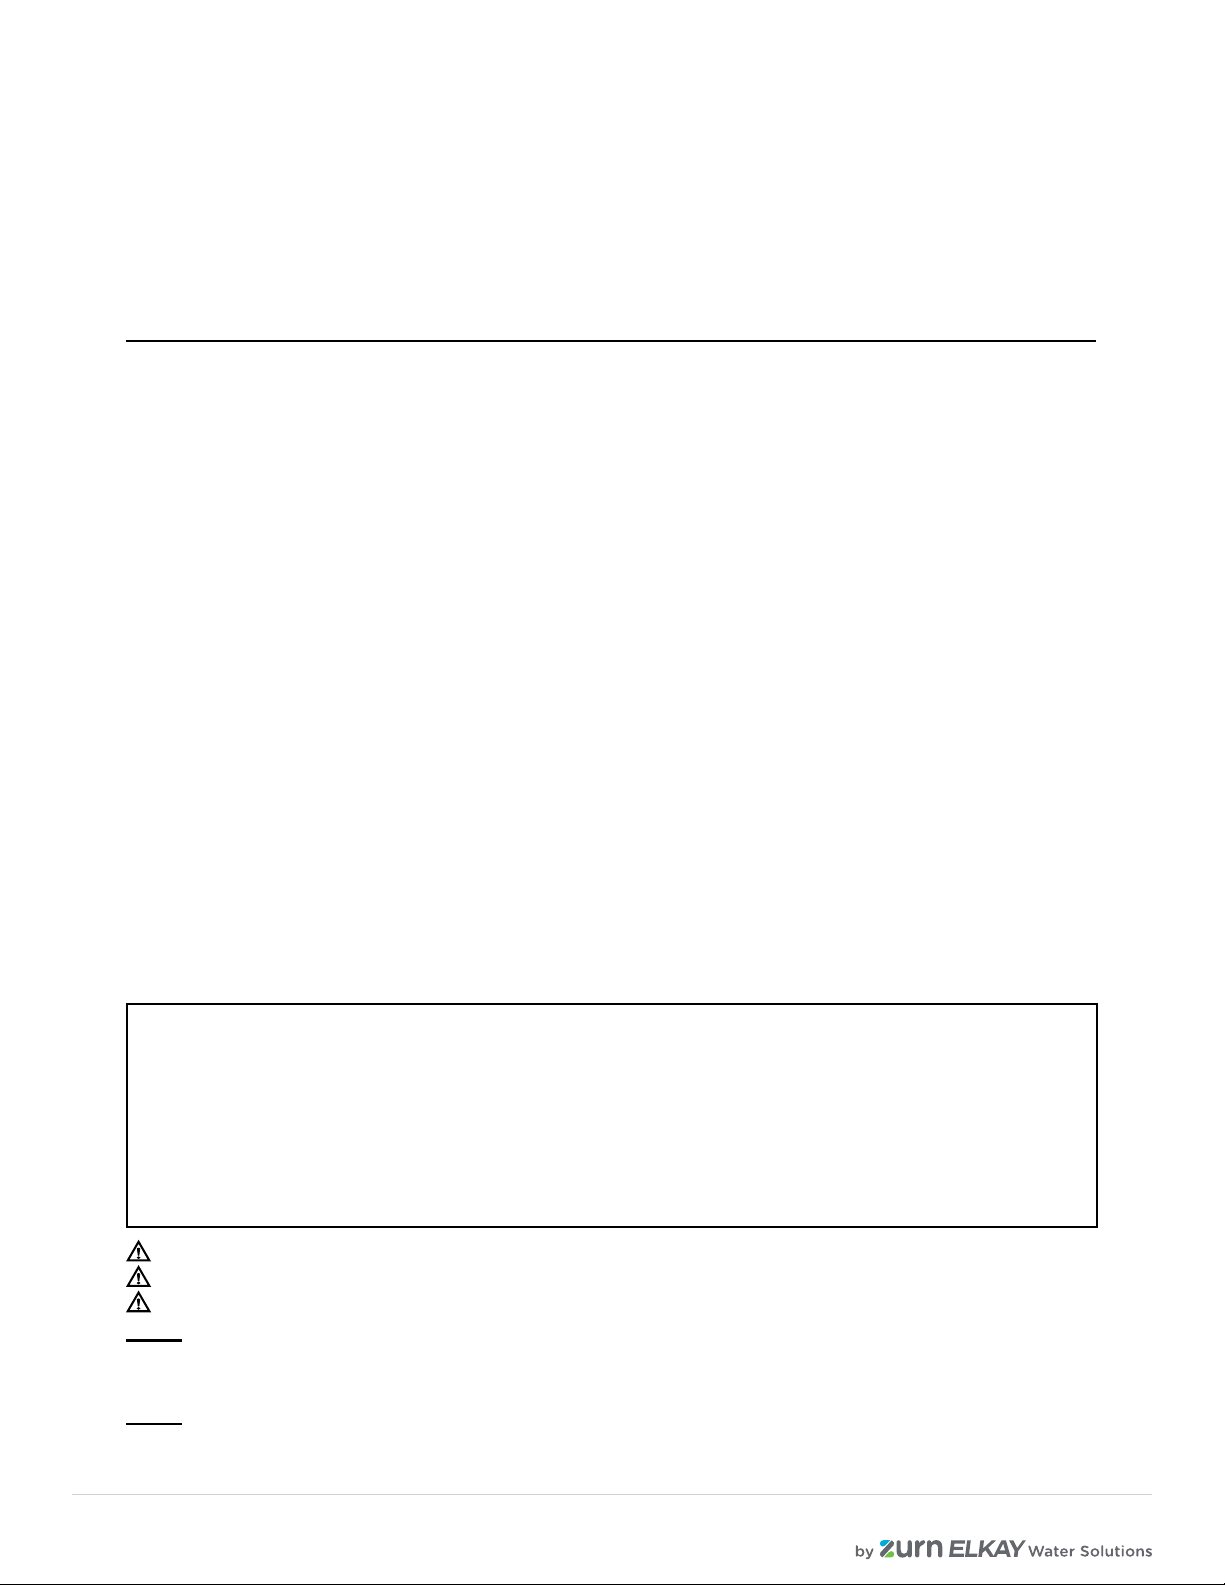
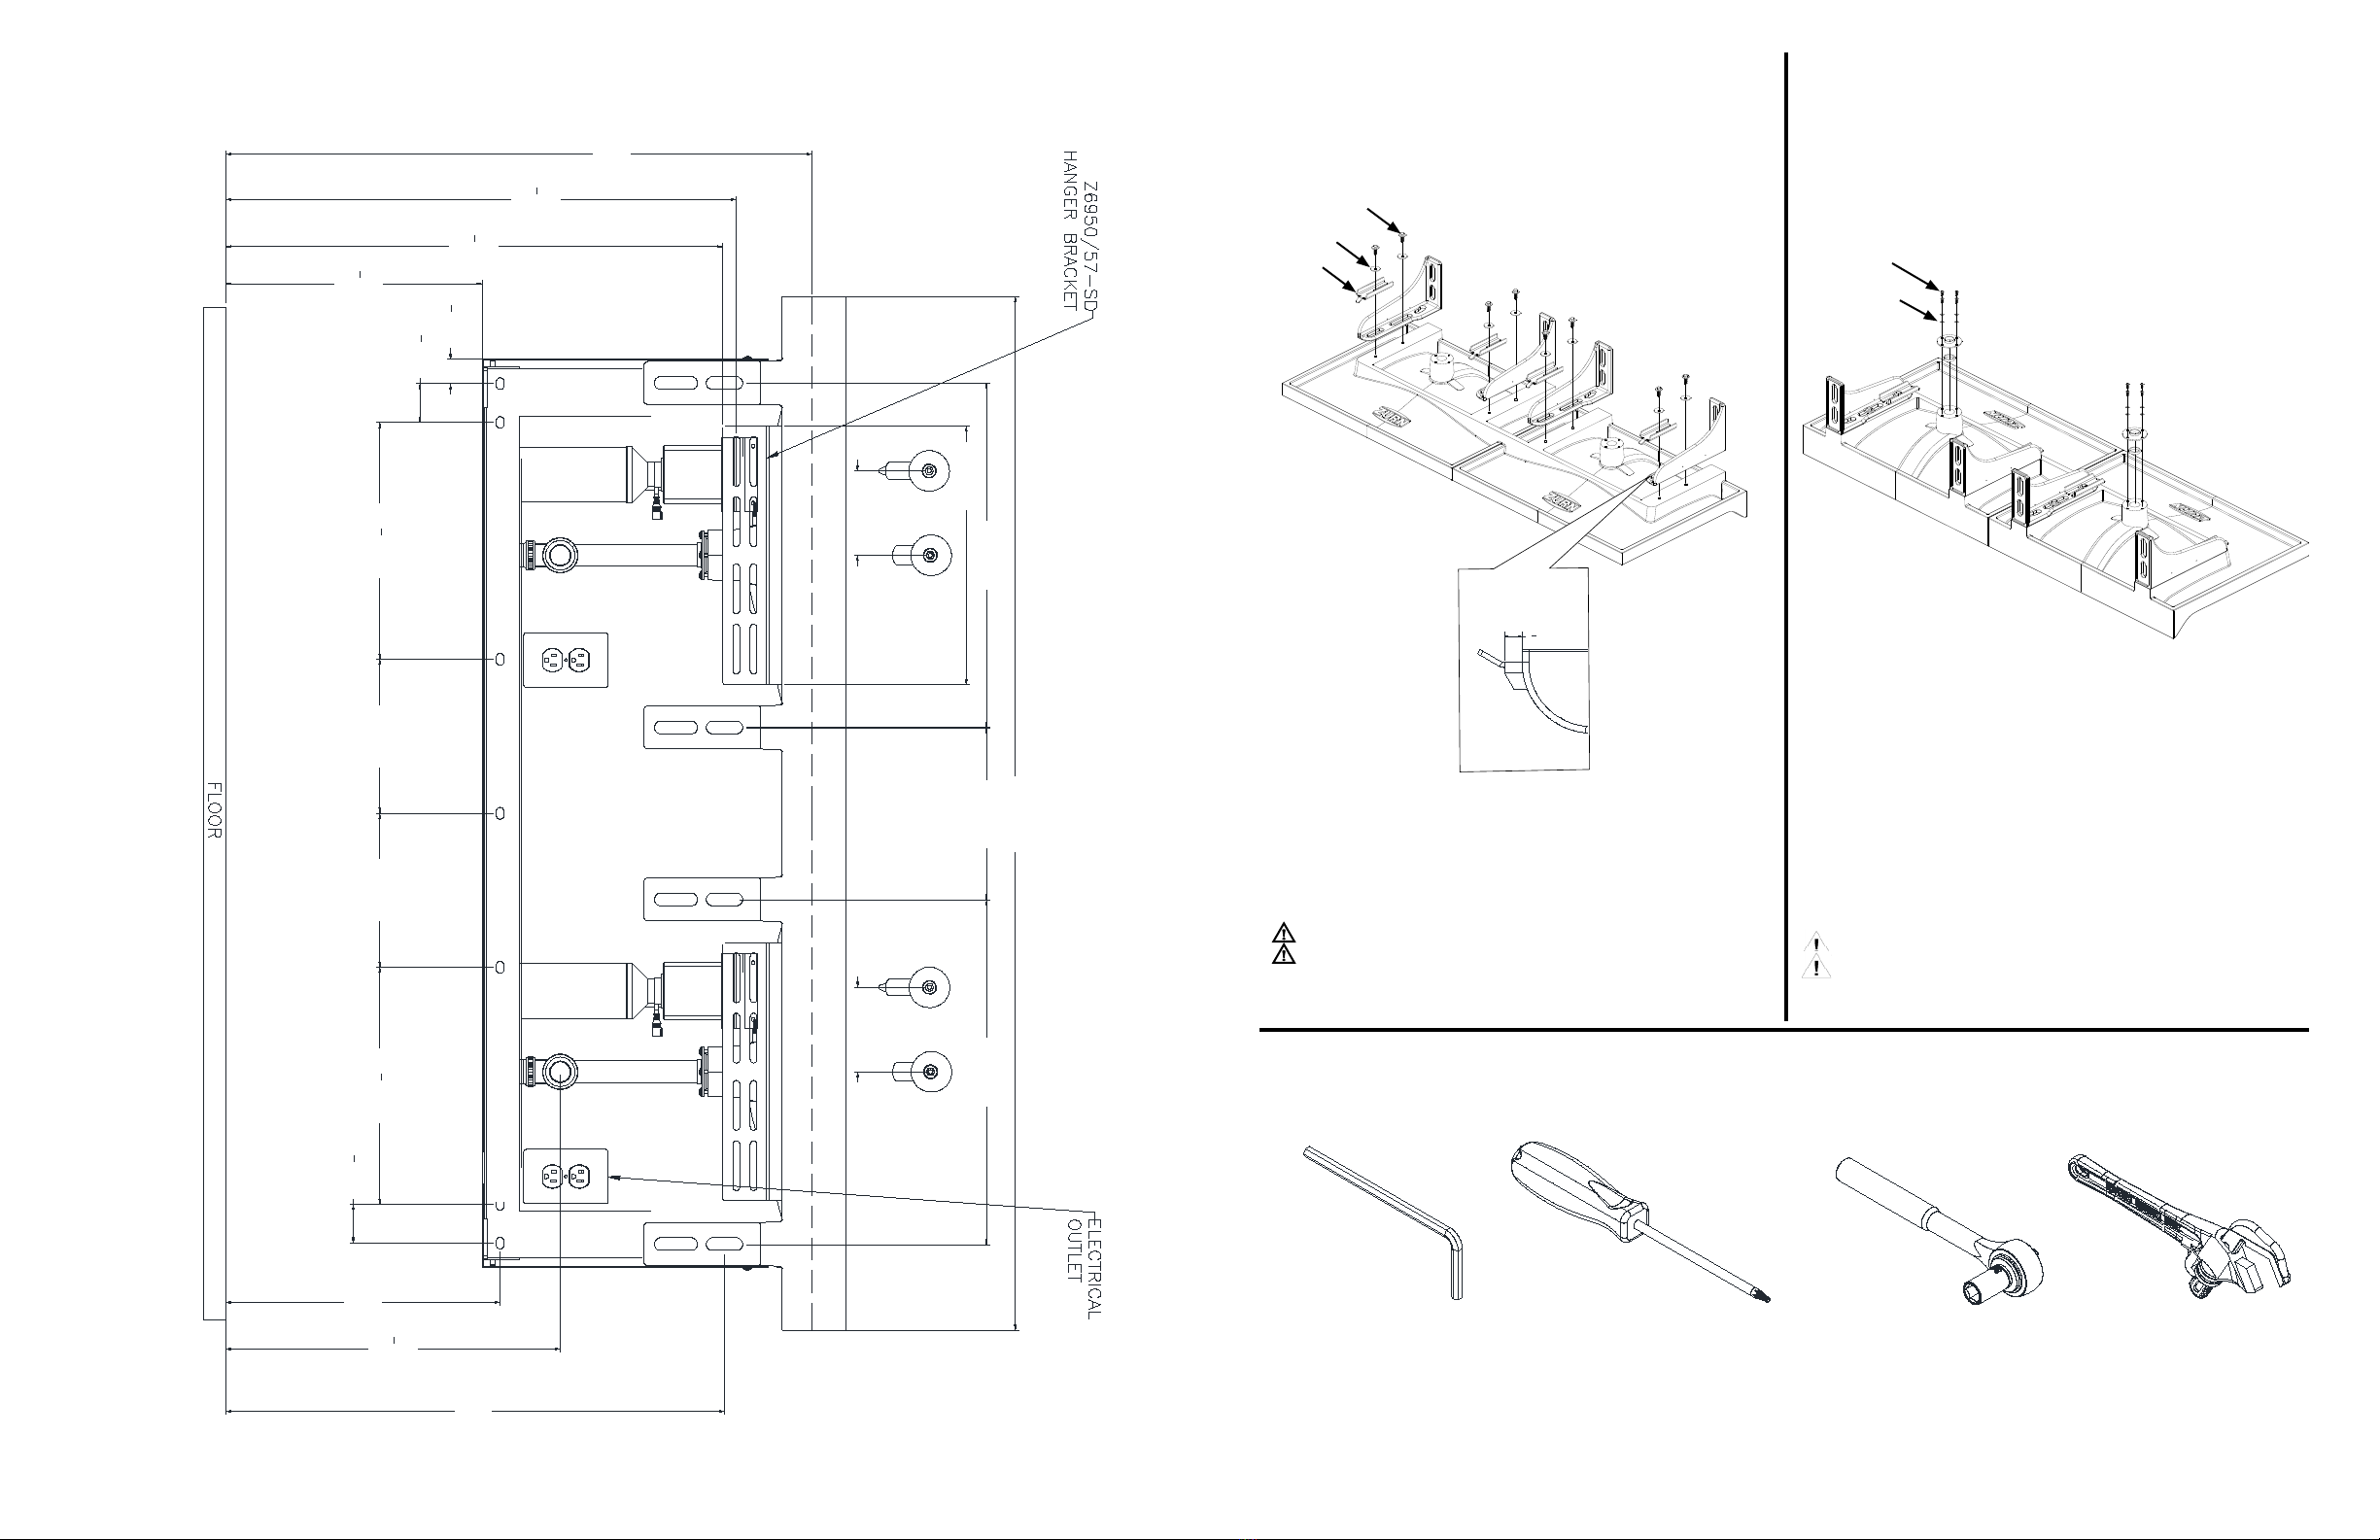
• Remove the wall bracket and drill 3/4” holes into the
center of the holes previously marked. (Note: For installation
with carrier, do NOT drill the two outside holes. For retrot
applications, the two outside holes are recommended.) En-
sure that wall studs are not immediately behind the marked
hole locations prior to drilling.
• Install anchor toggle bolts into previously drilled holes in
walls.
• Re-install wall bracket with coarse screws in previous lo-
cation. Then, fasten the wall bracket with 3/8” bolts through
each holes and into the toggle bolts.
22
• Place shroud on hanger hooks of wall bracket as shown.
Then, position the pivot of the shroud through the hole in the
wall bracket. (Note: the shroud will likely need to be rotated
upward slightly in order to install each pivot.
• After one pivot is installed, fasten the ange screw into
the pivot with the 3mm allen wrench. Then repeat this step
for the other side
• Install two shroud handles as shown using provided
mounting screws.
• Using the handle, rotate the shroud up to the basin until
the slots on the shroud engage with the hanger brackets.
From this postion, the threaded hole in the L-bracket should
be visible through the slot in the shroud.
• Then, install the screw shown, and repeat for the other
side.
15
18
9
Faucet Related Issues Refer to Faucet Manual included with faucet
Soap Dispenser Issues Refer to Soap Dispenser Manual included with soap dispenser
Part Number Part Descripon QTY
P5001-GD-PC Grid Drain Assembly for Reef Basin 1
P5000-DA Drain Adapter Assembly 1
P5000-WH Wall Hanger Assembly 1
P5000-BKT Mounng (L) Bracket Assembly for Reef Basin 1
P5001-SS1 Stainless Steel Shroud for Reef Basin 1
P5000-DA-BAG Drain Adapter/Stainless Steel Shroud Hardware Bag 1
P5000-WH-BAG Wall Hanger Bracket Hardware Bag 1
P5000-BKT-BAG Mounng (L) Bracket Hardware Bag 1
P5002-SH-V2 Bracket and Handle Hardware Bag 1
19
23